Trail cameras are expensive, and if you’re like me you are trying to get the most out of each trail camera you own. Proper placement is necessary to do this, especially for mature bucks. There are two types of trail camera placement in my opinion, inventory placement and bedding area placement. I go into detail on both.
Inventory Trail Camera Placement For Mature Bucks
The first method is inventory placement of trail cameras. Inventory placement is the placement of trail cameras over food sources, bait, deer trails, rubs, scrapes, or a combination of these, basically any location that is not bedding. Inventory placement can work well to inform you if a mature buck is in the general area. Finding a mature buck to hunt is in my opinion the hardest part. Getting a few trail camera pictures of him means he’s most likely living nearby (outside the rut).
I’ve noticed when hunters start getting pictures of a mature buck they get excited and become content with their camera placement, ultimately leaving their trail cameras in the same spot in hopes that they will get more pictures of the particular buck. Usually, hunters will get a few more pictures of this buck until the season changes and the buck moves core areas.
Placing Trail Cameras and Buck Seasonal Shifts
The biggest problem I had when placing trail cameras in inventory locations was bucks disappearing from their core areas as hunting season approached. This frustrated me because I took extreme precautions to avoid spooking deer when checking trail cameras, so I was fairly confident that was not the issue. I found it especially difficult to hunt a particular buck.
What I noticed was I would get pictures of hitlist bucks fairly consistently until about the first weeks of September when they started to shed their velvet, then they would vanish. The funny thing was they would be right back in the same spot at the exact same time the following year, only to vanish again before the hunting season. Only a small percentage of bucks I got pictures of would stay in their core area into the hunting season.
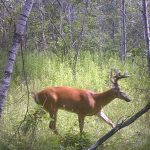
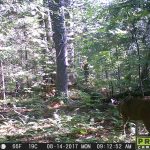
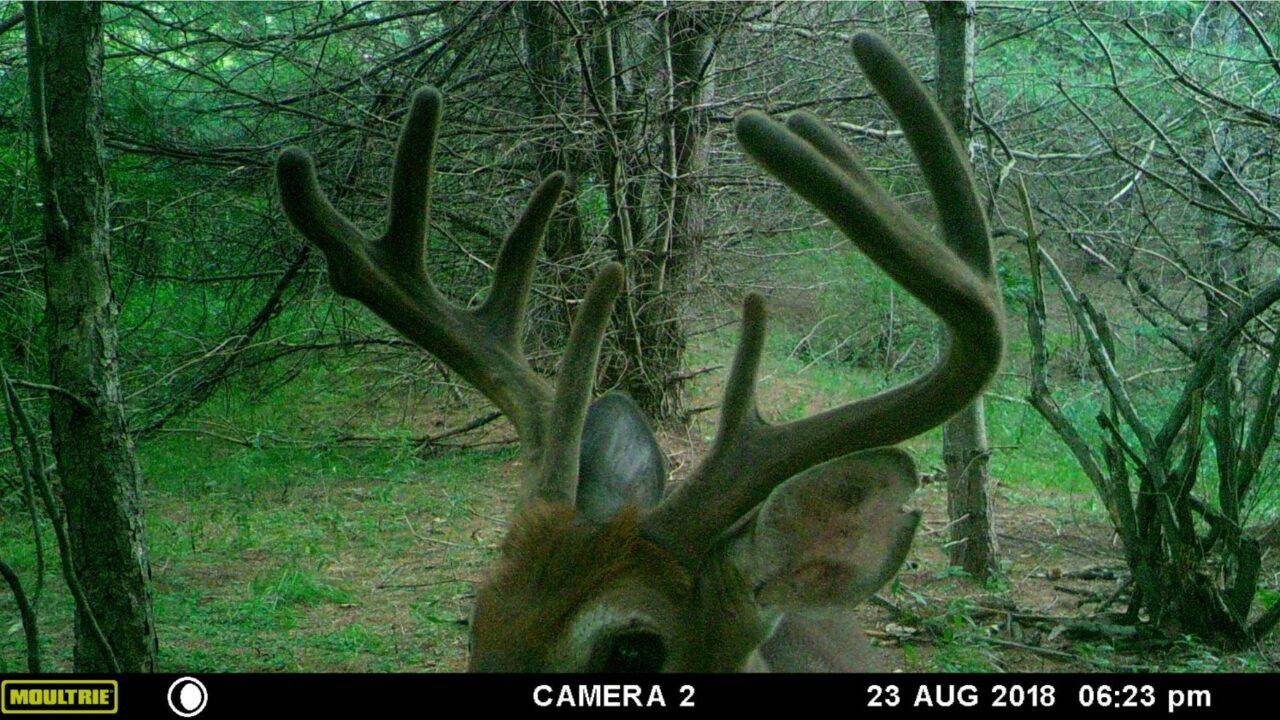
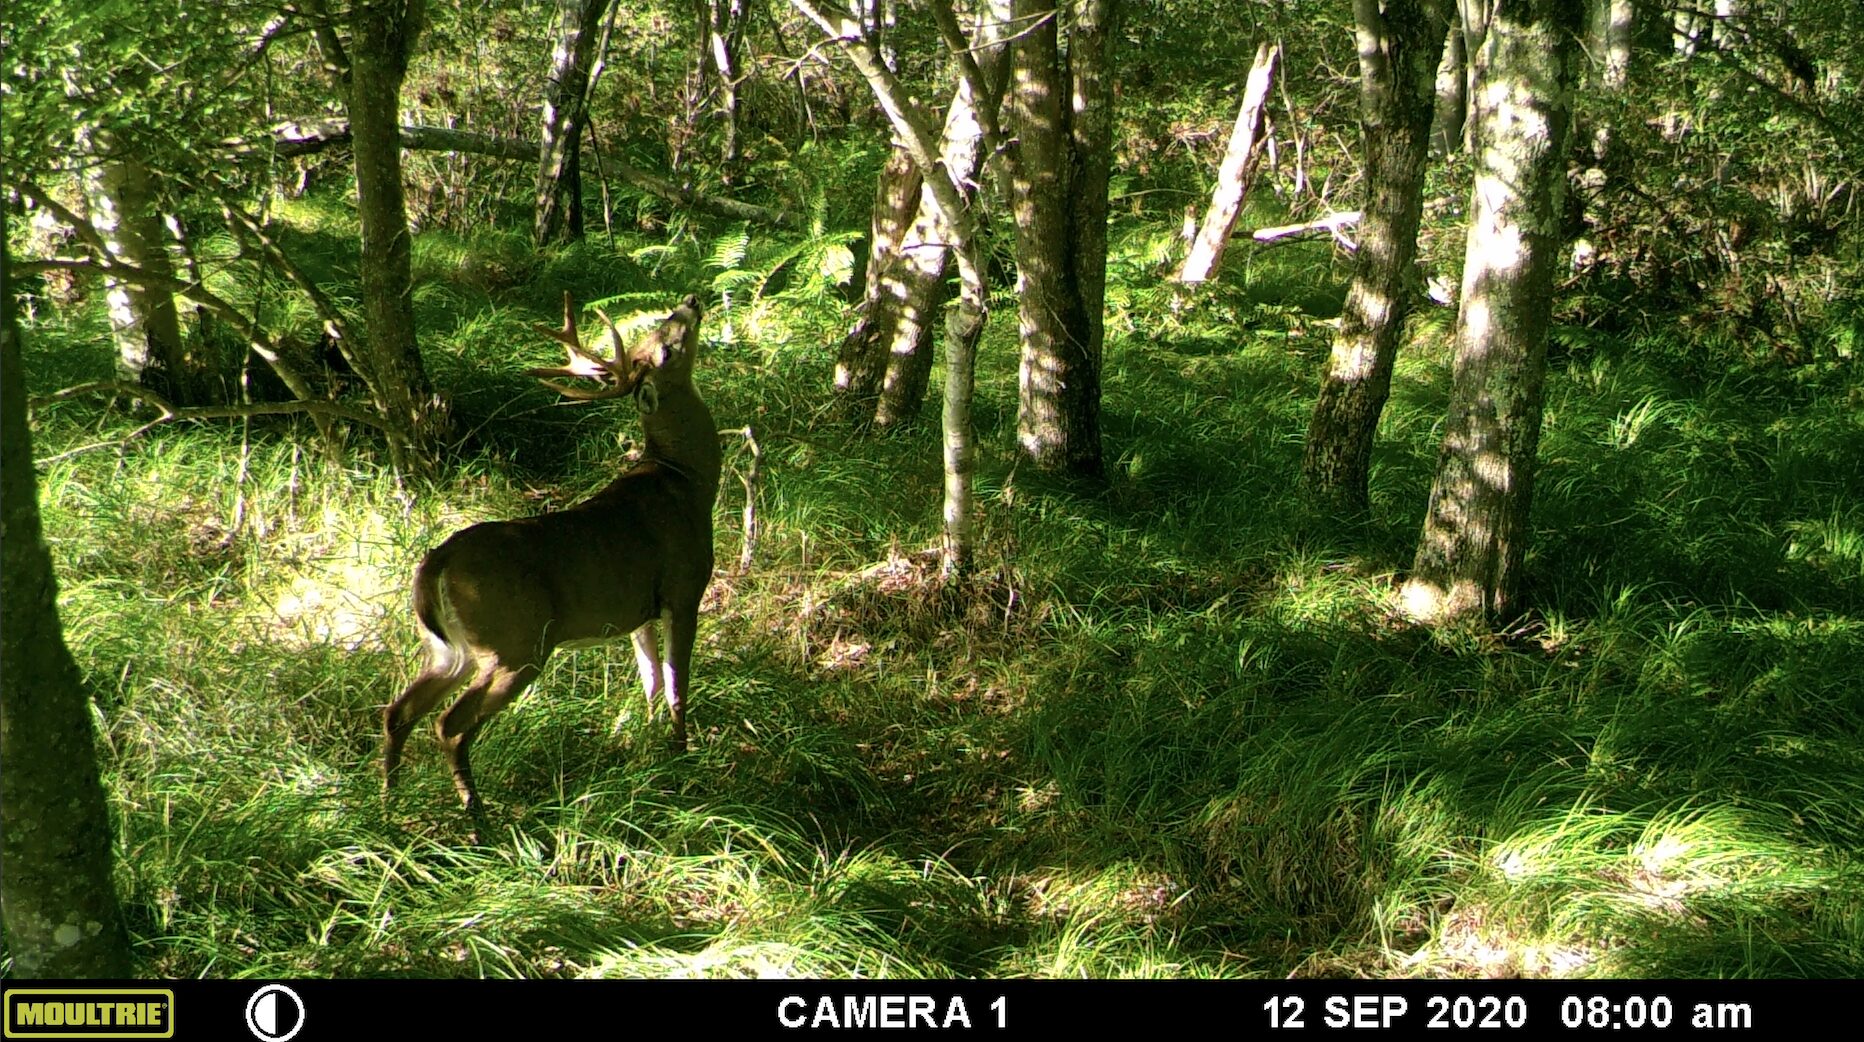
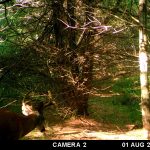
Above you will see photos taken of big bucks in the summer. In both years the trail camera was placed over a well-used deer trail. Although camera’s exact placement changed these pictures were all taken in the same spot. These pictures show the same two bucks during the summer of 2016 and 2017.
Bucks in this area show up at the same time every year in the summer but then vanish in August every year (The date and time on the photos is not correct, I was able to figure out the exact date and time and have inserted the correct date and time as text below each photo.) “Buck 1” shows up within 3 days of the previous year. “Buck 2” shows up within the same hour as he did the previous year. This year I will have to move my cameras and figure out where these bucks are bedding.
Place Trail Cameras Where Bucks Will Be During Hunting Season
Unfortunately, inventory trail camera placement will likely not be where a mature buck feels comfortable during daylight hours during the hunting season. More often than not when hunting season rolls around bucks aren’t using food sources, bait, deer trails, rubs, and scrapes during daylight hours, especially if you’re hunting an area with hunting pressure. As hunting pressure increases daylight movement tends to decrease. Of course, there are exceptions to every rule but in general, I have seen less success when I leave cameras over inventory areas throughout the hunting season.
If you have located a mature buck using inventory trail camera placement that is fantastic, finding a mature buck is the hardest part, but now you need to take it to the next step. Where is this buck likely spending his time in daylight during the hunting season? Bedding areas.
Trail Cameras and High-Quality Bedding Areas
I felt that if I could just figure out why a small percentage of bucks remained in the same area for longer periods I could put myself in similar situations and start capitalizing on particular bucks. After a few seasons of brainstorming, increasing my arsenal of trail cameras, and testing hypotheses I started to notice a pattern; my cameras, even though they were over inventory placement they, by chance, were on the border of bedding areas. Cameras at the edge of high-quality bedding areas were more likely to keep bucks in their core areas longer into the season.
This is how I first discovered high-quality bedding areas. I define high-quality bedding areas as an area that provides excellent protection in the form of security from hunters and predators, so much so, that mature bucks feel safe and relaxed. However, in this definition, I include proximity and availability to does, food sources, and water. The more readily available these are, the higher the quality of the bedding area.
From trail camera observations I found that the higher the quality of the bedding area the more likely I would be to get pictures of a particular buck into the hunting season.
Bucks Spend The Most Time In Bedding Areas
The more I thought about this the more it made sense. High-quality bedding areas are where mature bucks feel safe which is where they will be spending most of their time during most times of the year. Additionally, even if deer seasonal patterns change due to food availability, loss of foliage, testosterone levels increasing… etc, mature bucks will likely want to remain in the same high-quality bedding area because it is where they feel secure.
The highest quality bedding area on a property can likely hold multiple bucks depending on its size. These bucks will want to take advantage of its safety and compete for the safest areas in that bedding area. Mature bucks will push satellite bucks out to maintain the highest quality bedding areas for themselves. Camera placement near high-quality bedding like this increases the odds of catching dominant bucks and respectable satellite bucks on camera during daylight into the hunting season.
From trail camera placement trial and error I have found that buck bedding that provides food, water, and does nearby gives bucks less of a reason to leave in September and into the hunting season. Do I still have bucks disappear on me in September? Absolutely. Each situation and buck is different but the rate at which they disappear has reduced.
It is important to note that I rarely intrude on a buck’s bedding area when placing trail cameras, as this will likely result in the buck leaving his core area or becoming nocturnal before the season starts. Instead, I put my trail cameras as close to the bedding as possible but where I am confident that the buck will not be alerted in any way by sight or sound. I assume some of my scent may be left behind but I take precautions mentioned below to minimize this as much as possible.
The one exception is if I place a camera deep within a bedding area in the spring, during spring scouting, and leave it there throughout the entire hunting season. I will only check this camera after the hunting season has ended. The information on this camera will help me plan for future hunts because I will be able to see what days and times bucks are moving through the bedding area.
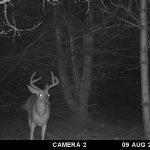
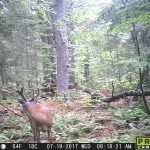
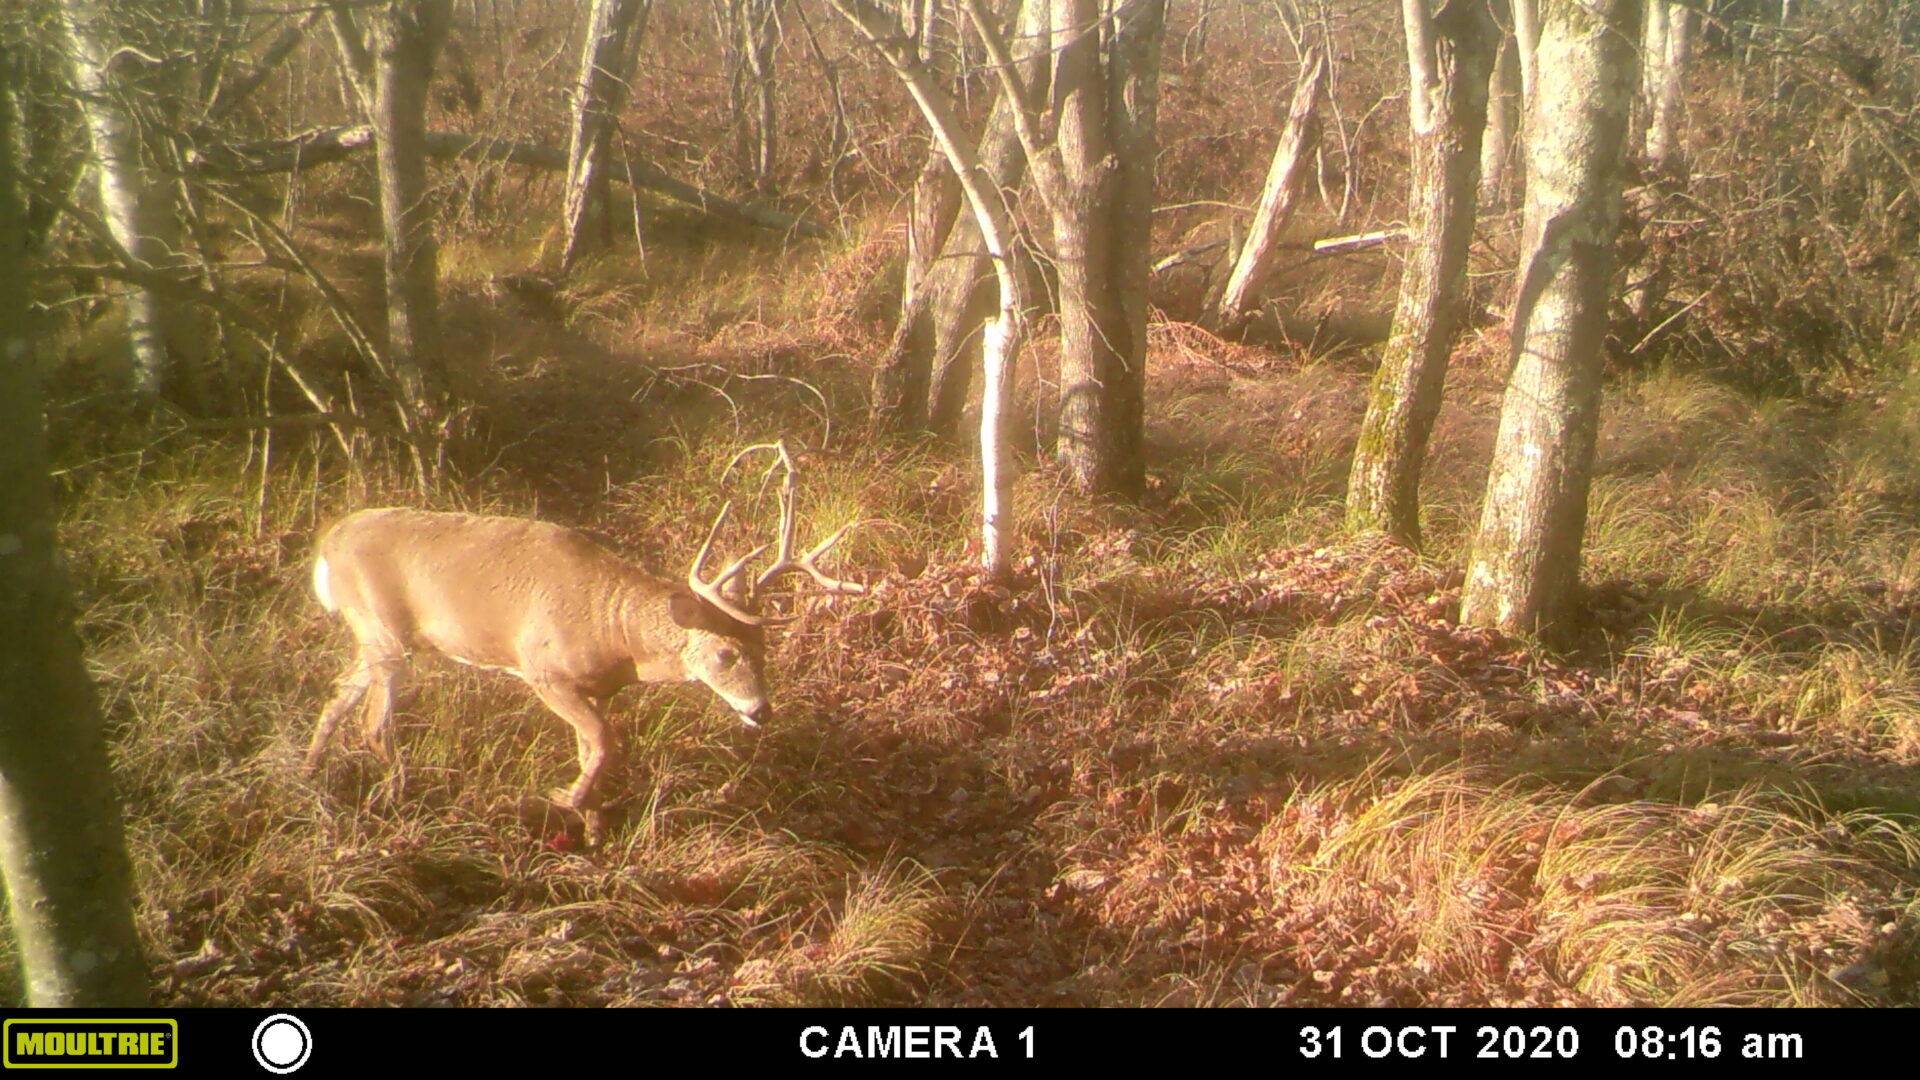
High quality bedding location: I had this buck (above) on camera from the beginning of June through the middle of August. Unfortunately, I forgot to turn my camera on for the last check of the season. However, on October 13th, 2017 I had a deer walk by at 20 yards, 5 minutes after quitting time. I couldn’t see him, but when I got out of my tree I smelt what was unmistakably the smell of tarsal gland. I’d bet a lot of money it was him. The location of this camera was just on the outside of a thick winterberry and alder swamp, this buck made many appearances.
When To Place Trail Cameras For Mature Bucks
Most of my scouting takes place just after snowmelt in spring. When I find a buck bedding area from scouting I will come back and place a trail camera at the edge of the bedding in May. To learn how I scout for buck bedding check out my article Finding Pressured Bucks. I like to put my cameras out in May.
I check my trail cameras about once every two months preferably during windy or rainy weather conditions. This way I leave almost no evidence that I was in the area and the bucks have a minimal chance of catching onto me. I always wear rubber boots and use scent-free wipes to clean my cameras when I’m done setting them up. I also am quick to download pictures and get out of the area to reduce scent contamination.
If I am not getting any mature bucks on camera after two months I will adjust accordingly. Sometimes I’ll move the camera and other times I will leave a camera out over the hunting season to see what it turns up if I have a good feeling about an area. Sometimes there’s not much activity in an area until the hunting season starts. Other times I will move the camera to another bedding location I feel has potential.
I will continue to check my trail cameras until one month out from the season opener, sometimes later if there is really bad weather that lets me sneak in undetected. This gives the area time to cool down before hunting season.
There is a balance between checking cameras close to the season and having high-quality information telling you that a mature buck is moving in daylight close to the start of the season. During this check, I wear full scent-lok clothing that has been carefully stored to minimize scent.
Trail Cameras And The Rut
I have found that during the peak rut most bucks have left their core areas in search of does, making it much harder to capitalize on a particular buck. For this reason, I won’t check my trail cameras again for the rest of the hunting season. I let trail cameras collect valuable data that I can use and apply to future hunts.
Being that the buck I am after is most likely gone during this time there is no reason to check cameras. Instead, during this time of year I rely on last year’s trail camera dates and times. Deer are habitual creatures and often visit areas at the same time and dates each year.
I will use the dates of rutting buck pictures from the previous year and use them to determine when to hunt during the present year. This way I do not contaminate my hunting locations with my scent from checking trail cameras. I don’t want to be checking my cameras during the season because as the season progresses and hunting pressure increases bucks will become much more sensitive to human presence. Checking trail cameras during the season is a great way to ruin a spot.
Conclusion
If you are a hunter who is having trouble capitalizing on trail camera pictures of bucks then I recommend you try the method above on how to place trail cameras. Although placing trail cameras near bedding areas can be risky, I have found it to be worth the risk with the proper precautions. I hope you can take away from what I have learned and apply it to your trail camera strategy to capitalize on mature bucks.