Scouting deer using Google Earth will save you countless time and effort by scouting properties more efficiently. Not to mention it can be done without even leaving your house! The tools and add-ons mentioned of Google Earth Pro combined with aerial imagery a very powerful deer scouting deer tool. You don’t have to spend hours scouting entire properties. Instead, with a little practice, you’ll be able to identify portions of properties that are of higher quality than others without setting foot on the ground.
By eliminating portions of properties that are of lower quality from your scouting missions you are ultimately spending less time on properties. Although you are spending less time on properties, you are spending a higher proportion of your time in high-quality areas. This undoubtedly increases scouting efficiency and makes scouting even more enjoyable.
Although I love scouting for deer, it can sometimes be frustrating. Finding new properties, getting permission to hunt properties, and meticulously walking those properties to understand how deer use them is a slow and time-consuming process. If you’re like me and you don’t have a lot of time to scout, using your scouting time efficiently is key to hunting season success.
Scouting deer using Google Earth provides powerful preliminary information, but it is no substitute for boots-on-the-ground scouting. Make sure you get out there and compare what you are seeing on Google Earth with the actual site. Over time, after comparing enough Google Earth data to on-site observations, you will become proficient at finding the best areas to scout for deer.
Table of Contents
Tip Number 1: Scout Deer Using Google Earth Pro
The first step toward effectively scouting deer using Google Earth is to download Google Earth Pro to your desktop. Google Earth Pro is free and better version of Google Earth. With Google Earth Pro you get everything Google Earth offers and more.
Google Earth Web is another option to choose from but does not provide the same features as Google Earth Pro. I regularly use measuring tools that are only found on Google Earth Pro and is the program I recommend.
Tip Number 2: Measuring Tools
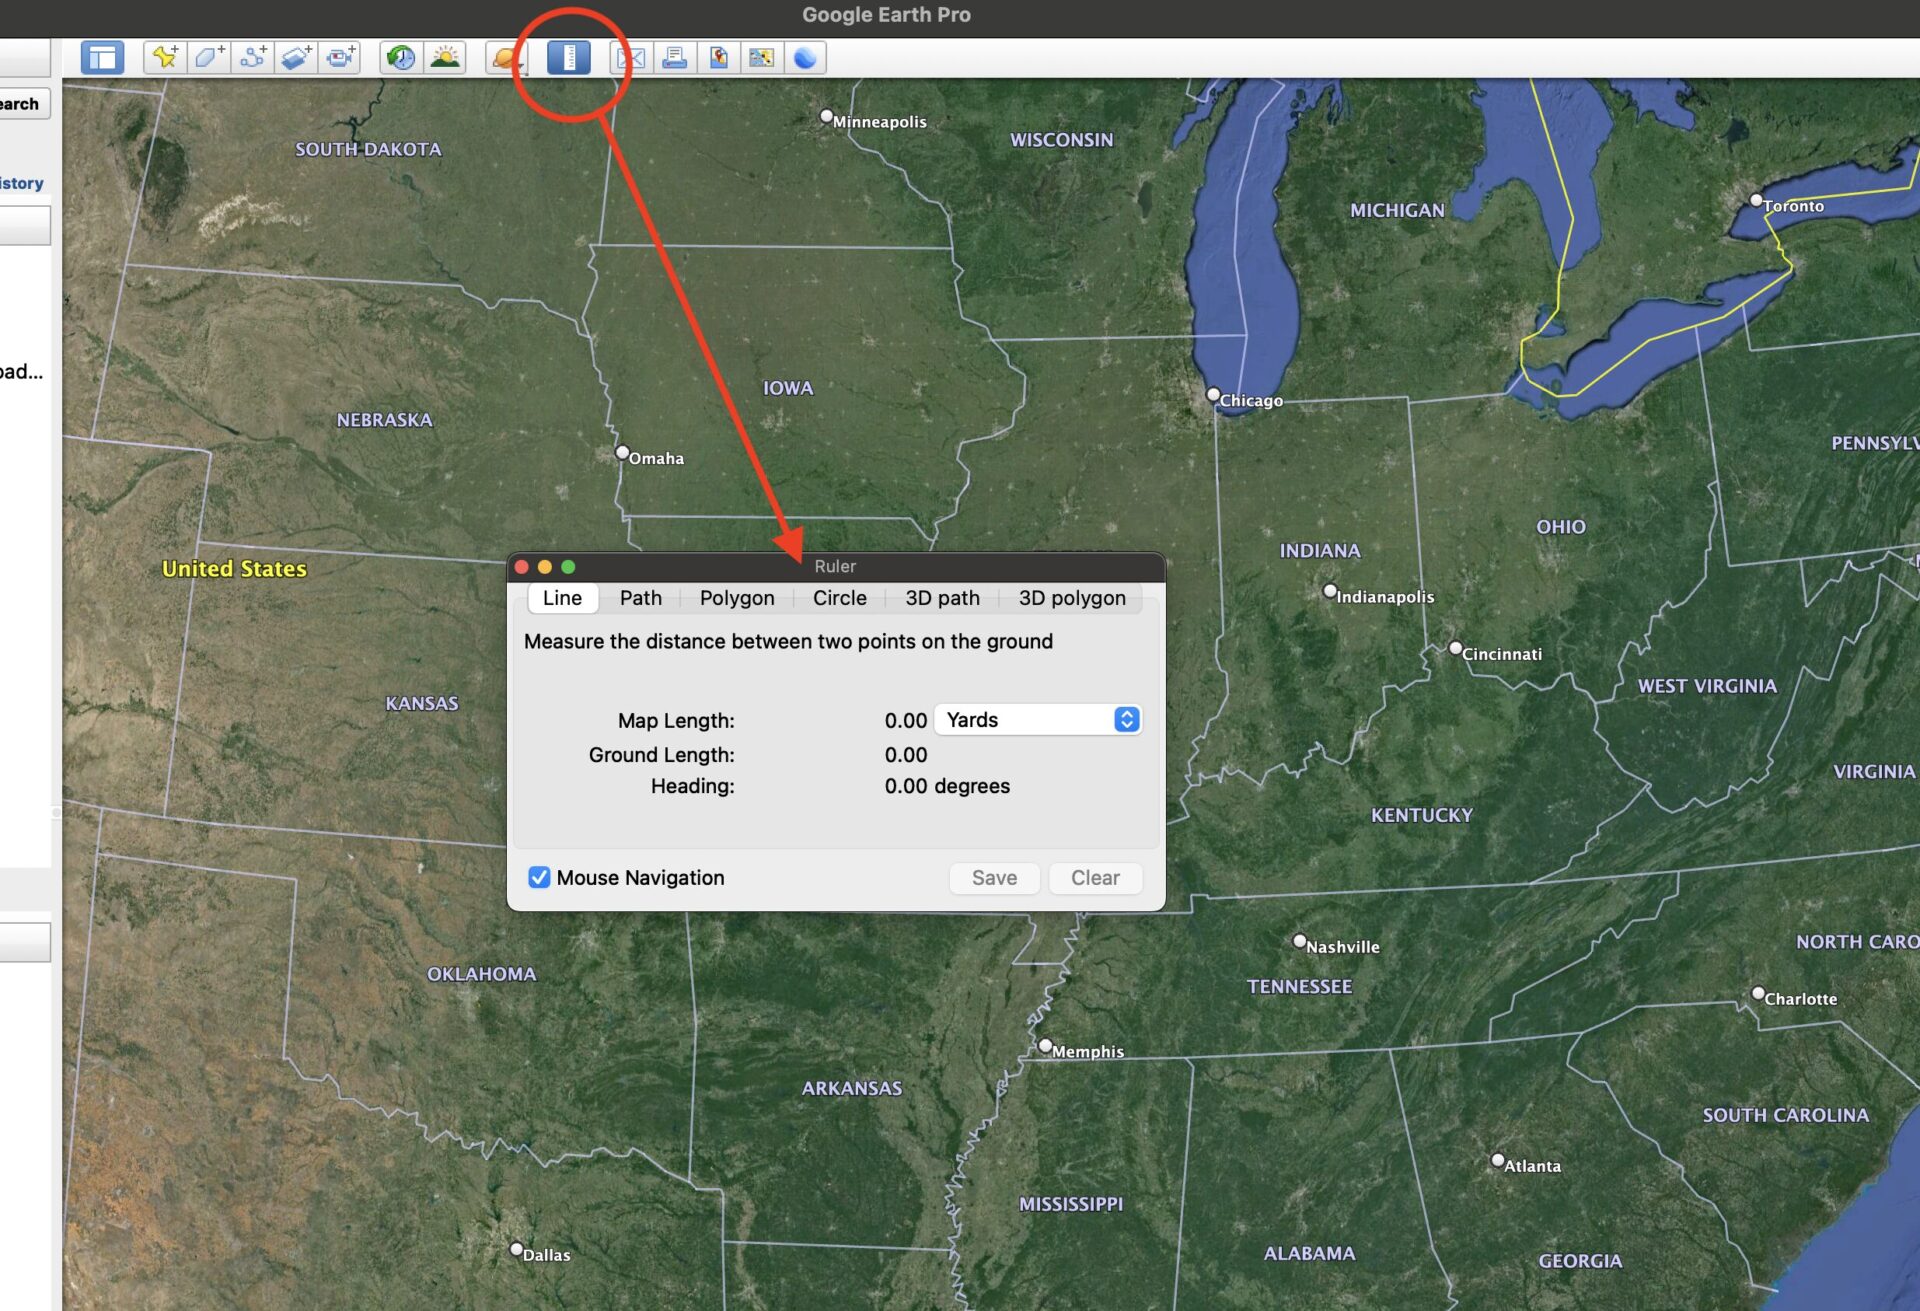
If you click on the ruler at the top of the window you can measure areas of interest. It gives you the option to measure with a Line, Path, Polygon, Circle, 3D Path, and 3D Polygon. I commonly use these measurement tools as drawing tools to journal my past and future scouting trips. I do this by placing circles and Placemarks on areas I’d like to scout and drawing Paths where I’ve previously scouted. By doing this I can recall these areas at a future date. Measurements overlaid on top of the aerial imagery are saved in the Places window and can be toggled on and off.
Tip Number 3: Organize and Prioritize
You can also roughly pre-determine the distance you will be walking, and the area of a property. This is helpful when determining how many properties you can realistically scout in a day. Another advantage of measuring tools is marking boundaries. For example, in Maine we have an expanded archery season. This season only takes place in a few specific locations of the state. By using the Path measurement tool, I was able to draw the boundaries of the expanded archery zones. Doing this eliminated the redundancy of checking to make sure I was in the expanded zone before each new scouting trip. The use of measuring tools has helped me organize and prioritize my scouting schedule greatly, saving me a lot of time in the field.

Tip Number 4: Historical Imagery
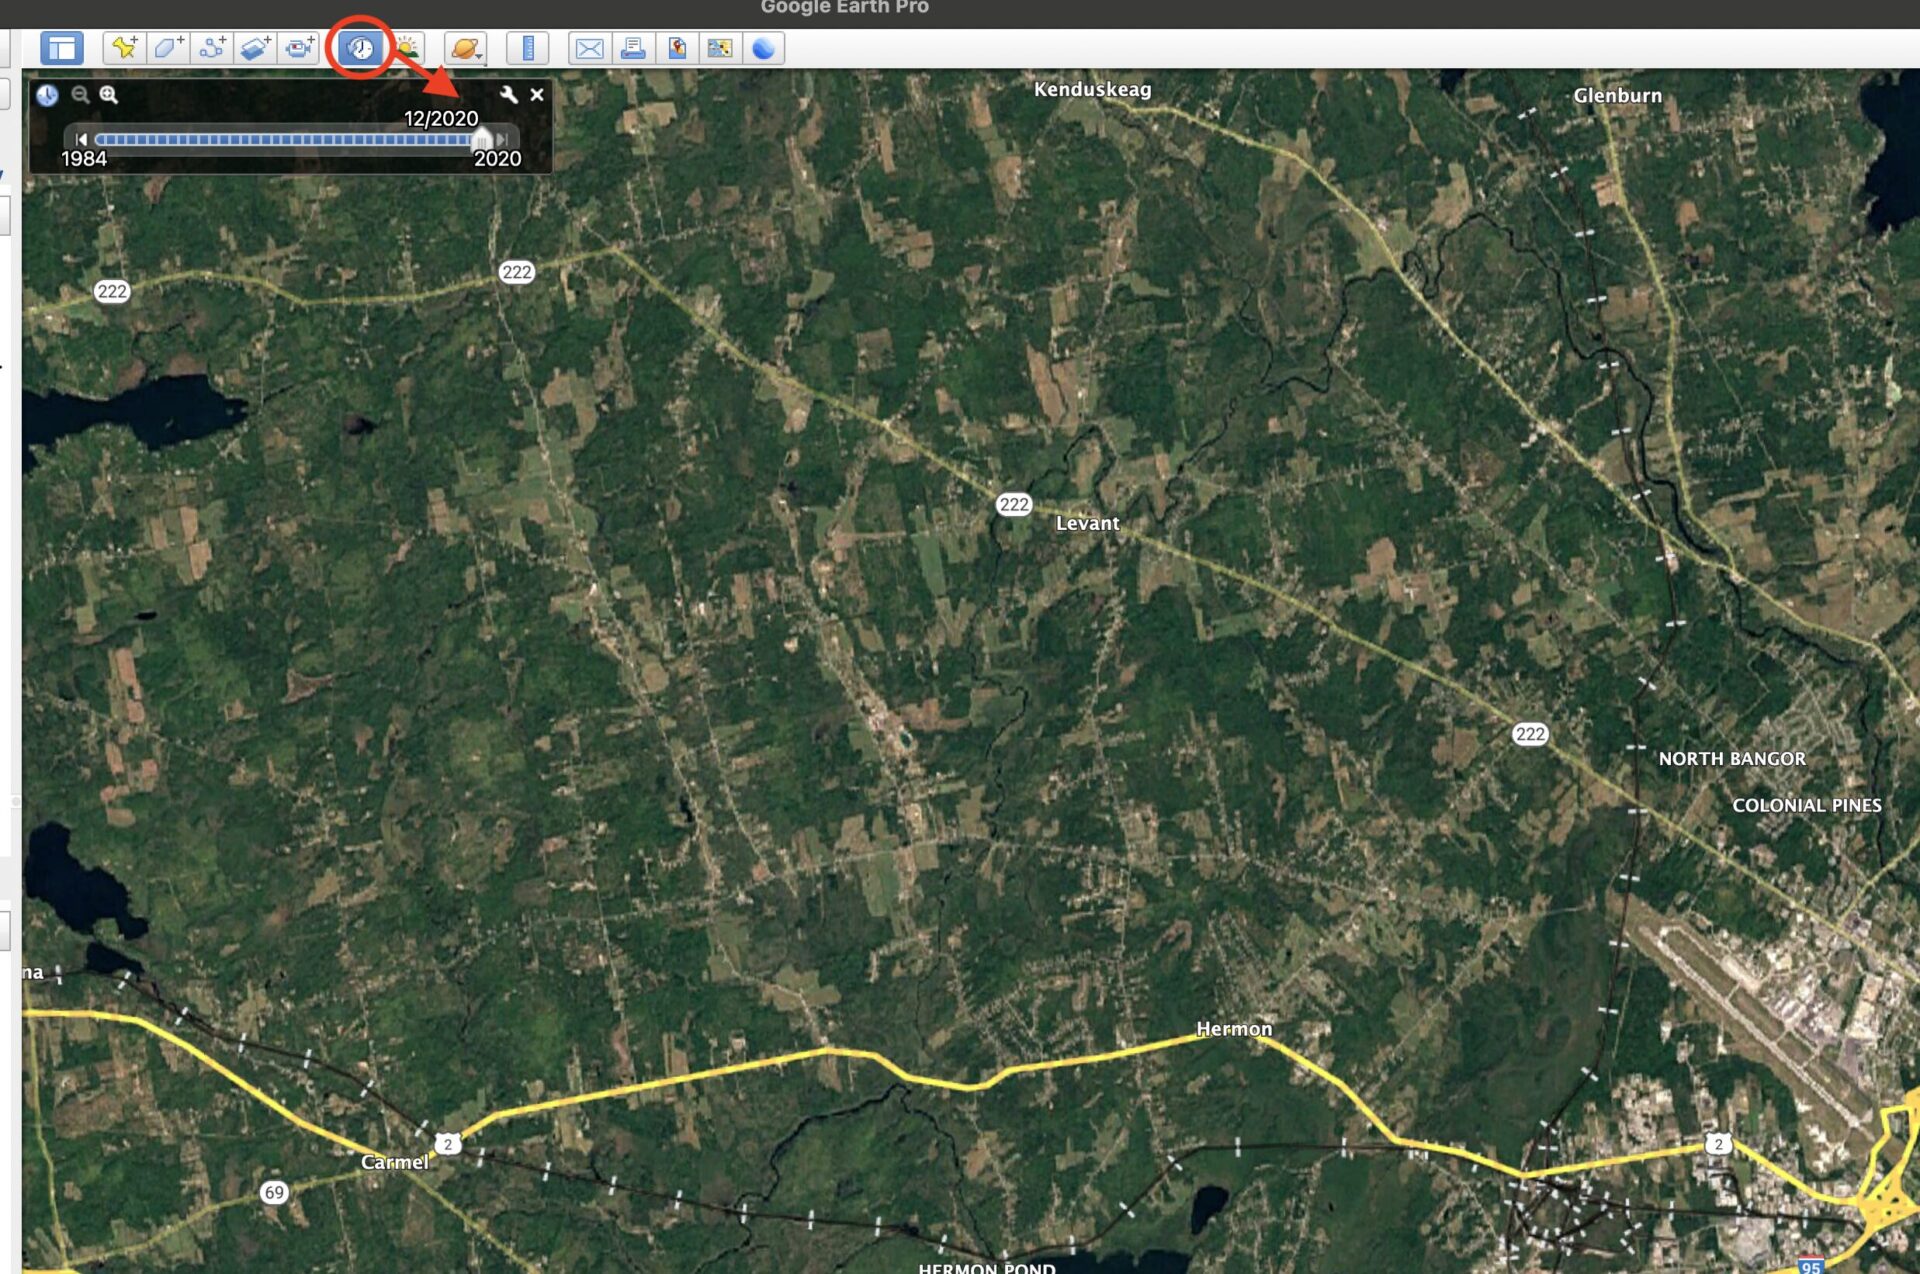
A simple yet effective tool for scouting deer using Google Earth is using Historical Imagery. The Historical Imagery icon can be found at the bottom left of your Google Earth Pro window, shown as a clock with a green arrow. The icon appears when you zoom into a location close enough so the program can find the area’s imagery dates. Once zoomed in far enough, click this icon and a slide bar with a range of dates will appear. By moving the slider across these dates, you will be able to observe years of previously recorded aerial imagery.
Tip Number 5: Find Wetlands
Another benefit of Historical Imagery is you can toggle between different seasons. This is because the imagery was captured at different months from year to year. By choosing imagery with the foliage off you can locate features that you otherwise would not be able to. I often use this feature to find small streams, swamps, and other wetlands when scouting deer using Google Earth because wetlands often provide high-quality bedding areas.
Tip Number 6: Forest Composition
You can also use Historical Imagery to look at forest composition. Using aerial imagery with foliage off will make determining the hardwood-to-softwood ratio simple. I like to know the ratio of forest types of the property before I scout. This helps me understand what the area looks like. It also helps me get a general sense of how much food could be available to deer in the area. Higher proportions of hardwoods often will often mean more forage in the area.
Tip Number 7: Age Timber Harvests
If logging has taken place in an area you can estimate cover density and the age of a forest stand. For example, let’s say in your most recent aerial image you find an old clear-cut. You can determine how old the vegetation will be by going back in time on your Historical Imagery. The date where you encounter the clear-cut disappearing will roughly be the age of that logging event. Being able to age forest stands like this is important because it allows you to theorize how deer will be using the area.
I often scout clear-cuts that are around 8-15 years old to see how they have grown back. Often they provide quality bedding and feeding. Using this method has allowed me to identify sections of properties that I believe are worth scouting over other areas, increasing efficiency. Historical Imagery is a very effective tool for scouting deer using Google Earth.

Tip Number 8: Google Earth App
Google Earth can be found in the App Store and has proved very useful. Data placed on Google Earth Pro on your desktop can be uploaded onto the Google Earth App on a phone. This means that any Google Earth Pro file that you find online such as; topo maps layers, parcels layers, public land layers…etc. can be uploaded onto your phone via the Google Earth app. This is one of my favorite tips because it allows you to take preliminary research from your laptop into the woods.
Tip Number 9: Placemarks & Baselayers
Before I head into the woods I like to set Placemarks on my Google Earth Pro desktop in areas I specifically want to visit on a property, then download them onto my phone. This is helpful because when using different baselayers, like topography, you can’t see the aerial imagery. This makes it difficult to navigate to the preliminary features of interest you marked. Placemarks will stay on top of all layers so that you know where your features are at all times, even when using other baselayers. This eliminates having to repeatedly toggle a base layer on and off to see the aerial imagery.
Tip Number 10: Property Parcel Information
Parcel information is another huge advantage to have remotely. Having property lines available at your fingertips while in the woods allows you to always know whose property you’re on; thus, you’re quickly able to ask for permission when you find good deer sign. This has sped up my permission-seeking and asking process immensely. The Google Earth App is a great tool for scouting deer when combined with Google Earth.

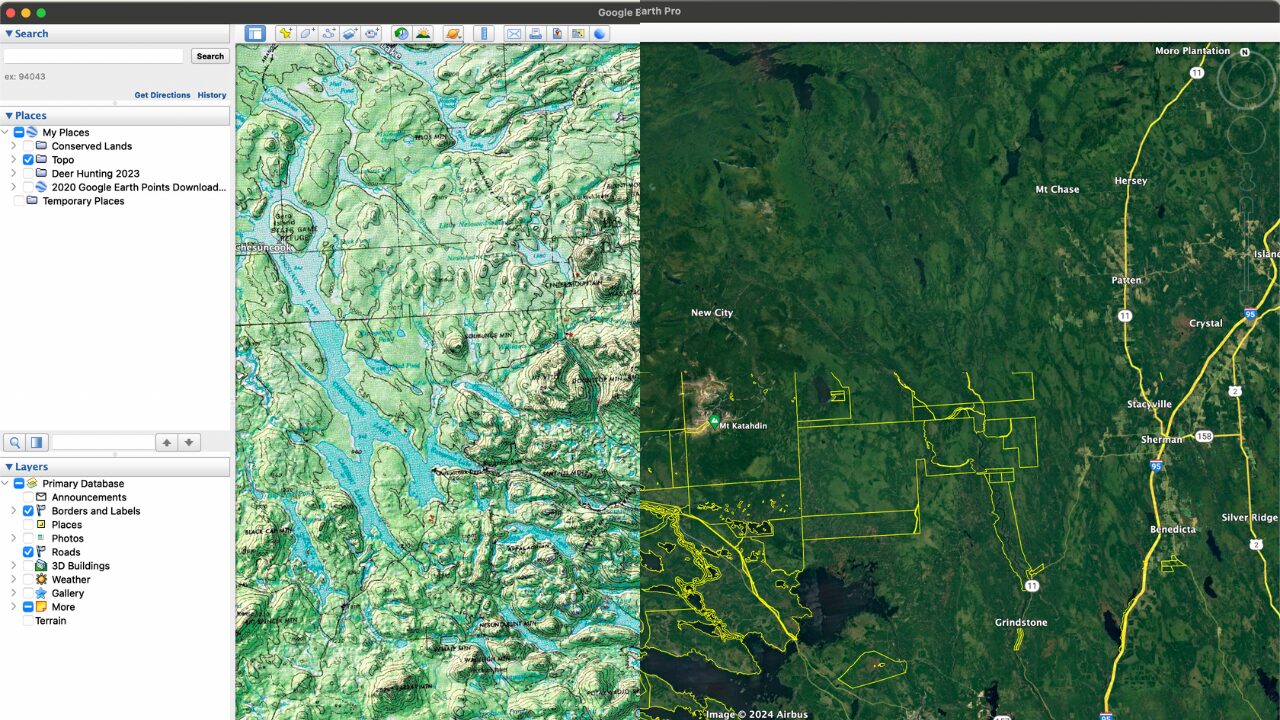
Tip Number 11: USGS Topographic Map Layer
USGS Topographic Maps layer is a layer I use every time before I start scouting. This layer can be easily downloaded from the internet and can be found by clicking the link above or with a simple Google search. I have found viewing topography to be a helpful preliminary step before putting feet on the ground. Topography influences deer movement, whitetails generally want to follow the path of least resistance. There are exceptions to every rule but generally, you can predict where you should focus scouting. Doing this reduces time wasted on areas that have a low potential for concentrating deer movement.
Tip Number 12: Pinpoint the Best Areas on Properties
Pinch points are a type of terrain feature I key in on with topographic maps. An example of a pinch point would be a steep hill that runs perpendicular to a river. A hill that decreases in steepness as it nears the river creates a great pinch. Whitetails generally will want to use shallow terrain to get around hills. In the picture below, the closest part of the hill to the river provides the easiest travel corridor. I will place a Placemark to remind myself to scout this area to see how well-traveled the pinch point is.
Another example of a pinch point would be two steep hills near each other that create a valley in-between. Often, the deer will walk in the valley. Using the valley acts as a shortcut and is less energetically expensive than climbing the hills. Pinch points like these are excellent candidates for tree stands, especially during the rut when bucks use travel corridors to find does.
Topographic layers have helped me identify specific sections of properties that should be scouted more thoroughly. It has also helped me identify sections that aren’t worth my scouting time. Topographic map layers are great tools for scouting deer using Google Earth and are a must in my scouting regimen.

Tip Number 13: Parcel Data Layer into Google Earth
There are multiple ways to obtain parcel information to be downloaded into Google Earth Pro. Parcel information is available to the public. Historically, to interpret parcel information you had to visit a town’s assessors page and figure out the map and lot number of the property of interest by looking at confusing PDFs. This took a long time and was tedious. Recently, however, parcel information is becoming digitized/computerized. Towns often have an online parcel viewer which is incredibly helpful. Even better this information can often be downloaded as a Google Earth File (.KMZ) which can be overlaid onto Google Earth Pro aerial imagery.
Tip Number 14: Research State and Town Websites
Parcel information is not a nationally recognized layer because parcel information is only at the state or town scale so it can be harder to obtain. Some leg work may be required to find out where to obtain Google Earth parcel information for towns and states you’re interested in, but it’s worth it. I recommended searching state and town websites for this information. It may also be beneficial to get in contact with state and town officials.
Tip Number 15: Interactive Parcel Layers
Once projected onto Google Earth Pro they often (not always) do much more than show you the locations of the parcels. These Parcel layers are generally interactive which means you can click on them to display additional information. Some of the more helpful pieces of information that pop up include the property owner’s name, address, and acreage. After locating properties you deem worth scouting you can overlay parcel information over those properties. This allows you to obtain all the information you need on properties you want to scout before heading into the woods.
As previously mentioned, parcel information can also be downloaded onto your phone so you can have it in the field with you. Having property lines available at your fingertips while in the woods allows you to always know whose property you are on, enabling you to quickly ask for permission.
The ability to have property owner names, addresses, and acreages one click away, all on a single platform, rather than going through pages and pages of confusing documents to find it has saved me copious amounts of scouting time. Parcel information is a useful tool for scouting deer using Google Earth.

Conclusion
Although there are other ways to e-scout deer digitally, like with OnX Hunt, I still prefer Google Earth when I’m on the desktop. I feel like there is much more customizability.
There are so many ways to use Google Earth Pro to your benefit that this blog does not cover. These tips will help you unlock the potential Google Earth has to scout for deer. I am confident that if you implement these tips you will improve your scouting efficiency. Scouting deer with Google Earth is one of the best tools a hunter can use to become successful during the hunting season.
If you’re interested in more ways to effectively scout deer check out my post: Finding Pressured Bucks. This post goes further into scouting deer using Google Earth. I share how to how to determine habitat types and features that bucks are likely to key in on.
If you want to learn additional skills and shortcuts or are having trouble getting started with Google Earth the Google Earth User Guide is a helpful resource. Leave a comment below and let me know what you think about scouting deer using Google Earth! If there are any articles you want me to cover in the future feel free to let me know.