This Remington 7600 review is going to cover everything you need to know to decide if the pump-action rifle is right for you. The Remington 7600 isn’t perfect, but it does some things exceptionally well, better than any other rifle on the market, which may make it worth buying. This post is not affiliated with or sponsored by Remington in any way.
This post contains Amazon and other affiliate links, which means I’ll receive a commission if you purchase through my link, at no extra cost to you. Of course, you are not obligated to use my links, but it does help fund these posts in hopes of bringing more value to you!
Table of Contents
How Much Is The Remington 7600?
The price of the Remington 7600 is between the 700-1000$ mark depending on if you buy new or used. To see the most recent prices for the Remington 7600 You can also get the older counterparts like the Remington 760 for even better prices. But the question is – is the Remington 7600 worth the money?
How Accurate is the Remington 7600?
Accuracy
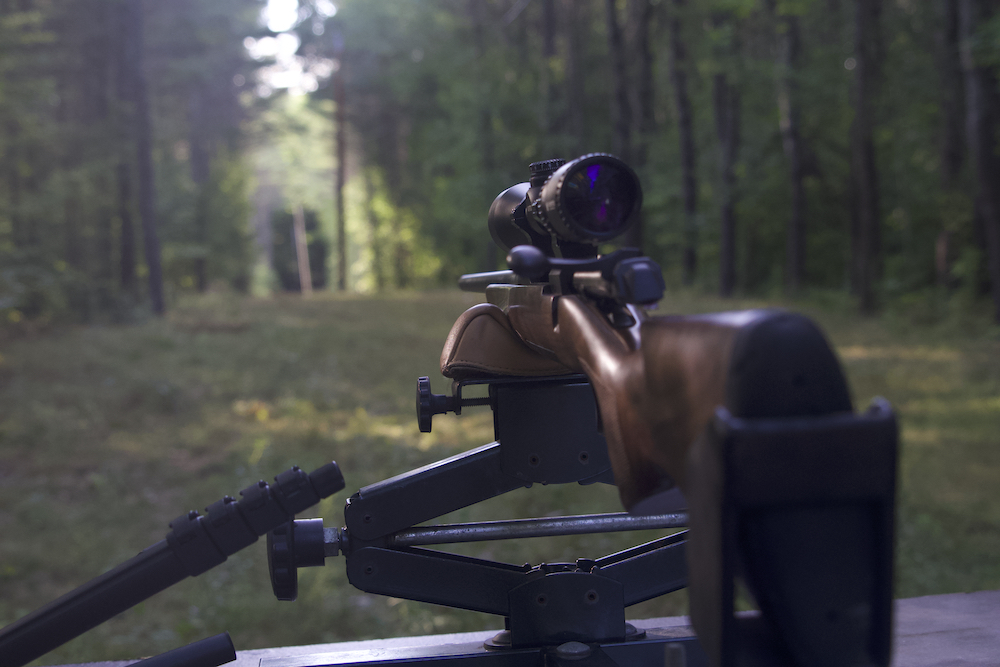
Scope
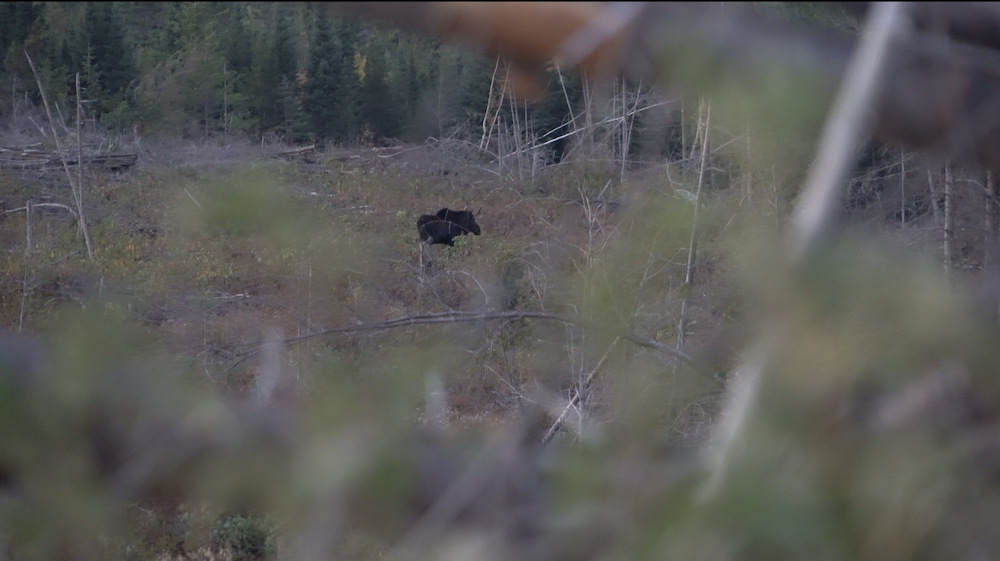
Although you might not want to take this gun on your next western hunt in vast open country, it is very accurate in those short to mid ranges. The Remington 7600 is more than capable of shooting accurately out to 200 yards with a scope.
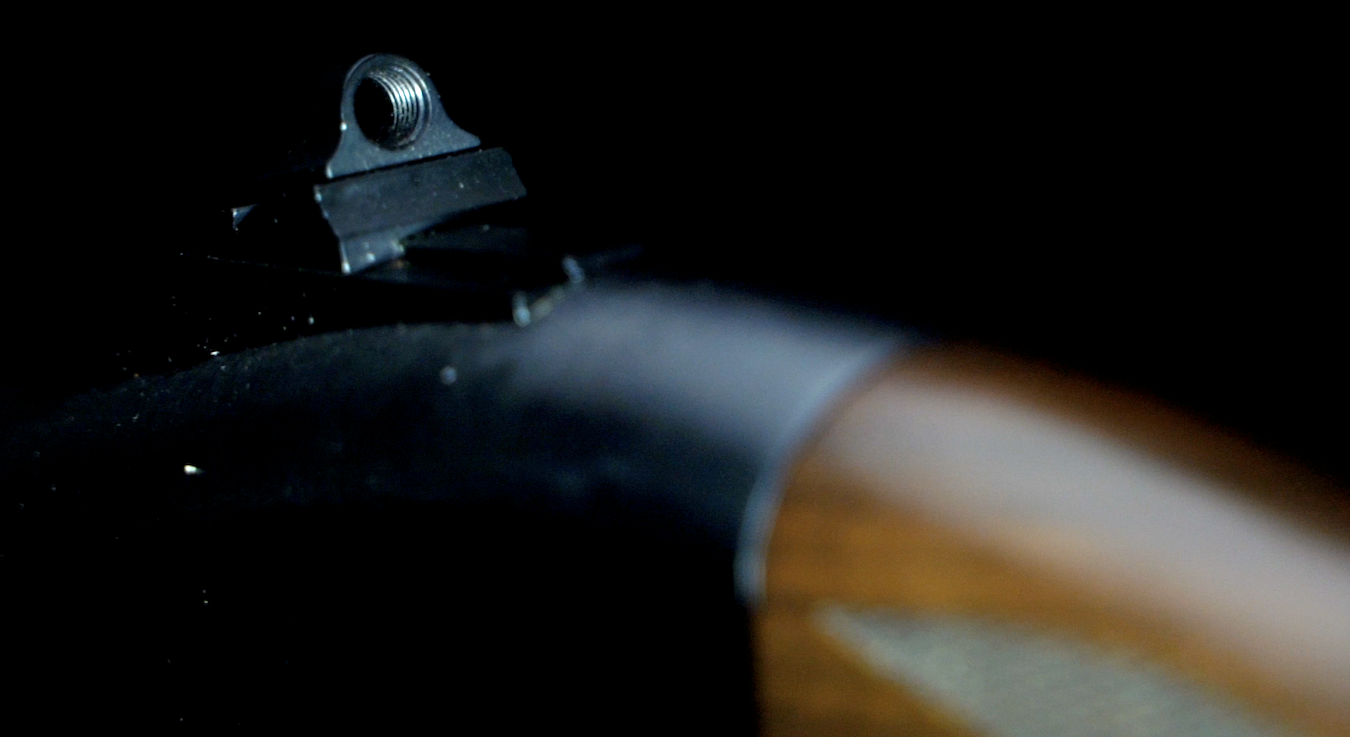
William’s Peep Sight For Remington 7600
I am able to shoot about a 2″ group at 50 yards with William’s Peep Sights. These peep sights are awesome for fast target acquisition which makes it a great option to pair with the Remington 7600.
Additionally, the 7600 is very comfortable to carry one-handed when using peep sights because you can easily grab onto the receiver and your thumb can wrap around the top of the receiver for maximum comfort. When using a scope you can’t grab around the top of the receiver, so you need to carry it from the bottom of the receiver or two-handed.
In this Remington 7600 review, I didn’t personally put the Remington 7600 through a rigorous accuracy test. This is because I use the Remington 7600 as a brush gun, the shots I take are rarely over 60 yards. This means accuracy is not a major factor for me at long distances.
Crisp Trigger
Out of the box, the trigger felt great. The trigger was very crisp and there was no trigger creep, which is something I definitely take into consideration when buying a new rifle. If your trigger isn’t crisp then you’ll be less accurate when shooting.
Pump-Action Benefits
Fast Follow-up Shots
This rifle is unique in that it’s a pump-action. Pump-actions can shoot fast follow-up shots reliably without taking your eyes off the target. When using other types of gun actions you will have to re-acquire your target which takes valuable time in those split seconds while shooting.
During follow-up shots with the 7600, you can keep the gun shouldered, with your trigger finger on the trigger, and your eye more or less still looking down the site at the target. Other guns on the market don’t offer this to the same extent.
You may argue that a semi-auto would be a better option, and I would agree if we were strictly talking speed. However, the 7600 is more reliable than semi-autos in poor weather conditions. I make this point in my Benelli R1 Review.
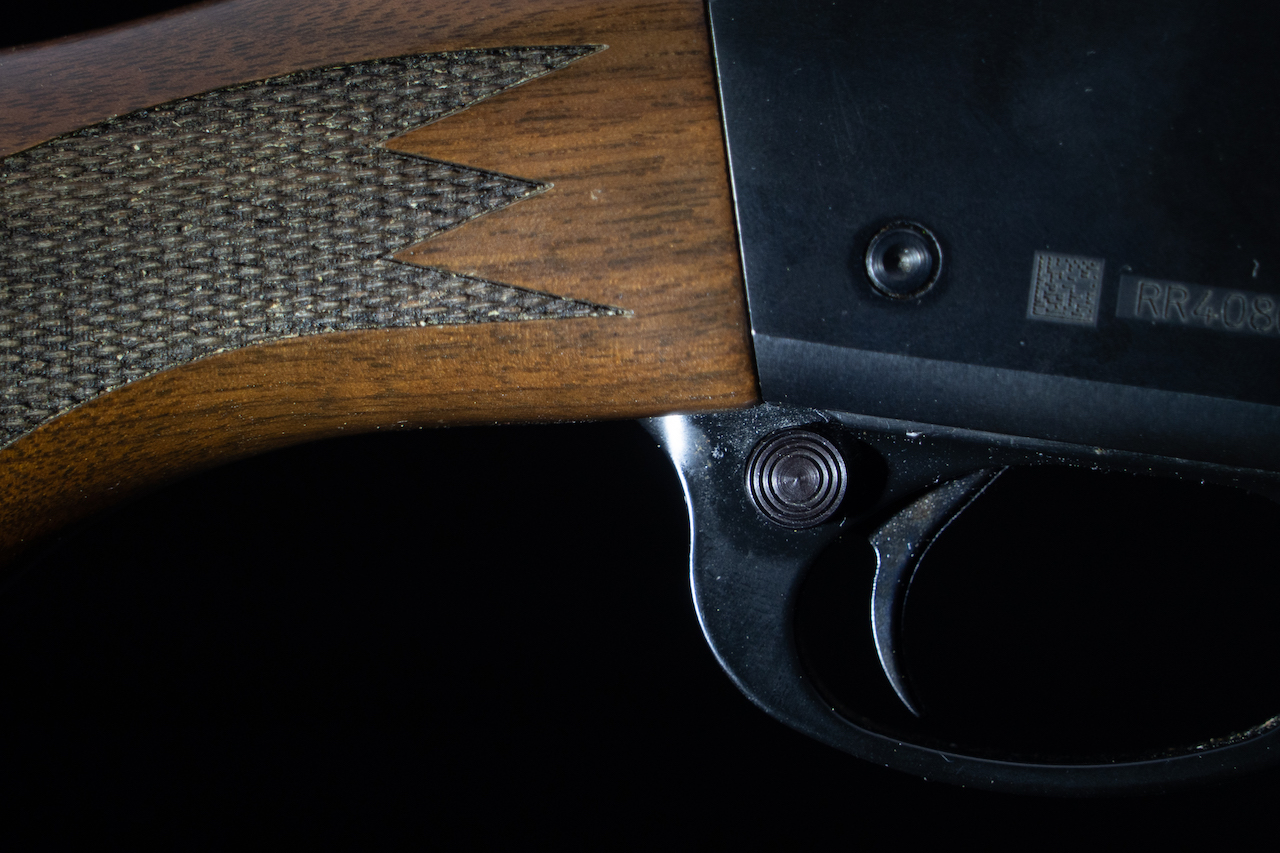
Cross-Bolt Safety
Another fairly unique feature of the 7600 is its cross-bolt safety. I really like this safety over other safeties because it is similar to the shotguns I use. I like to keep my shooting form as similar as possible between my guns so all of the little things become a habit and I don’t have to think about it during the moment of truth.
I had to get a gunsmith to reduce the amount of pressure on the safety because it was very hard to press and would end up making a loud audible click. Although it still makes a click, it’s quieter and much easier to press now.
I wish the safety was located in the front of the trigger housing because I feel like that is a slightly faster transition into shooting, but that is just personal preference.
Reliability
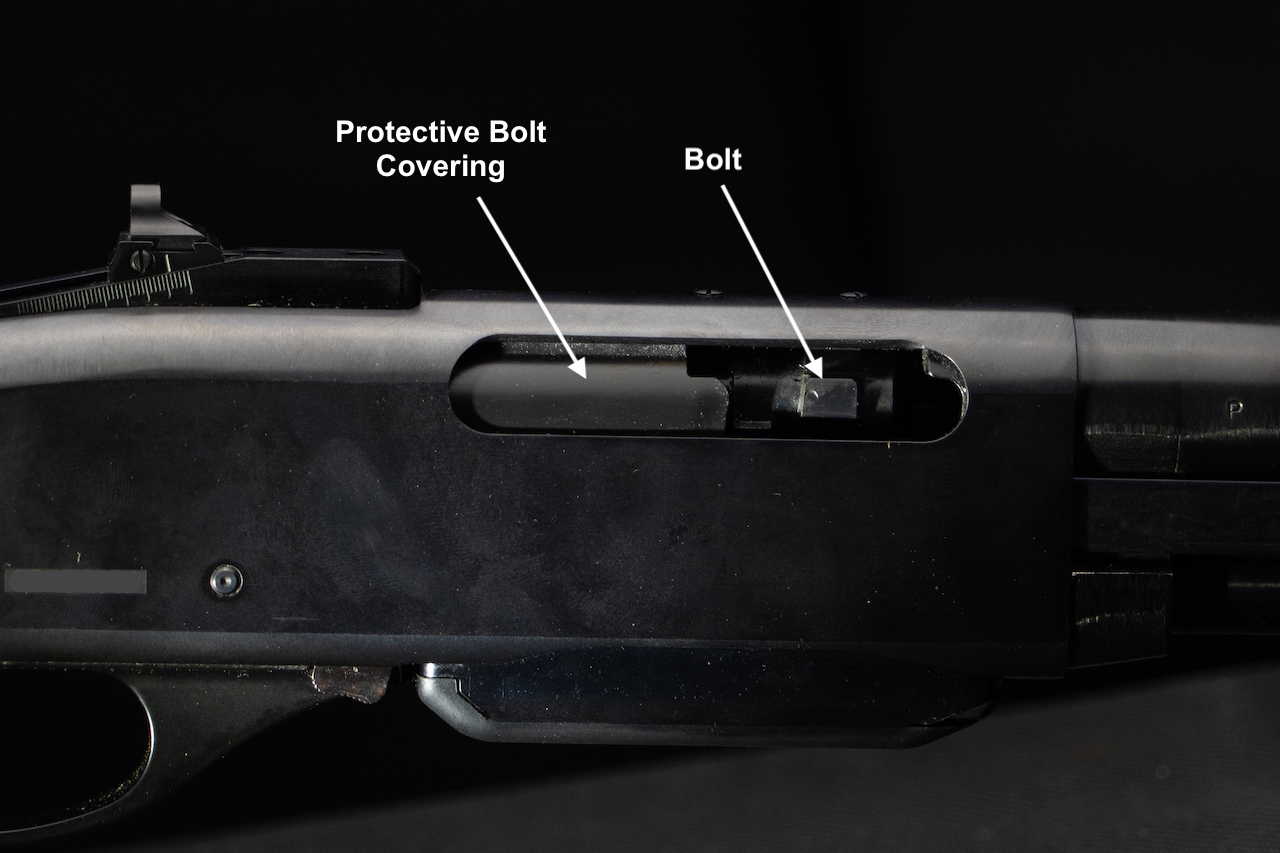
One of my favorite features of the Remington 7600 is that the bolt located on the side of the gun. This keeps debris from falling into the chamber from above while walking through brush which would otherwise cause malfunctions. Additionally, it has a plastic protective covering that works well to keep the elements out. These two features greatly reduce the chances of malfunctions and is a strong point to mention when talking about the reliability of this gun.
Additionally, not much can go wrong with pump-action guns because there are not many moving parts – like semi-autos for example. Because of this, your chances of a cartridge getting stuck in the chamber are greatly minimized.
Comfort & Carry-ability
One of the best features of this gun is its carry-ability. It is very comfortable to carry around in the woods for long periods.
Slim Reciever
The receiver is slim allowing you to comfortably grip around the receiver and magazine with one hand. Your thumb can wrap around the top of the receiver for maximum comfort. This works best with peep sights because when using a scope you can’t grab around the top of the receiver, so you need to carry it from the bottom of the receiver or two-handed.
Superb Balance Point
The receiver is also the balance point of the rifle so there is no strain on your wrist when carrying the gun one-handed. Some guns don’t have good balance points and your wrist has to compensate for the awkward tilt, which is fatiguing.
Remington 7600 Specs
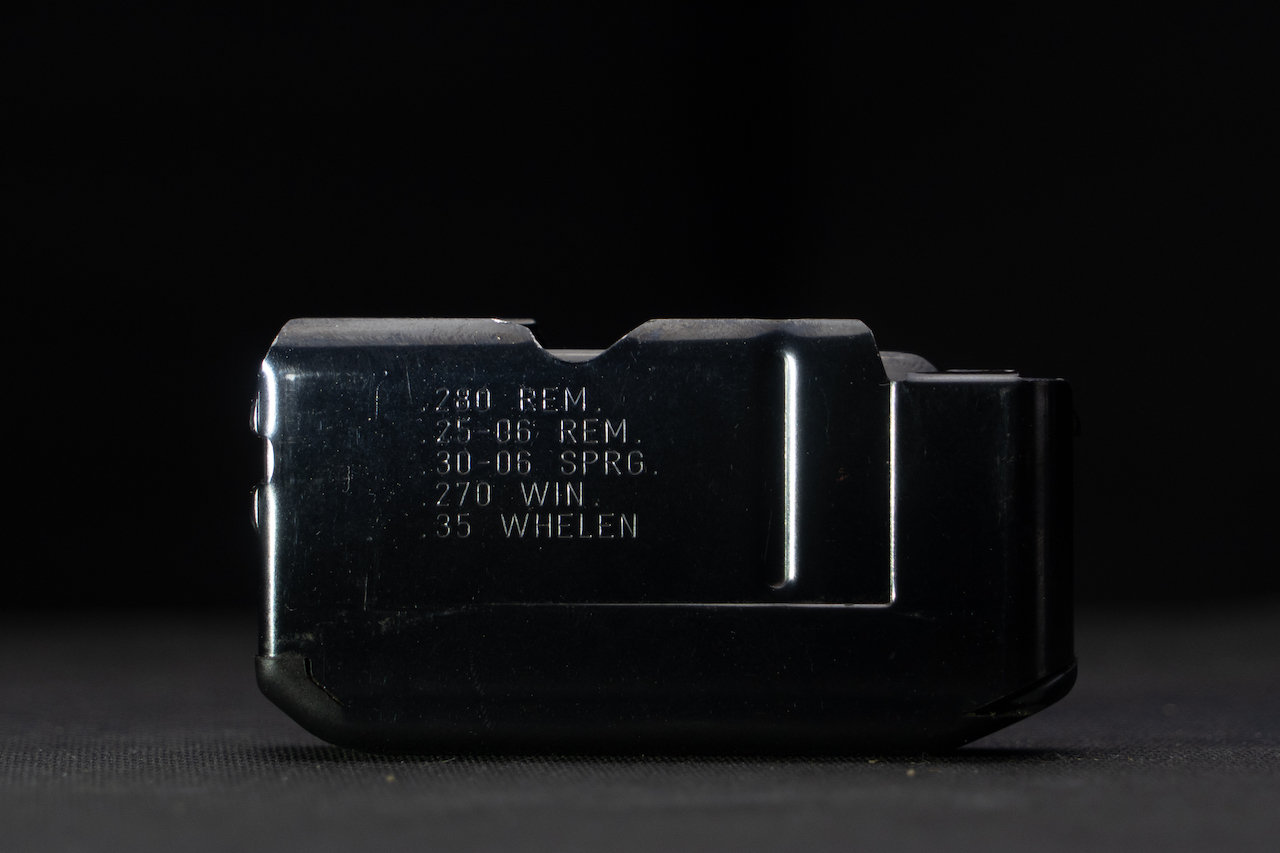
- Magazine Capacity: 4+1
- Overall Length: 42 5/8″
- Average Weight: 7.5 lbs
- Barrel Length: 22″
- Twist Rate: 10
- Length of Pull 13.5″
- Drop Comb: 2 1/4″
- Drop Heel: 1 3/16″
- Cross-Bolt Safety
Remington 7600 Carbine
The difference between the Remington 7600 Carbine and the Remington 7600 is minimal, the only difference is the shorter barrel. The barrel length of this gun is 18.5″ instead of 22″. This drops the overall length of 42 5/8″ to 38 1/8″. The weight change is minimal.
Remington 7600 Carbine Specs
- Magazine Capacity: 4+1
- Overall Length: 38 1/8″
- Average Weight: 7.5 lbs
- Barrel Length: 18.5″
- Twist Rate: 10
- Length of Pull 13.5″
- Drop Comb: 2 1/4″
- Drop Heel: 1 3/16″
- Cross-Bolt Safety
Stripping & Cleaning
Assembly and Disassembly | Full-Breakdown
Another spot of contention with the 7600 is its poor ability to break down easily. I remember when I first bought my Remington 7600 I tried to break it down and it was so confusing I had to watch a YouTube video what seemed like 50x to try to figure it out.
Even then I couldn’t get the gun fully broken down and had to bring it to a gunsmith because I couldn’t get a piece out of the gun near the firing pin and I didn’t want to break it.
Now that the piece has been loosened by the gunsmith, it will likely be easier next time. But there are a lot of pieces so I will still need the YouTube video.
Basic Cleaning
That being said, you rarely need to break the entire gun down anyway. Maybe once a year before you put it away for the season. In most cases, you just need to take a handful of pieces apart which will allow you to clean the gun thoroughly. So although it is more complicated than I feel like it should be, it can still be done.
Action Bar
After I got my 7600 back from the gunsmith after getting it worked on, it was pretty hard to pump. I finally discovered that the action bar was ever-so-slightly warped. I was able to rebend this with my fingers and it now works. Be aware of this when breaking down your gun so that you don’t bend these
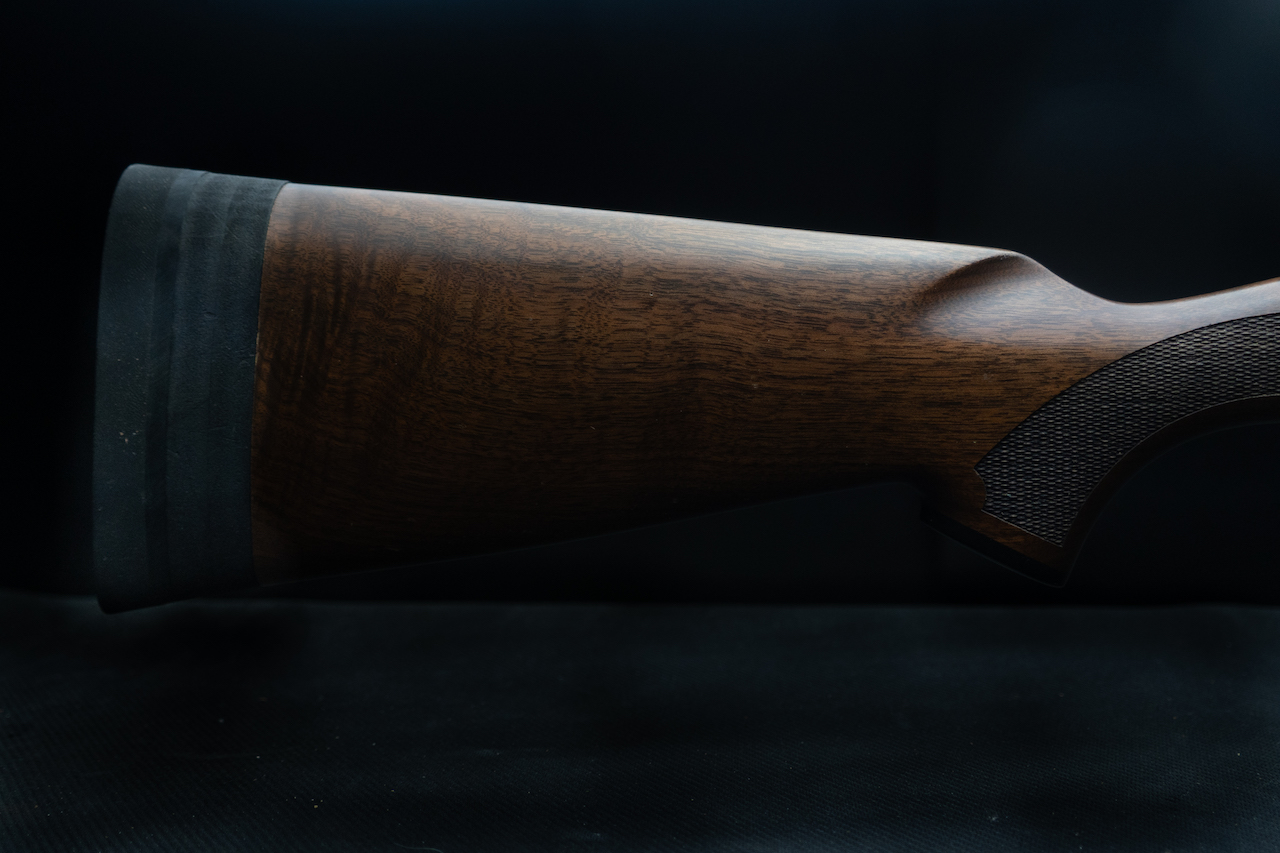
Gunstock
Gunsmith Likely Required
Out of the box, there are no options for adjustments. This is one of the biggest downfalls of the Remington 7600. Further, the guns usually don’t fit right out of the box, the 7600s have been known for this.
The stocks seem to be made with a high comb for putting a scope on. So if you’re planning to use a scope it may fit you assuming your length of pull is correct. If you’re looking to put iron rights on it may take some adjusting.
There’s nothing more important than fit and feel when buying a new rifle for hunting. For this reason, I would recommend bringing it to a gunsmith to ensure a perfect fit.
Thumbhole Stock
I really wanted a thumbhole stock on this gun, so I bought a Boyd’s thumbhole gunstock. This stock was beautifully made, unfortunately, it was much heavier than the original stock and the balance of the gun was off which made it weird to shoulder.
It’s possible the balance would have been better if I had also bought the forearm as well but the gun was too heavy for the amount of walking I planned to do so I returned it. Boyd’s was very easy to work with and had no problem with me returning the stock. I would have no problem going back to them in the future for other stocks.

Length Of Pull
I had to increase my length of pull from the factory 13.5-inches to 14.5 inches – an entire inch. This meant I had to put two spacers and a recoil pad on my 7600 just to get it to fit properly.
This is a feature Remington needs to improve in my opinion. There are modifications you can buy that will help the gun fit better, but the amount of increase in trigger pull I needed, there wasn’t anything on the market.
Remington 7600 Recoil
The recoil of the 7600 will depend on a couple of different factors – the caliber and weight of the gun and the type of ammo being used.
How Much Does The Remington 7600 Weigh?
The Remington 7600 is an averagely weighted gun. It comes in at about 7.5 lbs. for this reason it does not kick more than other guns that weigh that much. Now if you start loading bigger bullets it will pack a punch.
A 30-06 and with 180 or 220-grain bullets will recoil pretty hard, just like any gun would that weight. This is why the length of pull is so important, so you don’t have the scope or your thumb knuckle hitting you in the head upon recoiling.
No Recoil Reduction Features
There are no recoil-dampening features of this gun, I did end up putting a recoil pad at the end of my stock which is much better than the hard plastic option it comes with stock. I didn’t have a choice anyway because I needed the recoil pad to achieve my proper length of pull.
Remington 7600 Problems & Considerations
I haven’t had any serious problems with this rifle. Here are some things to consider:
- The metal seems to rust easier than other guns I’ve owned so you have to be adamant about gun care.
- The action bars can bend when taking your gun apart, be careful with them.
- There is not a great way to adjust the Length of Pull – You may need a gunsmith for a good fit.
- Reduced Safety Noise & Pressure
Suggestions:
My suggestions to Remington based on this Remington 7600 review would be to re-engineer to achieve:
- Tool-Less Breakdown
- Shim Kit to Adjust Drop and Cast
- Easy Length of Pull Adjustments
Remington 7600 Review Conclusions
I think the Remington 7600 could use an upgrade, feels like it is missing the quality, adjustability, and simplicity that other rifles at the same price point offer. But there really isn’t anything else on the market that does what this rifle can do.
In my experience, the pros definitely outweigh the cons for what I use it for – a brush gun and tracking deer in Maine’s harsh winters. The Remington 7600 has the best bad weather reliability coupled with fast shooting capabilities.
Who Is The Remington 7600 Right For?
It makes for one of the best brush guns on the market because of its ability to produce quick and reliable follow-up shots without taking your eyes and rifle off your target. The Carbine is also a great choice, it’s a small gun that packs a big wallop and is great for maneuvering in dense brush.
In my opinion, the Remington 7600 is well worth the money if you’re using it for what it’s intended for (speed, reliability, and close-quarters) because there really isn’t anything else on the market that does what this rifle can do.
It probably isn’t the gun of choice for Western hunters who shoot at long distances. Bolt actions are more accurate in those situations and you likely don’t need the same speed for follow-up shots as you might in close quarters.
I hope you found this Remington 7600 review helpful, let me know what you think in the comments below or on social media:


")