Although you can find big buck tracks in snow by aimlessly walking through the woods, having more consistent success requires a more refined approach. If this is your first time tracking or first time tracking in a particular area and you don’t have any history with the area it will save you time and energy by planning ahead.
Big bucks aren’t everywhere and in order to find a big track you’re going to want to look in the best places for finding big bucks. Your success finding a big buck track is also highly dependent upon the time of year and the phase of the rut.
Since bucks are changing behavior as the season progresses, so should your approach. Honing in on specific areas during specific times of year will reward you with the most success. Let’s get started with the process:
Scouting For Bedding Areas, Food Sources, And Pinch Points
Google Earth
I use Google Earth to preliminarily scout new locations with aerial imagery. Whitetails, no matter where they live, need food, water, and shelter. Big bucks in remote forest settings key in on two main habitats: At the edge of dense greenery on top of mountains where they have a visual advantage, or swamps where high stem count offers food, concealment, and a hearing advantage over advancing predators. These are the main bedding areas for bucks in big woods settings. These can be seen from aerial imagery and topographic imagery. Big woods bucks aren’t as picky about bedding as deer in more developed settings.
Clear-cuts are also easily visible on imagery and are great food sources for deer. Locating areas to hunt near mountains or swamps near clear cuts can be a good idea as bucks will use these and will keep tabs on the does that use them.
Since I have onX Hunt’s paid membership I have access to their online WebMap Application. I use this tool instead of Google Earth when it comes to topography. OnX allows you to use Hybrid imagery which is aerial imagery with topo lines overlaid on top. This makes it easy to see both swamps and mountains in an area. I can then mark mountains, funnels, ridges, and swamps with waypoints using onX and it will automatically be transferred to my phone’s OnX app. This way I’ll have those points when I’m out hunting or scouting.
If the onX WebMap Application sounds like something you would be interested in, you can start your free trial here: onX Hunt Free Trial.
Using The Rut Phases To Find Big Woods Buck Tracks
Whitetail Rut Dates Change Depending On Temperature In Maine
Pre-Rut
Before the rut kicks off, bucks aren’t moving very far. Tracks are hard to find at this time of year because of this. This is generally the entire first week of the season. They are locked down in their favorite spots in swamps and on mountaintops. If you do find a big track there’s a good chance you can catch up to him for this reason. To find a track at this time of year skirt the edges of swamps and softwoods knolls of mountains.
The areas and that big bucks in the big woods spend their time during the pre-rut are very similar to smaller parcels just at a much grander scale. For example, in smaller parcels of land where there is a lot of hunting pressure bucks seek hills, points of ridges, and swamps for protection in order to have the upper hand. These areas have offered them the best protection from predators which is why big bucks have chosen these areas.
I’ve also noticed that the rut phases are delayed depending on the climate/average temperature of the region you are hunting. This also has an effect on average deer body size. Check out my post on this subject: When is the Whitetail Rut in Maine?
The Rut
As the season progresses bucks are on the move and it is easier to find big buck tracks because they’ve come out of their hiding holes and are searching for does. The land is vast, and they cover a lot of ground. During this time of the year I still key in on the mountains and swamps because I hope to catch a tired buck sleeping in these areas where they feel safe. In addition to these areas, topography funnels, known travel corridors, and areas you’ve seen does can be great places to check as well.
Usually, towards the end of the second week most bucks will be chasing in the northern 2/3 of Maine. This will continue throughout the 3rd week, and slowly tapers off into the final weeks. The downside is bucks are tough to catch up to, you may never catch up to a rutting buck on a mission for does.
Post-Rut/ Late Season
At the end of the season when snow is getting deep, deer move to their wintering yards. You can sometimes find a nice buck near these wintering areas checking for does. Does, fawns, and small bucks head to the yard first. But having more does congregated is a benefit bucks take advantage of. I’ll often head to the wintering area cedar swamps at this time to pick up a track. Often though, old big bucks will stay away from wintering yards until later if it’s a mild winter and it may prove beneficial to hunt mountains or non-wintering swamps to find the biggest bucks.
I prefer cedar swamps at this time of year because the deer are naturally gravitating towards them for shelter, forage, and late-season breeding. Plus it’s a lot easier walking in the swamps than going up and down mountains when the snow is getting deep. Winter migration trails can also be a good place to intercept a buck’s track. These are areas that the smaller deer are taking to get to the wintering yard. If there is a doe or fawn in heat, you can bet a buck will be on that trail at some point.
Conclusion
I hope this post has helped you navigate where to find big buck tracks in the snow. If you have any questions leave them in the comment box or on my social media accounts below. Now that you know where to find a big buck’s track, it’s time to learn How to Read and Judge Big Buck Tracks.
Looking For More Tracking Information? Find Me On:
Proper gear is essential when you’re tracking big woods bucks on snow in the remote wilderness of Maine and New England. Proper gear helps you to be more effective, comfortable, and safe. If you’re hesitant to start tracking these big bucks because you aren’t sure how to prepare or what gear you’ll need, I hear you, I was in the same boat when I first started.
I’ve got you covered in this post. We’ll dive into the gear you’ll need to get started tracking big woods bucks in snow. I list all of the gear that I take with me in the woods to make sure I am prepared to handle all scenarios. I’ve tested and relied on almost all of this gear.
For your convenience, I have linked all the gear I use or similar gear in the appropriate sections below so you can see exactly what I’m talking about.
This post contains Amazon and other affiliate links, which means I’ll receive a commission if you purchase through my link, at no extra cost to you. Of course, you are not obligated to use my links, but it does help fund these posts in hopes of bringing more value to you!
The Best Vehicle for Tracking Bucks In The Snow
You might think, as I did, that you need a giant lifted truck filled with hunting and survival gear to start tracking. However, this isn’t true. You can even find places to park with a sedan, although I do recommend an AWD car. If you are using a sedan I suggest studded tires to keep you from slipping off the road when traveling to and from your hunting areas.
I used a Subaru Forester for many years and it worked pretty well. You just have to choose your hunting areas depending on the vehicle you have to work with. Did I wish I had a little more clearance sometimes? Sure, but it got me 70% of where I wanted to go and I made up the other 30% with a little extra footwork. Many times I’ll find a track before I get where I’ve planned to go anyway.
There are perfectly good opportunities to find big bucks near roads as well so you can just park on the main road and walk in. These overlooked areas can be hot. Just keep in mind there is something to be said for getting away from other hunters. For example, there will be less of a chance that someone will cut you off.
Essential Gear For The Vehicle
The most important gear you’ll want is equipment that will get you back home every night.
Come-Along / Power Puller / Winch
A come-along is essential to pull yourself out if you go off-road, and also for someone else to pull you out using your winch by attaching it to their vehicle. Every year I seem to need the winch once or twice. So make sure you bring one with you.
This winch is one of the best. The benefit of this winch is that it is mobile, so no matter how you get stuck you can pull yourself out by positioning it in a way that makes the most sense. You can anchor it to a tree and pull your truck out of a ditch with no issues. Additionally, it is great for pulling fallen trees out of the road, pulling moose out of the woods…etc. This winch does it all and with minimal effort on your part. It’s expensive but worth the money for your safety IMO.
4-Ton Dual Gear Power Puller
This 4-ton dual-gear winch is the most basic winch for getting yourself unstuck. This winch can also be anchored anywhere to pull yourself out of a ditch but has some limitations. For example, manual operation and cable length can help in a pinch. Having one of these as a backup wouldn’t be a bad idea if you plan on getting a power winch. You never know if a power winch may fail, it’s better to be over-prepared.
Shovel
A shovel is a key piece of gear because sometimes you need to dig yourself out of the snow if you get stuck. A shovel has saved me a few times. Sometimes I am able to dig myself out of a ditch enough so that I don’t need to get my winch out, saving me a lot of time.
During blizzards or just windy days, trees can blow down in the middle of the road. If it’s early morning you’ll be able to remove the tree and clear your path, allowing you to get further back in the woods. Additionally, if it’s the end of the day you’ll be able to clear trees blocking your path back to the main road.
A chainsaw makes life easy when you come across a blocked road by a blow-down.
At the very least it is a good idea to have a saw in the vehicle if you can’t afford a chainsaw. Although it may take you a lot of time to cut the blow-down at least you’ll be able to get home at the end of the day.
Not many rifles are up to the challenge of tracking bucks in the thick woods of the northeast in snowy conditions. I know this from experience. The first year I started tracking I missed my first buck because I had the completely wrong rifle setup. I was using a bolt-action with a 3-9×40. When I jumped the buck out of his bed at 20 yards I would have had a good running shot had I not been busy scraping the snow out of the scope when he got up.
Since I struggled to find the deer in my fogged/blurred, much too powerful 3x magnification scope, I managed only got a poor shot off and missed completely. I never got a follow-up shot because all of the snow that accumulated on top of my bolt fell into the ejection port when I tried jacking a new cartridge in…preventing me from being able to close the breach. I knew this gun wasn’t ideal but didn’t have the money at the time to buy a new gun so I had to make due.
Semi-Auto Rifles
The following year, year two, I bought a Benelli R1 (see gun review here) semi-auto figuring the new semi-auto would be able to handle the elements. I put William’s peep sights on this gun and it looked like it was going to work well. I was wrong. The ejection port kept getting filled with snow, melting from my hand warmth, and freezing. This would have caused the gun to malfunction had I shot with it. However, I didn’t pull the trigger until the muzzleloader season that year. But I wasn’t able to unload my gun until the ejection port thawed in the car.
Lever-Action Rifles
I grew up hunting with my Dad’s 35 Remington Marlin lever-action with Williams peep sights in southern Maine (not for tracking). I didn’t particularly care for the gun because of the hammer. It was hard to pull back when fingers got cold and was slower than a button or switch safety system. That being said, lever actions have come a long way and I do recommend them.
They are just as reliable as a pump, and they now have safety mechanisms so that you can keep the hammer pulled back the entire time you’re hunting. Personally, I think follow-up shots are more fluid with a pump and a hair quicker. However, you’ll become good at what you practice with. Lever-actions are also a choice.
Pump-Action Rifles
The Remington 7600 and 7600 carbine and its predecessors are the trackers go-to gun in the thick woods of the northeast. It’s quick, short, agile and reliable. The majority of people who track use this gun. Not wanting to conform to the masses I resisted at first. But after dealing with the bolt-action and semi-auto I caved in and bought the Remington 7600 carbine in 30-06 the day after the season ended. To be honest, though I had purchased the Remington 7600 in the past, but returned it because it left a lot to be desired.
Out of the box it does not fit well and will need to be taken to a gunsmith for most people. It is also extremely difficult to disassemble and reassemble. When assembling and reassembling I’ve bent some metal pieces and scratched some wood. I was able to bend the metal back in place but man…there could be some improvements to this gun. It’s no Benelli that’s for sure. That being said, with all the research I’ve done, there’s no doubt in my mind this is currently one of the best guns for tracking deer in snow.
Sights and Scopes For Tracking Bucks In Snow
William’s Peep Sights
I grew up hunting with my Dad’s 35 Remington with peep sights and grew accustomed using to them. They just seem natural to use, more so than open sights. Open sights, at least to me, seem to offer more room for error and don’t offer as much peripheral vision (just my opinion). However, with enough practice, anyone can get good with anything. I now use these sights on my Remington 7600.
I prefer to use peeps over scopes because as I mentioned above I missed a buck due to my scope being filled with snow and fogged up. That being said I was using a 3-9×40. I could see myself eventually trying a 1x zoom scope for tracking. The Trijicon 1-4×24 has been a favorite for some trackers.
The Trijicon TR24 has been around for a long time and is a popular LPVO scope. It’s been out for over 10 years and is still going strong. One of the most unique features of this rifle scope is that it uses AccuPoint fiber optics to illuminate the reticle, this means it does not need batteries to function. During the daytime, it’s illuminated by fiber optics, during low-light conditions tritium illuminates the reticle. The triangle post-reticle has been a favorite among trackers.
The Vortex Viper PST Gen II 1-6×24 is arguably the best of the best LPVO scope on the market for the money. The Viper has excellent illumination with true daylight brightness allowing the red dot to be easily visible in bright daylight conditions (such as tracking in bright snow). This scope is so good it is often said to undermine Vortex’s Razor Series 1-6×24 LPVO scope (which are +/- 2000$). The Vortex Viper is much better than the Vortex Strike Eagle, so if you can save your money or buy this scope used it is definitely worth it.
Wool clothes are the go-to clothing for trackers. In my opinion, wool is a super-clothing for snow conditions. Wool has many properties that make it ideal for tracking bucks in snow. There are different types of wool that I use; virgin wool, merino wool, ragg wool. If temperatures are from 20-40º I wear one set of merino wool base-layers with my virgin wool outer-layers (below). It’s important to keep the wool against your skin because wool is warm when wet, so you want your sweat to go into the wool, not polyester.
Once it gets in the 10-20º range I will throw on another fleece-lined polyester long-sleeve shirt. From -10 to 10º I put another base-layer of polyester or two on. I like polyester on top of my merino wool because it’s lighter than wool. If I start getting hot I take layers off, however, it’s annoying trying to find a place to put the clothing you’ve removed so I do my best to figure out what clothing I’ll need at certain temperatures to operate at optimal performance.
Each person is different in the amount of clothing they’ll need. The last thing that you want to do is get hot because it drains your energy quickly. The cold is energizing, err on the side of being a little chilly. You’ll warm up to a comfortable temperature once you start tracking.
Merino Wool Base-layers
I always wear merino wool base-layers (top and bottom). Merino wool against your skin will still keep you warm even if it gets wet with sweat. This is important when you have to slow down when you know you’re getting close to the buck.
Polyester Fleece Base-layers
I like polyester fleece-lined base-layers because they are lightweight, breathable, and dry fast. They also add just enough warmth in colder conditions, and they can keep being layered on top of each other to get the perfect amount of warmth depending on the temperature.
Polyester Fleece Mid-layers
I like polyester fleece material, especially fleeces like these that have some ‘fuzz’ to them. For example, the berber fleece that Sika Gear makes is an excellent material but is too thick for tracking on snow. This sherpa fleece is less expensive and still offers a similar material, while not being overly hot. The ‘fuzz’ helps to keep snow off from your body so it does not melt as easily, thus keeping you dry longer. You just brush the snow off. Eventually, you will get wet but it stays dry longer.
I will often just tie my fleece around my waist, and only put it on when I know I getting close to the buck I’m tracking so I can stay comfortable and warm when I need to slow my pace down to a stalking speed. When wearing my wool jacket it drapes over my fleece (that’s around my waist) and does a good job keeping my fleece dry until I need to put it on.
Temperature Regulation (warm when wet, breathable and cool when hot)
Silent in the woods
Very Breathable
Wonderful Insulator
Strong
Wool Jacket
This is the exact jacket I swear for tracking, and I absolutely love it. Water has a very tough time saturating this jacket because the water beads up and can be brushed off, keeping the jacket very dry throughout the day compared to any other material.
Wool Pants
Suspenders
Another piece of gear that I resisted to use at first was suspenders. Now I use them religiously, I won’t leave home without them. They are super helpful especially when wearing a fanny pack because the pack tends to push your pants down. Always pulling your pants up, no matter what is causing the issue is incredibly annoying when you’re trying to focus on the track and shooting a buck.
For a hat, I wear a basic orange ball cap. I like to be able to hear, and I feel hats that cover ears are a great disadvantage when a split second is at stake. Some trackers like the bucket hat style in order to keep snow from running down the back of their necks.
I like insulated ragg wool convertible mittens for hand-wear over ragg wool gloves. These work well for me because when my hands get hot, I can fold them down into gloves or take them off. When my hands get cold I can completely cover the non-trigger hand, and have all fingers except my trigger finger covered on the other hand. I’ve found that mittens keep my hands slightly warmer when I need them to be warm. For example, when I am close and need to go slow for long periods of time. Because the rest of my hand is warm, I’ve found my trigger finger stays warmer even though it is exposed. I also prefer having the trigger finger exposed when shooting.
If you prefer gloves, I have used Fox River Ragg Wool Gloves and they work pretty well too but offer slightly less versatility than the convertible mittens.
Lacrosse Grange rubber boots are one of my favorite boots for tracking because they are very lightweight, and don’t tire me out nearly as much as other heavier boots. Additionally, they’re 18-inches tall and completely waterproof, which allows me to cross almost any stream a buck will cross and stay dry all day through the snow. They leave a few things to be desired. First, they aren’t great for going uphill in the snow because they have no traction. Second, they are extremely slippery on rocks, sticks/logs, and even leaves that are frozen or wet.
The GumLeaf Field Wellys are handcrafted boots in Europe. They are made of 85% real rubber which prevents cracking and should last around 10+ years with proper care. Most other rubber boots on the market are mixed with a higher percentage of clay and only last 1-2 years before they crack. I bought the GumLeaf Field Welly boots because I was tired of my Lacrosse boots cracking after 1-2 years.
Additionally, the Lacrosse Grange boots (which I love) do not have good traction (really no traction at all). The GumLeaf Field Wellys have soft, flexible, Vibram sole which provides much better traction and keeps your feet from getting tired as easily. The sole is soft and pliable enough to still feel the environment underfoot like the Lacrosse Grange boots.
Also, these boots are almost exactly the same height as the 18″ Lacrosse boots, so you’re not really sacrificing any height.
I’ve liked these boots so much that I reached out to GumLeaf USA to see if I could get a discount for my viewers. If you enter coupon code “JTOTen” at checkout you’ll receive 10% off these boots.
Another favorite among trackers is the Lacrosse Burly Air Grip boot. It is similar to the Grange in that it is an 18” tall rubber boot. The difference is that this boot has some insulation in it and much better snow traction, the trade-off being heavier and bulkier. I personally own this boot as well and really like it. However, I notice the extra weight does take a toll after days of tracking in a row when compared to the Grange for me. People with bigger and stronger legs than me will probably prefer the Burly. These boots are just as, if not more slippery on wet logs and rocks.
Lacrosse Grange boot (Left) and Lacrosse Burly Boot with Grips (Right)
Socks and Boot Liners
Within all of my boots, I have wool felt insoles that make a huge difference, I highly recommend them. They add a lot of comfort and warmth to the cold rubber.
I also wear merino wool socks. Doubling up with wool socks and insoles keeps your feet warm when they get sweaty or wet, and at points along the track where you have to slow down.
I use a fanny pack in order to hold most of my gear, and the gear I don’t use as often. The gear I use most is in my vest. The fanny pack that I use is an old Fieldline fleece pack. I love it because it is quiet and somewhat water-resistant because of the thin plastic membrane inside of the pack.
This pack isn’t sold anymore, you might be able to find one on eBay. Your best bet for finding a good fanny pack for tracking deer on snow is probably searching for a fleece fanny pack on eBay.
Below is a list of gear I carry in my fanny pack with me every time I go tracking:
Two Compasses
Having two compasses ensures you that the direction they are pointing is correct if you are in disbelief. Personally, I carry one navigation compass and one ball compass. I rarely use my directional compass because I use my GPS to set the path I want to travel, then use my ball compass to keep me roughly on track. However, a directional compass is required for more precise navigating.
I always carry 5 rounds in my gun, and 10 in my pack, and 5 more in my pocket. In the future, I will buy another magazine and keep that loaded in my pocket instead. You never know when those extra bullets may come in handy for locating a lost person or for finding your way out of the woods.
Space Blanket
I always carry a space blanket if by chance I need to spend the night out in the woods. Space blankets are handy in survival situations to block the elements and reflect heat back toward your body.
I also carry pre-made tinder that I bought in a store that is in a waterproof plastic bag for emergencies. Usually, for lunch, I can find birch bark if the weather is fairly dry. If wet, I’ll eat my lunch cold.
I always carry paper towels for a variety of reasons. First and foremost is for when nature calls. However, spare paper towels can be used as a fire starter, minor wounds, remove scope dampness, and whatever else you can think of.
Stormproof Matches
I carry military matches in a waterproof container. These matches are incredible. They are pretty much everything proof (wind, rain, sand..etc) and burn great. I only use these if I’m in a pinch (although I’ve tested out a couple for fun).
Electric lighters are also a good option to have. This electric lighter is waterproof, windproof, and flameless making it a great option in tracking situations. I wouldn’t solely rely on this lighter, I would also have a backup. My recommendations would be to bring stormproof matches and this electric lighter. This lighter is battery operated, so it can fail so I would bring a backup just to be safe. Since they don’t take up much room and they are inexpensive, I wouldn’t hesitate to bring all three lighters mentioned above. I always carry at least two ways to start a fire when tracking deer in the big woods.
I carry my lunch (usually a sandwich in a hard plastic container) and a non-crinkle (silent) water bottle (Smartwater for example) in the side pockets of my vest. You could also bring canned food, and heat it up on a fire at lunch. Warm foods taste 10x better on cold days. Energy bars are great to keep in your pack for emergencies. If you end up having to spend the night in the woods you’ll be thankful you had them. When I’m back to safety at the end of the day I’ll usually eat them and replenish for the following day.
You should always know how to get out of the woods if your GPS fails. However, for me a GPS is an essential piece of gear. I have the Garmin InReach GPS which I absolutely love, mostly for peace of mind. I have the ability to send an SOS signal if I get hurt, and can send a text to other people’s cell phones even without service, and it comes with pre-downloaded basic topo maps that can be used offline, and it links directly to the app on my phone. Usually, I just turn it on before every hunt and mark my vehicle location, then shut if off for the rest of the hunt because I just use the app on my iPhone to run it and take waypoints.
My phone is also an essential piece of gear for me. My phone allows me to text, call, use GPS, and link to my Garmin InReach app. I use the OnX Hunt Application on my phone. This app allows me to download offline imagery so that I can keep my phone in airplane mode all day long, so that very little battery is used throughout the day.
This way if I need to call someone I still have plenty of battery to do so. OnX also allows me to see aerial, hybrid and topo very easily by using it’s quick toggle button. I also enjoy tracking my hunts so I can see where I walked and how many miles I went while also placing waypoints in key areas. You can check out my review of this app in my post: 6 Best GPS Hunting Apps if you want to learn more.
Dragging Rope
This is pretty self-explanatory. You’ll wish you had this if you get a big one. 1/4-inch nylon will do the trick.
My 10×50 binoculars were much too big and bulking for tracking deer. I recently did a review on 14 binoculars, in my review I determined that the Athlon Midas binoculars were the best value for the money. I got them in 8×42 which is the size I would recommend for tracking. 10×42’s will also work just as well. You can check out my review of the binoculars below:
Personally, I just carry a sharpened jack-knife. I keep it in my pack and I rarely use it unless I shoot a deer. However, I also carry a small Leatherman in my pack as well. Ideally, I would carry a slightly larger Leatherman and carry it on my belt in order to create more room in my pack. A Leatherman has many uses in the field for gutting, breaking walking sticks for spanning streams, emergencies, opening canned food, repairs…etc.
I carry a grunt call but rarely use it. Mostly because I don’t like the way it sounds and because you can’t blow it quietly. I usually just use my mouth for vocalizations (bleats and grunts). If I’m feeling like I need a louder call that is when I bring out the grunt tube which isn’t often.
Flashlights & Lithium Batteries
I always carry two flashlights with me. A regular small handheld flashlight, and a headlamp. I prefer the headlamp because it’s hands-free. Make sure you use lithium batteries, they’re much more effective and reliable in the cold. This headlamp also offers different colors of light. I really like a red light for hunting because it doesn’t ruin your night vision. I almost always use red light when I’m using headlamps.
Survey flagging is a great piece of gear because you can use it for many different things. First and foremost, flagging up where you shot your buck if you have to leave him in the woods overnight. Another use would be for creating a shelter in a survival scenario. Flagging is stretchy and could tie sticks together. The uses are endless with this stuff.
I don’t use them very much, but I have a few times when I know I’m getting close to a buck and am creeping along slow. When going slow, you can get cold. I’ve broken out a couple of these in times like that and they’re worth their weight in gold in those scenarios. Otherwise, you’ll be trying to shoot with a numb hand.
Since I plan before I head out in the woods, and have two GPS’s with me I don’t carry a map with me. I always know what direction to travel with my compasses if everything goes wrong. However, this is something I am going to change going forward, especially in a new area.
Having a map could save you if your phone and GPS quit and you have no idea where you are. It’s never a bad idea to have too many backups. It also does not take up that much space. You can rip out a Maine gazetteer page and put it in a plastic bag. Just remember to get a new one every year and have a backup! You can also purchase USGS Maps online.
I use electrical tape to tape the end of my gun barrel so that no snow or mud gets lodged into it. I’ve had a couple of spells where I dropped my gun and the barrel got filled with mud and snow. I had to dump stream water down the barrel to flush it out. In order to prevent situations like this from ever happening again, I just tape the end of my barrel. Taping the end of the barrel is not dangerous nor affects accuracy. The compressed air in the barrel when the bullet is fired blows a hole in the tape before the bullet reaches the end of the barrel.
For me, a high-quality vest is essential for a smooth and enjoyable hunt. There are so many vests on the market that are, in my opinion, junk. They don’t have zippered pockets so things fall out, they don’t have inside pockets, they use buttons or snaps to fasten the vest instead of a zipper so sticks and twigs open the vest as you walk through the woods, the material isn’t quiet, the design is bulky and loose. Perhaps these designs are adequate for sitting in a treestand, but they don’t work well walking through the woods. I use the Cabela’s Blaze Pro Guide II Vest.
Having a vest with many well-thought-out pockets, that is quiet, and well-fitted makes for a more enjoyable hunt. In addition, I can store a lot of gear in my vest. For example, I store a water bottle, my lunch, calls, and compasses and they are easy to access rather than dipping into my fanny pack all of the time.
Having this vest storage would otherwise make my fanny pack very heavy and bulky. Being able to distribute the weight makes for a much more enjoyable hunt because you won’t have to deal with your fanny pack falling off your waist or the waist-band chafing. That being said, there is a lot to be desired with the vest I currently use.
Gear for Tracking Bucks in snow
Optional But Useful Gear For Hunting In Snow
Tire Chains
I have a set of tire chains for my Subaru and I love them. In my opinion, they are worth the money. I’ve been stuck a couple of times where I would not have been able to get out had it not been for having tire chains. Often roads get a lot of traffic by loggers or other hunters and it only takes a matter of hours for the vehicle tracks on the back roads to turn from snow to ice from compaction. Tire chains help stay on the trail. Before I had chains I was constantly driving super slow and slipping around and was a nervous wreck. Now I drive with confidence.
Jet Sled
I love using a jet sled because I throw all my gear in it and it keeps my car dryer and cleaner. Additionally, although I have not done this personally yet, I believe it would provide an excellent way to get a big buck into the back of my SUV, and keep it from getting bloody. Those with trucks may have a more difficult time getting the buck in the back of your truck but at least you don’t have to worry about making a mess. The winch can always be used.
It can be a good idea to keep extra clothes in your vehicle. If your vehicle does not start for whatever reason when you get back at the end of the day, if you’re wet some dry clothes will help you stay warm as you wait for help.
Conclusion
There you have it, that’s all of the gear that I bring with me when I’m tracking big woods bucks on snow. I hope you’ve found this post on tracking gear helpful. Now that you know what gear is needed, you’re ready to learn Where to Find Big Buck Tracks – Tracking in Snow.
Looking For More Tracking Information? Find Me On:
The best GPS Hunting Apps in 2025 are simple to use, reliable, maximize hunting efficiency, and keep you safe in the woods. The 6 GPS Hunting Apps discussed in this post I have personally field-tested for years. You’ll learn the pros and cons of all of them so you can determine which is right for you.
To create the most authentic review I decided not to add any affiliate links in this post and I am not sponsored by any of these apps.
Let’s jump in into the post:
Table of Contents
How GPS Apps Improve Hunting Success
Quality GPS hunting apps are one of the most essential tools for hunters. A good quality GPS app saves precious scouting and hunting time by:
Gaining an understanding of properties and landscapes visually by using both aerial imagery and topographic maps.
Determining who owns the properties so you can ask for permission quickly and easily.
Safely and efficiently find your way back to your vehicle after wandering all day in remote areas.
I’ve used a lot of GPS apps in search of what works best for whitetail hunting. In my opinion, there is not currently a GPS app that has everything I want as a whitetail hunter.
Over the years I have tried many different GPS apps, most of which were functional but were difficult to use and lacked some important features. Currently, I’ve narrowed down my GPS apps to 6 that work the best for me and my style of hunting. This post covers the 6 apps that make my life as easy as possible when out in the woods.
I don’t use all 6 GPS apps every time I go into the field, I will often just use one primary GPS app which will be dependent on where I’ll be hunting/scouting. That being said, I’ll alternate through the others depending on the information I’m looking for.
In addition, I’ll use some of the apps to answer quick questions and when I want to know specific information. Then I will close out of the app until I need it again. I may only use some of these apps for a brief minute, but they provide helpful enough information for me to keep them on my phone.
Free Versions Of These Apps
I have experience with many GPS apps because I didn’t want to subscribe to an app when I was in school before I had a job. By downloading many different types of GPS apps I found many of them had different free/premium features.
I was able to combine these free apps to get all of the features that I wanted. The only downfall is I had to switch between apps a lot.
The free versions of the apps that I talk about in this post below, when combined, have all the premium features you will need to effectively hunt and scout whitetails.
That being said, now that I have a job I have purchased a couple of premium apps. In my opinion, they are worth the money. The paid versions of all of these apps are a yearly subscription.
In most cases, the most expensive apps equate to less than 30¢/day, and most are less than 8¢/day. The biggest difference is that I find myself switching less between my GPS apps which is really nice, however, I still do use all the apps to some extent.
The Top 6 GPS Hunting Apps:
1. OnX Hunt App
Key Features Discussed:
Layout & Ease of Use
Parcel Information Layer
Federal, State, and Public Land Parcel Layers
Aerial, Hybrid, Topo Maps
Measure Tools
Tracking and Track Library
Offline Maps
onXmaps Web Application
GPS Chips
Subscription Pricing
Although a pretty similar post, you may also like my OnX Hunt App Review:
OnX is also laid out very simply and it took no time at all to figure out how to use it and is one of my top GPS hunting apps. I have found many GPS apps on the market can be quite confusing to use at first. OnX is one of the simplest to learn, while still being feature-rich.
When you open the app you will have a dashboard below the map. In this dashboard, there are 5 main tabs to choose from which makes things clean and simple. These tabs are “Map Layers” “Off-Grid” “My Content” “Map Tools” and “Tracker” as shown in the photo below. Everything you need can be found within these 5 tabs.
OnX Hunt App Home screen Layout – Clean and Easy to Use.
Parcel Information Layer
The paid versions of OnX give you the option to toggle off property parcel information so you can see where you are in relation to property lines. I can’t say enough good things about OnX with its helpfulness in finding out the owners of parcels.
OnX has made it so easy to determine what house owns a certain property just by looking at the parcel information. It saves hours of headaches trying to find out who owns what parcel of land and talking to a bunch of different landowners.
In Maine, you can access anyone’s land as long as it is not posted. Often, I end up scouting a property first before I ask permission so I can figure out if the property is even worth hunting in the future.
If the property is worth hunting, I will make a point to still ask for permission and OnX makes this a breeze.
OnX Hunt Private Parcel Layer
Federal, State, and Public Land Parcel Layers
There is a lot to like about OnX but arguably my favorite aspect of OnX is that you can toggle on/off Federal, State, and Public land parcel layers. This is super handy because you can quickly scan the state you are hunting and find places that are likely to be open to the public.
I use this feature all of the time to find new places to scout and hunt. When possible, I prefer to hunt on public land so that I don’t have to ask for permission.
It’s always nice to have a handful of public land areas in your portfolio of places to hunt when hunting season approaches. OnX makes it very easy to find these overlooked public land areas because it highlights these parcels so they stand out from the private land parcels.
In the photo below you can see the public land areas highlighted.
OnX Hunt Gov Lands – Federal, State, and Public Land Parcel Layer
Aerial, Hybrid, Topo Maps
OnX also has an excellent quick toggle button on the bottom right hand of the home screen that allows you to switch from aerial, hybrid, and topo maps very easily. Although the topo maps aren’t super detailed, they are quite good and usually give me detailed enough information for 90% of what I’m using it for.
OnX Hunt Map Quick Toggle Button
Measure Tools
Measure tools are a must-have for me when scouting and hunting. I like to be able to measure distances and areas to estimate how long an area will take to scout or to determine how many miles I have back to my vehicle at the end of the day.
This helps estimate what time I need to leave the woods to get back to the truck by dark. This app has the option to measure both lines and areas.
Tracking
You can record the path you’re walking by clicking the “Tracker” Tab. Here you will find a big green button that says “Start” when you want to stop tracking there is a big red button that says “Stop” making it straightforward to use.
OnX Hunt Tracking
Offline Maps
Another dynamite feature of the paid version of OnX is the option to download offline imagery. This allows you to always have a map in the background of your app, even if you don’t have phone service. I use this feature a lot when I am tracking bucks in the snow in remote areas of Maine, where service is rare.
This offline map feature gives me more time to hunt at the end of the day because I am able to find my way out to the nearest logging road easily. This feature also makes me much more confident when I’m in the big woods.
It’s easy to get lost in remote areas, but OnX helps me feel comfortable going anywhere. This way I spend a lot less time thinking about getting lost or figuring out how to get back to my car at the end of the day, keeping me in the woods longer.
To do this, it does require a yearly subscription. Downloading offline maps is very simple in OnX. First, you navigate to the “Off-Grid” tab, then you choose the option “save a new map”.
Next, you select the area you want to download, and then OnX will download it for you. After downloading is complete, you can use this offline map anytime, even without service.
PRO TIP: I like to keep my phone in airplane mode when using offline. Since I don’t need service to load the maps anymore this allows my battery to last so much longer.
OnX Maps Web Application
The onXmaps Web Application is one of my favorite features. With this feature, you can use your computer browsers to open the OnX phone app. This allows you to have a much bigger screen.
Additionally, you can import and export KML files from Google Earth onto the website application. This information is then seamlessly transferred to your phone application.
I believe this website application could replace Google Earth in the future altogether if it keeps improving. For me, this alone is worth the subscription price.
OnX Website Application
GPS SD Chips
Another awesome feature OnX provides is an SD chip that can be used in many Garmin GPS’s. I haven’t used this feature but I feel like it is worth mentioning in this post. The OnX website lists the Garmin GPS’s that will work with the SD chip.
I like that this SD chip can be updated so that the information on the chip doesn’t go out-of-date. In addition to buying the chip, OnX gives you a free year membership for the OnX App. This is nice because you’ll have a backup if either your phone or GPS stops working for whatever reason.
Considerations
The location icon in OnX is a circle. Because it is a circle, to determine the direction you’re facing in relation to the map you need to double click the ‘find location’ crosshair icon just below the map type quick toggle button.
However, when you do this the entire map adjusts and throws off the north orientation. This works fine, and some people may even prefer it. Personally, I’d prefer to keep my north orientation and have a triangular location icon point in the direction I’m facing instead of the whole map moving.
A setting to toggle this option would make this app even better than it already is. The video below will help visualize what I am describing:
Subscription Pricing
Currently, OnX Hunt charges $29.99/year for Premium (a single state). Elite costs $99.99/year but gives you information for all 50 states.
2. HuntStand App
Key Features Discussed:
Layout & Ease of Use
Free Parcel Information Layer
Free Public Land Parcel Layers
Many Basemaps
Measure & Wind Direction Tools
Tracking
HuntStand is relatively new to my GPS app collection. It’s not easy to change my mind once I have a system in place that works well for me. However, HuntStand is a welcome addition to my GPS hunting app collection and it’s quickly becoming a favorite.
It offers everything the other apps do, except HuntStand offers everything for free. The one thing I’ve noticed is that the user experience is not as smooth as the other apps. It can be choppy at times, but it’s barely noticeable and for what it offers it’s worth dealing with a little choppiness.
Layout & Ease of Use
This app has a slightly larger learning curve than the previous apps because there are so many tools and options. However, once you learn how to use it you’ll get a plethora of useful tools at your fingertips for free.
This app is laid out slightly differently than the previous apps. Instead of your main screen being a map, it’s a menu grid menu with two main options to choose from “Tools” and “Maps”.
By choosing a map from the Map menu you will be brought into the GPS program which is very similar to the other GPS apps listed above.
HuntStand Homescreen
Free Parcel Information Layer
HuntStand also has a private land parcel information layer, and it’s free! HuntStand is the only app that I know that offers this for free which gives it a huge advantage.
In addition, it offers parcel information for all 50 states. This is toggled on and off by choosing the basemap called ‘Property Info’.
HuntStand Parcel Layer
Free Public Land Parcel Layer
Not only does it have public parcel information, but it also gives you the option to view public lands for free and highlights these parcels so they appear clearly as well.
Many Basemaps
HuntStand offers 14 free types of maps to choose from as well. These maps include the already mentioned public, and hunting lands. However, other maps include satellite, hybrid, terrain, topo, and street maps. There are a few more maps types, but these are the main basemaps that I use.
A Few of Many HuntStand Basemaps
Measure Tools & Wind Indicator
This app also comes with the option to measure areas and lines. One additional feature I found helpful is the wind indicator tool. This tool shows a circular diagram around a location of interest (i.e. your treestand) and shows you the prevailing wind direction, and will even show you where the wind is expected to switch.
This is awesome because it takes time to look at a weather app, and then come back into your GPS app and figure out what the wind is doing. HuntStand makes it easy, and you don’t have to leave the app. Take a look at the photo below to get a better understanding:
HuntStand Wind Direction Tool – HuntZone
Tracking
HuntStand comes with the option to track your route as well. In HuntStand though, it is called “Trace Path”. By clicking on the Trace button on the map you are viewing, you can start recording your trip.
Offline Maps
Another huge benefit of HuntStand is that you can download offline maps for free. Having property parcel information and the ability to use offline maps for free is something no other app offers and is something I’m looking forward to taking advantage of more.
Free vs Premium
There is a premium version of HuntStand that costs 25$ per year which is very affordable. But honestly, they don’t offer much in their premium package that I would use. Everything I need is available in their free version.
3. GPS Tracks App
One app I find myself using a lot is the GPS Tracks app. I really like this app because it is a feature-rich free app that is very user-friendly. I used the free version of this app for many years until I just recently upgraded to premium for the hunting season.
Now that I have the premium version I can download offline maps, which is an option I need for my hunting style.
Key Features Discussed:
Layout & Ease of Use
Aerial and TOPO Maps
Measure Tools
Tracking and Track Library
Easily Upload/Export Google Earth Files
Save Your Trips and Save Phone Storage Space
Offline Maps
Free vs Pro vs Premium
Layout & Ease of Use
The home screen is simple yet feature-rich. There is a lot of customization available as well which is great for a personalized touch. In the settings, you’ll be able to toggle certain features on and off so the home screen only shows the features you want.
The default imagery is based on Apple Maps and is beautiful, crisp, and clear. This app has some of the best aerial imagery that I have used.
GPS Tracks Homescreen
Aerial and Topo Maps
Not only does this app have crisp default imagery, but it also has a selection of maps to choose from in the layers settings. Here you will see a handful of maps that can be used with service and some that can only be downloaded for offline use.
Maps for both online and offline use consist of different types of aerial and topo maps. This is nice because the topo maps are pretty good and really reduce the need to switch out of the app to view topography on another app.
Measure Tools
GPS Tracks also has measuring tools, which as I’ve stated are important to my scouting and hunting regime. Under the Map Tools tab, you get the option to measure lines and shapes (areas).
Tracking and Track Library
GPS Tracks has a really good tracking feature and it is very simple to use. There is a big “start” button and “stop” button that you can’t miss.
Once you save a track it will file the track away in the tracks library where you view all of your saved tracks. When you open up a previous track you are shown many statistics about your trip. You’ll see graphs showing where you sped up and slowed down in an easy to read color-coded chart.
It shows your pace (min/mi) and Altitude. By running your finger along with the chart, your location icon will move to the area you are referencing on the map. This allows you to see exactly where in your travels you slowed down/sped up, or where the highest/lowest altitude was in the areas you walked.
Easily Upload/Export Google Earth Files
There is a lot to like about this app, but my favorite feature is the ability to import KML (Google Earth files) into the app. This is an awesome feature for many reasons. One reason is that you can draw up a scouting or hunting plan on Google Earth and then export the file to GPS Tracks.
Then you will have all of your information in the field with you. Vice versa, you can take your tracks and waypoints on your phone and import them into Google Earth so you can analyze your path and waypoints on a bigger screen.
This gives you the ability to upload updated parcel information onto your phone. This is handy because sometimes the GPS Apps that have parcel information aren’t current and don’t have the correct boundary lines.
Save Your Trips and Save Phone Storage Space
Additionally, since you can export files from your phone to Google Earth that means you can save your trip as a Google Earth file and save it to your desktop or an external drive.
By doing this you can save it for later use. It also allows you to delete the file in your GPS Tracks app so that you can save storage on your phone. When you need that track again you can upload it back to your phone.
Offline Maps
By downloading offline maps ahead of time, I’m able to continue to have aerial imagery in the background of the app so I can navigate back to my car at the end of the day, otherwise, I would have no map.
Having aerial imagery is in areas where there is no cell service is worth its weight in gold because you can see old skidder trails, existing dirt roads, where to get around wetlands… and more. This greatly improves efficiency and confidence in the woods, especially in remote areas.
Free vs Pro vs Premium
The main difference between the free and paid versions is the ability to download offline maps. The main difference between the Pro and Premium version is more storage to download more offline maps.
I personally don’t need a bunch of maps downloaded offline maps. I usually delete older maps when I’m not using them so I have plenty of room with Pro for all my offline maps needs. The subscriptions aren’t very expensive either:
Pro Subscription Cost: 19.99 per year
Premium Subscription Cost: Cost 39.99 per year
Considerations
The downside to this app is that it is only found on the Apple App Store, droid users will not be able to download this app, which is unfortunate.
4. Garmin Earthmate App
The Earthmate app is one of my favorite apps out there, but it has a very specific purpose. It was designed to keep you safe in the woods, especially in remote areas with no phone reception. It’s not great at a lot, but it does a few things better than the rest.
Key Features Discussed:
Layout & Ease of Use
Phone to GPS Pairing
Insane Battery Life
Text without Phone Service
SOS Tool
Layout and Ease of Use
This app is laid out simply, and similarly to the majority of the other apps listed above. The first thing you see is a big map, with some tabs that allow you to navigate to other features of the app.
Because it’s pretty basic in its features it’s not all that difficult to figure out. It comes with a simple pre-downloaded Topo Map of North America that can be used when you don’t have phone service.
You can only get additional maps in particular areas. Earthmate doesn’t always have the option to download the specific type of map you want for the area you will be hunting. I found that areas I often hunted did not offer any other types of maps so I was stuck with a mediocre topo map of North America.
However, the main purpose of using this app was for safety and this default basemap was all I needed. That being said, the ability to download offline imagery & better topo maps would be a great feature for this app.
Garmin Earthmate App Homescreen
Phone to GPS Pairing and Insane Battery Life
One of the biggest differences between this app and other apps is Earthmate pairs with your Garmin InReach GPS via bluetooth. This means that all waypoints and tracks you take on your phone will be sent to the InReach and vice versa.
This feature is amazing because I was able to keep my InReach GPS completely off and just use the Earthmate app. This meant I hardly used any battery life on my InReach and could save it for emergencies if my phone died. Even if my phone died, all the waypoints I took would have already been transferred to my InReach.
I had my Garmin InReach with me all season long. I kept it off except at the beginning of my trip to make sure it was working and to locate the position of my vehicle before taking off into the woods.
Because I kept the InReach turned off, the battery didn’t get below 95% after hunting all season long! When I did turn it on, all of my waypoints on my phone appeared on the InReach. This is very handy if you hunt in remote areas because if one GPS (Phone or handheld) fails will have the other with all your waypoints.
In addition, because the InReach maps are pre-downloaded, and do not require service you can put your phone in airplane mode. Airplane mode significantly reduces the amount of battery life your phone uses because it prevents your phone from searching for service all of the time.
By keeping my phone in airplane mode I was able to track myself for an entire day, and still have over 50% battery life at the end of the day. And the great thing is, if I did use all of my phone battery, I would still have the fully charged InReach to get me back to my car at the end of the day!
Text Without Phone Service
Another awesome feature of the Earthmate app is that you can text people even when you don’t have phone service. Garmin uses its iridium satellite technology to allow this to happen.
By using satellite technology instead of cell towers, messaging is still a possibility. This requires a subscription in order to access this capability but is well worth it. Feeling safe in remote areas is priceless.
Not only does texting allow you to feel safe, but you can also let your buddies know you’re ready for them to help drag your big buck out! Another priceless feature in remote areas.
SOS Tool
In addition, the main purpose of purchasing a Garmin InReach is that it comes with an emergency system. This allows you to push a button on the GPS if you’re in trouble and an emergency team will find your last known point. This feature is also easily accessed on the Earthmate app so that there is no reason to dig the InReach out and turn in on in an emergency.
Garmin Earthmate App SOS Feature
Considerations
This app isn’t very versatile and is limited in its capabilities, I would not use it as a primary GPS app because it’s features are not as useful for everyday situations. Basemaps are quite limited, I ended up just using the default topo map.
The default map isn’t too bad it has roads, trails, wetlands…etc so it works fine for navigating back to your car which is all I need it for.
To get the safety features like texting and the SOS Tool a monthly subscription is required. The InReach subscriptions are the most expensive out of all GPS hunting apps mentioned in this post. But is well for the money in my option for the feeling of safety. There are 3 pricing Tiers:
Garmin InReach Subscription Pricing
If you’re thinking about using the Earthmate app, I would highly recommend buying a subscription. The Earthmate app isn’t very useful unless you’ve purchased the safety aspects, which is what the app is primarily designed for anyway.
6. Topo Maps+ App
Key Features Discussed:
Layout & Ease of Use
Detailed Topo Maps
Features
Easily Upload/Export Google Earth Files
Layout & Ease of Use
Another one of my favorite maps is the Topo Maps+ App. This app is different than the others because it only shows Topo maps, at least for the free version. The Topo basemap that it uses is very crisp and scales very well when zoomed in.
I don’t use this app very much, but it can come in handy in certain situations. It’s a very clean app, and simple to use. It has a similar look and feel to the OnX Hunt App.
Detailed Topo Maps
Sometimes when I am looking at aerial imagery on the other apps mentioned above, I want to see how the area is laid out topographically. This helps me guess where pinch points and funnels are located on a property. When I am scouting I sometimes flip between this app and the others.
The other apps do have topo maps, but this app does a better job than the other apps as far as topo is concerned. There is a pro version of this app but I have not purchased it at this point. The free version does everything I am looking to do. However, if you want even crisper topo maps at smaller zoom scales they can be purchased.
Topo Maps+ Homescreen Layout
Easily Upload/Export Google Earth Files
Topo Maps+, like GPS Tracks, can import KML (Google Earth files) into the app. This is an awesome feature as stated in the GPS Tracks section. However, for my uses with this app, I rarely use this feature. If I’m going to be uploading or exporting it will primarily be from GPS Tracks. But it is nice to know that this app has the feature as well.
Considerations
You can record your track and add waypoints in this app. However, you aren’t able to use measuring tools which I found disappointing. Additionally, the location symbol is circular which makes it difficult to tell which way you are walking. However, since I am only using this app for topo periodically, these missing features aren’t a big issue for me.
5. Google Maps App
Key Features Discussed:
Free Offline Maps
High-Quality Satellite Imagery
Free Offline Maps
You may already have this app if this is your preferred choice for vehicle navigation. You may be wondering why this app is on this list if it is primarily used for vehicle navigation. The reason is Google Maps allows you down download offline maps for free! So, if you already have this app installed, it might act as a double-whammy.
Now that I have paid versions that work well, I don’t use Google Maps nearly as often. However, it is worth throwing in this post because you might be looking for a way to get free offline imagery without needing to download more GPS Apps.
Google Maps Free Offline Maps
High-Quality Satellite Imagery
By going into settings, there is an option to choose “Offline Maps”. Next, there is an option for “Custom Map”. Here you will be able to choose the size of the map you want to download for offline use. Google Maps states that once this map is downloaded, you can just continue to use the app normally.
When you arrive to the area that you have downloaded offline, it will automatically switch over to your downloaded map if there is no service. This will allow you to have high-quality satellite imagery, even without service. The process is similar to downloading offline imagery with OnX which is shown in a video above.
Google Maps Homescreen Layout
Conclusion
I still use 6 GPS hunting apps and am waiting for the day when one app does it all. HuntStand is a strong contender for being free and feature-packed. Although GPS hunting apps are improving greatly, I still find that each of these apps has its strong points, making it hard to get rid of one.
Everyone will have their own opinions on which apps they prefer depending on their hunting and scouting style. These are the apps that I have grown to love out in the field for whitetail hunting. They have made my scouting and hunting much more precise, effective, and efficient. What GPS hunting apps are you using? Let me know in the comments below.
There is much confusion regarding the timing of the whitetail rut in Maine. Everyone seems to have a different opinion which makes deciphering the actual rut timeframe difficult.
Understanding the rut timeframe is crucial because the rut is a great time to take a big buck and a fun time to be in the woods. On top of that knowing when the rut is will help you plan your vacation time in order to put the odds in your favor to achieve success.
I believe there are a couple of reasons why hunters in Maine can’t seem to agree on the rut timeframe. In this article, I explain the reason there are so many people with different theories on the timing of the rut in Maine. I also lay out what I believe to be a more accurate interpretation of the rut in Maine.
Table of Contents
Maine Rut Myths
First off, let me begin by cutting through the myth that the rut starts at different times each year. This is false, the rut starts at exactly the same time every year but is location-dependent. That being said, there are some factors that will influence the intensity of the rut, making some days and some years better than others. Some of these factors include temperature, weather conditions, and hunting pressure.
Understanding that the rut occurs at the same time each year made me a much better deer hunter because I was able to focus my time off from work to pick the best days each year to hunt, increasing my odds of success to the fullest potential.
Why So Many Opinions On Rut Timeframe In Maine?
Media
One of the biggest reasons hunters get confused about the rut timeframe is from the media on the subject. YouTube videos, magazines, and books seem to all have varied dates of the rut timeframe. The problem is this information comes from everywhere; the Midwest, Southern U.S., and the Northern U.S. and it is hard to sort out what applies to Maine and what doesn’t.
Climate-Related Rut Timing Shift
Honestly, it’s no wonder Mainers are confused on the subject. In my experience, Maine and northern New England are pretty unique when it comes to the rut.
What I have noticed from being on stand in southern Maine, tracking bucks in more northern areas of Maine, and data from a dozen of trail cameras placed in different parts of the state is that the rut timeframe is different depending on the average climate of a particular area of Maine. For the same reasons buck weights increase as you go more north, rut timing changes as you move north. In my article Where to Find Big Maine Bucks, I explain the concepts behind why heavier bucks are found the further north you go.
More accurately, I believe this has to do with climate more than latitude because the climate is the driving factor of bigger-bodied bucks. It just happens that colder climates are located as you continue north. However, by looking at the graph below, the climate in Maine does not change at a straight east-west line across Maine. Instead, the climate divisions are at a slant.
The images below show that the climate at the western portion of the state is colder at more southern locations than the eastern portion. This is why western Maine often has the southern-most snow during the hunting season. Whereas it is common to have to travel further north as you move east in order to find early tracking snow.
Maine Climate Divisions from Maine’s Climate Future. Long-term average temperature and precipitation (inches), based on NOAA’s National Climatic Data Center for 1895 through 2007. The divisions span 54%, 31%, and 15% of the state’s total area.
Map depicting how the rut timing is shifted depending on the average climate in Maine.
Northern Maine vs Southern Maine
For the purposes of this post, when I refer to southern and northern Maine I am referring to locations along the two division lines shown in the photos above as I have the most experience with these areas.
What I have found is that as you shift from the coastal/southern interior climate division line to the southern interior/northern zone climate division line, the rut occurs later in the season. More specifically, I’ve noticed the difference in rut timing from the coastal/southern interior division line compared to the northern division line appears to be about 10-15 days later. If you hunt further north than the northern division line, it is likely the rut will occur even later in the season, and you will have to adjust these dates accordingly to your specific location.
The Maine figure with the yellow-green-blue color gradient best represents how the rut changes over time in relation to climate. The change in the rut timing is a gradual process, day by day the peak rut will shift a little bit north as the season progresses. This information can help you stay in the peak rut longer by traveling with the rut as it progresses north.
Warmer Climate = Longer Ruts
What I am describing here is not a random theory either, it’s the same factors that influence some of the observed differences of the southern and northern rut in the U.S. In the south deer rutting behavior is much different than the northern rut. The southern rut is much longer and more drawn out, sometimes they breed all year long. This is because the south has enough warmth to support their needs energetically, and don’t have to worry about making it through tough winters.
By looking at the image below, you’ll notice the 35th latitude can be used to describe the approximate division between northern and southern rut differences. This image was taken from Deer and Deer Hunting to describe the approximate division of the northern and southern rut.
Deer and Deer Hunting Graphic of North & South Dividing Lines for Rutting Dates
If you compare the Deer and Deer Hunting graphic with the 35th latitude line (above) to the Plant Hardiness Zone Map graphic (below), which shows annual extreme minimum temperatures you’ll notice that the 35th latitude line is located at a clear temperature shift. That being, where the warmest areas are shown as yellow and orange meet the cooler green color. The key point here is that a warmer climate in the south changes deer rutting behavior. This is observed in Maine just at a less drastic magnitude.
USDA Plant Hardiness Zone Map. The map is based on the average annual minimum winter temperature, divided into 10-degree F zones. (https://planthardiness.ars.usda.gov/PHZMWeb/)
Fawn Survival
Energetics & Temperature
Although no hard-scientific research has been conducted on this topic due to the difficulty of gathering data on deer in the big remote woods of Maine, I’ve found my evidence to be very consistent and reliable over the last number years. As I collect more data and gain more experience I seem to support my theory even further. In addition, the reasons for this occurrence make perfect sense energetically.
This 10-15 day delay in northern Maine will bring increased temperatures, closer to temps that occurred in southern Maine a week prior. When northern deer breed a 10-15 days later, the does have their fawns 10-15 days later in the Spring. The fawning period is right around the time temperatures go from winter jacket to t-shirt weather. 10-15 day delay during this timeframe makes a difference for fawn survival because minimal energy is wasted on staying warm, so all energy can be used for fawn development.
The Growing Season
Additionally, the growing season starts later in the north because of the lower temperatures. The growing season is when rainfall and temperatures allow plants to start growing again. By having fawns a week later in the Spring, it gives vegetation more time to start producing abundant and nutritional food for the fawns, also helping fawn survival.
When Is The Whitetail Rut In Maine?
So, when exactly are bucks rutting in Maine? It will depend on where you are located in Maine. You’ve probably heard of the pre-rut, rut, and post-rut phases. However, there is a more detailed version of the rut that is important to understand and includes the subtle changes of the seeking, chasing, and tending phases of the rut. Below I break down each of these phases and describe what I have found to be the most accurate dates for these phases of the rut in Maine.
Pre-Rut
Southern Maine Oct. 10 – Oct. 20
The pre-rut is the timeframe where testosterone levels in bucks start to increase, food sources change, buck activity levels increase, and bucks have moved from their summer ranges to their fall ranges. Bucks during this timeframe are laying down scrapes, rubs, and are playfully fighting to establish dominance. Although bucks are starting to think about does, they aren’t any exhibiting rutting behavior such as seeking, chasing, or tending. If bucks have a fall range they have moved into it by now.
Northern Maine Oct. 1 – Nov. 7
Just like in southern Maine, testosterone and buck activity levels increase. Bucks are laying down scrapes, rubs, and checking signposts. If bucks cross each other’s paths they may fight lightly in order to establish dominance. Although bucks are starting to think about does, they aren’t exhibiting rutting behavior such as seeking, chasing, or tending during this time.
Northern Maine Pre-Rut Timeframe
The pre-rut period in northern Maine is similar to the southern zone except it is much longer. Does are not ready to be bred, and bucks in the north hang tight in the ‘thick stuff’ on mountains and in swamps in order to seek better cover now that foliage is dropping. The pre-rut starts earlier than southern Maine because the temperatures are colder earlier, so the food sources change earlier, making deer move to fall ranges sooner.
The pre-rut also runs later into the season than southern Maine. Any tracker will tell you that buck movement during the beginning of the first week of hunting season (which starts around the 1st of November) is minimal and finding a track can be tough. I believe this is the case because it is too energetically expensive to start seeking ‘local’ does until they are closer to being ready. A local doe group could be miles away and would result in a lot of wasted energy – a lot of work for little reward. Bucks will have more energy and will be able to breed more does by waiting for a more opportune time.
Bucks early in the week are sticking close to the same bedding areas they are comfortable with, just like in the south. Shooting a buck tracking during this timeframe can be a good bet because if you can find a good track, he’s usually not going to be far.
As the final week progresses, a few early bucks might start seeking and laying down more tracks.
Seeking Phase (Rut Phase 1)
Southern Maine Oct. 20 – Nov. 1
The seeking phase is when does are not ready to be bred, but the bucks are getting antsy so they start chasing their local does, often in daylight. In southern Maine, this time of the year is one of my favorite times to hunt because it’s the best time to shoot a target buck. Even though I’m using my bow mostly during this timeframe, I feel like my odds are better than during rifle season.
Bucks are sticking close to their local does and are usually using the same bedding areas since establishing their fall ranges. For this reason, if you know of a particular buck you’re trying to kill this is one of your best times to get him because there’s a good chance he will be up and moving. If you can get close to a buck’s bedding area without bumping him, your odds are good. He’ll often get out of his bed in daylight to go look for does.
I can’t tell you how many times the first buck pictures I’ve got on trail camera for the year, in southern Maine, were on Oct. 20th. October 20th seems to be just about the first day any true rut activity happens, with the peak seeking phase of the rut occurring around the middle of the last week in October.
Northern Maine Nov. 7 – Nov. 17
Buck activity in Northern Maine is similar to southern Maine during the seeking phase except it happens about 15 days later. Bucks in both the north and south are moving a lot more and in daylight hours.
The biggest difference between northern and southern Maine is that does in northern Maine are in pockets, forcing bucks to do a lot of traveling between pockets of does. Bucks in the south stick to their local does and don’t travel very far because they usually have all the does they could want in close proximity.
Chasing Phase (Rut Phase 2)
Southern Maine: Oct. 28 – Nov. 8
As the days continue more bucks move away from the seeking phase and into the chasing phase. During the chasing phase, few does are ready to be bred but they are close so most bucks are not ‘locked-down’ with does. During this time bucks are traveling more fiercely than any other time. With bucks up and moving, it can be an exciting time to be in the woods. Bucks that aren’t hung up with does are putting on the miles to find does.
It is harder to shoot a target buck at this time because they’re usually chasing does elsewhere, and could be miles away. That being said, your chances of shooting a random buck are increased greatly so it’s an even trade-off.
After the peak rut buck movement starts to taper off and your odds of shooting a buck start to diminish by day.
Northern Maine: Nov. 14 – Nov. 28
Like the seeking phase, the chasing phase in northern Maine occurs later than southern Maine During this time bucks are also traveling more fiercely than any other time and are laying down a lot of tracks looking for does. Since there aren’t as many deer in the big woods, this is one of the best times to see deer. It is also a good time to catch a distracted buck with a doe.
However, it can be tough to track a buck at this time because bucks often only have one thing on their minds, and don’t bed down very much. If the buck you’re on does not find a doe it can be hard to catch up to him that day no matter how fresh the track is.
Tending Phase ‘Lockdown Phase’ (Rut Phase 3)
Southern Maine: Nov. 3 – Nov. 16
The tending phase is when bucks get hung up with does. This is often referred to as the ‘Lockdown Phase’ and have found this to be more noticeable in the southern areas of Maine. When a buck gets with a doe that’s close to ready to breed he will stay by her side and try to keep her in thick cover during the entire process.
This often leads to fewer buck sightings at this time unless you dive deep into thick, unpressured, high-quality habitat, where bucks feel safe. Bucks that are not hung up with does, or that are done breeding a doe will continue to put on miles to find other hot does. Hunting pressure in southern Maine contributes to the decrease in activity at this time as well.
Northern Maine: Nov. 20 – Dec. 1
Because deer in the northern areas of Maine are found in pockets, I haven’t found the same effects of the lockdown phase as I have in the south. These pockets can be spaced out by miles, bucks that aren’t with does are frantically moving from pocket to pocket looking for a hot doe. This is because the woods are so vast which causes bucks that aren’t locked down to put on a lot of miles.
Additionally, bucks don’t feel the same hunting pressure as southern Maine so bucks are more willing to breed anywhere. Bucks will be moving similarly to the chasing phase because they are moving from doe pocket to doe pocket, the only difference is maybe a slight decrease in distance traveled because a higher percentage of bucks will be with does. This reduction in distance traveled makes catching up to a buck on a track easier. Once caught up, the buck could be distracted.
So, although some bucks will be locked down at this time the ones that aren’t locked down are desperately traveling far and wide to find does. This makes the lockdown phase less noticeable than in the south. In addition, doe-buck ratios are more even so there is more competition for does in the north keeping bucks on the move.
Post-Rut
Southern Maine: Nov. 21 – Nov. 30
Northern Maine: Dec. 1- Dec. 9
During the post-rut timeframe, most does have been bred and aren’t in estrous anymore. Bucks have used up a lot of energy reserves during the rut. At this point in the season, the energy it takes to find that last doe usually does not outweigh a buck’s need to rest and recover. Especially because temperatures are much often much colder, and high-quality food is scarcer. Since the cost does not outweigh the benefits, bucks focus less on does and return to survival mode.
If the opportunity presents itself, and a doe in heat happens to be nearby while a buck is in recovery mode, he will chase that doe. They are looking for good winter thermal shelter and a good source of food. For this reason, bucks are not moving very far. Hunting food sources near thermal cover can be a good bet. In the northern region’s deer start heading into their deer yards. The timeframe for yarding is dependent on the weather and snow depth.
Secondary-Rut
Southern Maine Dec. 1 – Dec. 10
Northern Maine Dec. 7 – Dec. 14
The secondary rut is a small window where does that did not get bred come back into estrous, and some fawns come into heat. It’s been said that this phase occurs 28 days after a doe has come into heat the first time. So, to put the odds in your favor use the peak rut date and jump down 4 weeks on your calendar to find the approximate date the second rut will occur.
Because only a small portion of does were not bred, you might not observe rutting this late in the season because it is location-dependent. Some areas may experience a short second rut, while other nearby areas don’t experience any secondary rut action. This is why on the graphs (above) the number of bucks during the secondary-rut is much lower. However, if you’re able to find some does and fawns around a food source at this time there is a chance one will come into heat and is an excellent time to shoot a big buck.
Considerations
Provided Rut Dates
This does NOT mean by the start and end dates that I have provided ALL activity has either started or stopped for each phase. Instead, these dates bleed into one another. Also, the dates I have provided are where the vast majority of bucks will be in a given year, giving you a statistical advantage so you can plan your hunts.
That is not to say you couldn’t observe a buck rutting earlier or later in the season, it just means the odds of seeing that behavior is less likely outside of the dates provided. This is why the graphs above are a great representation of the phases of the rut. They show that there is a slow tapering on-off effect after each phase, meaning bucks will enter a leave a phase of the rut at different times.
Sometimes there will be outliers, a buck may start chasing really early or late in the season. However, most bucks will experience very similar timings because evolutionarily they have adapted to breed during a tight window in order to birth fawns at the best time of year, energetically speaking.
Weather-snow depth
Snow depth can have an influence on these timings to a small degree in the north. Heavy snowfall will push deer into their winter patterns a little earlier than if there was minimal snowfall. This is something to consider when hunting northern Maine in order to fine-tune your hunts.
Hunting Pressure
Hunting pressure is a big factor in determining how deer move throughout the deer season. If you’re not seeing any movement in your area at the timeframes listed above it could be due to hunting pressure. Low-pressured deer will feel more comfortable expressing rutting behavior during daylight than high-pressured deer.
Conclusions
If you only have a few days to take off from work each year and want to hunt the best part of the rut, this does not mean that you should take off what I have defined as the first couple days of the rut. Not all days of the rut are created equal.
Although you might be hunting the rut, your best chance will be to take the few days surrounding the peak days of the best phases. This is when the highest percentage of bucks are moving and visible during daylight, increasing your chances to the max.
Hunters sometimes have a hard time getting away from what they have always believed to be the rut, so if you don’t believe these dates or if they don’t seem to apply to your area I encourage you to study trail camera data, tagging station data, state data, and any other information you can get for your specific region of Maine for the best results. I personally wouldn’t use information from regions that are not close to you because there could be a shift in rut timing depending on the differences in location. This caused me confusion for a lot of years.
Hopefully, this post on the whitetail rut in Maine has helped to clear up the confusion on the rut timing controversy. If you have questions:
I am not affiliated with Benelli in any way, I bought this gun with my own money.
How The R1 Was Tested
This review is based on the +/- 100 miles I carried this rifle while tracking whitetails in the nastiest conditions of Maine’s northern forests. Because of the good feedback from the Benelli Supernova Review, I decided to keep a similar format in this post.
When tracking bucks in the snow in the Northwoods of Maine it is common to walk 10 miles per day. After 10 miles of walking with a gun in your hand, you notice every pro and con of your firearm ergonomically. Those pros and cons are what I will be going over in this review.
Here is a video of me using the Benelli R1 while tracking a big buck on snow. You might find my video helpful in understanding how this rifle was tested.
I understand that only a small portion of hunters track deer in the Northwoods of New England so even though my experience with the gun has been while tracking, the points I cover in this post will be beneficial if you’re a tracker, stand hunter, or anything in-between.
Tracking Whitetails Requires a Specific Rifle
Not a Bolt Action
Almost a decade ago, I started tracking bucks in the snowy conditions of the big woods of Maine and New Hampshire. Hunting deer in these conditions requires a special kind of rifle. My 30-06 bolt action with a scope just wasn’t up to the challenge. Snow would congregate on top of the bolt. Then when attempting to rack another round after a shot, snow would fall into the chamber and would jam.
Also, the safety would freeze in place, and the scope would fill with snow. When this caused me to miss an opportunity at a buck I knew I wasn’t going to let that happen again. Additionally, a bolt action is much too slow in my opinion for tracking. For these reasons, I wanted to upgrade to a gun that was fast and reliable.
Pump Action Rifle vs Modern Semi-Auto Rifle
The traditional gun for tracking bucks in New England is the Remington 760 carbine or the newer 7600 carbine (find my review here). These guns are known for being compact, agile, and reliable in the thick cover and snowy conditions of the Northwoods.
But with the advances in semi-auto technology, I felt a manufacturer with a good reputation would have a semi-auto rifle that could handle the elements and be faster with follow-up shots than the pump-action Remington 7600’s. After researching and comparing different rifle manufacturers and weighing the pros and cons of each I finally settled on the Benelli R1. With their good reputation and my experience using their shotguns, it seemed like a natural fit.
For tracking, the ideal gun is lightweight, has fast target acquisition, be snow, ice, and evergreen needle-proof. It is not uncommon to travel 10 miles a day. After walking hundreds of miles during the season the last thing you want is a rifle malfunction when you finally get your chance. I go into detail on the Benelli R1’s performance in these tough, snowy, winter Maine conditions. These are the conditions under which I tested this Benelli R1 review.
Benelli R1 Price
The first thing I’m curious about when buying a new gun is price, so in this Benelli R1 review, that’s what we’ll start with. On the Benelli website, the price of the R1 ranges from 1,149$ to 1,349$. The 30-06 synthetic version came in at 1349$ which is a fairly expensive rifle. I’ve noticed similar pricing at other gun shops. I’ve noticed slightly better pricing on Gunbroker.com.
Benelli R1 Fit and Feel
Fit and feel are the most important aspects of buying a new gun whether it’s a rifle or shotgun. For this reason, this Benelli R1 review covers this extensively. To achieve the proper fit you should be able to close your eyes, bring the stock to your face, then open your eyes and be able to see perfectly down the sights without needing to make any adjustments.
If you can’t do this with your rifle then your accuracy and quick shooting capabilities will suffer. It does not matter how much a gun costs if you can’t shoulder your gun and have it come to your face naturally then you should not be using that gun. Fortunately, the fit and feel of the R1 is superb. However, I had to make some adjustments to get my perfect fit.
Proper rifle fit ensures fast target acquisition. Here I look through the installed Williams Peep Sights.
UPDATE: Peep Sight Model: I’ve had a lot of people reach out and ask me what peep sight I used for the Benelli R1. William’s Peep Sight doesn’t make a peep sight specifically for the R1, however, I was eventually able to figure out that a BAR version of the William’s Peep Sight will fit this gun because it has the same barrel/receiver crown as the R1. I’m not sure if there are multiple BAR models, I can’t remember the exact BAR model I used, so make sure to research the correct one or bring it to the local gunsmith. Hope this helps.
Benelli R1 Stock Shim Kit
With the R1, gone are the days of spending money on a gunsmith to have them do some quirky adjustment to your new gun so you can see down the barrel properly. A fantastic feature of the R1 (and all Benelli guns) is that the stock can be adjusted to fit anyone.
The shim kit comes with the Benelli R1.
The R1 comes with shims that can be placed where the stock and receiver meet. The shims allow you to adjust the angle of the stock up, down, left and right (drop and cast) until it fits your face perfectly. Having the option to adjust the cast allows left-handed shooters to achieve a great fit as well.
In my opinion, this is a huge win for Benelli and is something that is lacking in other rifles on the market. To learn how to adjust drop and cast take a look at this Explanatory Video for the Super Black Eagle III (the process is the same). I had to drop the stock down just a little in order to get my perfect fit.
Installing the shims to adjust drop and cast.
Comb Height
In addition to the shim kit, the comb height can be adjusted on the R1. This could be especially helpful if you decide to put a scope on your gun. Extra comb height will enable you to get a little extra facelift off your stock so your scope comes to your eye effortlessly.
Benelli Recoil Pad
The original recoil pad that comes with the R1 is nice. However, my length of pull is much longer than what the R1 comes in off the shelf (13 5/8 inches). I found this out because every time I shot the recoil would shove the back of my thumb into my nose.
To alleviate this, I had to purchase an expensive Benelli recoil pad to replace the stock recoil pad so I could get my 14 3/8 inch length of pull. That being said, with the new recoil pad the R1 fits me extremely well.
Exchangeable recoil pads to adjust the length of pull.
Carry-ability
When I bought the R1 I failed to realize how the gun would carry. In the store, it seemed like it would be a great gun to carry because it’s so lightweight. After using it in the field I quickly figured out that the charging handle, when closed, is directly at the balance point of the rifle so I was forced to place my hand behind the charging handle at a weird balance point. Overall, I was able to deal with it all season and it wasn’t too big of a deal but it was an annoyance and puts unnecessary strain on the wrists.
The cocking handle is located on the gun’s balance point making it slightly uncomfortable to carry.
Trigger Creep
I like a crisp trigger and I think most people would agree. I did not find that the R1 had a very crisp trigger. While sighting in both my rifles, my much less expensive Marlin XL7 had no creep whereas the Benelli had noticeably more. This did not affect accuracy too much, but I was using peep sights at 50 yards.
It would have been interesting to put a scope on it and shoot at further distances. I’m sure there is a way to get the trigger as crisp as I want by bringing it to a gunsmith, but it is just another hoop to jump through.
Benelli R1 Review – Recoil Specifications
ComforTech® System
The Benelli R1 synthetic model that I purchased came with the ComforTech stock. The wooden models don’t come with this option. Benelli claims “The ComforTech® system reduces felt recoil by as much as 48% over the competition.”
Benelli R1 ComforTech Stock and its features.
A 48% reduction in felt recoil over competitors was a big selling point for me. Although this does not mean there is less recoil after the shot, it does mean you feel less of the recoil. In my mind, this would make the gun more comfortable to shoot and would help with follow-up shots at deer. I am a big fan of the ComforTech stock and love the one I have on my Benelli Supernova. I have to say that when firing multiple fast-paced, 180-grain rounds through the Benelli R1 while target shooting it was very comfortable, and was more impressed than I thought I would be.
Benelli does a good job of explaining ComforTech and how it can achieve great felt recoil reduction on their website through computer-aided design. They even compare the Benelli Super Black Eagle (without ComforTech) to the Benelli Super Black Eagle II (with ComforTech) so you can see the difference even in their models.
Benelli R1 Weight
Weight was an important consideration for my purchase. On a 10-mile day of tracking, every ounce you save on your gun helps. One ounce may not feel like a big difference when comparing two guns in the store, but over a 10-hour day, you’ll notice each ounce.
The Benelli R1 weighs in at only 7.1 lbs making it lighter than many rifles on the market. The Remington 7600 carbine weighs 7.25 lbs so with the R1 weighing less than the gold standard of tracking rifles I decided that would meet my requirements for weight. After using the gun all season, I found the lightweight rifle to be nice. The downside, though, is the carry-ability of the gun was not ideal as discussed above.
Weather Resilience
Since I used this gun primarily in snowy conditions, weather resilience was a big part of this Benelli R1 review. Being able to handle these conditions was an important factor for me. Before I bought the gun, I was skeptical of how it would perform. From the get-go, it was questionable because, behind the charging handle, there is a slot that allows the charging handle to throttle back after a shot.
I was nervous that evergreen needles and snow would get into this slot when walking through the ‘thick stuff’. I convinced myself this would be fine because of the reliability reputation Benelli has with its auto-loaders in less-than-ideal conditions.
Charging Handle Slot
After testing the gun, I found my suspicions were correct. This part of the gun did get snow clumps inside the gun and junk down behind the charging handle. The snow would melt and turn to ice inside the gun and didn’t leave me feeling very confident that it would rack another round.
Debris
Additionally, over time the debris that got behind the charging handle made its way towards the recoil system in the stock. I could imagine over time the recoil system of the R1 would gum up pretty bad.
Freezing Issues
On one cold 20º day, the snow was fresh and wet the snow kept falling onto the side of my gun while I was pushing through the brush. This snow made it on top of and around my bolt and behind my charging handle. When I got back to the car after a long day I found I was not able to take the clip out of my gun or pull the bolt back because the gun was so frozen.
I’m not sure what would have happened if I had shot. I regret not shooting to see what the results would’ve been. Anyway, I had to let the car heat up with my gun loaded to thaw it and unload it. I figured a semi-auto would need to be maintained a little more in these conditions and I was prepared for that, but the R1 just wasn’t up for the challenge of the snowy weather conditions.
The slot behind the cocking handle (charging handle) where snow and debris got into.
Stripping and Cleaning
Tool-less Breakdown
One of my favorite features and another big advantage of the R1 over the competition is its ease and convenience of stripping and cleaning. The R1 stripping process is completely tool-less! This is extremely useful because it gives you the option to break down the shotgun in the field if something were to happen.
When you take the forearm off there is a knob at the end of the forearm. This knob can be used to unscrew the gas system so that the trigger assembly can be taken out. This also made cleaning the gun easy after getting ice and debris out from behind the bolt after hunting.
The forearm of the rifle comes with a tool for disassembly.
Reliability and Durability
In a gun review, reliability and durability is a big component. During my Benelli R1 review my biggest complaint with this gun is with the magazine and/or bolt. Before the hunting season, after I finally got the gun set up and sighted in I wanted to shoot some rounds through it quickly to practice speed shooting. I quickly found out that the bolt had trouble jacking another round into the chamber. Whether this was a weak bolt or a tight magazine, I am not sure.
This happened to me many times but would not happen every time. This was frustrating because I never knew when it was going to jam on me. I probably could have got another magazine for free to test it out but I did not experiment with the magazine.
With hunting season right around the corner, I didn’t have time to wait for a new magazine so hunted with the gun as it was and hoped it would rack another round if I needed more than one shot.
Benelli R1 and magazine
Considerations
I big reason I decided to try the Benelli R1 was because of its impressive 10-year warranty. Had it not come with this warranty I probably would have bought another gun known to handle snowy conditions.
With the advances in semi-auto technology, I wanted to see if the R1 could work as a tracking gun. Unfortunately, it was not up for the challenge but with my 10-year warranty, I was able to get my money back and return the gun with no issues.
Benelli R1 Review Conclusions and Recommendations
It’s Not For Deer Trackers
To be honest, all semi-autos are probably not the best choice for tracking deer in the snowy conditions of the Northwoods. But with the 10-year warranty, I was willing to take a chance with the Benelli R1. I thought perhaps modern automatics can handle the northern Maine tracking conditions.
Although I had some trouble with the gun’s ability to chamber rounds I believe I got unlucky with a defective gun. But even if I was given a new gun that worked, there were issues that, as a tracker, led me to believe the Benelli R1 was not suited toward that style of hunting. This made returning the gun the right choice for me. That being said, Benelli has a good reputation and a 10-year warranty to back it up. I’m sure I could have got a new gun if I wanted to.
Great For The Average Hunter
I believe the Benelli R1 would be a great option for stalking with no snow and for tree stand hunting. With no snow and a little debris getting inside the charging handle and behind the bolt, I’m confident the gun would perform perfectly fine if kept clean.
Also, if you’re not walking long distances then carry-ability won’t be as big of a factor. I would not hesitate to buy this gun, it’s a great gun for all weather conditions besides snowy ones.
I did not keep the rifle because I was strictly looking for a rifle for tracking and already had a scoped rifle for treestand hunting.
For this reason, I ended up purchasing the Remington 7600 Carbine to be used as my tracking rifle in 2020. Currently, in 2025, this is still my tracking rifle. Although not flawless I am pretty happy with its ability to handle the tough winter conditions. I did a review of the Remington 7600 if you’re wondering how it compares to the Benelli R1.
Whitetail energetics shows us that whitetails are not simple-minded animals that aimlessly walk through the woods with no purpose. It’s quite the opposite. Their entire lives revolve around maximizing energy use for survival and reproduction. With this information, you can put the odds more in your favor by creating a strategy for each hunt that maximizes your success. Randomly meandering or sitting in the woods is a recipe for failure. To get the most out of a hunt, you need to think about what a big buck would want to do on that particular day. It could be to conserve the most energy or to have the most reproductive success, or a mix of both.
Table of Contents
What Is Whitetail Energetics?
I define whitetail energetics by; a whitetail’s thought process on how to most efficiently acquire/expend its energy to maximize its survival and reproduction.
There are many similarities between big bucks, young bucks, and does in energetics, with the ultimate goal being the same; use energy as efficiently as possible to maximize survival/reproduction. However, between bucks and does one big difference; thought processes. Thought processes between genders are different to achieve this goal. However, for this article, I will primarily explain how energetics directly influence the decisions of big bucks.
To explain the importance of whitetail energetics, consider this; energy is a whitetail’s form of currency. How so? Energy can be spent on survival and reproduction, and the more energy a particular buck has the more he can spend on those things. So, until the rut, bucks are focusing on one thing; acquiring and conserving energy.
Knowing this, wouldn’t it make sense to learn what decisions big bucks make to acquire and use energy most efficiently? By understanding whitetail energetics, you can find big bucks more successfully. You will be more able to get into the mindset of the caliber animal you’re hunting and predict movements depending on the many factors that influence whitetail energetics.
Whitetail Energetics & Habitat Relationship
There is an energy flow between a whitetail and the habitat it has chosen to live in. Another way to look at it is the high-quality habitat has chosen the big buck to live in it. When you look at habitat this way, after a while you can start to pick up similarities between the highest-quality habitats and you can start scouting habitat instead of bucks. This is because big bucks will gravitate to the highest-quality habitat to maximize energy efficiency.
Whitetails are slaves to nature. They have to seek out high-quality habitat to sustain their energetic demands for survival and reproduction. Unlike people, deer cannot manipulate their habitat to increase survival. Also, people don’t worry about the energy we exert because we have so much food, water, and shelter available to us that we can replenish our energy at any time. Whitetails and other wildlife have to try to save and store energy at certain times of the year when food is abundant so it can be used when it is needed most.
Mature bucks are very patternable from year to year. Especially so during years when food sources and abundance remain similar. They have fine-tuned the most energetic way to survive from previous years. To deviate much from this would likely lead to unnecessary energy expenditure, reducing chances of reproduction and survival.
Although some areas may be good enough to support a whitetail’s life, they are still going to choose the highest quality habitat available to them to maximize their energetic gains. I can only think of a couple of reasons whitetails would choose to live in a lower-quality habitat than what is available in the surrounding area. Reasons would include; too many deer in the high-quality habitat already and high hunting pressure/poor safety.
High-quality habitat will maximize energy gains. Energy gains are the life goal of big bucks until the rut rolls around and it switches to breeding. As a deer hunter high-quality habitat combined with energetics is important to understand because helps predict with a higher degree of accuracy where a big buck is likely located before the rut.
Science Behind Whitetail Energetics
Energy is the biggest factor influencing the success of a buck to breed and survive to pass on his genes, and bucks know it. The more energy a buck has, the more it can be used when it’s needed most. Having a surplus of energy at the right time of year gives certain bucks a competitive advantage over other bucks. So how does a whitetail acquire more energy? By using less than it burns.
To understand energetics, you should know what a Calorie is, simply put, it is a measurement of energy. Three bodily functions burn Calories in organisms;
Basal Metabolic Rate (BMR)
Thermal Effect of Food (TEF)
Physical Activity (PA)
Total Daily Energy Expenditure (TDEE)
BMR+ TEF+ PA = TDEE
BMR is the absolute minimum number of Calories (energy) an organism, such as a whitetail, needs to consume to maintain its current body weight. TEF is the energy it takes to digest food. PA is the energy expended exerting any type of movement. When you add these three Calorie consuming bodily functions up, you get the total daily energy expenditure (TDEE). A whitetail that consumes and digests more calories than TDEE will gain weight and vice versa. To simplify this, take a look at this equation:
TDEE – Energy Consumed = Calories Gained or Lost
TDEE > Energy Consumed = Lose Weight
TDEE < Energy Consumed = Gain Weight
Body Fat, Energy, and Survival
When a deer consumes more energy than what its body needs (TDEE < Energy Consumed), it will be stored as body fat. Why does a deer want body fat? Because fat is stored energy that can be used when external sources of nutrition don’t provide enough Calories to exceed TDEE. When deer can’t eat enough Calories or are burning too many Calories from activity, then body fat will be burned instead. Essentially, it is backup energy.
Whitetails cannot control their BMR or TEF to a large degree, but they can reduce energy expenditure from these through rest and sleep. They can control their amount of physical activity to a much larger degree. Limiting physical activity, such as fighting is important for survival. The reason bucks will fight is that there is an opportunity for reproductive success. Often reproductive success outweighs the energy costs of fighting. In a fighting scenario, a win would energetically make sense because the buck would be able to pass on his genes. However, bucks take risks when they fight with each other. Not only will the loser spend a lot of energy that could be used for survival, but he will also not pass on his genes. Too much fighting will limit the energy bucks have for breeding.
Fat is essential for survival in the colder months for insulation and nutrition. Having body fat during the cold months means more backup energy for when weather conditions don’t allow deer to stay at or above TDEE. This is how deer can survive periods of harsh weather conditions. A deer that uses less energy will generally put on more fat because physical activity is lower, which conserves more Calories. This is why hunters often don’t see big bucks until the rut has started. Big bucks are resting and digesting all day until the rut so that way they can maximize their stored energy for reproductive success.
Body Fat, Energy, & The Rut
Having healthy stores of fat gained from the growing season allows bucks to focus on one thing, reproduction. Because bucks were putting on as much fat as they could during the growing season, they could afford to take a short break from focusing on energy accumulation. Instead, they will burn these energy reserves and put them towards reproductive success.
Because of the importance and short window of the breeding season, reproductive success is ranked higher than everything else in the mind of a buck. Essentially, this is what bucks have been preparing for since the growing season. Fat reserves allow for a higher competitive advantage over other bucks with less available body fat during the rut. The reason for this is the bucks with more body fat have more energy to use. The Quality Deer Management Association (QDMA) states “bucks can easily lose 20 to 25 percent of their body weight during the rut”. This goes to show you how important fat is to rutting bucks.
Weather & Whitetail Energetics
Snow, rain, wind, hot, and cold…etc all play a role in how whitetails move from day-to-day. Knowing that bucks are trying to use energy as efficiently as possible to maximize reproductive success during the rut you’ll need to ask yourself before every hunt: “What is a buck going to do today? Will he want to be on his feet? Or will he spend too much energy doing so based on the weather conditions so that it’s not worth his time or effort?”
Does it make sense to hunt from a treestand if there is a blizzard with 40 mph winds? What about in 70º F temps in November? No, deer are likely not moving because it’s too energetically expensive. They will be resting and digesting and waiting a day or two for conditions to improve. Bucks will get the most out of their energy this way. Knowing this you could make a more aggressive game plan and increase your odds of success. Thinking about how weather affects energetics will help put the odds in your favor for success.
Whitetail Energetics & Hunting Pressure
Although understanding whitetail energetics is a fantastic tool to improve your hunting success, it’s important to understand that energetics is best understood if hunting pressure does not exist. This shows how whitetails would interact with nature under unpressured conditions. Under non-pressured situations, whitetail energetics is very accurate in predicting what deer are up to throughout the year.
It’s important to first understand how deer move in unpressured scenarios because it allows you to understand where deer want to be naturally. When pressured, these deer still want to be where they would be if unpressured. However, they know that it’s too risky. This causes them to avoid going to these areas or at least until they feel safe (like at night).
However, the truth of the matter is that you are probably dealing with a certain degree of hunting pressure. Once you understand how deer would react in unpressured scenarios you can start thinking about what the bucks might do under the specific amount of hunting pressure your area is receiving.
When hunting pressure is involved, energetics provides the framework for determining where deer will be. But survival is another large piece of the puzzle. Bucks especially will veer away from making the most energetically-sense decisions if there is a threat to their survival. This is because bucks bed for security and does bed for food. Because bucks are bedding for security they will go out of their way and spend more energy to get to places that make them feel safer. This may mean creating a nest in the middle of a swamp somewhere in a highly pressured area.
Conclusion
I hope you’ve taken away some insights that help you become a better deer hunter. Energetics is a large portion of the puzzle in finding big bucks. Knowing that a whitetail’s life revolves primarily around energy acquisition for reproduction and survival, you can more accurately predict what bucks are thinking throughout the year. This greatly improves your chances of taking a big buck.
That being said, does whitetail energetics predict the movement of all bucks 100% accurately? No. Information in this post is what I’ve found to be what the average big buck is thinking based on energetics at different times of the year. Bucks could be moving at any time, anywhere, for any number of reasons, and you could see success despite the information in this article. However, this article does help you put the odds in your favor for the most success. Most people can’t take the whole hunting season off from work, so knowing when to use your vacation time wisely based on energetics will put you in a position to have more consistent success in the woods.
Thinking in terms of energetics has helped me become much more successful in finding big bucks. I hope this article has helped you think about how you can put a big buck on the ground this fall. Let me know if you have any questions in the comments below, I will do my best to get back to you.
It’s difficult to get into the biggest bucks in Maine club by shooting a buck over 200 lbs if you don’t know where to find big Maine bucks. In this article, I will teach you how to position yourself in areas with the highest probability of taking a big-bodied buck. I use science and numbers to explain where to find big Maine bucks.
A 200-pound caliber buck is a regarded accomplishment for Maine deer hunters because they aren’t super common. Shooting a buck of this weight places you in the Biggest Bucks in Maine Club. The bucks of this caliber are old, smart, and cagey, making them veterans of survival and difficult to kill. You can greatly improve your odds of shooting the biggest bucks Maine has to offer by understanding a few key concepts about body weight and temperature. These concepts are described in more detail below.
Table of Contents
Where To Find Big Maine Bucks
Body size changes to attain appropriate thermal regulation based on the climate a particular animal (deer in this case) are living in. This concept is explained by Bergmann’s rule and Allen’s Rule.
Bergmann’s Rule
Bergmann’s Rule Example
Bergmann’s rule states that species found in higher latitudes will have a larger body size to survive colder temperatures that coincide with higher latitudes. This is an evolutionary process that allows species to keep appropriate internal body temperatures in relation to external environmental temperatures.
Larger body sizes can withstand colder temperatures because they have lower surface area-to-volume ratios. This is shown in the example above; 24/8=3 whereas 96/64=1.5. Having a lower surface area to volume ratio allows larger animals to retain heat. Below is a graph showing how buck weights change as latitude increases in Maine. This graph was generated from data supplied by Maine Inland Fisheries and Wildlife.
Bergmann’s Rule – Average Maine Whitetail Buck Weights vs Latitude by Wildlife Management District (WMD).
Allen’s Rule
Allen’s Rule Example
Allen’s rule states that body form or shape is linear (long and skinny) in warm climates and more rounded and compact in cold climates. So, just like Bergmann’s Rule, the main principle is that surface area to volume ratios change depending on the climate.
For example, round forms have smaller surface area to volume ratios than long and skinny thus retaining heat more efficiently. In comparison, an animal that is long and skinning will have more surface area and will dissipate heat more easily. An example of this is shown to the right:
Bergmann’s Rule & Allan’s Rule Summary
In summary, these two rules are saying deer body size becomes larger, rounder, and more compact as climates become colder. The further north you hunt in Maine, the colder temperatures will become. For this reason, it is safe to say whitetails will be bigger, stockier, and denser the further north you travel. This means your odds of shooting a buck over the 200 lbs. mark increases as you move north (or more accurately, in the coldest areas of Maine, which is generally north). These first two concepts are the bread and butter of where to find big Maine bucks.
Hunting Pressure
Hunting pressure in southern Maine is much heavier than in the northern woods of Maine. For this reason, big bucks are rarer in the south because they often get shot before they reach 4+ years of age. Additionally, even if you do your homework and find a handful of big bucks to hunt in southern Maine, they still are not necessarily going to weigh over 200 lbs. per the rules described above.
Since hunting pressure in northern Maine is much lower than the pressure that occurs in southern and central Maine it allows more bucks to get 4+ years of age. A buck that has reached this age class will be more likely to weigh 200+ pounds compared to younger bucks. That combined with the genetic tendency for bucks to be larger in the north puts the odds in your favor (Age + Big Deer Genetics = Big Maine Buck). The trade-off is that the deer population in the Northwoods is lower. Thus, you’re less likely to see deer.
Habitat & Nutrition
Civilization
Habitat does play a role in how big an animal will grow. In the Northwoods, there is so much land that bucks can roam to find all the food they need. However, not all food is created equal. The food in the big woods of Maine, although enough for survival, is not necessarily the most nutritious when compared to crops. Sometimes the bucks that receive the best nutrition will be those who have taken advantage of crops, fields, and other amenities that human civilization offers for deer.
Weight & Antler Growth
You might think that shooting a big Maine buck weighing over 200 lbs will mean that this deer will support a giant rack. However, this is not always the case. Big bucks in the Northwoods get a lot of food from what they can find naturally on the landscape. Although the forage they find is plenty to sustain a big buck’s life, it is not as plentiful and nutrient-dense when compared to areas closer to civilization/agriculture.
For this reason, big Northern Maine bucks put all of their energy into bodyweight production in preparation for the cold winters, any leftover energy can be used to generate antler growth. The majority of the time they don’t produce large racks because they don’t have a vast surplus of nutrients. This is especially the case with older bucks because they aren’t able to extract/attain the same amount of nutrients as they did when in their prime.
Bucks found close to agriculture/warmer climates don’t need to put on as much body weight because it’s necessary for optimum survival. On top of that, they have more nutritionally dense diets which allow them to put on weight faster, allowing for more energy toward antler production.
Maine Deer Wintering Areas
Deer wintering areas play a huge role in the number of deer that will be in a given area. This is increasingly so in the Northwoods of Maine. High-quality deer wintering areas have a food source and a tall dense softwood canopy. In addition to a tall canopy, a dense softwood mid-story provides thermal shelter in the cold months. This reduces the amount of snow that reaches the ground. With less snow on the ground, deer use less energy moving around when snow conditions are bad.
Large and abundant deer wintering areas allow deer to survive harsh winters. A higher-quality deer wintering area helps reduce energy expenditure. Less energy is needed to acquire shelter and food. With good nutrition and shelter, bucks will enter the growing season with good health. This will enable bucks to allocate more energy on weight gains and antler growth.
By finding and hunting in the general vicinity of high-quality deer wintering areas you will increase the odds of seeing more healthy and mature deer. It’s going to be difficult to find deer, let alone a big buck if you’re hunting in an area with no deer wintering areas in the vicinity.
Big Maine Bucks & Genetics
If you relocated a southern Maine deer into the Northwoods of Maine and it bred with a Northwoods deer, this would cause some genetic contamination. This is true because some offspring would likely be smaller than the average Northwoods deer. This would reduce the odds of offspring survival in colder climates as demonstrated by the rules above. Therefore, genes for smaller deer have been removed through evolution. Since big deer can survive better in the colder temperatures of the north, genes for bigger deer remain in the north.
Having pockets of deer in the Northwoods that are superior to other pockets is unlikely. This is because bucks travel far during the rut to breed. This creates a lot of genetic mixing, meaning it is unlikely genes are the cause for any particular area to have better potential to hold big bucks. The only aspect genetics allows you to take advantage of is genes for larger bucks that will be found in colder climates.
Average Whitetail Buck Weight vs Latitude in Maine by Wildlife Management District (WMD). This graph was generated from Data supplied by Maine Inland Fisheries and Wildlife.
Conclusion
Hopefully, you have a good understanding of where to find big Maine bucks. The takeaway might be to hunt as far north/northwest as you possibly can to increase your odds of shooting the biggest buck possible, right? As far as strictly weight is concerned, you would be correct. However, it’s important to consider the hunt you want to experience.
There are some trade-offs to consider to have the best hunt for you.
How much excitement do you want to have? Is seeing a few deer per week good enough?
Do you want to be in the middle of nowhere and not see another person? Or do you want to have some comfort knowing other people are around?
Do you care about antler size? Big Northern Maine bucks often don’t support big racks. More often it’s the deer that are between 180 and 200 lbs. that are in their prime that support the best racks in the Northwoods of Maine.
I believe hunters can find their ‘sweet spot’ in Maine. By ‘sweet spot’ I mean a location in Maine where you’ve considered all aspects of your perfect hunt. Align yourself by location based on those aspects to put the odds in your favor. This will increase the probability of bringing a successful hunt into reality. This might mean sacrificing some percentage of shooting a 200-pounder so that you can see more deer and smaller bucks to have an enjoyable hunt.
If all you care able is bagging a 200+ pound whopper and you could care less about seeing any other deer, hunting as far north/northwest as possible, while also considering the other points mentioned in this article, will create the highest odds for you.
You Might Like My Other Maine Related Hunting Articles:
This Rynoskin review is based on my extensive use of the clothing for my profession and hobbies over the last decade. I’ve used the original Rynoskin for about 7 years, and Rynoskin’s new Rynoskin Total clothing for the last 3 years. During this time, I have regularly been in the harshest insect conditions Maine has to offer.
When I’m not working in the outdoors as an environmental consultant I’m either hunting, fishing, or exploring the outdoors. For these reasons, I wear my Rynoskin almost daily from April into December. Because of my occupation and outdoor hobbies, I have been able to draw strong conclusions on how they both (original and new) perform and how they compare to each other. These experiences and conditions are what this Rynoskin review is based on.
The purpose of this post is to share a product I believe in, and that will help keep people safe in the woods. I’ve been so happy with the results I wanted to share my experiences with them. I am not affiliated with this company in any way. However, I am an Amazon Associate and I earn from qualifying purchases. If you’re looking for a rigorous field test to determine if Rynoskin actually works, or wondering how Rynoskin Total compares to previous versions of Rynoskin then this post is for you.
What Is Rynoskin?
Rynoskin Total is a chemical-free, breathable base-layer that is designed to protect you from ticks, mosquitoes, chiggers, biting flies, no-see-ums, and other biting insects. The clothing is created with very fine mesh material, making it difficult for insects to bite or penetrate through the Rynoskin fabric.
The original Rynoskin also protected against many biting insects. The major difference is that it did not protect against mosquitos. This Rynoskin is no longer made, only Rynoskin Total is currently made.
Rynoskin Review – Original Rynoskin (Camo & No Longer Made) & Rynoskin Total (Black and Green) Other colors are available. Currently, camo is not an option for Rynoskin Total.
How Breathable is Rynoskin Clothing?
Maine’s Hot Summers
The first question I often get asked is: “Is it breathable?” Since insect season is during the hot spring/summer months this is an important question. The answer to that question is a resounding yes. It reminds me of Under Armour, but with insect-resistant capabilities. It may not be quite as breathable as Under Armour due to its close-knit fabric, but it works very well. For the extra protection, it is well worth it in my opinion. It’s thin and stretchy, allowing sweat to dissipate. While working in Maine’s hot summers I’ve relied on Rynoskin Total to keep me cool and dry for the last two years and I couldn’t be happier with the results.
Other States
The hot months of Maine are cooler than the hot months of other states. I have not tested this clothing in other states. For this reason, I am personally unsure of how it would perform in hotter locations. That being said, I did a little digging and on Rynoskin’s website they state that:
“The answer will depend on the climate and the season of where you are located. For those in the northeast of the United States, the New England states where you want that extra layer of protection from Lyme Disease. We’ve heard positive feedback in terms of the coolness in the comfort level of the wearer. However, in the southern part of the United States where humidity is 80% in the summer months it may feel a little warm by having an extra layer of clothing, but during the fall and spring months, are generally more favorable for the wearer that resides in those more humid climates. Now for those who reside in a dry climate during the summer months, there hasn’t generally been any complaints about Rynoskin Total providing any extra heat for the wearer.” – Rynoskin
Is Rynoskin Chemical Free?
One of my favorite aspects of Rynoskin is that it is chemical-free. Since I am outside all the time and always need protection during insect season I decided for health reasons that being as chemical-free as possible was the route I wanted to take. Since I don’t currently use the gloves, hood, or socks that Rynoskin sells, I do have some areas where insects can bite. When insect densities get bad I’ll throw on a head net and I’ll spray my hands with bug spray. Even though I do use bug spray on occasion Rynoskin Total reduces the overall amount of chemicals that I need to use which I appreciate.
Insect conditions in Maine can be very dense, especially around wetlands, which is where I spend most of my time at work. Rynoskin has done such a great job that I only need insect repellent for non-Rynoskin-covered areas in the harshest of mosquito conditions. As I mentioned, I am outside all of the time for work and for fun. For this reason, my skin would be in constant contact with repellent all day, every day. I don’t know about you but I’d rather not have chemicals on my skin all day long if I don’t have to, even if it’s low exposure.
Frequency
If you’re someone who does not go outside much and you’re worried about getting bitten it’s probably not going to affect you all that much to use chemicals now and again. But like I mentioned above, I’ve found that ticks still find ways to get under clothing, and mosquitos still bite. If your mind is made up on using chemicals I highly recommend doubling up with Rynoskin for extra protection. Rynoskin will prevent ticks from getting underneath regular clothing. It will act as an extra layer of defense against biting insects, and will also help put distance between your skin and the chemicals.
Insecticides & Repellents
Before I started using Rynoskin I used chemicals such as DEET and Permethrin to help prevent ticks and insects from biting me. Even after applying the chemicals ticks would still find a way to get under my clothing and mosquitos would bite me. Some chemicals work better than others, but in general, the ones that work better are more potent.
Consistent contact with chemicals over time has been shown to irritate the skin, and absorption of the chemical into the bloodstream. It’s more than likely this will cause harm to your body over time. There are many insecticides, repellents, and insect repellent/insecticide clothing on the market today. In my opinion, these repellents are not the best option for health reasons. I don’t claim to be an expert in toxicology, but if repellents are strong enough to kill and repel bugs, especially those with exoskeletons, they are probably not the safest items to use on our bodies consistently. For more information on the side effects of these chemicals/insecticides check out this article by Indiana University Bloomington:Insect Precautions – Permethrin, Deet, and Picaridin.
I don’t claim to be an expert in toxicology, but if repellents are strong enough to kill and repel bugs, especially those with exoskeletons, they are probably not the safest items to use on our body on a consistent basis. Photo From: https://draxe.com/health/news/deet/
Rynoskin Review – Rynoskin vs Rynoskin Total
Original Rynoskin
I received my first pair of the original Rynoskin as a gift about seven years ago (2012) and consisted of the Rynoskin pants and shirt. The original version of Rynoskin claimed it would protect against ticks, chiggers, biting flies, and other biting insects. Prior to 2017, however, it did not protect against mosquitoes. I knew this as the company made it clear. However, this was not a problem for me because I was only worried about ticks at the time.
Rynoskin Total
The newest version of Rynoskin (Rynoskin Total) was brought into the market in 2017. The claim to fame of Rynoskin Total is that it protects you from a wider range of insects. On the company’s website, they state Rynoskin Total prevents ticks, mosquitoes, chiggers, biting flies, no-see-ums, and other biting insects from being able to bite through or penetrate the fabric.
The biggest difference that I noticed between the original Rynoskin and the newer Rynoskin Total shirt and pants was their ability to protect against mosquito bites. From wearing the clothing there is a clear difference between the two. Rynoskin Total was so much more effective. Mosquitos were still able to penetrate Rynoskin Total but you can tell mosquitos struggle with finding a spot to get through the fabric. I noticed they’d oftentimes get frustrated because they were not able to penetrate the clothing and would try to find a new spot. Sometimes they were able to get through if you gave them enough time.
Rynoskin Review: Field-Tested Results
Lucky for me 2017 was the year I was hired as an environmental consultant. Not wanting to use my hunting pair of Rynoskin for work, I found out very quickly that I would need to buy a second pair. A big part of my job is providing wetland services. Wetlands are where many insects breed so I often find myself in the middle of prime biting insect and tick habitat. After finding ticks crawling on me throughout the day I knew I would need to get a new pair for work, and pronto!
At this point, I was unaware that Rynoskin Total had been brought into the market. When I saw Rynoskin Total protected against both ticks and mosquitos, as well as other biting insects it had me very excited. In addition to improved clothing, many more color and size choices were available as well. I purchased Rynoskin Total’s shirt and pants right away.
I’ve tested the clothing against ticks, mosquitoes, horseflies, and black flies so that is what this review will cover. I discuss the results below:
Rynoskin vs Ticks & Lymes Disease
Maine is close to ground-zero for Lyme disease. Ticks in Maine come out of winter hibernation in April, peaking in May, June, and July. Ticks remain at lower numbers throughout the Fall. After being treated for Lyme disease myself I did not want to take any chances of getting bit by a tick again. That being said, refraining from the outdoors was a non-option for me. Rynoskin clothing seemed like a more than reasonable alternative so I decided to give it a try and I’m glad I did.
I am blown away by how effective Rynoskin and Rynoskin Total are against ticks. During the summer, it is common for me to pick off between 30-50 ticks per day! From the thousands, and quite possibly tens of thousands of ticks I’ve had on me I’ve never had a tick fully burrow into my skin. In a year I might get one or two ticks that bite quickly and only penetrate partially through the skin layers, not making it to the bloodstream. These bites are not deep enough to cause an infection like Lyme disease because they haven’t made it to the bloodstream.
Tick Bite Prevention Method
Although I give almost all of the credit to Rynoskin for this feat, I do have a tick-prevention regimen that I follow. My regimen greatly reduces the odds of being bitten. I have fine-tuned this regimen over the years and it works very well for me. My regimen protocol is simple and is outlined in the next section below called: Rynoskin Regimen – Get the Most Out of your Rynoskin Clothing. My regimen combined with Rynoskin clothing is a brilliant combination for preventing tick bites.
Rynoskin vs Mosquitos
As mentioned earlier there was a major difference between Rynoskin Total and the original Rynoskin when it came to mosquitoes. I have tested both against mosquitoes to see what the results would be. Rynoskin recommends it be worn as a base layer but I wanted to see the results when the bare fabric was exposed to mosquitoes.
Out of curiosity, I let mosquitos land and stay on the Rynoskin Total on my forearm so I could observe their behavior. What I found was that mosquitoes had to poke and prod with their mouths, otherwise known as their proboscis, then reposition and move to various areas of my forearm to find just the right alignment in the fabric where it would get through. Many times they would become frustrated that they were not able to find a spot so they would fly away or land on a different spot on my forearm. Eventually, with enough time, mosquitoes were able to penetrate the Rynoskin Total clothing, but they had to take their time. The fabric of the original Rynoskin clothing was almost immediately penetrated by mosquitoes. The improvement from the original Rynoskin to Rynoskin Total is a big win in my book.
Experimenting with Clothes
As stated above Rynoskin is made to be a base-layer, so the fact Rynoskin Total did this well without any additional clothing added was very impressive. I started adding more clothing slowly. Next, I wore an Under Armour T-shirt over my Rynoskin Total, and I saw the same results; mosquitoes were able to penetrate through my Under Armour and Rynoskin Total if given enough time. However, I was sitting very still without moving. Walking through the woods I noticed mosquitos had a lot of trouble biting me with the movement of the Under Armour. It seemed like they didn’t want to risk hurting their proboscis with the increased movement between the two fabrics.
Button-up Cotton Flannel For Added Bite Prevention
I was bitten more often when wearing polyester (like Under Armour) than when wearing cotton. The thin and breathable properties of polyester seem to be penetrated more easily than other materials. From what I have tried, cotton seems to be the best. Currently, I use a lightweight, long-sleeved, button-up cotton flannel. This works very well for me. I think the fibers of cotton are more rigid and dense, making it harder for mosquitos to penetrate.
In my experience, if you are moving around or able to brush away mosquitos periodically then mosquitoes don’t have a chance to bite you. Just a lightweight shirt, preferably cotton, is all it takes to keep from getting bitten in low to moderate mosquito densities. If you have to be very still – like in hunting situations, or if you’re in high mosquito densities you will get bitten if you don’t wear some additional clothing. I recommend a cotton long-sleeved shirt. The hood and gloves would probably be a good addition in these scenarios as well.
Although mosquitoes can penetrate Rynoskin Total, it’s much more difficult for the mosquitoes to do so. Because of the increased difficulty of mosquito’s ability to penetrate clothing, it greatly reduces the number of bites you endure.
Rynoskin vs Horse Flies
I have never been bitten by a horsefly through Rynoskin Total. That being said, horseflies are much easier to detect than mosquitos and are more easily brushed away. I did not let a horsefly land on my Rynoskin clothing and waited to see what would happen as I did with mosquitos. However, in the last seven years, I can’t recall a time when I was bitten through any version of Rynoskin by horseflies.
Rynoskin vs Black Flies
Both Rynoskin and Rynoskin Total have worked well for me against black flies. For me, Rynoskin shined during fishing trips to remote locations in Maine. Black flies at dusk while fly fishing can be brutal. Before Rynoskin, it was hardly worth trying to tie on a new fly. Once both hands were occupied you were defenseless against the swarms. In the time it took to tie on a fly, you’d be just about eaten alive.
Both versions of Rynoskin kept black flies from touching my legs and body which was fantastic. However, black flies seem to be able to find any little spec of open skin. For this reason, black flies were able to bite me everywhere the Rynoskin was not present such as my head, hands, wrists, neck…etc. That being said, no black flies were able to get underneath my Rynoskin and no black flies were able to bite through the fabric so it performed as advertised.
Furthermore, Rynoskin offers additional articles of clothing. The additional articles of clothing consist of: a hood, gloves, and socks. These additional articles of clothing would have been a great addition to preventing black fly bites especially. I have not personally tested these smaller articles of clothing out, but because they are made from the same material and double-layered. I imagine they’d work the same if not better than the shirt and pants. They have been designed so that you can tuck the smaller articles of clothing into the shirt and pants to create a seal so no skin is open to insects.
Rynoskin Regimen – Getting The Most Out Of Your Rynoskin Clothing
Below I share my tick prevention methods that I apply every day to make sure I don’t get bitten by ticks while wearing Rynoskin:
Wear a Ball Cap to Protect your Head.
Wearing a ball cap to prevent ticks from getting into your hair is important. Usually, ticks will get onto your body at waist height or lower because that is their preferred size of vegetation to wait for hosts. That being said, if you’re ducking under branches you’re more apt to get one higher than waist height once in a while. It also helps prevent ticks from crawling up your neck and getting deep into your hair. Wearing a ball cap is a worthwhile prevention method.
Wear Rynoskin Underneath Clothing
By wearing layers, it makes it harder for ticks to come into contact with your skin as it is an extra line of defense. More importantly, Rynoskin is not all that durable and is designed to be worn under clothing. This is how it is meant to be worn as recommended by the company. Wearing layers on top of Rynoskin will keep your Rynoskin intact for many years. I still use my older original Rynoskin when sometimes from 7 years ago!
Tuck Rynoskin Into Itself
Make sure to tuck Rynoskin in as shown in this picture. This allows for the greatest protection. Photo From:(https://www.rynoskin.com/)
To prevent ticks from biting around the ankles I tuck my socks over my Rynoskin pantleg cuffs. I also pull my pant legs over my 18″ Lacrosse Grange Rubber boots. This will prevent ticks and debris from falling into your boots that could potentially come crawling out at a later time. I also tuck my Rynoskin shirt into my Rynoskin pants.
Regularly Checking Clothing Throughout the Day
I get just about all the ticks off of me in a day but regularly check the front and back of my pants from the waist down. I do this every time I walk through scrubby brush or grass. Because ticks utilize a lie-and-wait tactic to come into contact with a host they will almost always attach to the front part of your body. I’m 6’3” and the vast majority of ticks I get are also below my waist. But routinely looking down on your pants and shirt you can eliminate 90-95% of the threats, which will greatly reduce the number of ticks that make it to your neck.
The other 5-10% will migrate upwards on the body until they reach the skin. Since Rynoskin will prevent them from getting on your skin until they reach your neck (assuming you’re not wearing the hood) you will eventually get the remaining ticks on your neck if not picked off. DON’T PANIC. I find my neck to be more sensitive because of the fine hairs located on the neck allowing me to easily notice crawling ticks and pick them off before biting. Although this sounds a little unsettling for some, this has worked better for me than any other method so far.
Prevent Hitchhikers – Bring a Change Of Clothes And Storage For ‘Tick Clothes’
Since Rynoskin does not use chemicals it does not keep ticks and insects from being on the clothing, it only prevents them from getting onto your skin. For this reason, it is common to have ticks alive and, on the clothing, when you’re done with your outdoor adventures. You might have looked yourself over good, but trust me it’s inevitable some will still be on you, they’re difficult to see.
Rynoskin will protect you against ticks but watch where you drag them. I’ve had a few close calls where I’ve dragged ticks into my car on my way home from work without knowing it. Later, when my Rynoskin was off, on my way to the grocery store I had ticks crawling on me. Friends and family have also got them from being in my car.
After learning from these incidents, I decided it was time to make a change. Now when I am finished in the outdoors I remove all clothing I had on outside, including my Rynoskin. I use fabric grocery bags, they work well if I roll up the tops so the ticks don’t get out of the bag. The bags in the link above are white, so it will be easiest to see ticks. Ideally, you could invest in a sealable bag. I like fabric bags because I toss them in the washer/dryer along with the clothes so any ticks that fell in the bag will be killed.
Right: Unfolded Grocery Bag – Left: Folded Grocery Bag to Keep Ticks from Crawling Out
Throw All Clothes In The Washer – Dry On High Heat For At Least 10 Minutes
Before getting into the shower wash or dry your clothes. I like to do this step before getting into the shower because a few times I’ve had ticks get onto me from handling my ‘tick clothes’. The last thing I want is to feel nice and clean and then feel like I have ticks on me again.
Throwing your clothes in the dryer on high for 10 minutes will kill the ticks that are on your clothes. So, if my clothes are clean I will always throw them in the dryer after I come back from the field. If they’re dirty, I will wash and dry my clothes. This helps ensure that when I wear my clothes and Rynoskin the following day there won’t be any surprises.
Take a Shower and Comb your Hair with a Fine-Toothed Comb
The final step is to take a shower. The sooner you can take a shower when you get home, the less likely a straggler will inhabit your house and bite you or someone else. Additionally, when I take a shower I use a fine-toothed comb to comb my hair to ensure no ticks made it into my hair. In my time using Rynoskin, having ticks on you after removing the clothing is a very rare occurrence. I have only had a couple of ticks make it into my hair, and the comb has been effective at removing them.
Hunting With Rynoskin
Turkey Hunting
For me, I find Rynoskin shines during turkey hunting season. Turkey season coincides with peak tick activity (May) here in Maine. During this time of year, I find it doesn’t matter if I’m busting through brush, or just sitting on the ground waiting for a gobbler to come into range, ticks seem to find me in numbers. It is not uncommon for me to get 10-20 ticks in a morning of turkey hunting. Mosquitos also start popping up later in May and Rynoskin Total does a great job of protecting me in turkey hunting scenarios.
Early Season Deer Hunting
The expanded archery season in Maine starts at the beginning of September. During this time ticks are still around but are not nearly the same as they were in May. However, mosquitos are surely still around. Rynoskin helps reduce the number of mosquito bites during this time of year.
Scent-Free
As a diehard whitetail hunter, being as scent-free as possible is very important to me to get the most out of my hunts. Since no chemicals are used to create the product, there is no smell. Also, there’s no need to spray repellents on the clothing because it already prevents insects from biting. Rynoskin clothing is a huge win as far as I am concerned in regards to hunting. You can wash Rynoskin in your favorite scent-killing detergent and they’ll be just as scent-free as the rest of your clothing.
Less Movement
Since the clothing does a great job at preventing insects from biting through the clothing, I am not moving around nearly as much trying to swat away bugs when in the treestand or the blind. Sure, I am still doing a little swatting, but not nearly to the same extent. I can take a little bit more time to brush off bugs, instead of flailing and swatting. Less movement helps reduce the chances of an animal spotting me.
How Does Rynoskin Fit?
Being tall and skinny (6’3’’ 155lbs) I chose the large options and it fits well. The elasticity of the material allows it to stretch and take the shape of the individual wearer. On Rynoskin’s website, they have a sizing chart so that you can see what size would work best for you.
As a skinny person, I have noticed that the neck of the product does not fit all that tightly around my neck. This was concerning at first because I thought ticks would be able to fall down my neck and into my suit. However, since I’ve been wearing Rynoskin I haven’t had a problem with ticks getting under my suit. For some reason, they just don’t seem to crawl downward once getting to the neck. They crawl upwards from the suit up my neck where I can feel them and pick the ticks off.
Rynoskin Review Considerations
Skinny People
At first, I was skeptical if the Rynoskin was going to work for ticks. Being skinny I thought the elastic cuffs of the pant legs, sleeves, and neck may be too loose to prevent ticks from working their way underneath. But after putting my first pair of Rynoskin to the test I found this not to be an issue. The elastic cuffs worked well, not once did I have a tick get underneath my Rynoskin while hunting. You can see an example of this in the video provided in this review.
Durability
Rynoskin is plenty durable as a base-layer and will last a long time if worn underneath clothing. However, it is not durable enough to be worn as an outer layer. Thorns will chew through the fabric and sticks will tear the clothing over time. For this reason, it is best to wear the clothing as a base-layer, as designed, for maximum longevity.
Threading
On both the original Rynoskin and Rynoskin Total thread starts to come loose due to the type of material it is made out of. Thread has a hard time staying in the fabric, I’m not if this is because it is very elastic. The company realized this was a problem with the original Rynoskin and made upgrades to the new Rynoskin Total to prevent this from happening. From what I have found Rynoskin Total is much better at keeping the thread from coming out, nonetheless, over time it still does come out. That being said, for me the thread only comes out around the cuffs, but the cuffs act as a scrunchy whether the threading is in them or not. For this reason, there was little to no negative effect on the performance of the clothing because of some thread loss.
Thread does fall out over time, but it does not affect the effectiveness of the clothing.
Rynoskin vs Wet Feet
Be careful if your feet or legs are wet like when getting out of the shower. It is easy to pull too hard on the material and rip the cuff. This is not a fault of the company but a lack of taking care on my part. However, it shouldn’t be a deciding factor in your purchase but rather something to be aware of so you can get the most out of the clothing.
When you have wet feet be careful when putting your Rynoskin pantlegs on, it can over-stretch and rip the cuffs.
Rynoskin Review Conclusions
Rynoskin has proven to be a game-changer for anyone seeking effective, chemical-free protection against biting insects. Over the past decade, my extensive use of both the original Rynoskin and Rynoskin Total in Maine’s harsh insect conditions has demonstrated their exceptional performance. While the original Rynoskin offered solid protection against ticks and other biting insects, the newer Rynoskin Total goes a step further by providing significant defense against mosquitoes as well.
Although not impervious to all bites, Rynoskin Total greatly reduces the risk and frequency, making it an invaluable tool for outdoor enthusiasts, hunters, environmental consultants, and anyone frequently exposed to insect-dense environments. Its breathability, lightweight design, and lack of chemical treatment make it a healthier alternative to traditional insect repellents, especially when combined with effective layering and tick-prevention strategies.
Despite minor durability concerns, particularly if worn as an outer layer, the clothing’s overall effectiveness far outweighs these drawbacks. Whether you’re hiking, working, or hunting, Rynoskin Total is a highly recommended investment for staying protected and comfortable in the great outdoors.
The best anchor point for drawing a bow will vary depending on the individual archer. There is no cut-in-stone anchor point formula that will work best for everyone. With that being said, there are some fundamental steps to consider when choosing the best anchor points for you.
Table of Contents
What Are Anchor Points For Drawing A Bow?
Anchor points are designated points of the face to be touched by the draw hand and/or bowstring when at full draw. The placement of these points on the face should be identical each time the bow is drawn. Not all archers will use the same anchor points. Archers determine their own anchor points by comfort and repeatability. Anchor points that are comfortable and repeatable will ensure the best consistency. Comfortable, repeatable, and consistent anchor points will result in the best anchor point for drawing a bow. Archers commonly designate points on their mouth, chin, jaw, neck, nose, or ear.
Although the best anchor point for drawing a bow will be different for everyone, these are some common examples.
Why Do You Need Anchor Points?
Anchor points are critical for maintaining a high degree of consistency between shots. The increased consistency will improve accuracy, which will allow you to group arrows much closer together. Your draw hand would be at different positions on your face after each shot without designated anchor points. This inconsistency will show up in your arrow groupings downrange leaving you confused and frustrated.
Slight changes in your anchors between shots will change where the arrow impacts the intended target. This change is compounded at further distances. The closer you can get to identically re-positioning your anchors will result in better results downrange.
Try to think about shooting a bow like trying to be as close to a robot as possible. A robot that is programmed to shoot a bow would perform the same exact motions the same exact way every single time. Trying to obtain robot-like performance will ensure the best consistency, thus the best accuracy. A point that will allow you to obtain robot-like performance will be the best anchor point for drawing a bow.
How To Pick Your Anchor Points
Some common anchor points are described below:
1. Position Release in Hand Consistently
You should first consider the position of your release in your draw hand. Make sure you’re placing your release in the same spot of your draw hand (or wrist depending on what type of release you’re using) every time you shoot. Doing this will help you achieve the best anchor point for drawing a bow with your release hand. Draw length and form will vary between shots if your release isn’t positioned identically in your hand every time. This will introduce inconsistency into your shots.
For non-index style releases, it may be helpful to mark your release. By marking your release you’re able to refer back to the same spot on the release every time you shoot. For index-style releases with a wrist strap, make sure the trigger sits consistently and at a comfortable distance on your index finger. I make sure the trigger of my index-finger style release sits just behind my first knuckle on my index-finger when at full draw. I’ve even drilled an extra hole in my wrist strap so that it fits very snug to eliminate sliding.
Comfortable and repeatable release placement in the draw hand will ensure more consistency. By consistently bringing the bow to the same spot of your face every time you will see better accuracy.
2. Draw-hand to Face Anchor
The next anchor point to consider is what points of the draw-hand to place on points on your face. Picking points on your draw hand and associating those points to a specific point on your face will help improve consistency. These points will be matched to each other identically every time you shoot. The best anchor point for drawing a bow when considering a draw-hand to face anchor will be comfortable and repeatable points. Additionally, if bone to bone contact can be implemented it will further increase consistency. Just make sure you can maintain comfortable and repeatable anchors.
Where you are able to anchor points of your hand to points on your face will largely be determined by; the type of release you’re using and the shape of your face. For example, I use an index-trigger style release. Because of this I find it most comfortable to anchor my draw hand pointer finger knuckle on my ear lobe. If you use a handheld release you may find it easier to place a knuckle/s on a specific part of the jaw.
3. Bowstring to Face Anchors
Additionally, the bowstring can be used as an anchor point. This can be accomplished by placing the string on a point or points of the face. There are two places I anchor the bowstring on my face. The first bowstring anchor point I use is the tip of my nose. My second bowstring anchor point is the corner of my mouth. Having these two points makes sure the bow is aligned to my face the same every time I draw my bow. The best anchor point for drawing a bow when considering bowstring to face anchors are those that are comfortable, repeatable, and don’t cause a lot of facial pressure.
4. Peep Sight Alignment
After choosing your newly designated anchor points, adjust your peep sight up or down until you can clearly and comfortably see through it. You’ll know when it’s adjusted properly when your sight housing sits just inside of the peep sight.
After you have set anchor points and have adjusted your peep sight, draw your bow and bring it to your face with your eyes closed. When you feel like you have properly anchored the bow open your eyes. You should be able to see perfectly through your peep sight. Although not a physical anchor point, having proper peep alignment acts as an anchor point validator. Having a properly aligned peep sight will ensure you are coming to the same spot of your face every time with you anchor points. If you sometimes cannot see perfectly through your peep sight, you’ll know that you are not anchoring consistently.
Anchor Point Best Practices
When choosing the best anchor points for drawing a bow there are a few things to consider:
1. Comfort & Repeatability
Anchor points are designated by the individual archer and are determined by comfort and repeatability. It is crucial to comfortably come back to the same exact anchor points every time you shoot. Comfortable anchor points will allow you to more precisely refer back to the same points. If you are not coming back to the same points every time then you won’t be consistent and accuracy will suffer as a result.
2. Light Facial Pressure
When choosing the best anchor point for drawing a bow it’s best practice to not have too much facial pressure. Too much facial pressure will cause face distortion making it difficult to get back to the same point on your face every time. Additionally, too much facial pressure may cause the string to contact your face or facial hair. The difference in friction between shots may cause the arrow to veer off inconsistently.
Also, squishing your face too much when anchoring will cause the elasticity of the skin to push the string outward upon release. This causes the tail end of the arrow to veer away from your face affecting accuracy. The goal should be to rest the bowstring on your face lightly so there is no influence on the bowstring.
3. Bone to Bone Contact
When possible it is best to use a bone on your draw hand and match it to a point on your face which is also bone. Bone to bone contact will help you become more effective at repeating the motions identically each time you shoot. This will result in better consistency because bone won’t move like facial tissue. If your anchor points are soft facial tissue than there is slightly more opportunity for error. If points are comfortable and repeatable the best anchor point for drawing a bow will include bone to bone contact.
4. In the Saddle (aka “cradle”)
You also don’t want your arrow to rest too high or low on your face when at full draw. Having an arrow too high or low on your face will result in unwanted facial pressure from the bowstring or arrow fletching. The bowstring will be pushed outwards during the release of the arrow if facial pressure is occurring. The outward push of the bowstring will cause the arrow to kick sideways.
On your face, there is a ‘sweet-spot’ located between your cheek and lower jaw called the saddle. This is where you want the arrow to sit. The saddle allows the arrow to sit as far as possible from your face, resulting in less facial pressure and facial hair contact. The best anchor point for drawing a bow will utilize the saddle. Below is a video describing where the saddle (aka cradle) occurs:
5. Kisser Button
A kisser button is a small object or knot of thread that is placed on the bowstring. It is designed to be felt on an archer’s lips at full draw which acts as an anchor point. Not everyone will need a kisser button. However, if you do not have a way to anchor with your draw hand, due to the type of release, or the shape of your face, you should then use a kisser button. Not everyone has the same shaped face, so not everyone will find a good anchor against the jaw.
I am able to anchor my draw hand on my face so I don’t use a kisser button. However, I still place the bowstring in the corner of my mouth just to have some additional control.
How Many Anchor Points Should You Have?
You would think that the more anchor points you have the better your consistency would be right? Not so fast. This is true in concept, however, there is a point of diminishing return. Too many anchor points will have you thinking too much about anchor points and not enough time focusing on the shot. For this reason, having 3-4 anchor points will be all that is necessary.
Personally, I use three anchor points (my specific examples stated above) as well as peep sight alignment to ensure that my consistency is top-notch. Having three anchor points allows me to create an invisible triangle between my anchor points.
Using three anchor points will allow you to create an invisible triangle between your anchor points.
I found having three anchor points on my face and maintaining this triangle helps me to ensure my anchor points are in the right position in relation to one another. The third anchor point helps to magnify any mispositioned anchor points. For example, I will notice if one anchor point is out of place because my other anchors will be slightly out of place as well.
Anchor Points And Steep Angled Shots
I shot over the back of a few deer when I first started whitetail hunting with a bow from treestands. I couldn’t figure out why. At this time I was using two anchor points with proper peep sight alignment. After some archery lessons, I finally figured out why steep elevations were giving me trouble.
I learned that my anchor points weren’t necessarily changing, but they were rotating in their spots. This rotation of my anchor points, unknowingly to me at the time, changed the way the bow rested on my face. Because of this, it was difficult to properly see down my peep sight. I had to adjust my head to see down the sights better. This created a lot of inconsistency between level shots and angled shots.
Maintaining the Triangle
I realized when using two anchor points I was dropping my bow arm and slightly altering my head to re-align with my peep sight. Because I only had two anchor points I did not notice the slight rotation in my anchor points when shooting angled shots.
Establishing a third anchor point allowed me to maintain the same triangle on my face, thus eliminating anchor rotation. Therefore I was able to correct my peep sight alignment at steep angles. Maintaining the triangle on my face also forced me to rotate at the hip. Below is a video describing the importance of rotating at the hip during angled shots.
Maintain Spine Angle
Spine angle is the angle of the spine in relation to your bow arm when shooting. For example, your arm will be roughly 90º to your spine if you are shooting at a target on flat ground . This creates a T- Shape. When you’re up 20-25ft in a treestand and an animal is 10 yards away, you need to maintain this same T- shape.
Shooters often lower their bow arm and arch their back when shooting at downward angles . This will rotate anchor points in their positions, greatly changing the angle between the bow arm and the spine. Your peep sight picture will change as well, further negatively influencing accuracy between level and angled shots.
It is important to maintain spine angle by rotating at the hips only. This will maintain the same T- shape or spine angle that is achieved when standing on flat ground. Maintaining this shape will prevent your anchor points and peep sight from changing.
So What Is The Best Anchor Point For Drawing A Bow?
By now you should have a good understanding of anchor points and that the best anchor point for drawing a bow will vary depending on the individual archer. I used personal examples for learning purposes. Every archer has a unique facial shape as well as prefers a certain release. These all play a role in what anchor points are best for you. For these reasons choosing the best anchor points for you entails some adjusting and experimenting.
You may have also noticed the repeated use of the terms “consistency” and “accuracy”. This is because these two words are the goal of anchor points. You have chosen the best anchor points for drawing a bow if you can be consistent with them. The more consistent you become the higher accuracy you will achieve.
You can increase a small property’s ability to hold deer by improving habitat that will make deer want to remain on your property for longer periods. If you give them everything they could want, they will have less of a reason to leave. Below I explain how to improve your habitat to hold deer on your small property.
Table of Contents
Small Property vs Large Property
My degree in wildlife ecology, combined with over 20 years of hunting deer, and my current job as an environmental consultant has given me a wealth of information regarding deer behavior and deer habitat. This experience has had me on hundreds if not thousands of properties. Properties ranged from the northern big woods of Maine and New Hampshire to small properties of the more developed southern Maine. Through these experiences, I’ve seen all kinds of properties from all sizes, some that hold deer and some that don’t. By seeing the differences in these properties I’ve been able to distill what works for holding deer on small property.
What I have come to realize is that a property’s ability to hold deer has less to do with the size of a property and more to do with the habitat a property offers. Of course, all things being equal a larger property has more potential to hold deer but a small property with excellent habitat will outperform a large property with poor habitat every time. I can’t tell you how many times I’ve scouted large properties and found little deer sign, then once I found a small pocket of high-quality habitat within that large property it was like a whitetail zoo.
Does this mean that deer never leave these small pockets of high-quality habitat? No, it doesn’t. It is just about impossible to hold deer on a small property permanently. However, steps can be taken to greatly increase a small property’s ability to hold deer for longer periods. More time spent on your property increases hunting season success.
Hold Deer On Small Property With High-Quality Habitat
Naturally, deer will gravitate to their preferred habitat. By creating this habitat on your small property it becomes much more attractive. This will lead deer to spend a disproportionate amount of time on your property because they have less of a reason to leave.
The type of habitat to be created will depend on the individual property. Creating a high-quality habitat will give deer a reason to start using your property more frequently. If your property is lacking in some areas then deer will go elsewhere to seek what they need.
It’s helpful to know the plants deer hunters should know to understand what vegetation might be best to implement on your small property.
Basic Habitat Requirements
The basic habitat requirements of a whitetail are food, water, and shelter. Creating high-quality versions of each of these will limit deer movement off your property. There are many ways to create high-quality versions of these. Some of these ways consist of sanctuaries, bedding areas, food plots, clear cuts, hinge cutting, screening cover, and water hole creation. These are just a few of the many great ways to improve basic habitat requirements.
Additionally, deer habitat changes throughout the year. It is important to consider habitat that reflects what time of year you want deer to be using your property. For example, if you only want deer on your property during the hunting season you might not want/need to create deer summering habitat.
Landowner goals and individual property needs will be different for each property. For this reason, every property will require a customized approach when implementing habitat improvements. This will ensure a proper balance that will maximize a small property’s potential to attract and hold deer based on its characteristics.
Switchgrass and winterberry provide good security cover on this property during most of the year.
Assess Neighboring Properties
Poor Habitat On Neighboring Properties
Understanding habitat characteristics on neighboring properties will help you determine your property’s potential to hold deer. If neighboring properties have poor habitat, then there is a good chance your small property could benefit greatly from habitat management.
If neighboring properties don’t have good whitetail habitat then creating high-quality habitat on your small property will be extra appealing for deer. By having the best habitat in your area you are going to attract new deer to your property.
This means deer will spend more time, or even take up residence on your property. Even if your property is small it will hold deer over neighboring properties with poor habitat.
Notice the heavy browsing in this picture. If heavy browsing is occurring on neighboring properties then providing more forage opportunities will hold deer on your small property.
Create Better Habitat Than Neighboring Properties
If neighboring properties do have good whitetail habitat, then creating high-quality habitat on your small property will be even more important. Better whitetail habitat on neighboring properties will give deer little reason to come onto your small property. Creating high-quality habitat on your property will level the playing field. It will also give deer a reason to start using your property more frequently.
If neighboring properties do have good deer habitat this is a good thing. Although deer may not be as permanent on your property as you would like, the herd, in general, will be healthier and it is more likely to produce bigger bucks as a result. But that does not mean you shouldn’t do everything in your power to get those bucks to stay on your property as much as possible.
Understanding what habitat components neighbors do and don’t have, and to what degree, will enable you to make educated choices on what habitat strategies your property needs. This will allow you to effectively compete with neighboring properties.
Pressure On Neighboring Properties
Pressure on neighboring properties is another way to gauge how effective your small property will be at holding deer. Quality deer habitat becomes somewhat irrelevant if deer feel pressured. Deer are adaptive and catch on quickly. If hunting pressure is high on neighboring properties then it likely will not take long for deer to move somewhere they feel safe.
This is good news because pressured deer will relocate to your small property. As long as you have great habitat and take precautions not to alert deer on your own property then it is likely deer will remain on your property. This could easily lead to deer permanently taking up residence. It is crucial to make your property feel like it is as unpressured as possible for the best results. This way you aren’t scaring deer off your small property and back onto the neighbors. Taking care not to spook deer will greatly help to hold deer on a small property.
Low Perceived Hunting Pressure Is Key
Having low pressure on a small property is as equally important as having high-quality habitat. For example, you can have the best habitat in the world but if you’re pressuring deer on your small property then deer will not stay. Vice versa, you could have the lowest pressured property of all time, but if there is no quality habitat then deer have no reason to use your property.
Keep deer from discovering that you’re hunting them. If deer feel pressured they will adapt. If you’re repeatedly getting seen, heard, or winded by deer they are going to move somewhere where they feel safe.
Although low pressure hunting is important no matter what size your property is, it becomes especially crucial when trying to hold deer on small property. On small properties, there is little room for error. Mistakes that are made on small properties have larger consequences.
Give deer the illusion that they are not being hunted. For detailed information on how to achieve low hunting pressure while still hunting often check out Tips 5 through 10 on my post 15 Most Important Deer Hunting Tips of All-Time [2024].
Sanctuaries
Sanctuaries are very important for keeping deer on your property feeling safe. Creating dense cover where deer feel safe will allow them to use this sanctuary as a bedding area. Getting deer to bed on your property has many advantages. Bedding areas are one of the most important components to consider to hold deer on a small property. Deer spend most of daylight in their beds. Having high-quality bedding areas will greatly improve the time deer spend on your small property.
Excellent entrance and exit routes are critical for holding deer on small property,
Holding Deer During The Rut Phases
It is difficult to hold deer on small property once the rut kicks in. Bucks can range for miles from their core areas in search of does. Although it is pretty much inevitable bucks will leave your small property during the rut, some steps can be taken to hold them as long as possible.
How To Hold Deer During The Pre-Rut
Once you’ve created a high-quality habitat that holds does, local bucks will want to be on your property during the pre-rut. This is because now that your small property supports a doe population there is more opportunity for local bucks to breed. With more opportunity to breed locally, they will be less apt to leave in search of does elsewhere. This helps hold pre-rutting bucks longer into the rut before they leave in search of does elsewhere.
Another way to hold bucks on your small property longer is by having a healthy doe-to-buck ratio. Ratios are pretty much impossible to manage on a small property. However, by talking to neighboring landowners you can come up with a plan to have an impact on the herd ratio.
A buck-to-doe ratio of 1:2 or 1:3 will keep bucks more likely to stay around than a tight 1:1 ratio. If this can be accomplished a healthy buck-to-do ratio will keep local bucks chasing local does for a longer time during the pre-rut. Less tight ratios will also reduce the likelihood of dominant bucks driving smaller bucks off your property.
Another way to keep bucks on your property a little longer during the pre-rut is by creating mock scrapes. Scrapes are used mostly during the pre-rut as a communication hub for deer. These hubs are abandoned once the rut kicks in. Placing mock scrapes on your property is a great way to keep bucks curious. This will keep them checking to see if any does have come into heat. Also, if bucks are leaving your property during this time, mock scrapes will give them one more reason to come back onto your property.
How To Hold Deer During The Rut
During the rut, bucks, especially mature bucks don’t completely throw caution into the wind. They still want to feel safe. Creating high-quality habitat that meets all of the requirements stated previously is crucial. This is because cruising bucks will prefer to use your property over others if done correctly.
Another benefit of having high-quality habitat that supports a doe population is that new bucks during the rut will be found cruising your property. If your property has high-quality habitat and healthy doe numbers then bucks will gravitate to your property over other properties. The reason for this is your property now has everything bucks are looking for during this time; does and safety.
Although local bucks have likely left at this time, the good habitat will hold new bucks during the rut. These new bucks will likely stay for a longer time. Quality habitat with a healthy doe population is good enough to keep their interest for a while.
How To Hold Deer During The Post-Rut
The post-rut is when some fawns start coming into heat later in the season. When this happens some breeding occurs. You can hold deer during the post-rut by creating high-quality late-season cover and food on your property. This will attract/keep does on your property, which will likely have fawns. Holding does and fawns on your property later in the season with quality late-season habitat is a great way to hold bucks during the post-rut.
Often with good late-season habitat, local bucks that were using your property as part of their core area during the early season will return towards the end of the rut. Having quality habitat for post-rut will increase the effectiveness of a small property to hold deer at this time.
Often small landowners abandon the idea of managing habitat on their property. This may be because you feel improving their habitat won’t make much of a difference. Or perhaps you think improvements will cost too much time and money, or you don’t know where to start.
Habitat management does not have to be expensive. A chainsaw with a little elbow grease will go a long way to improve the whitetail habitat on your small property.
Questions & Community
If you have more questions you can ask them on Facebook. You may also find answers to your questions on my YouTube Channel.


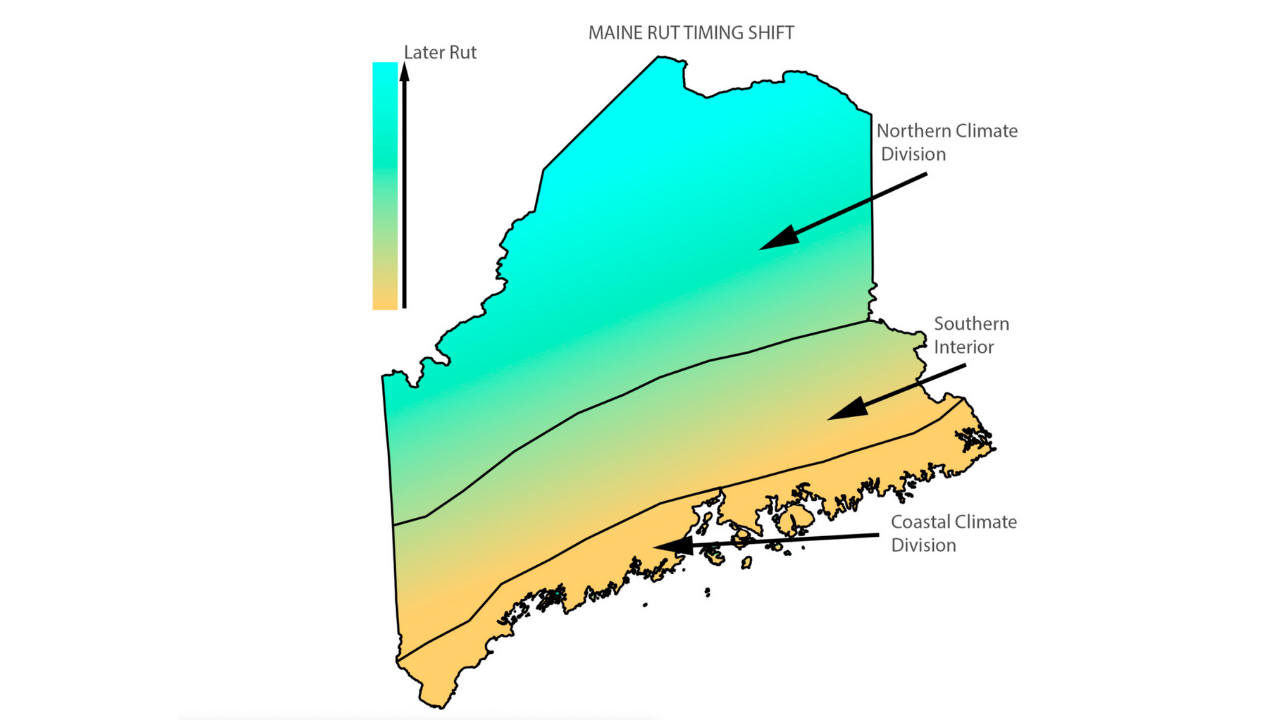
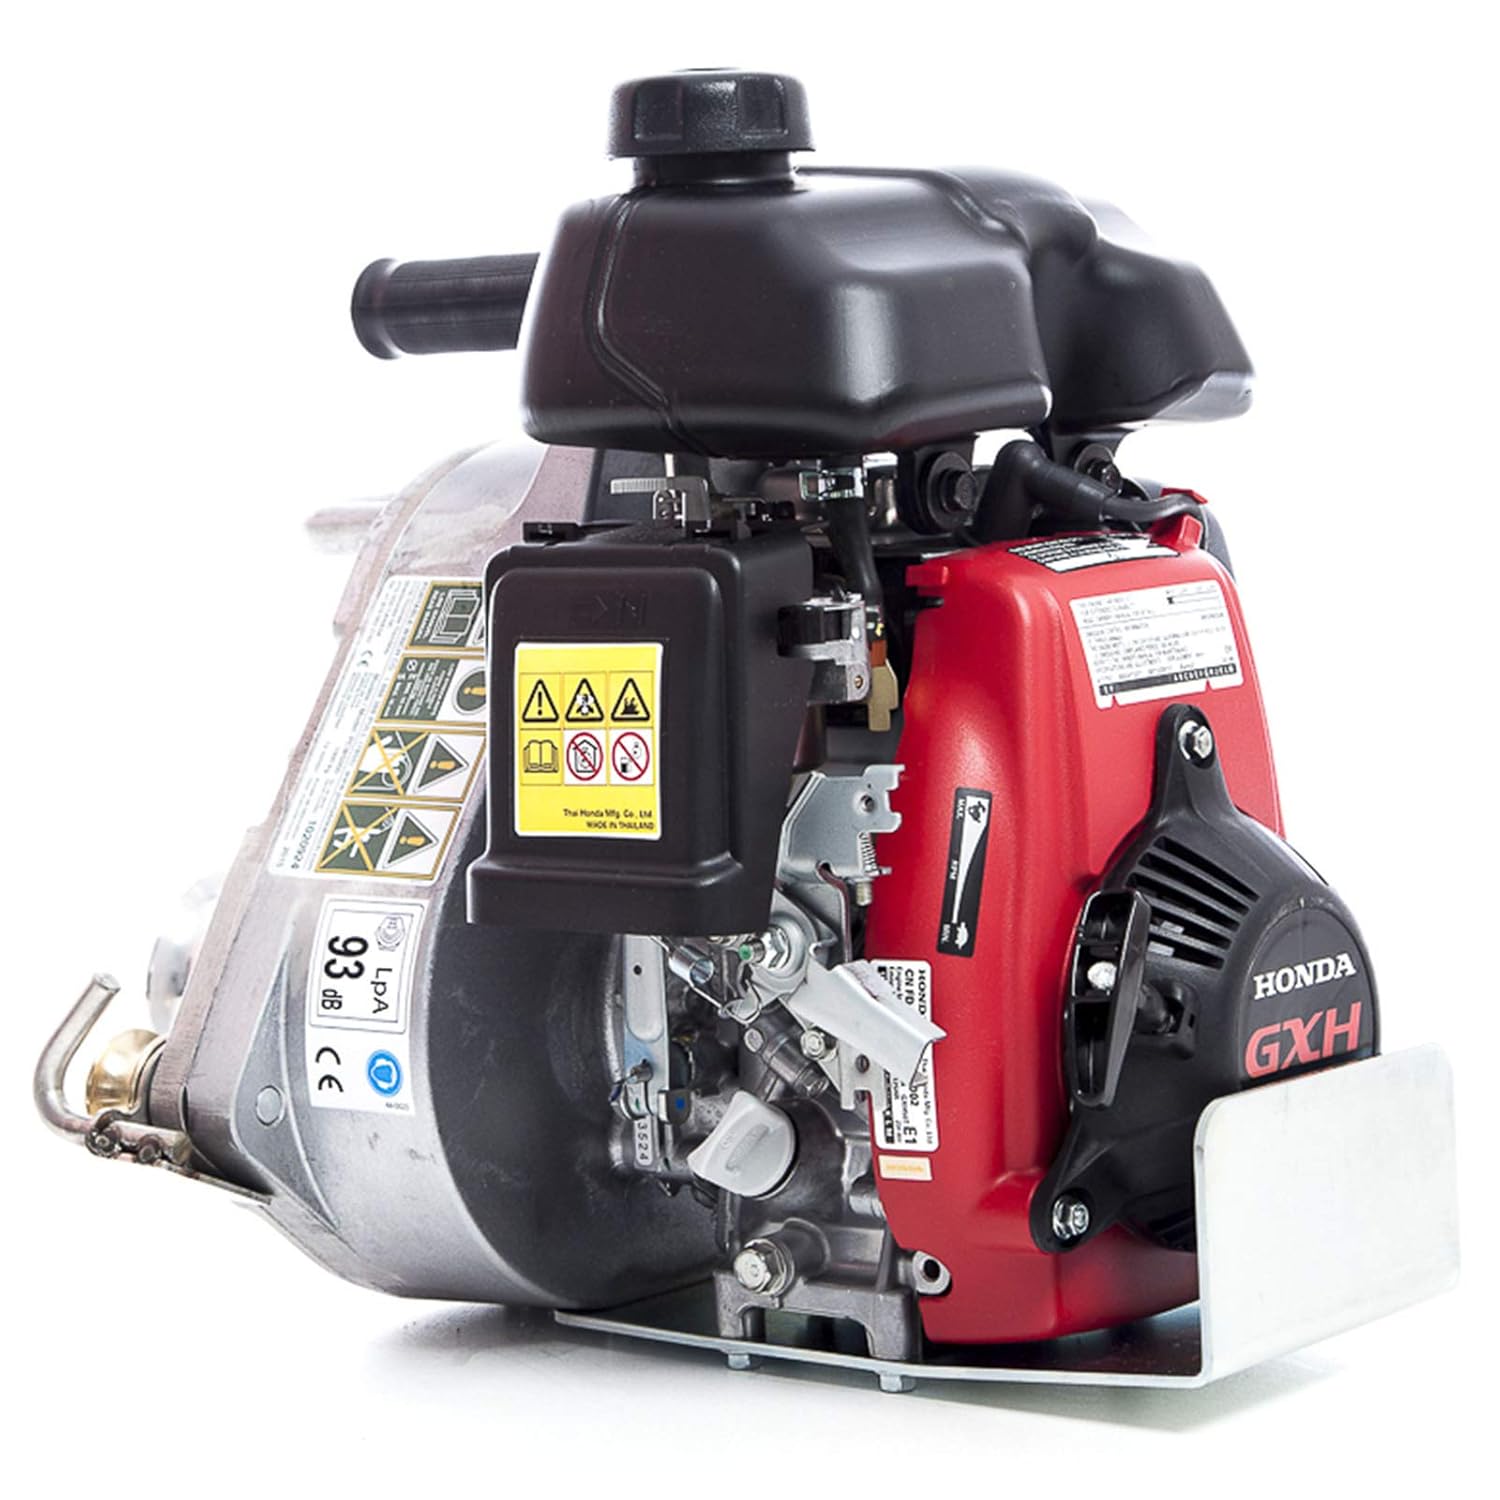
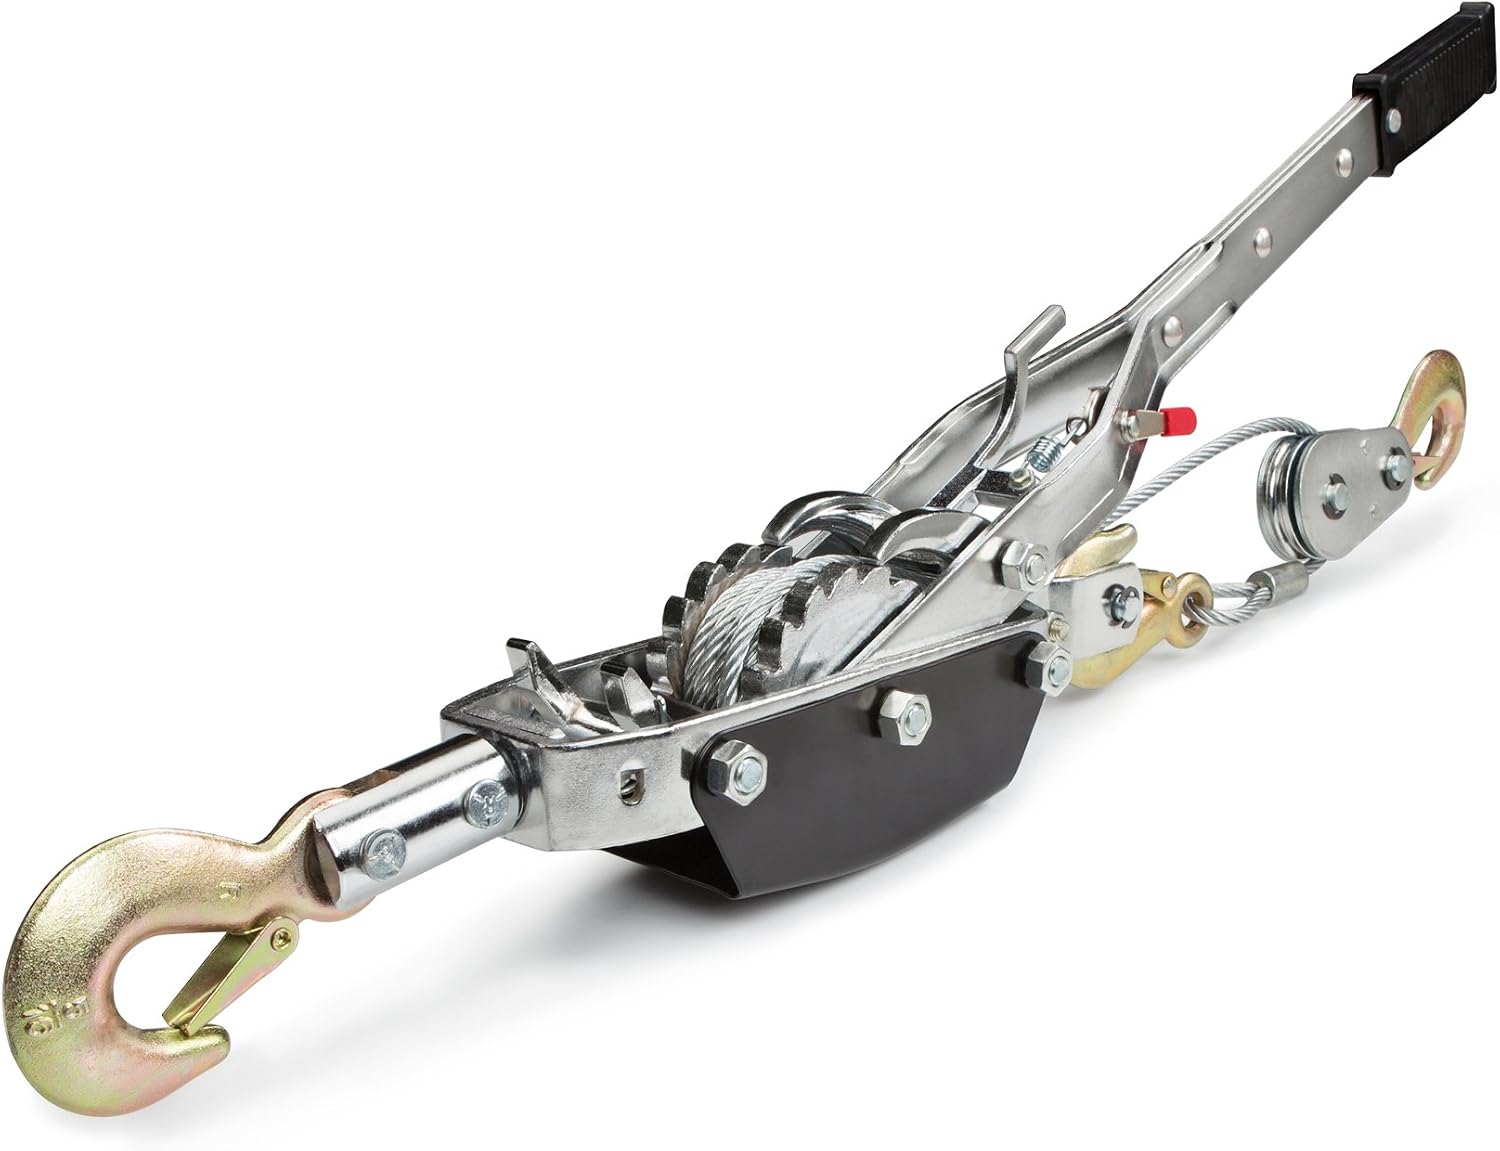
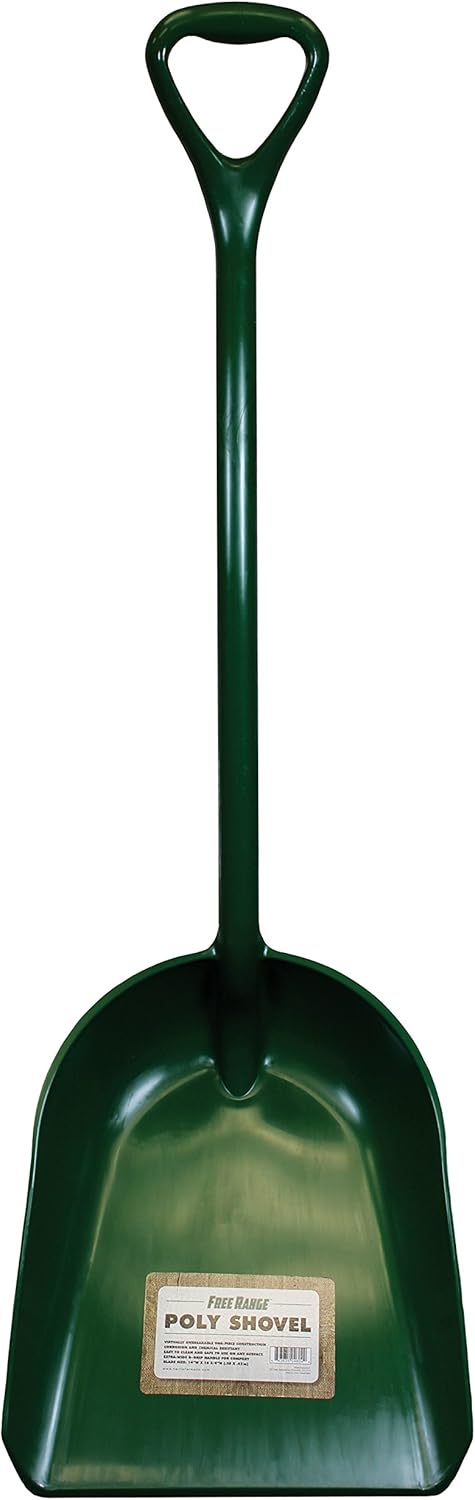
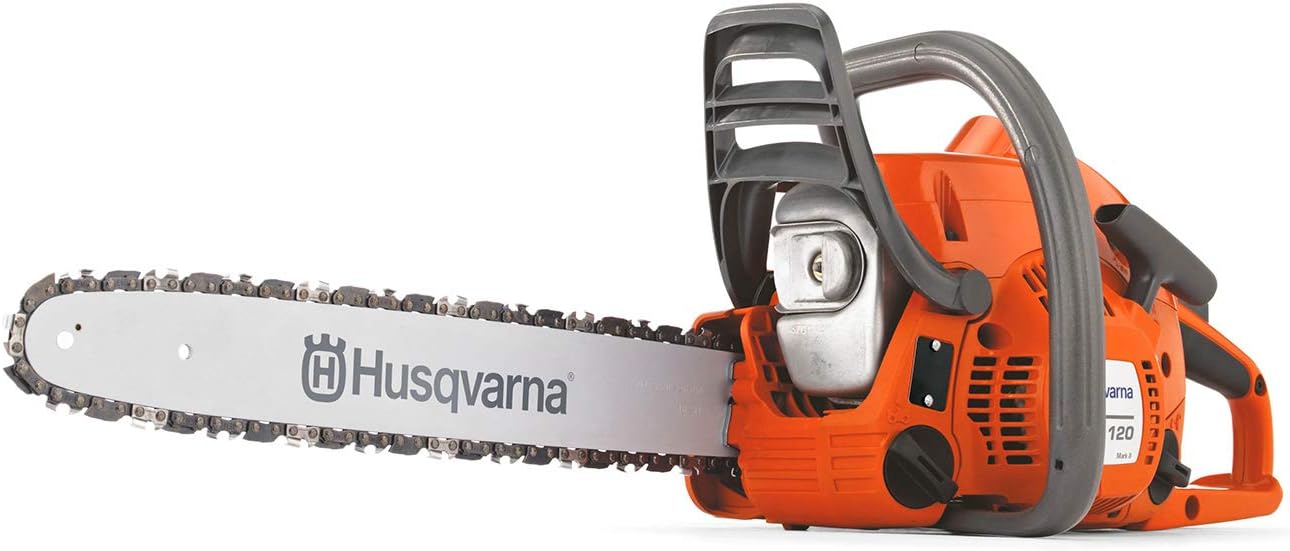

![WILLIAMS WGRS 7400 [Misc.]](https://images-na.ssl-images-amazon.com/images/I/41i0yfmXqZL._AC_.jpg)

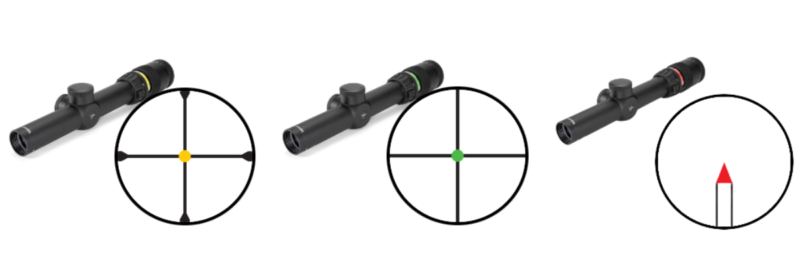
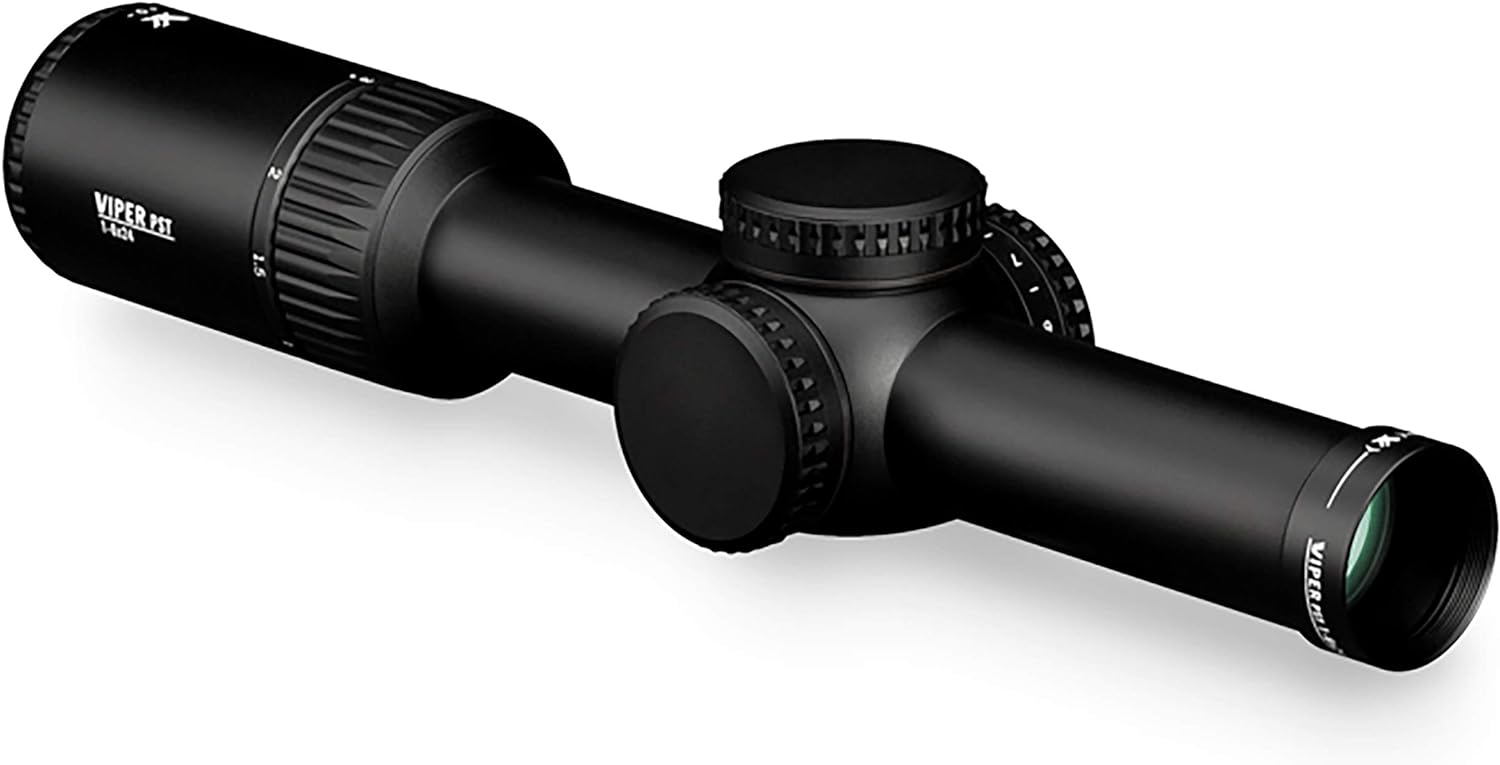
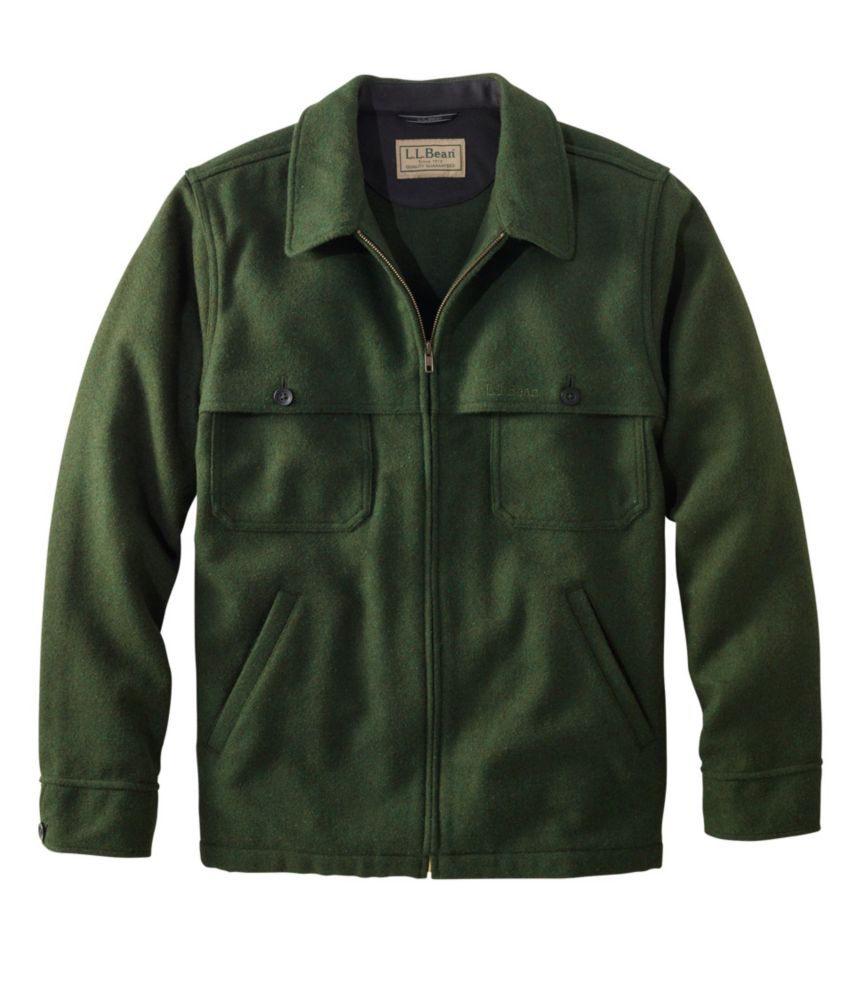
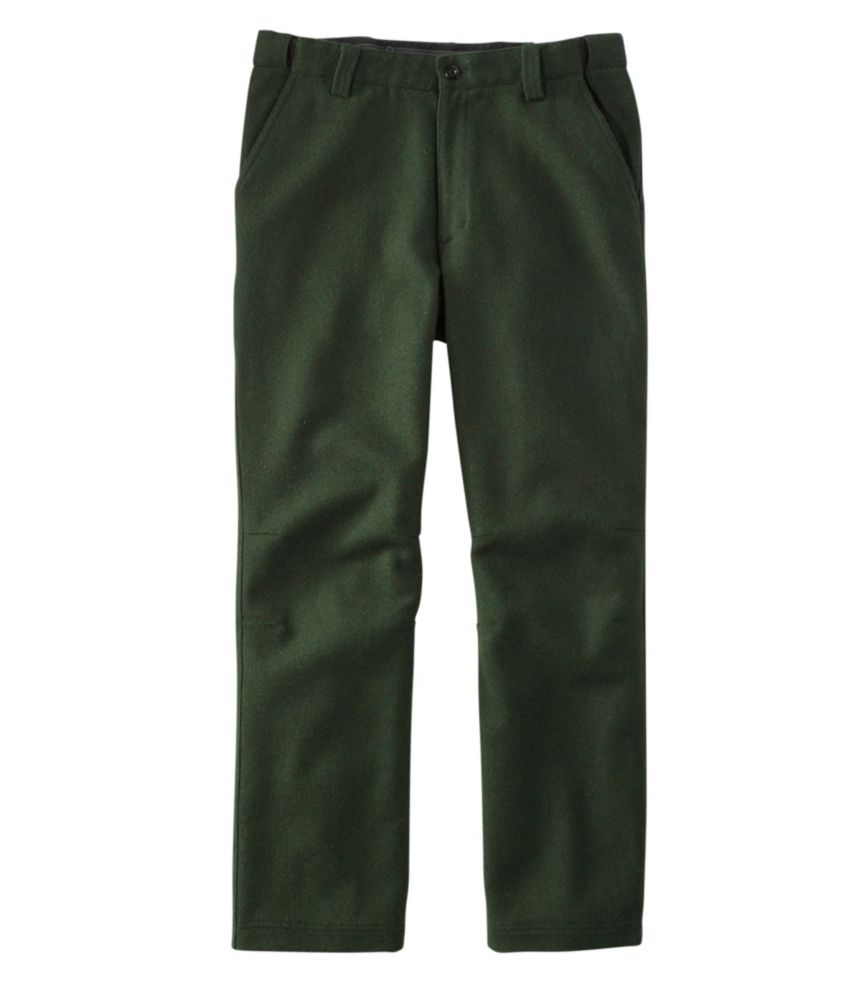
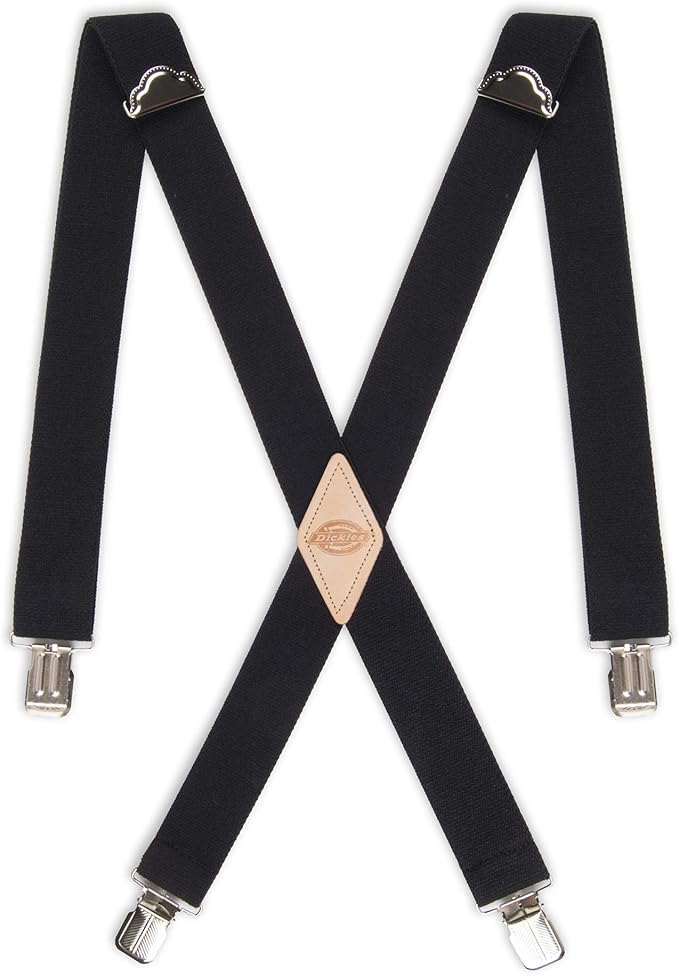
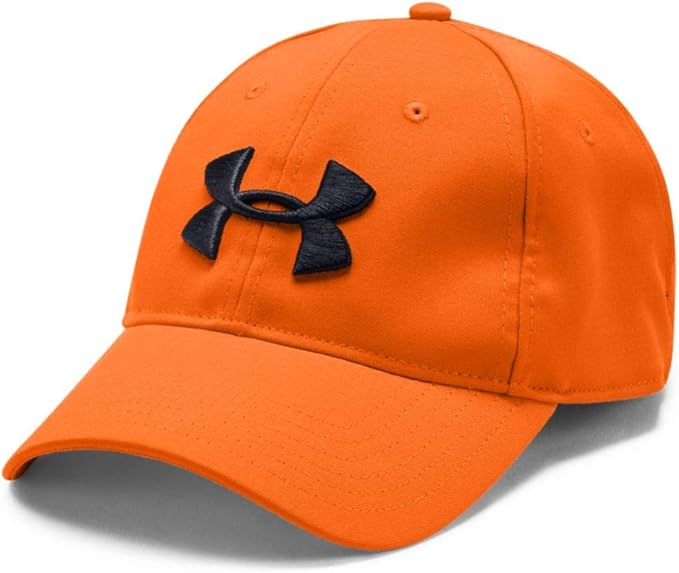

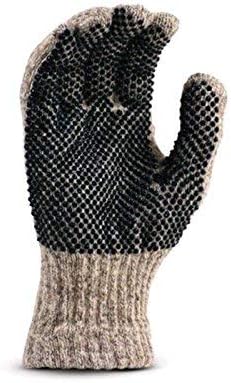
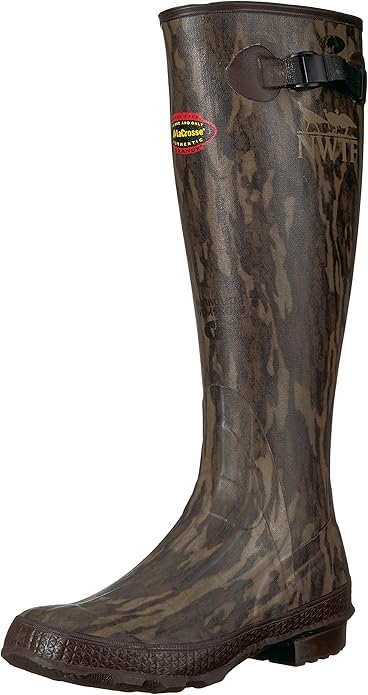

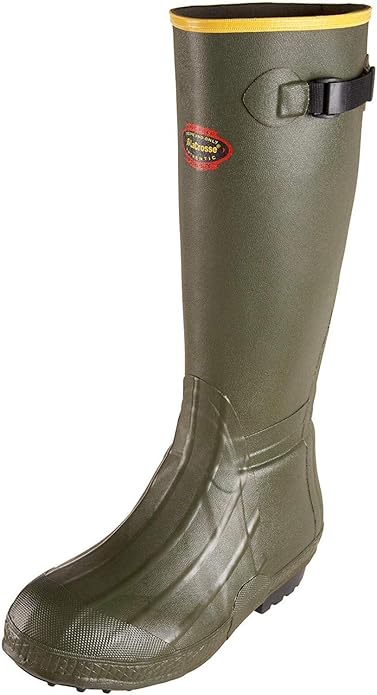


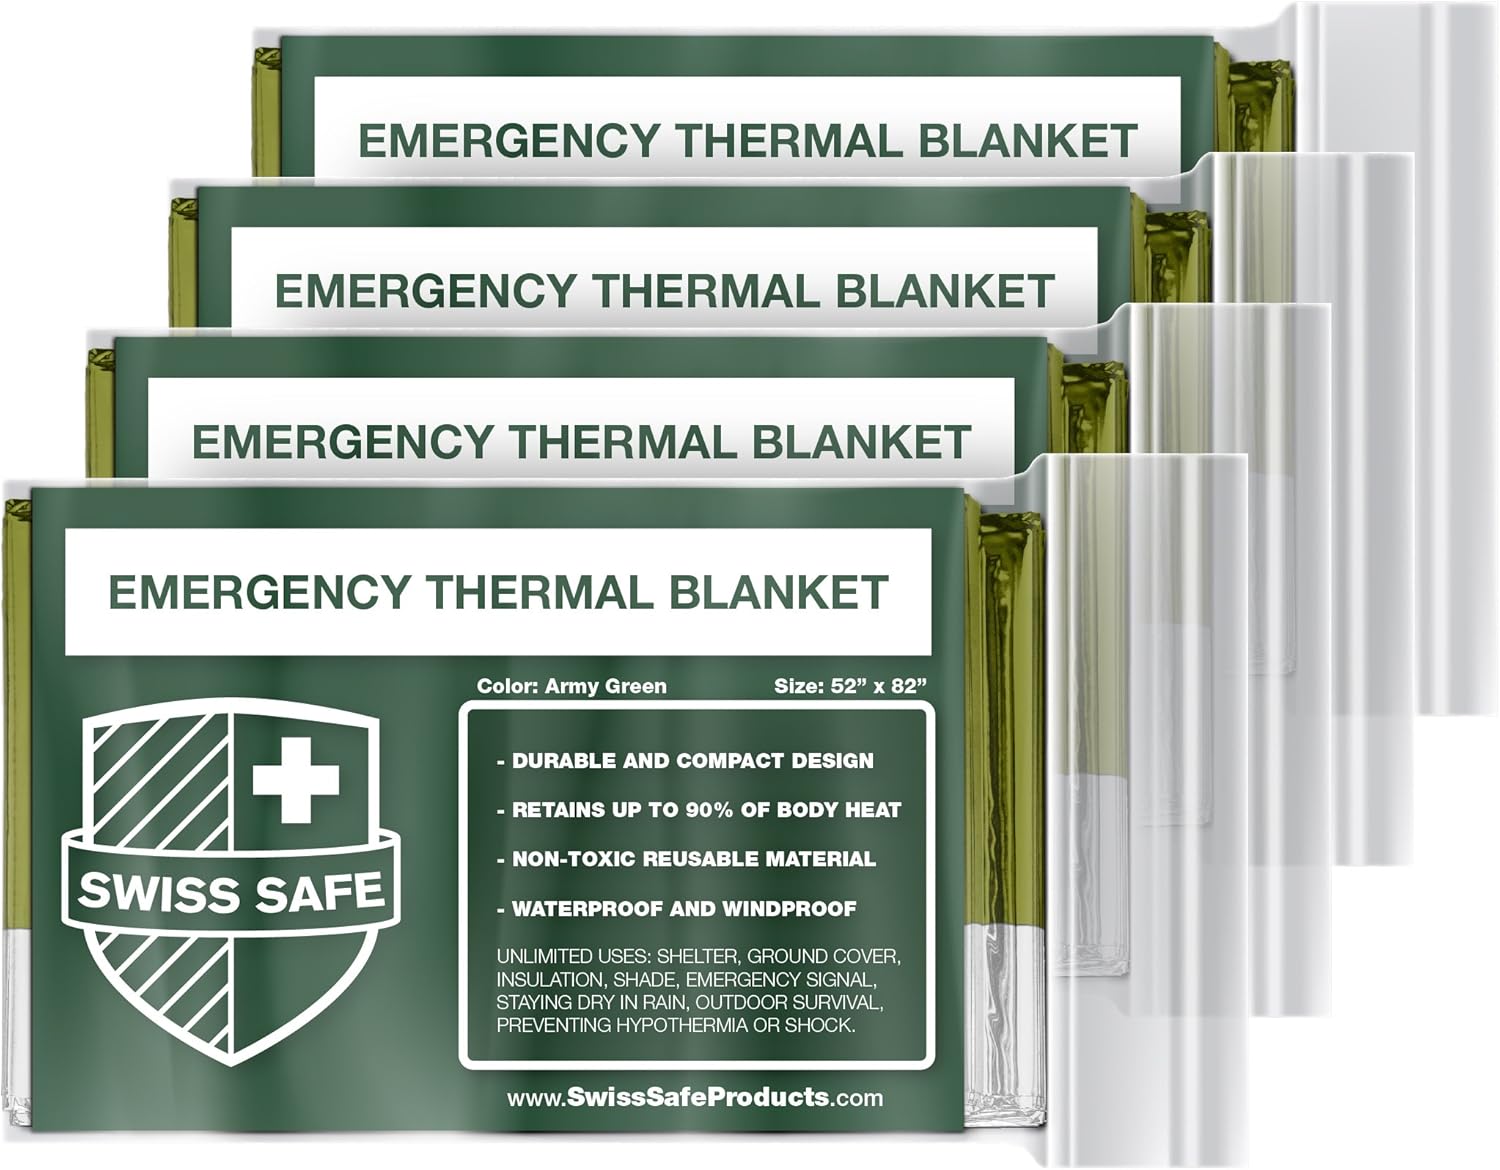
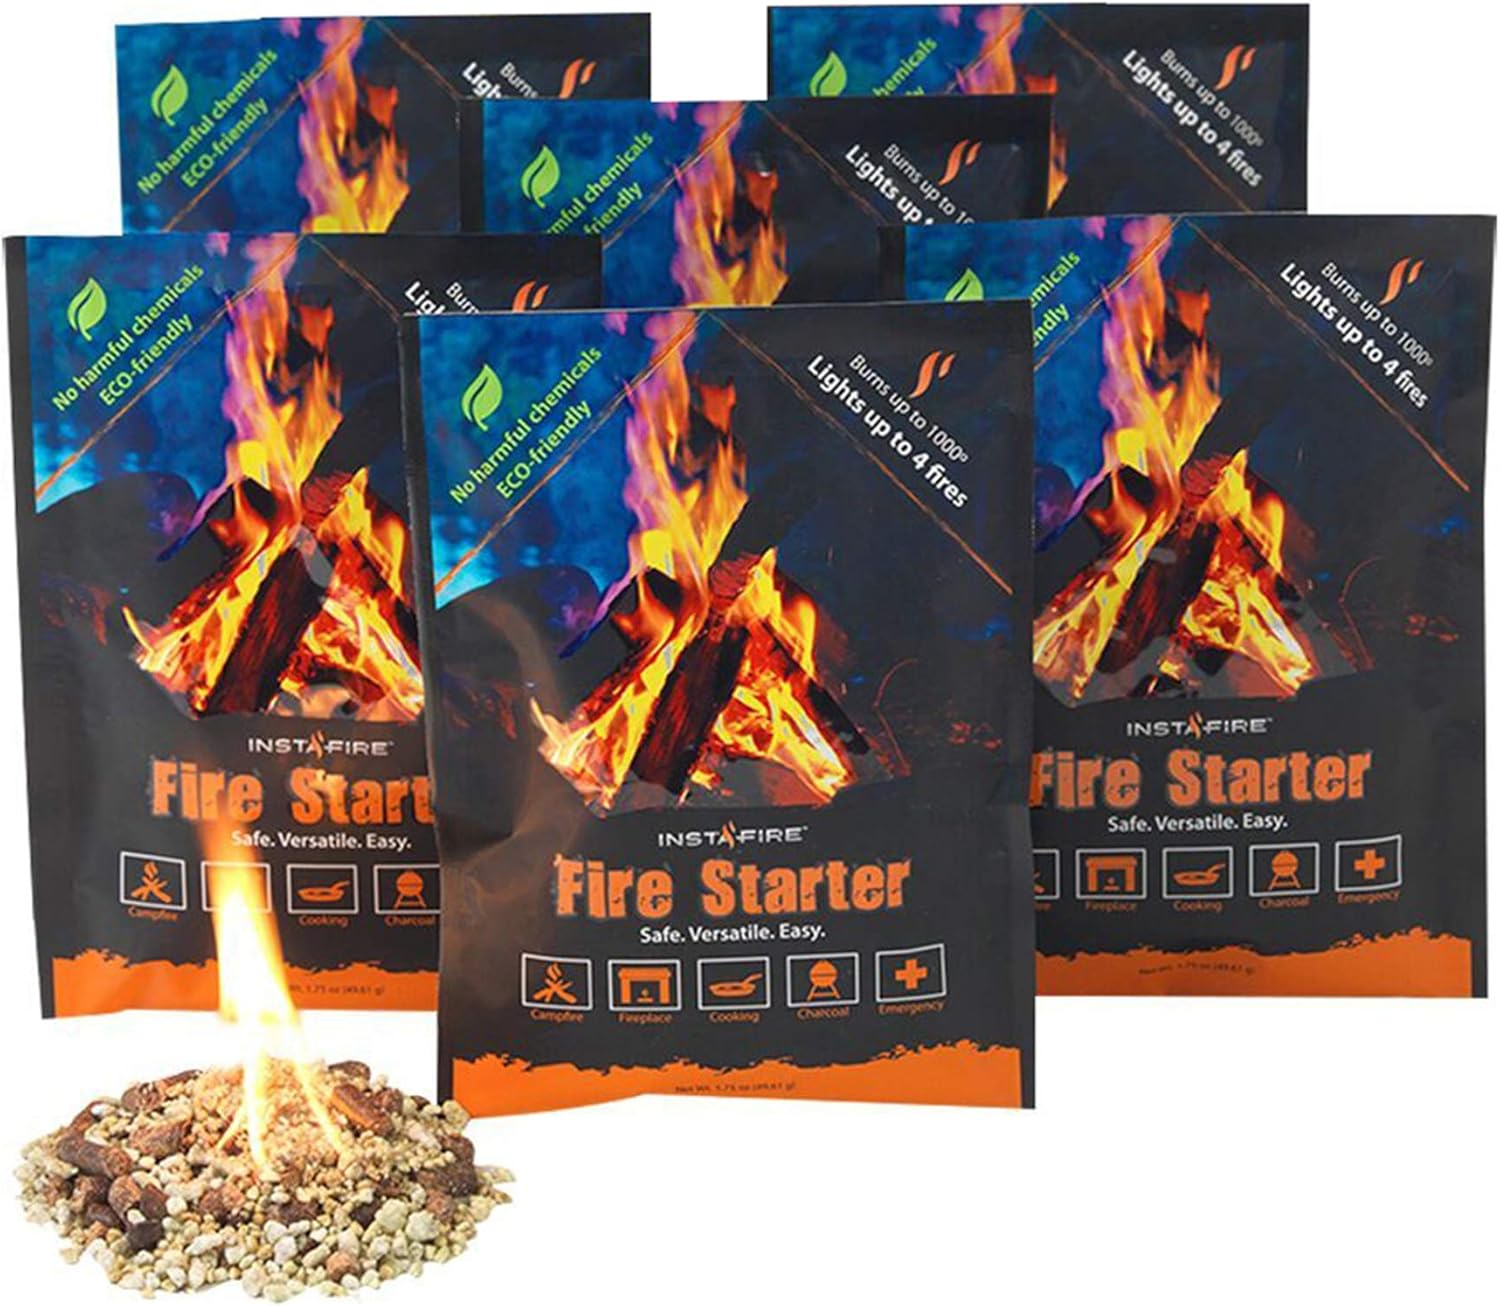
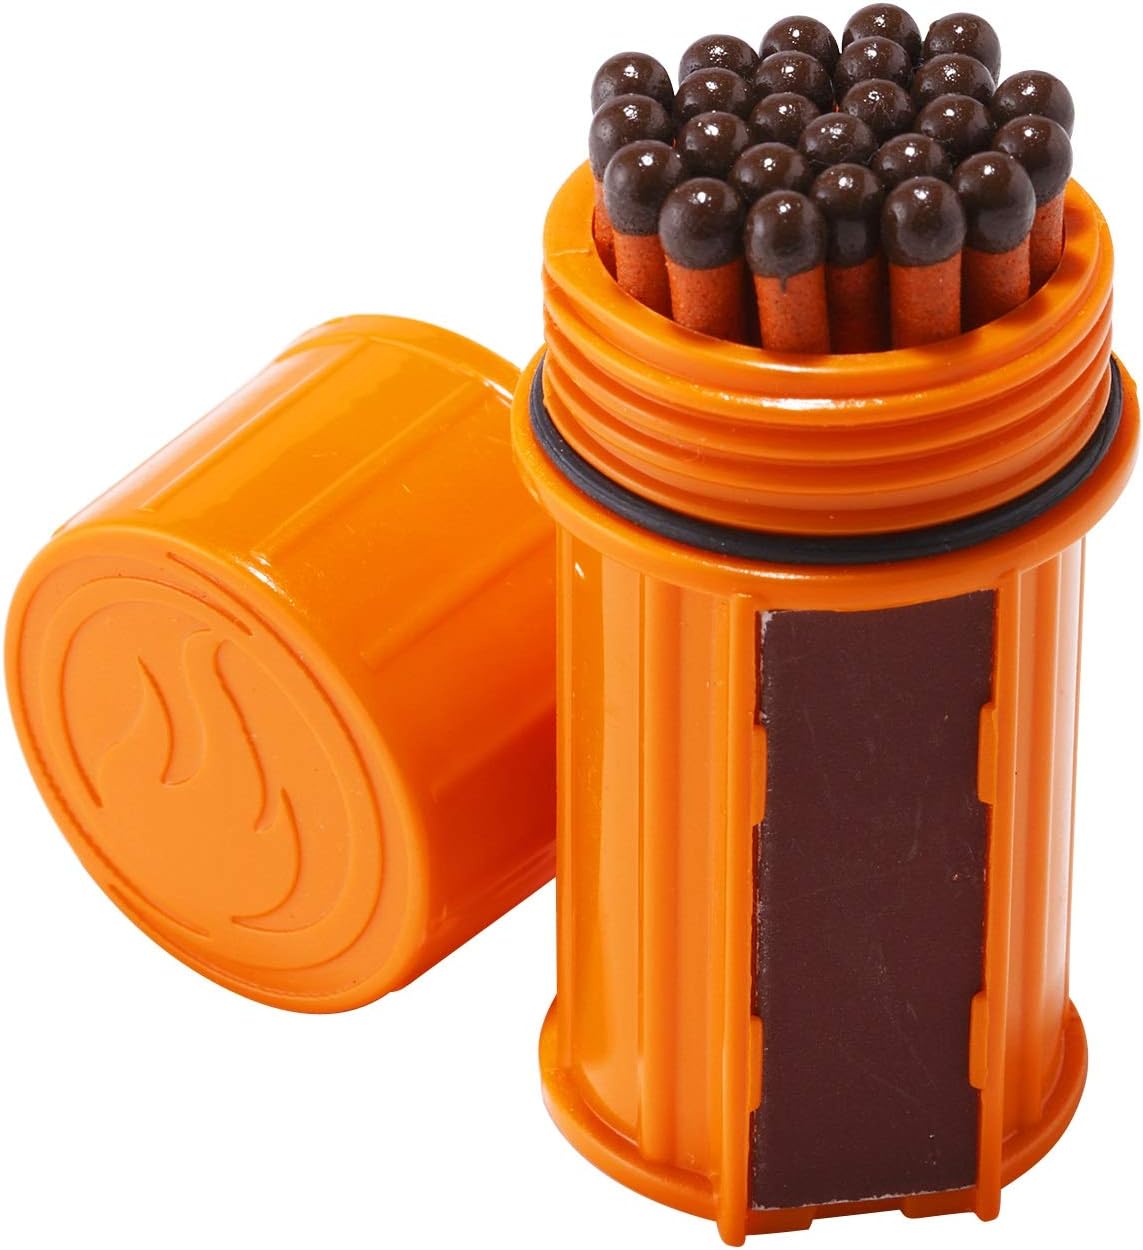
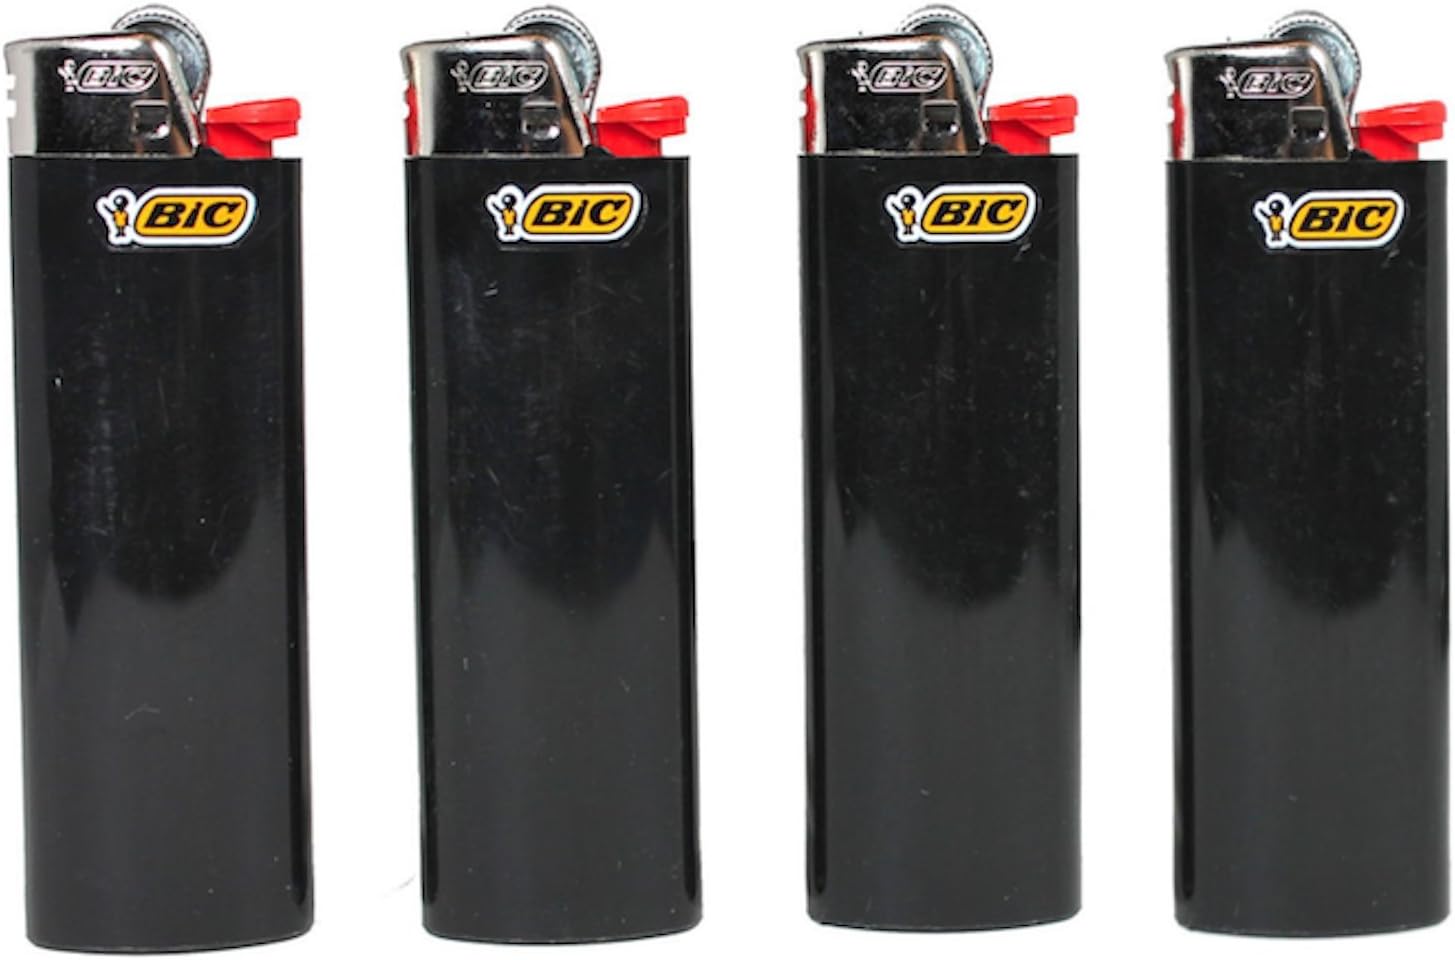


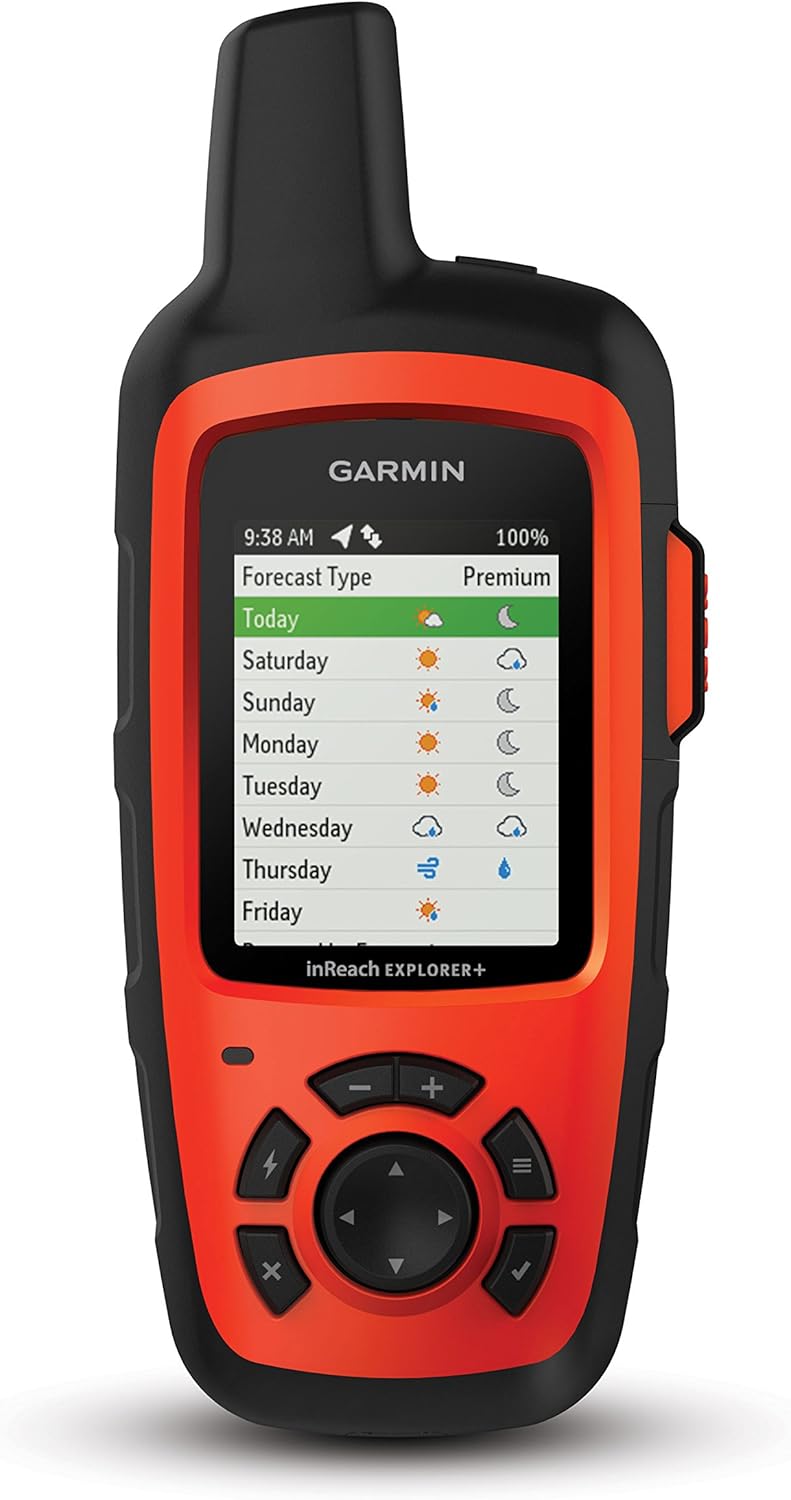
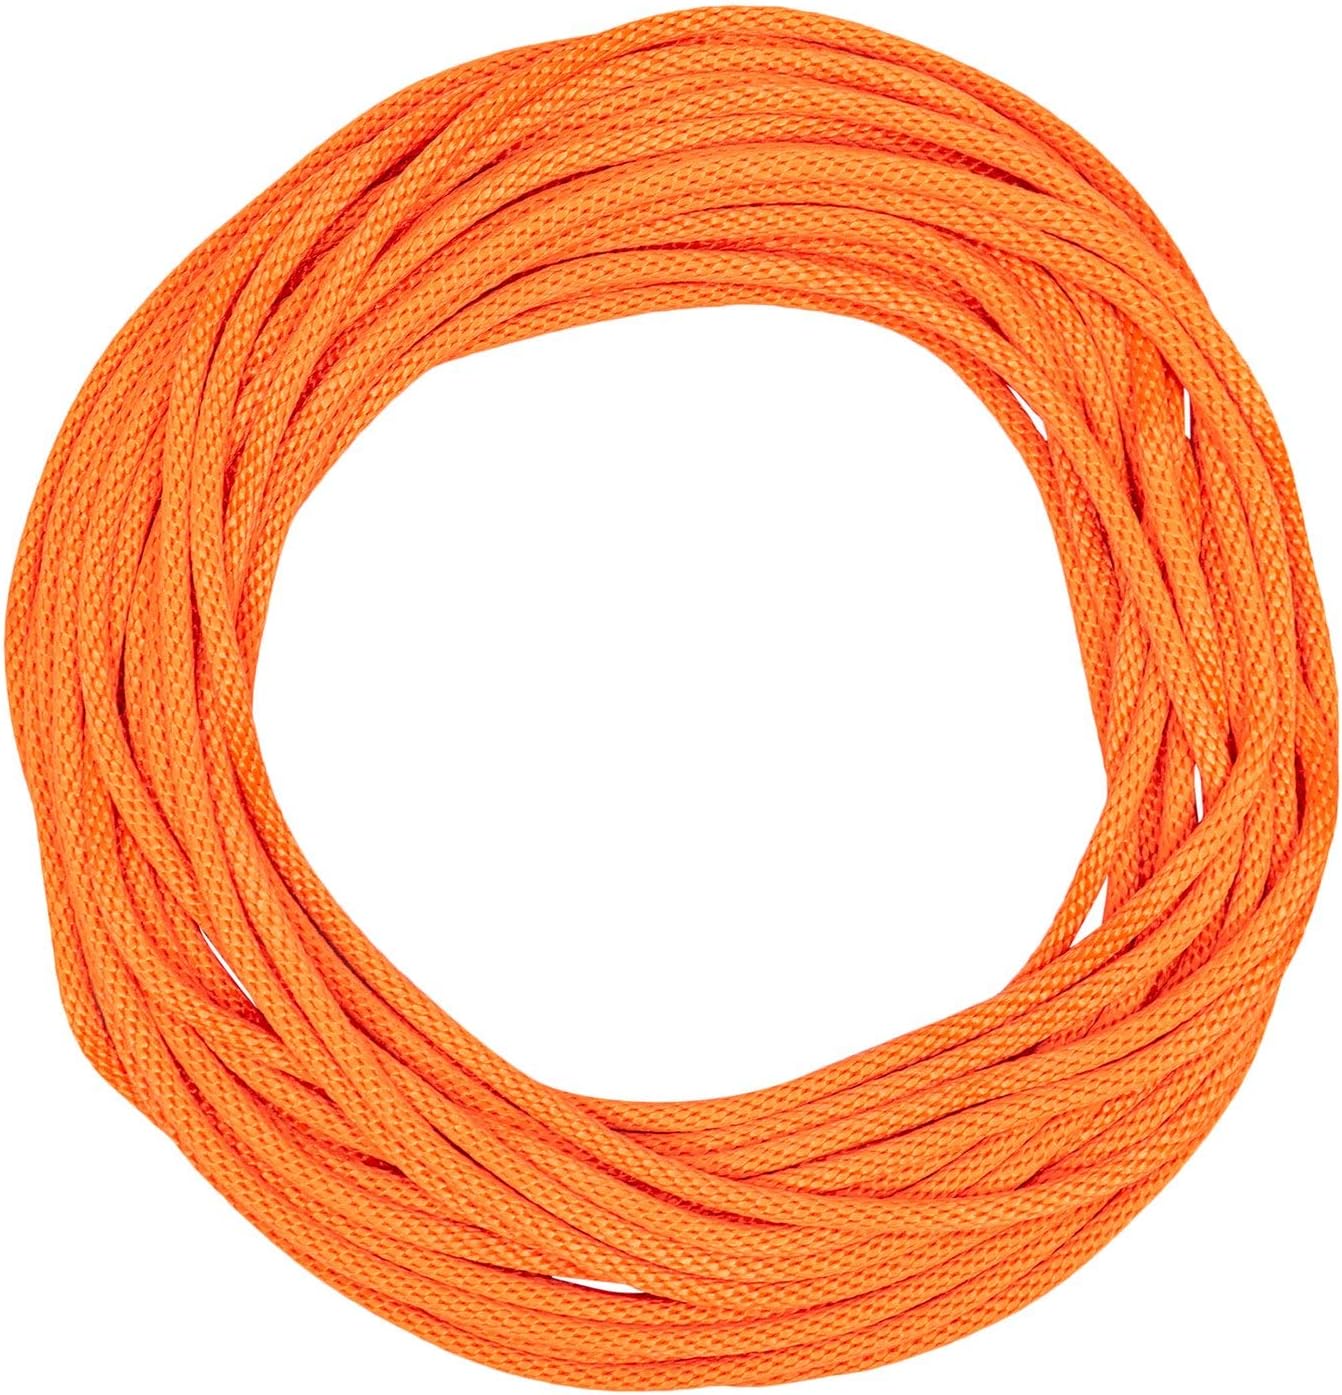
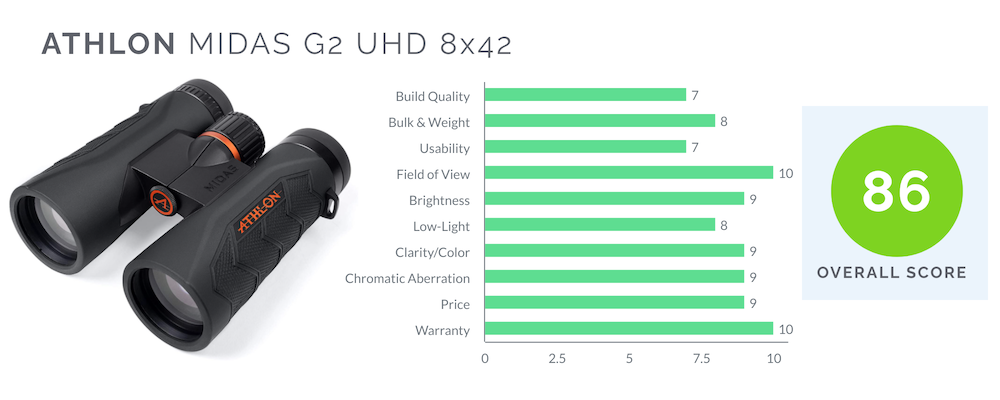
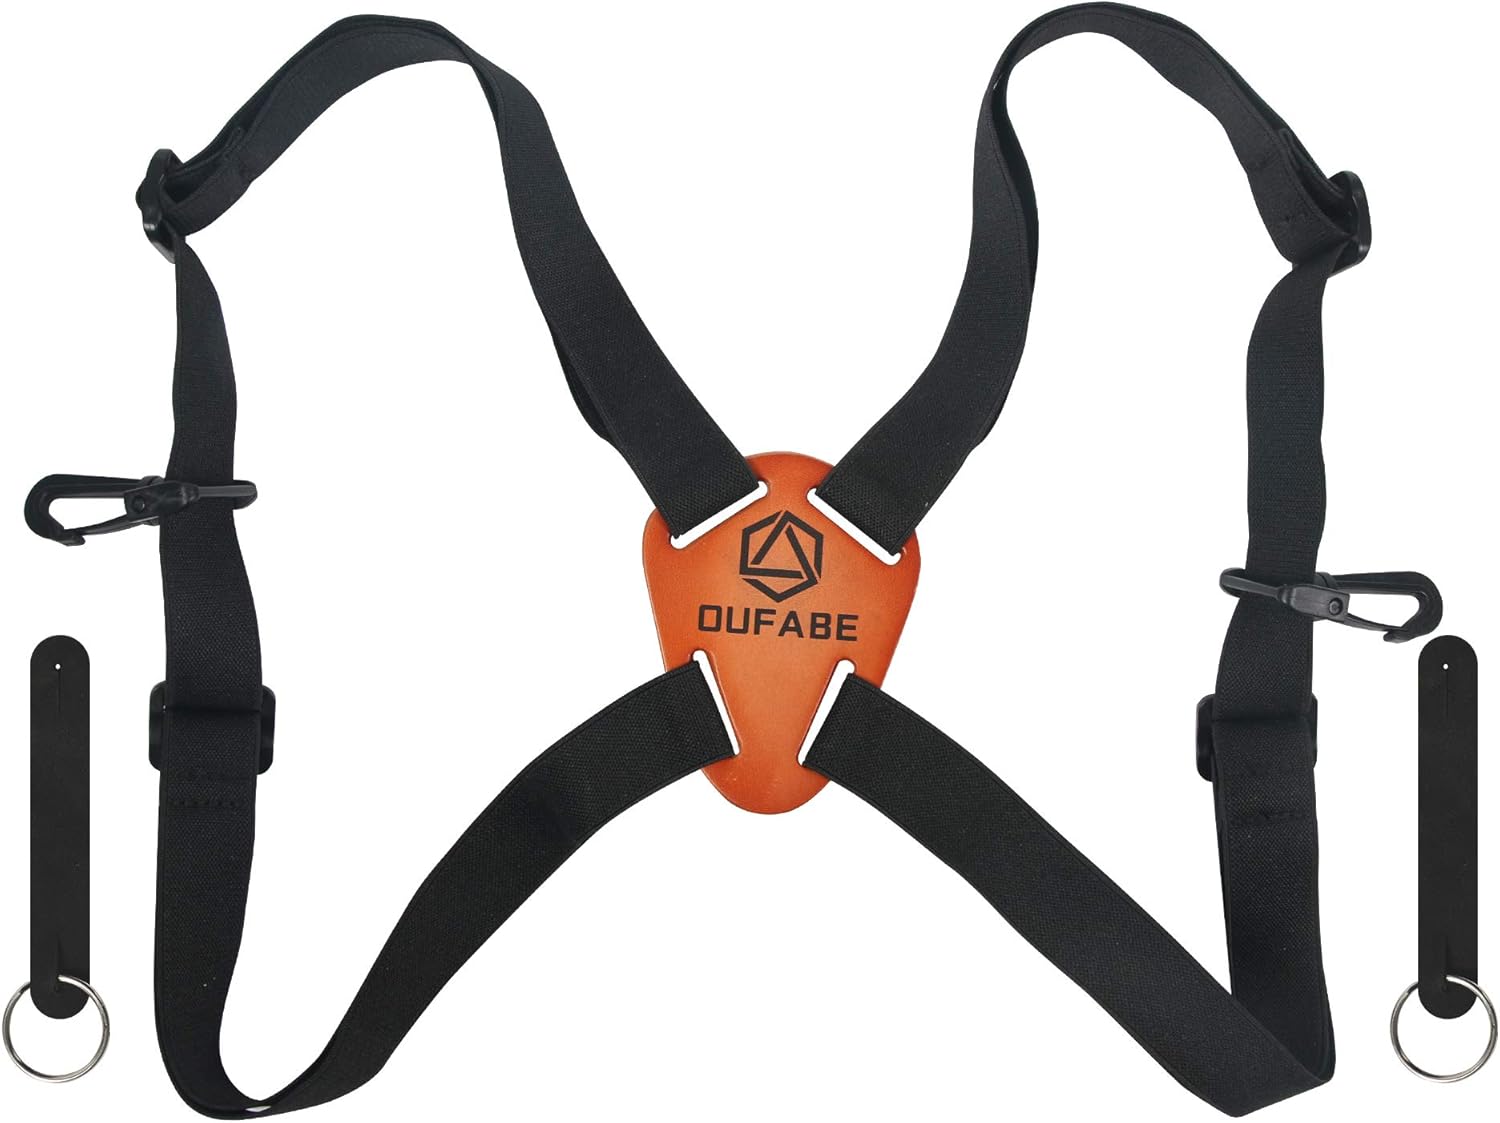
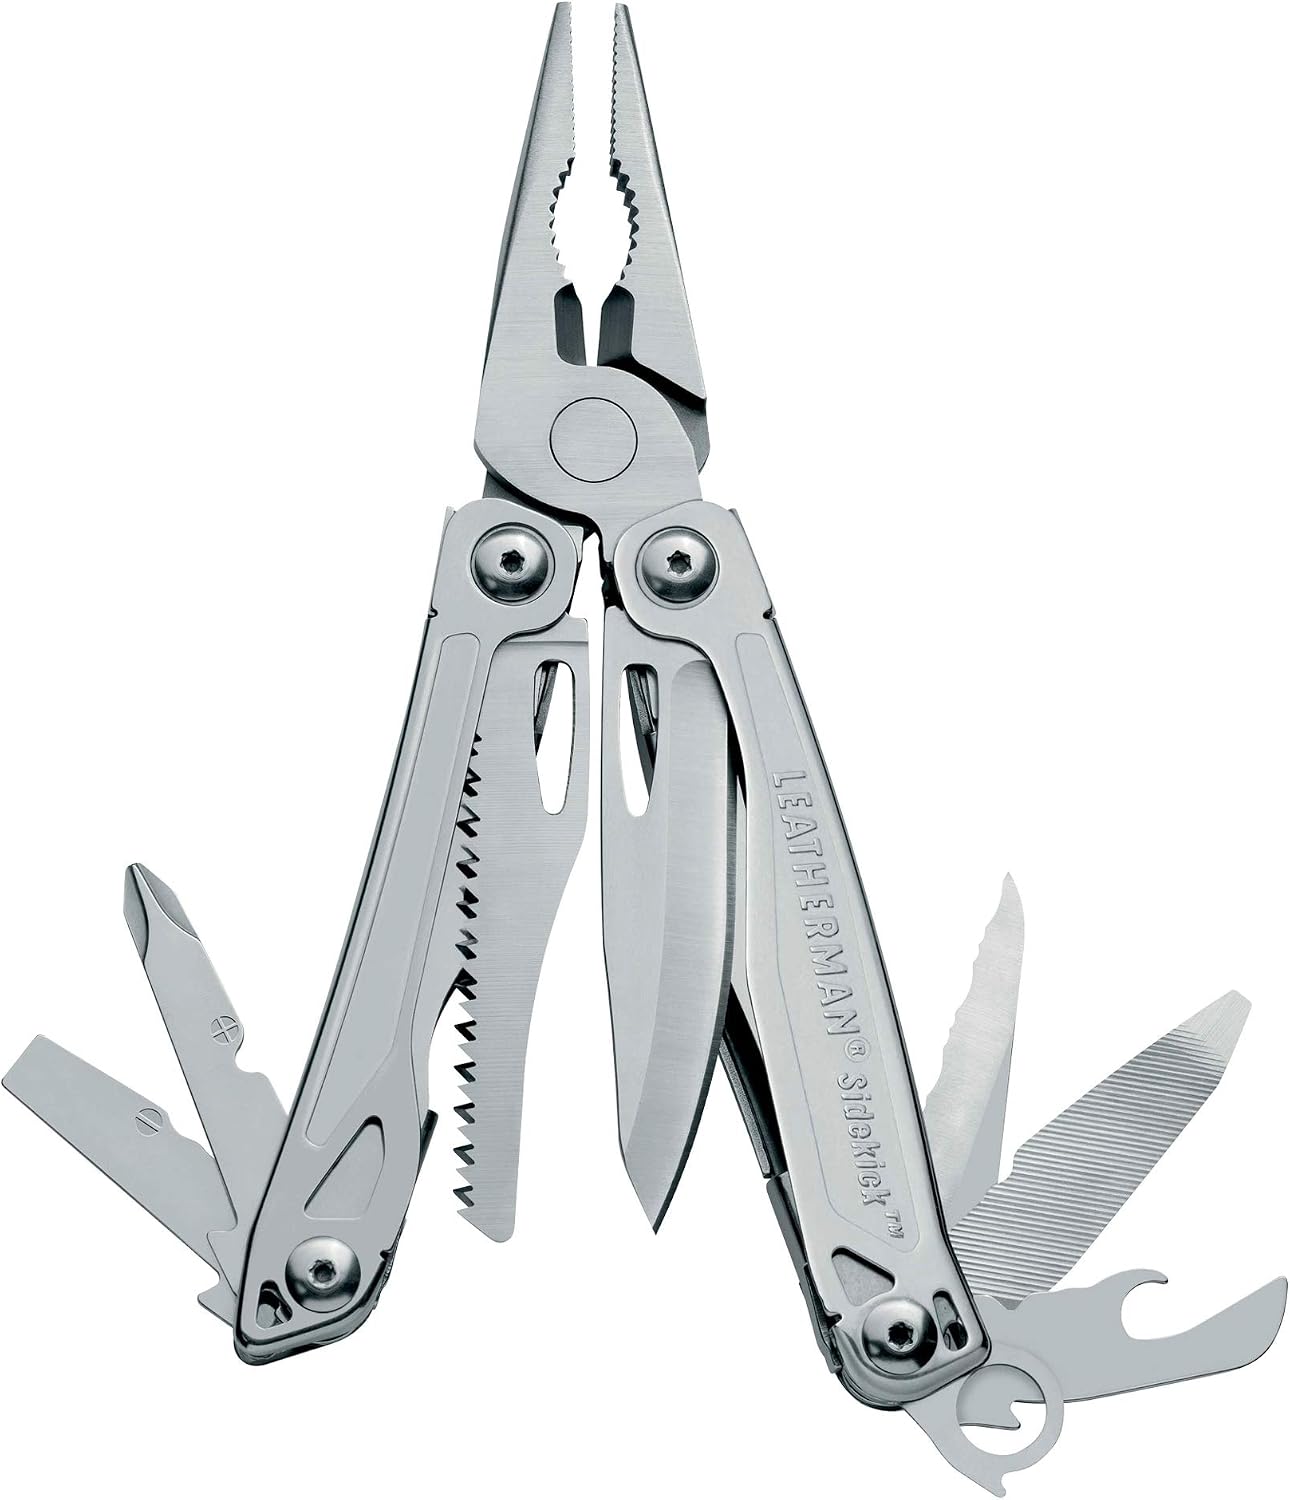


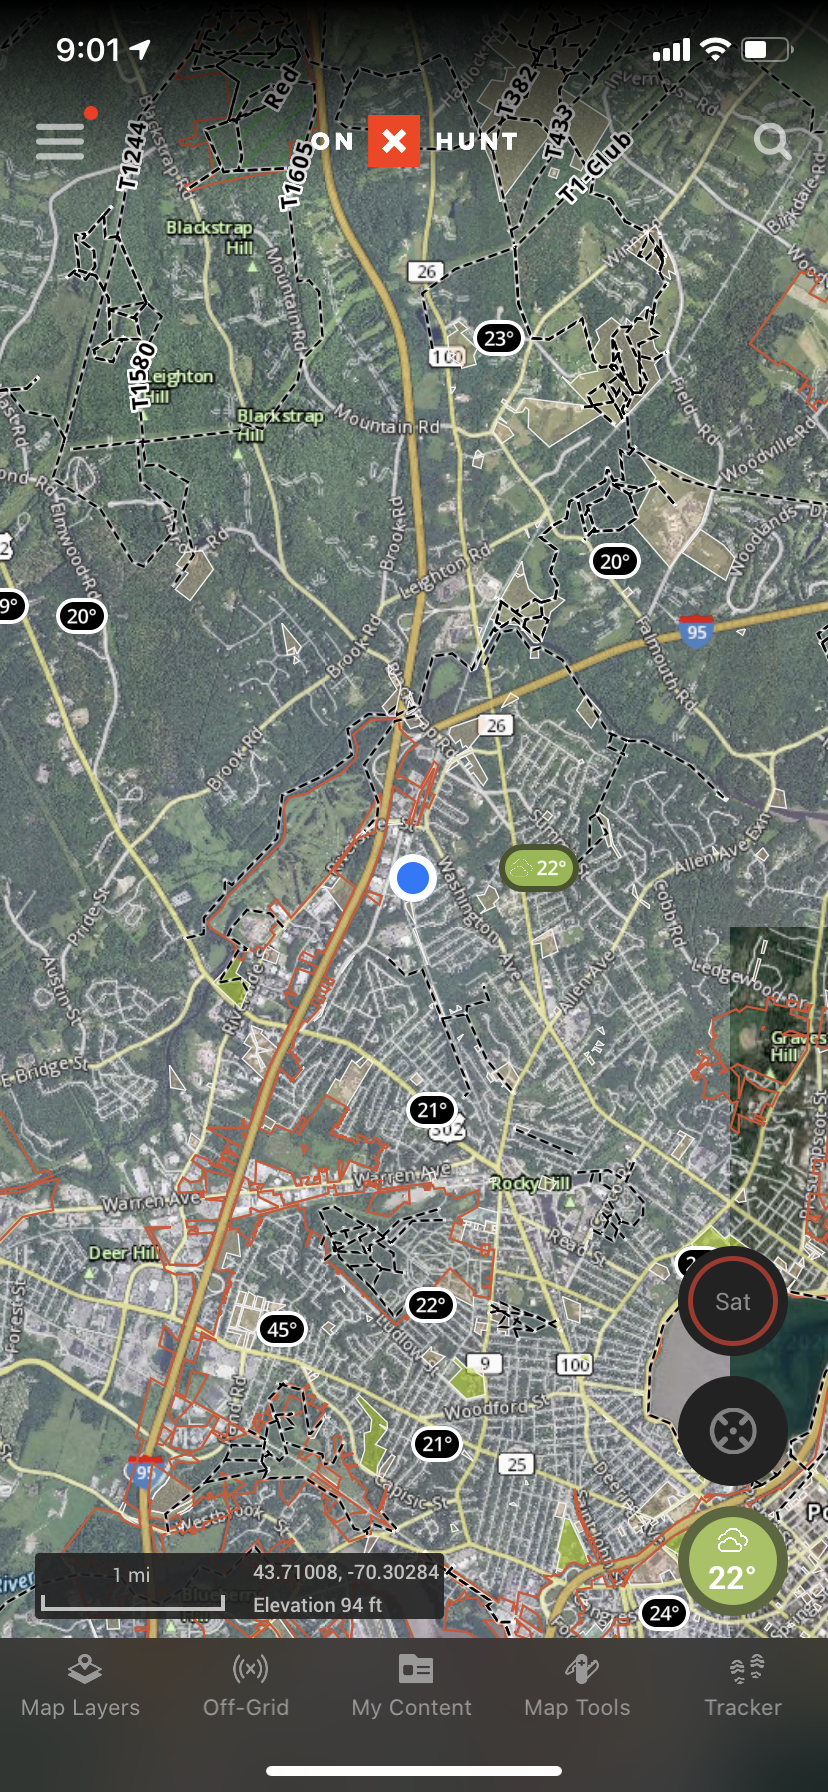
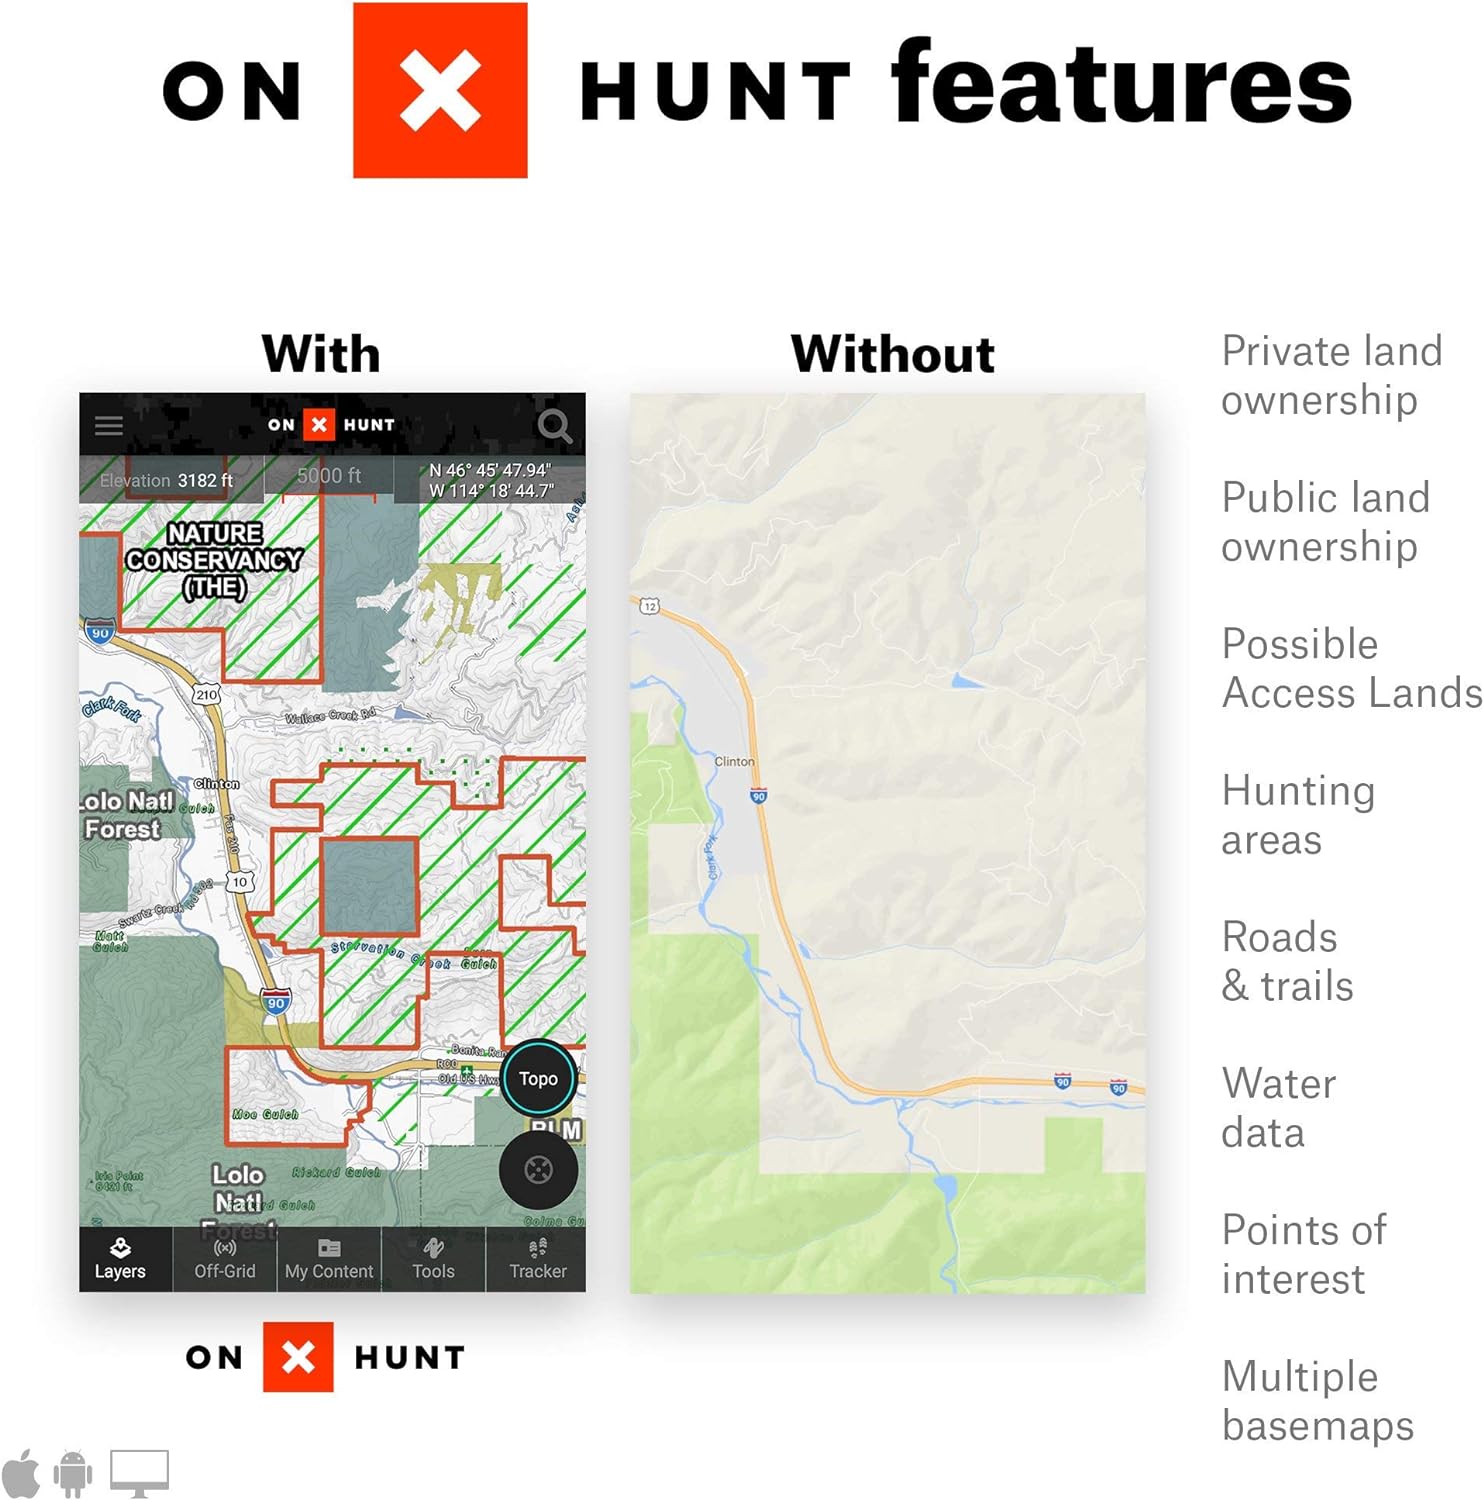
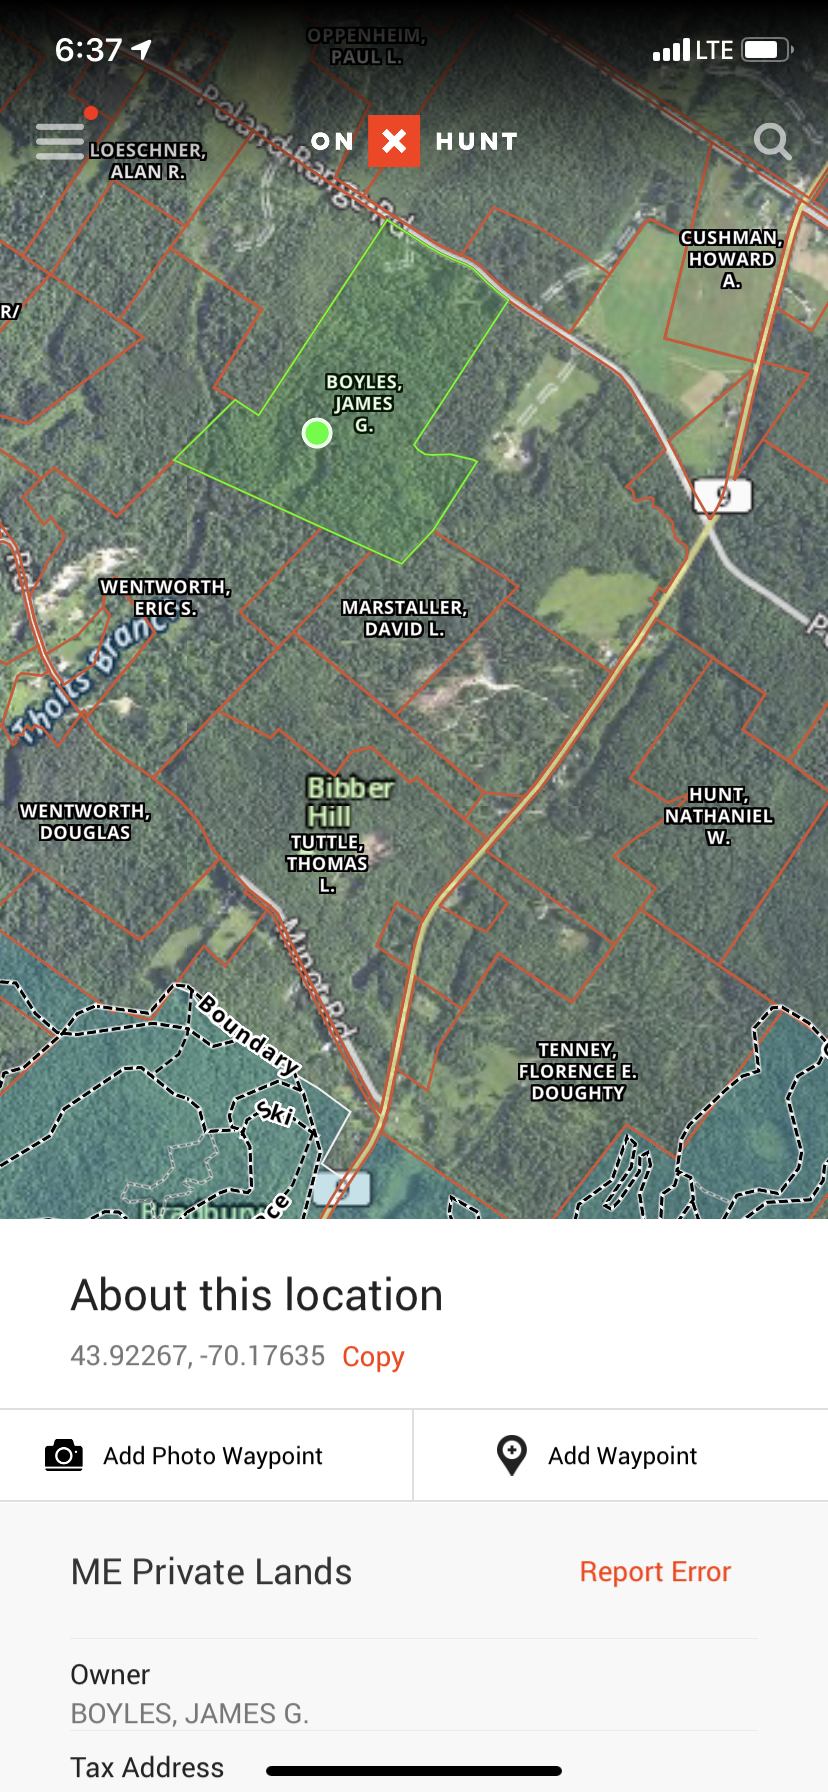
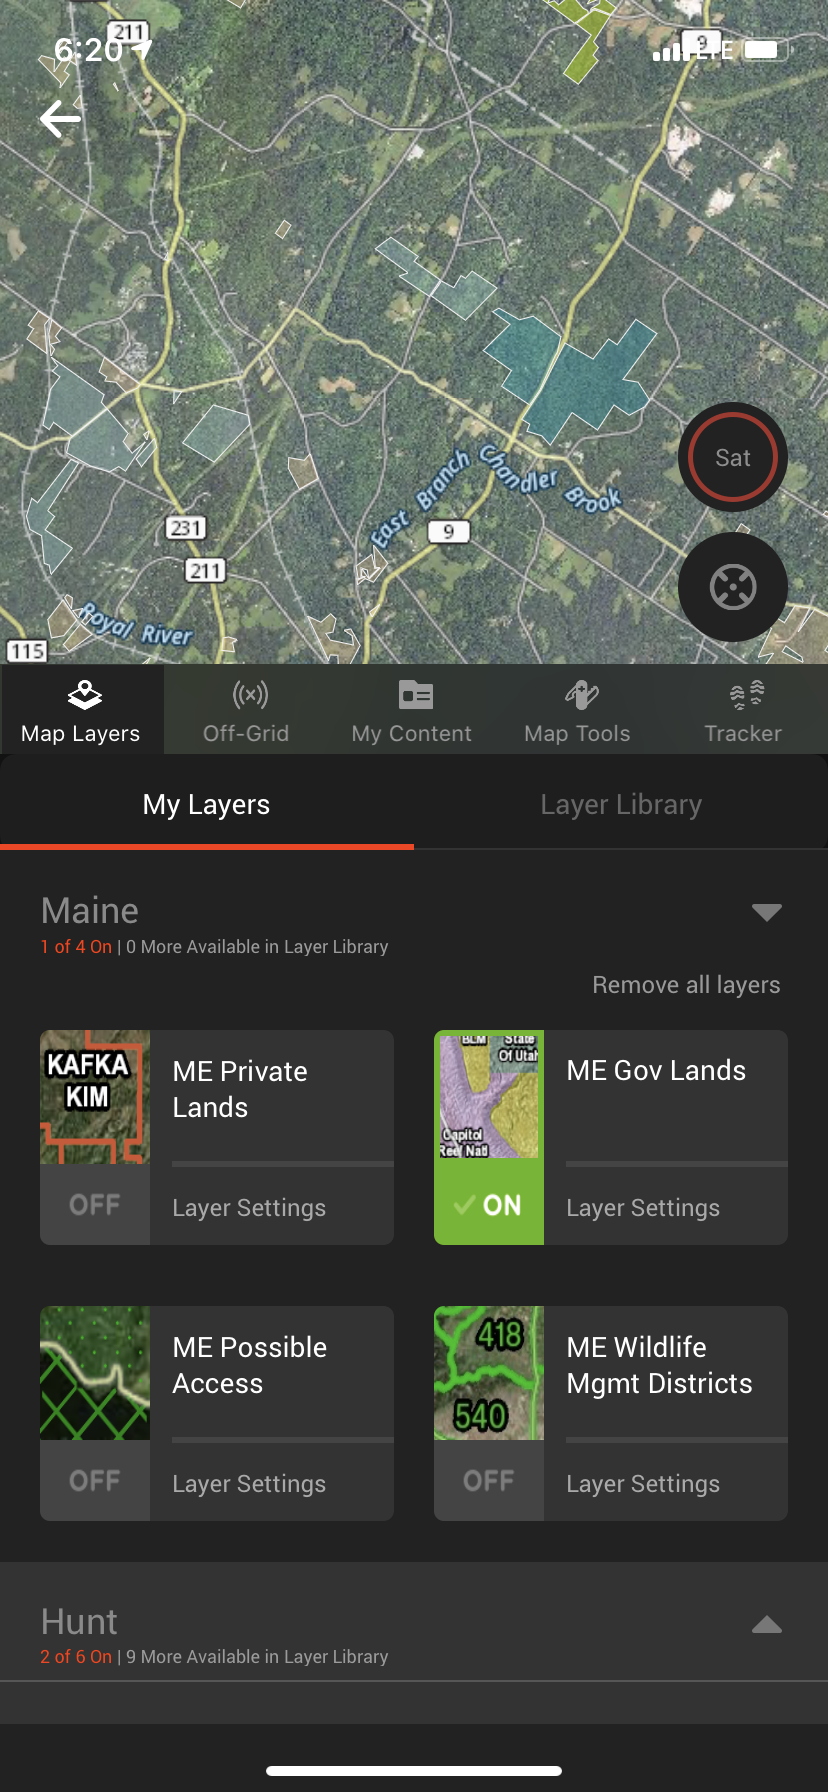
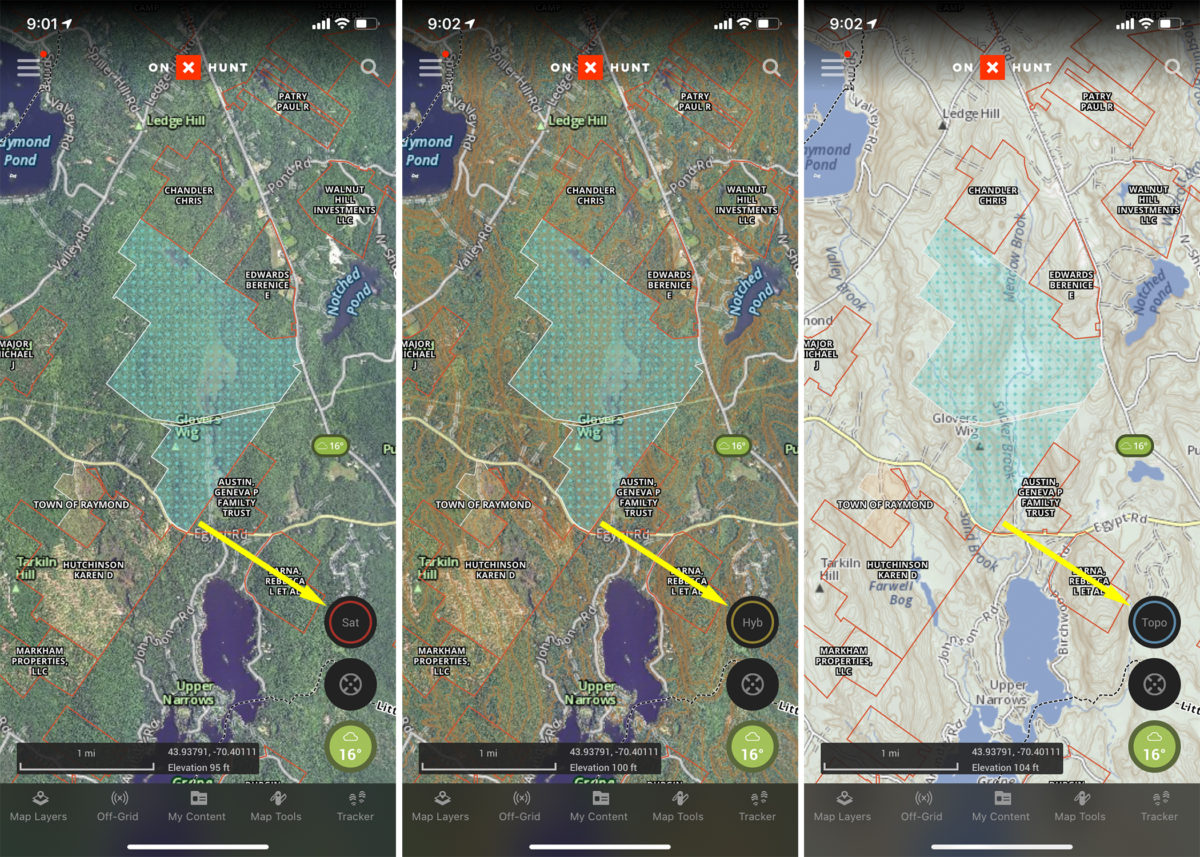
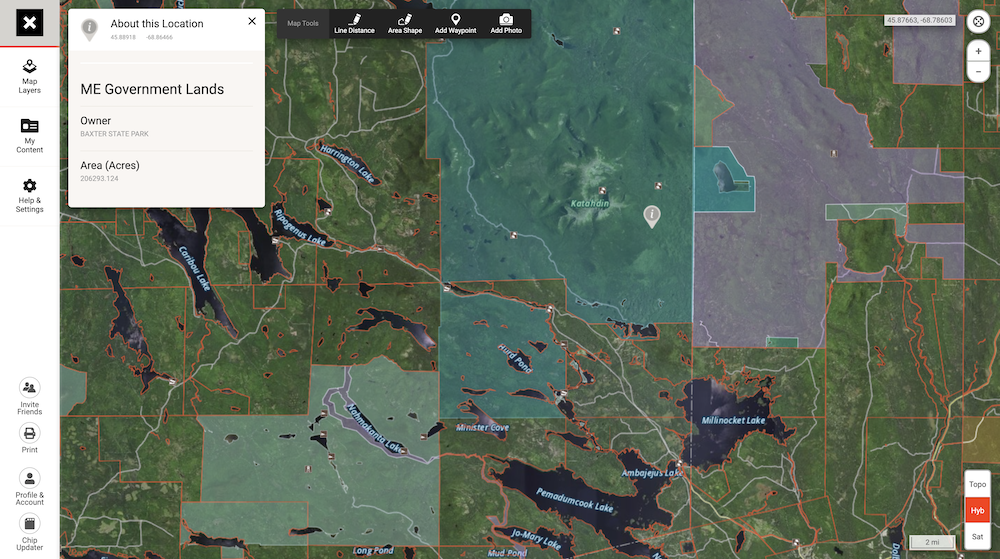
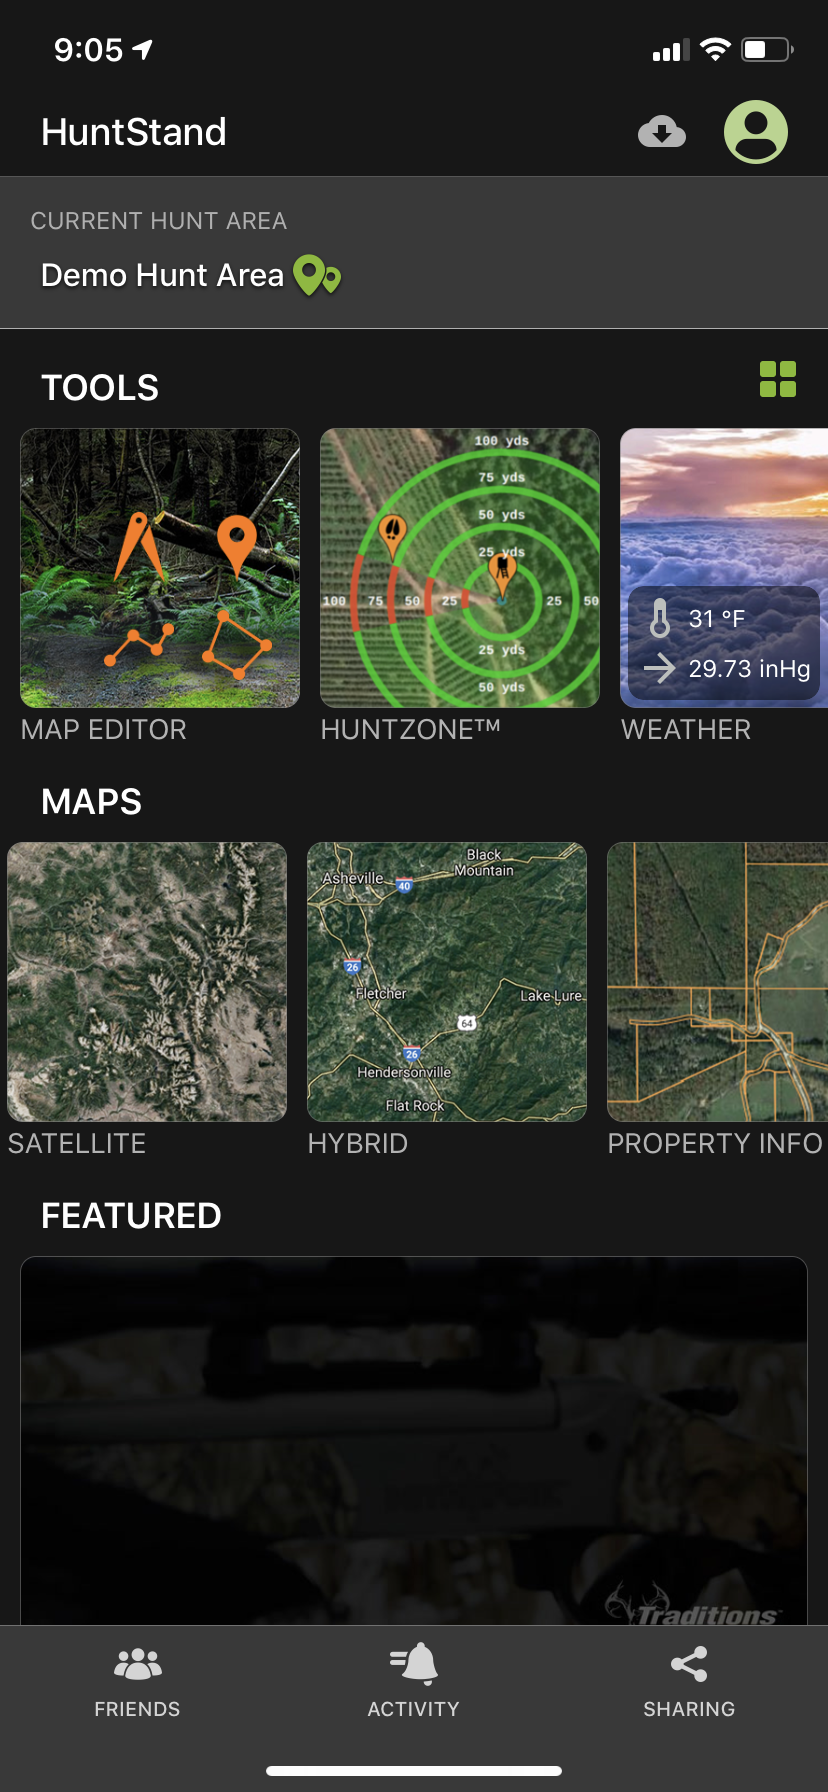
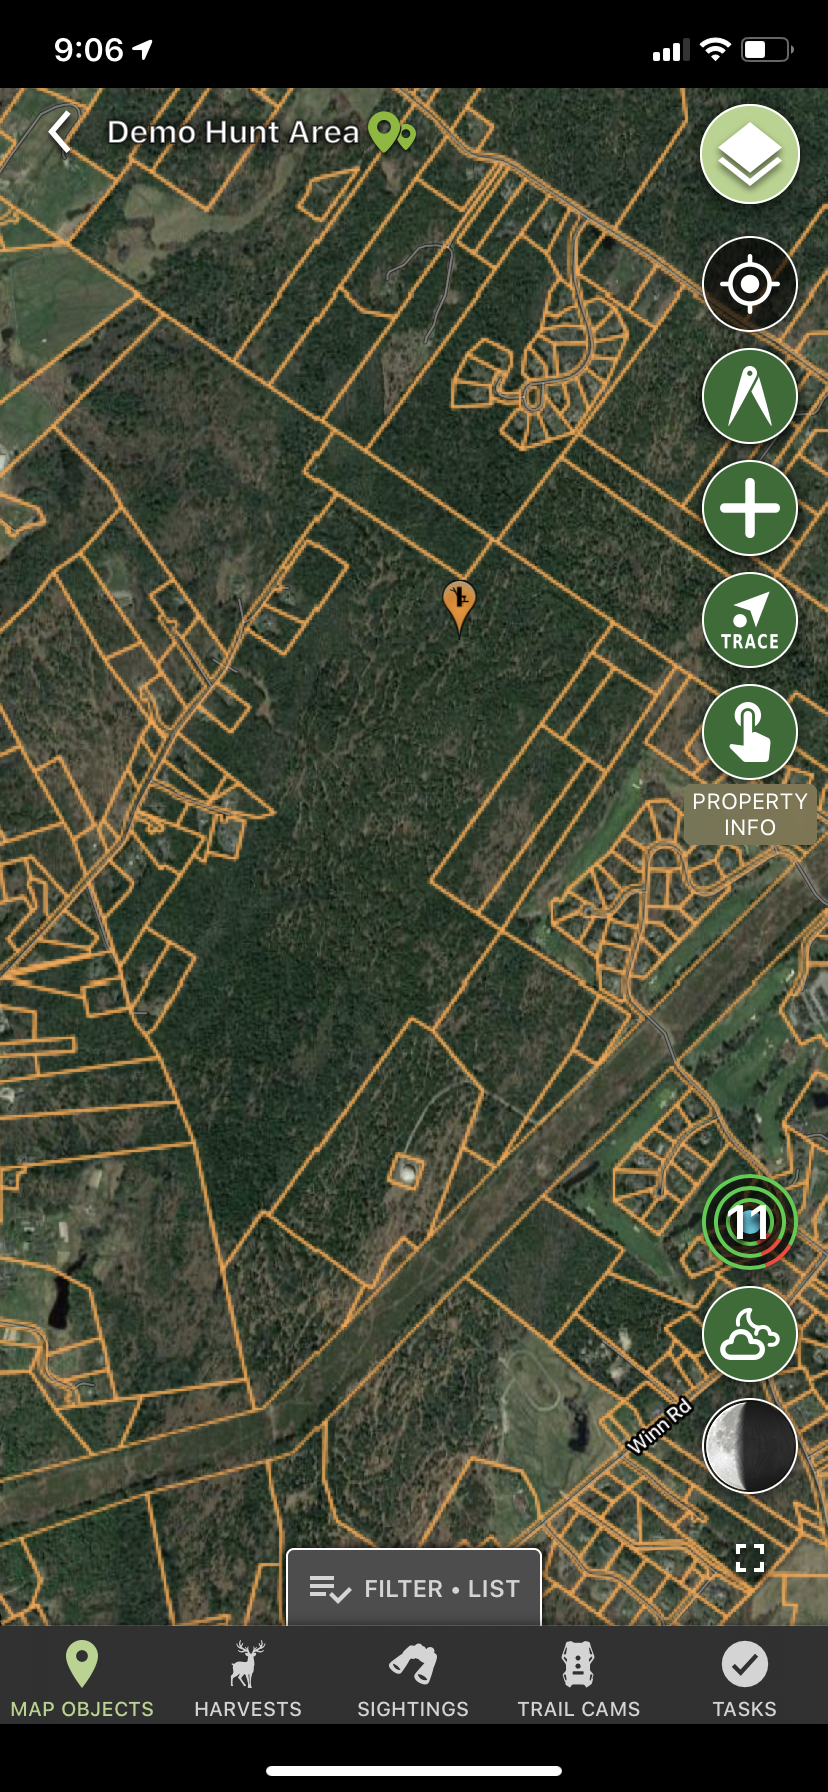
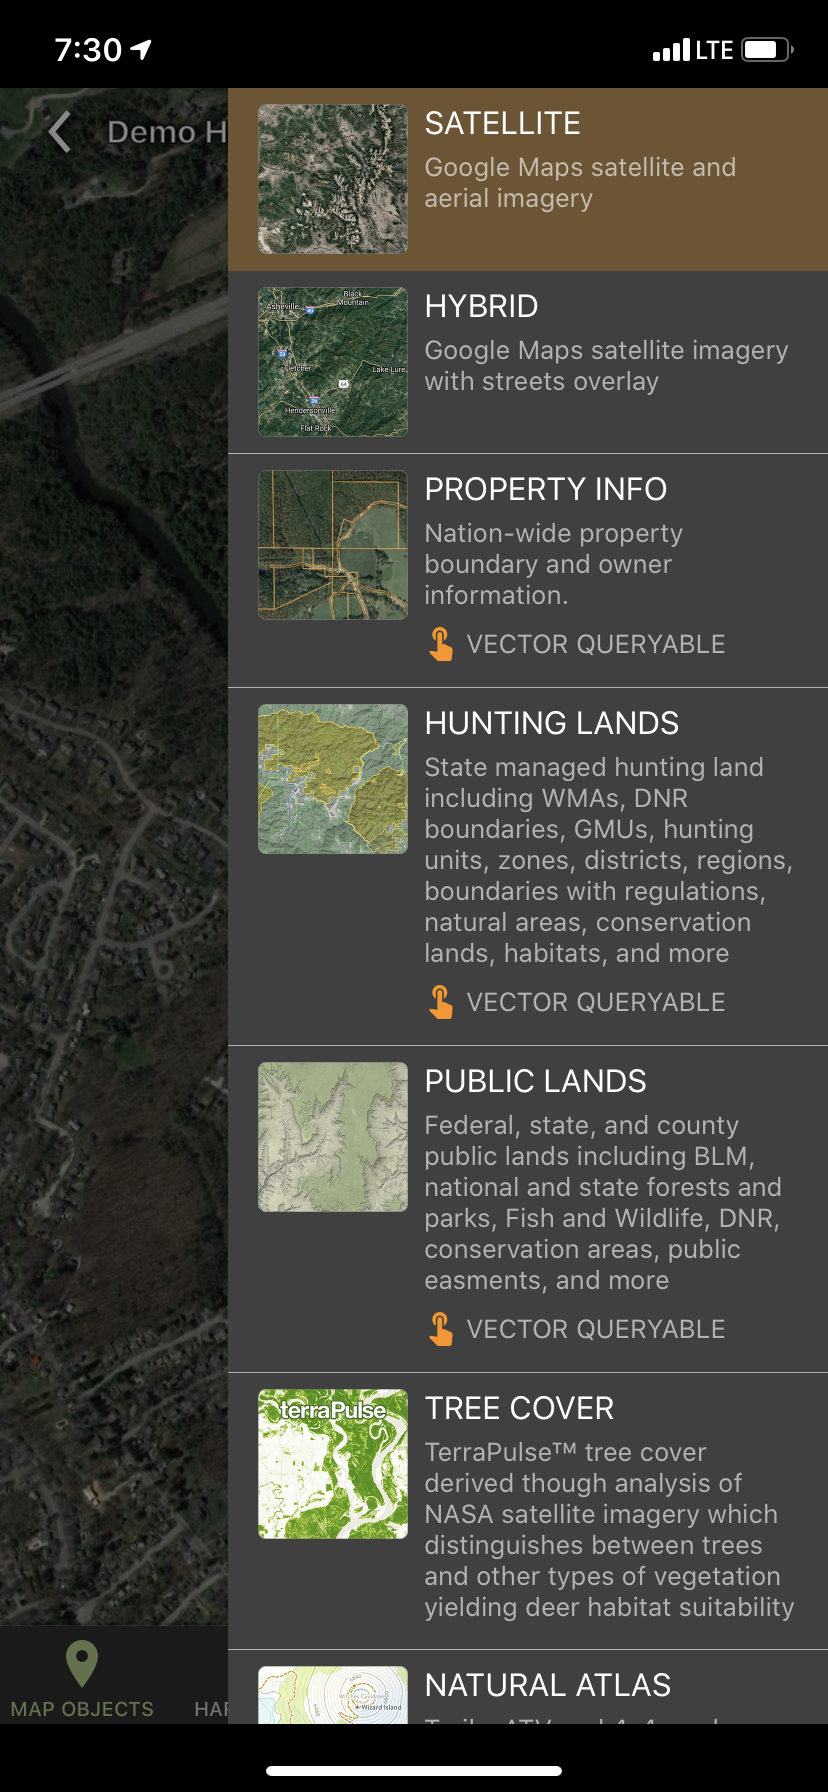
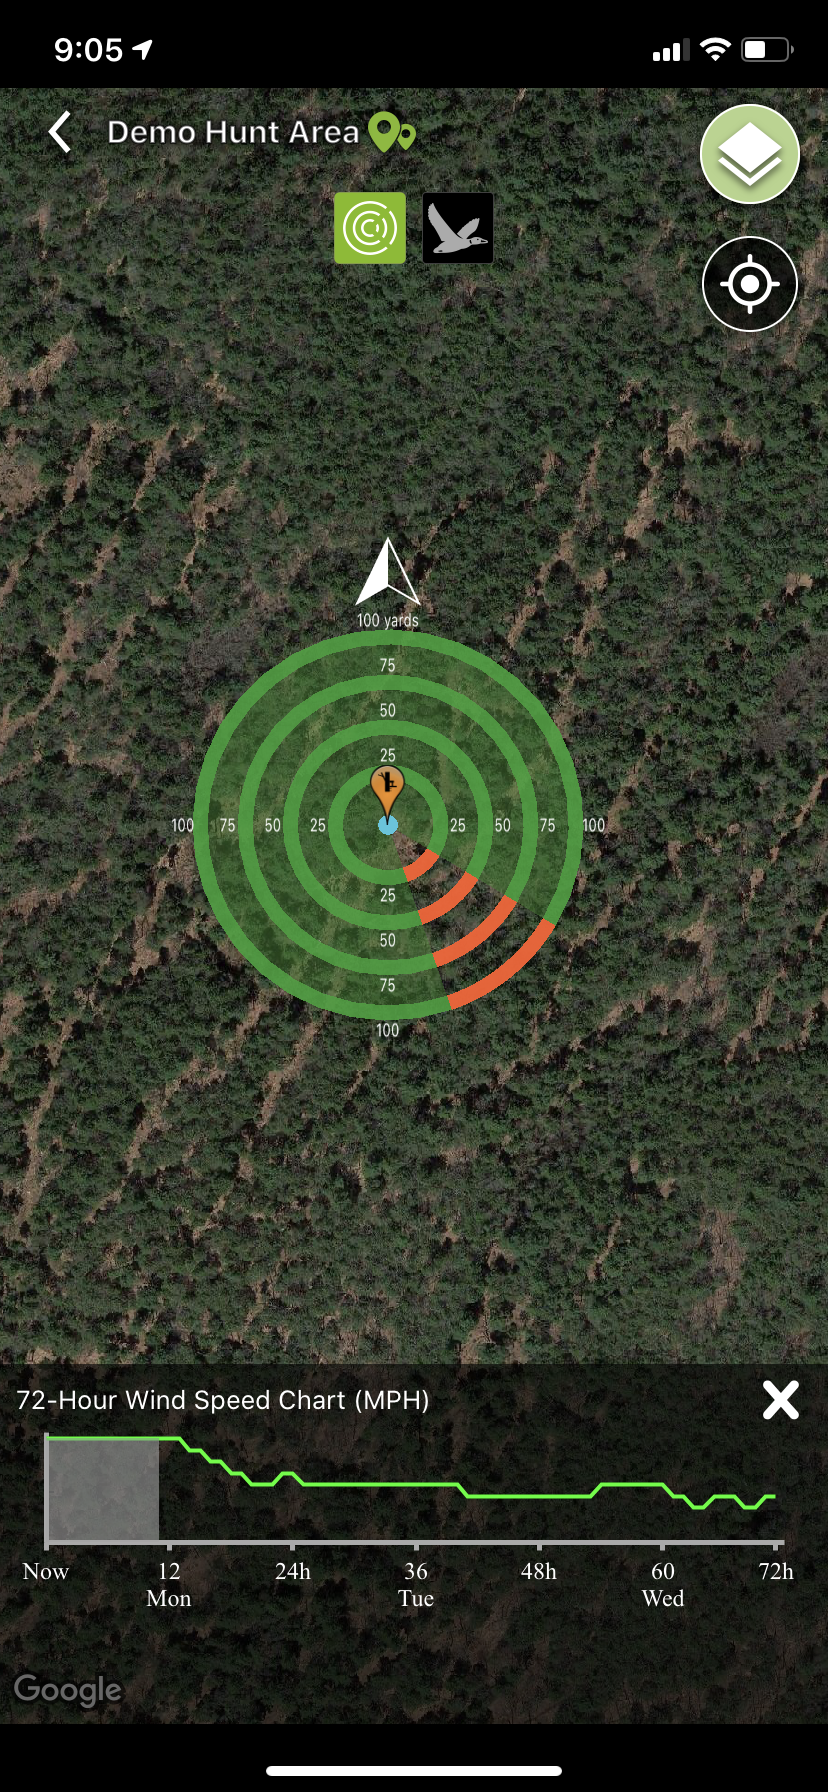

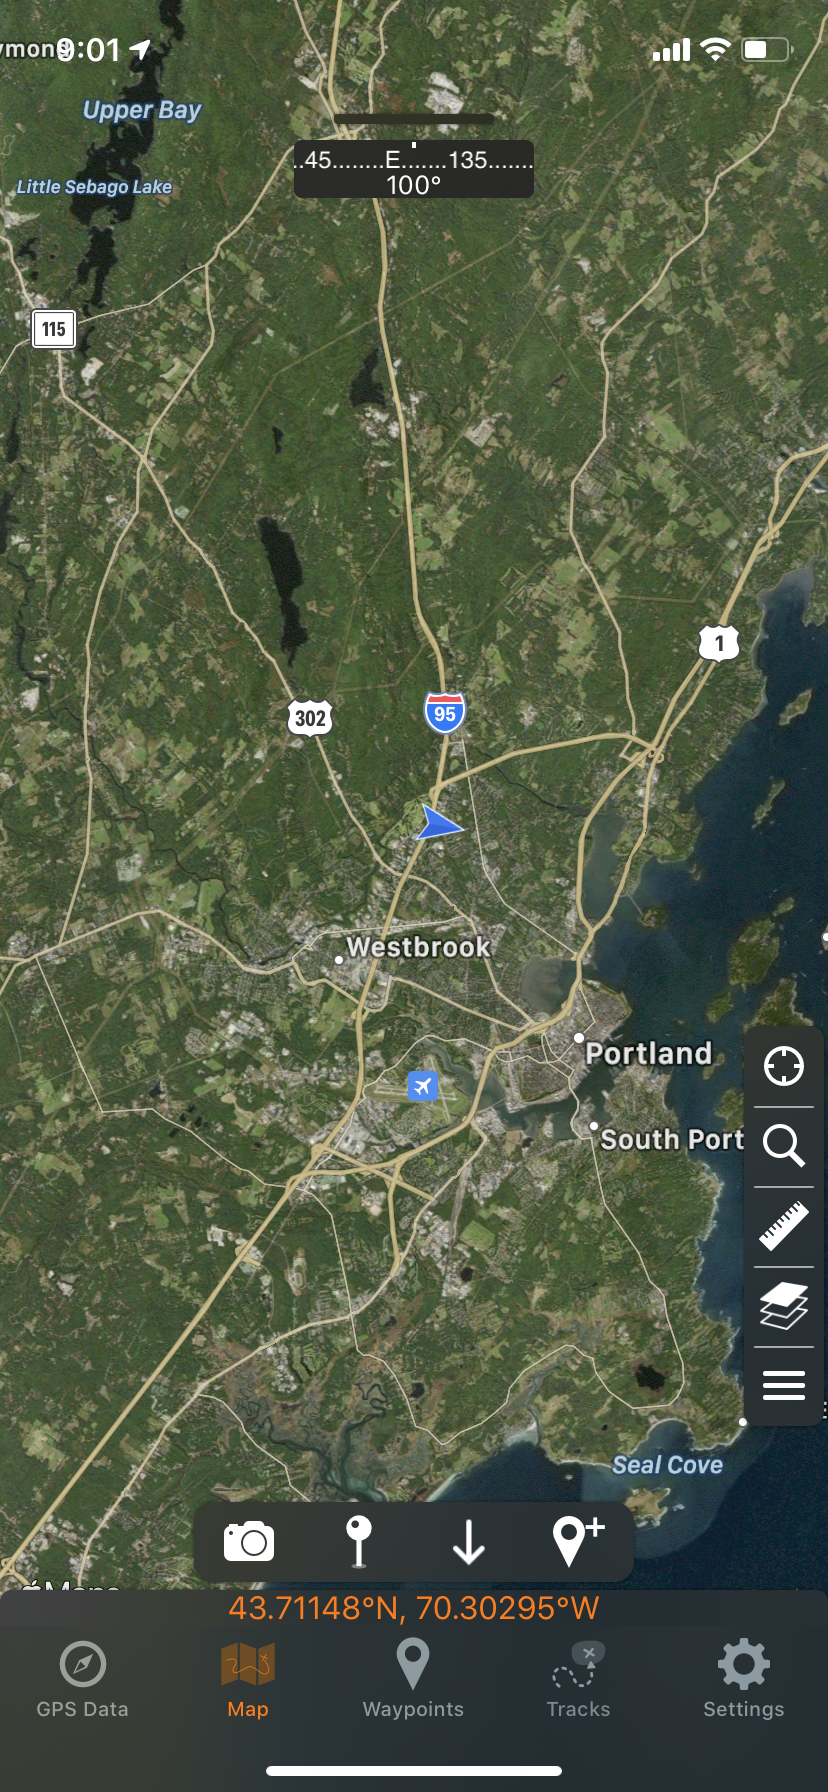
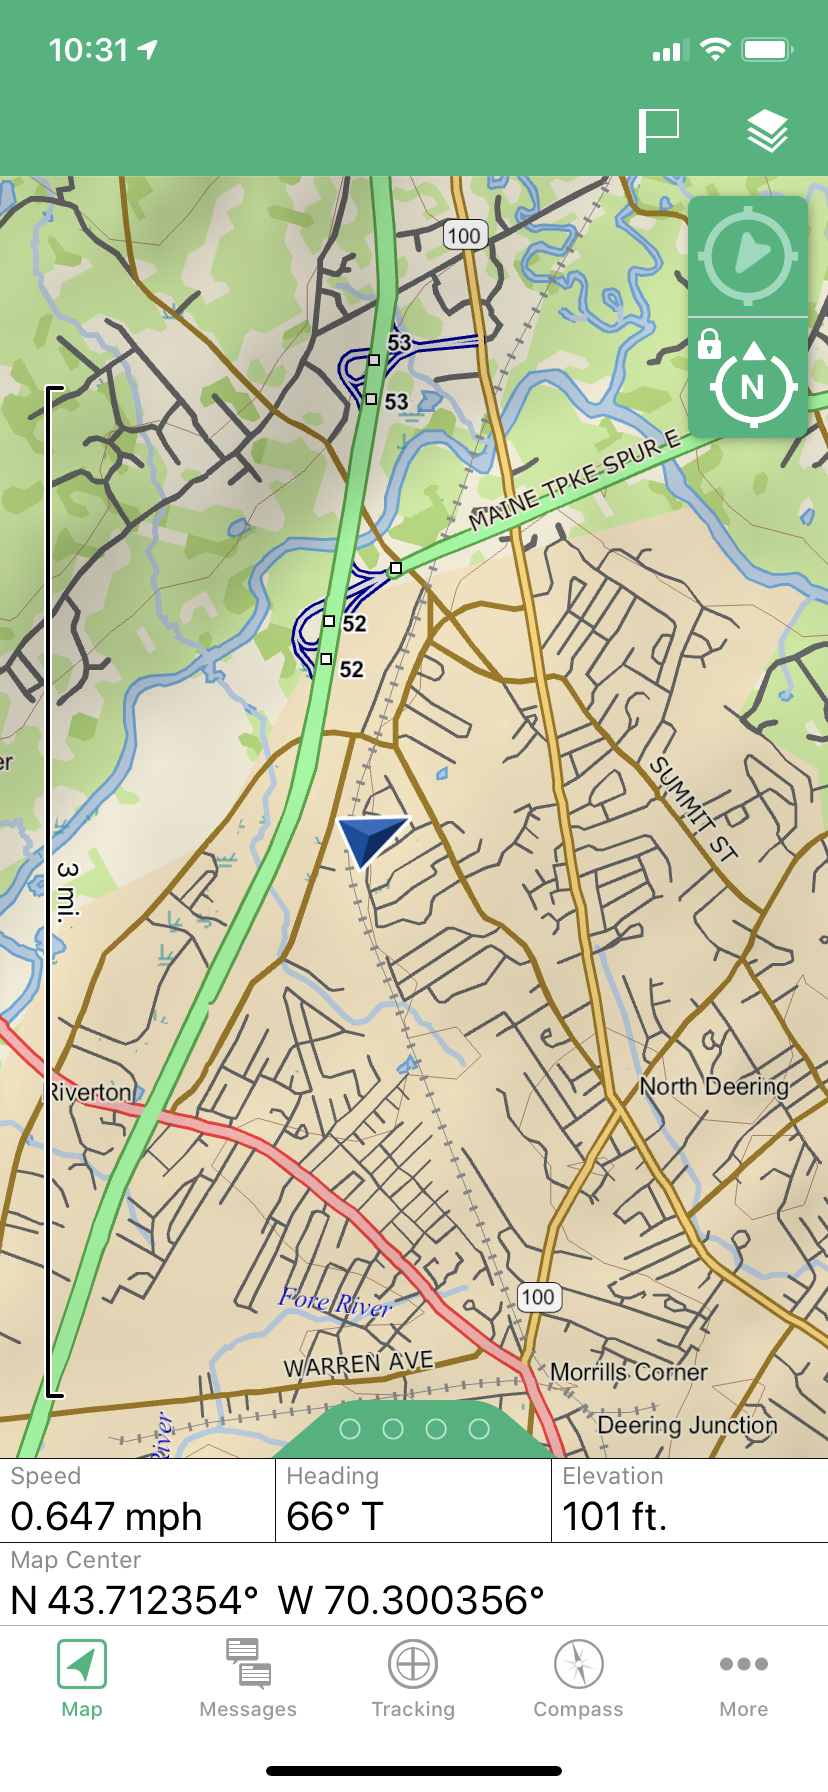
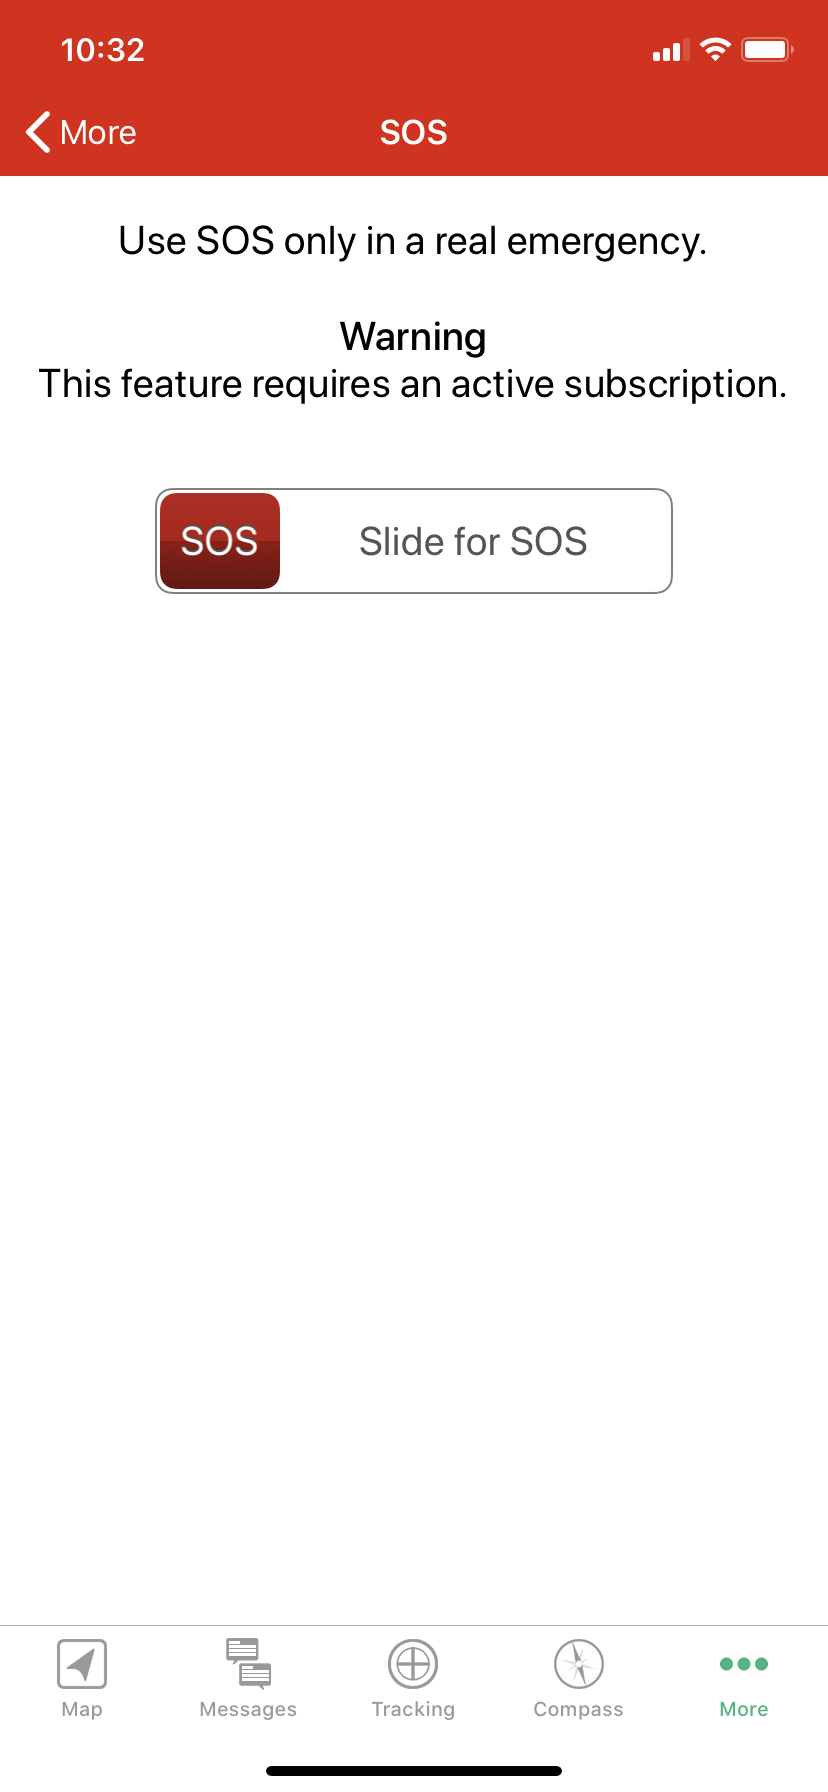
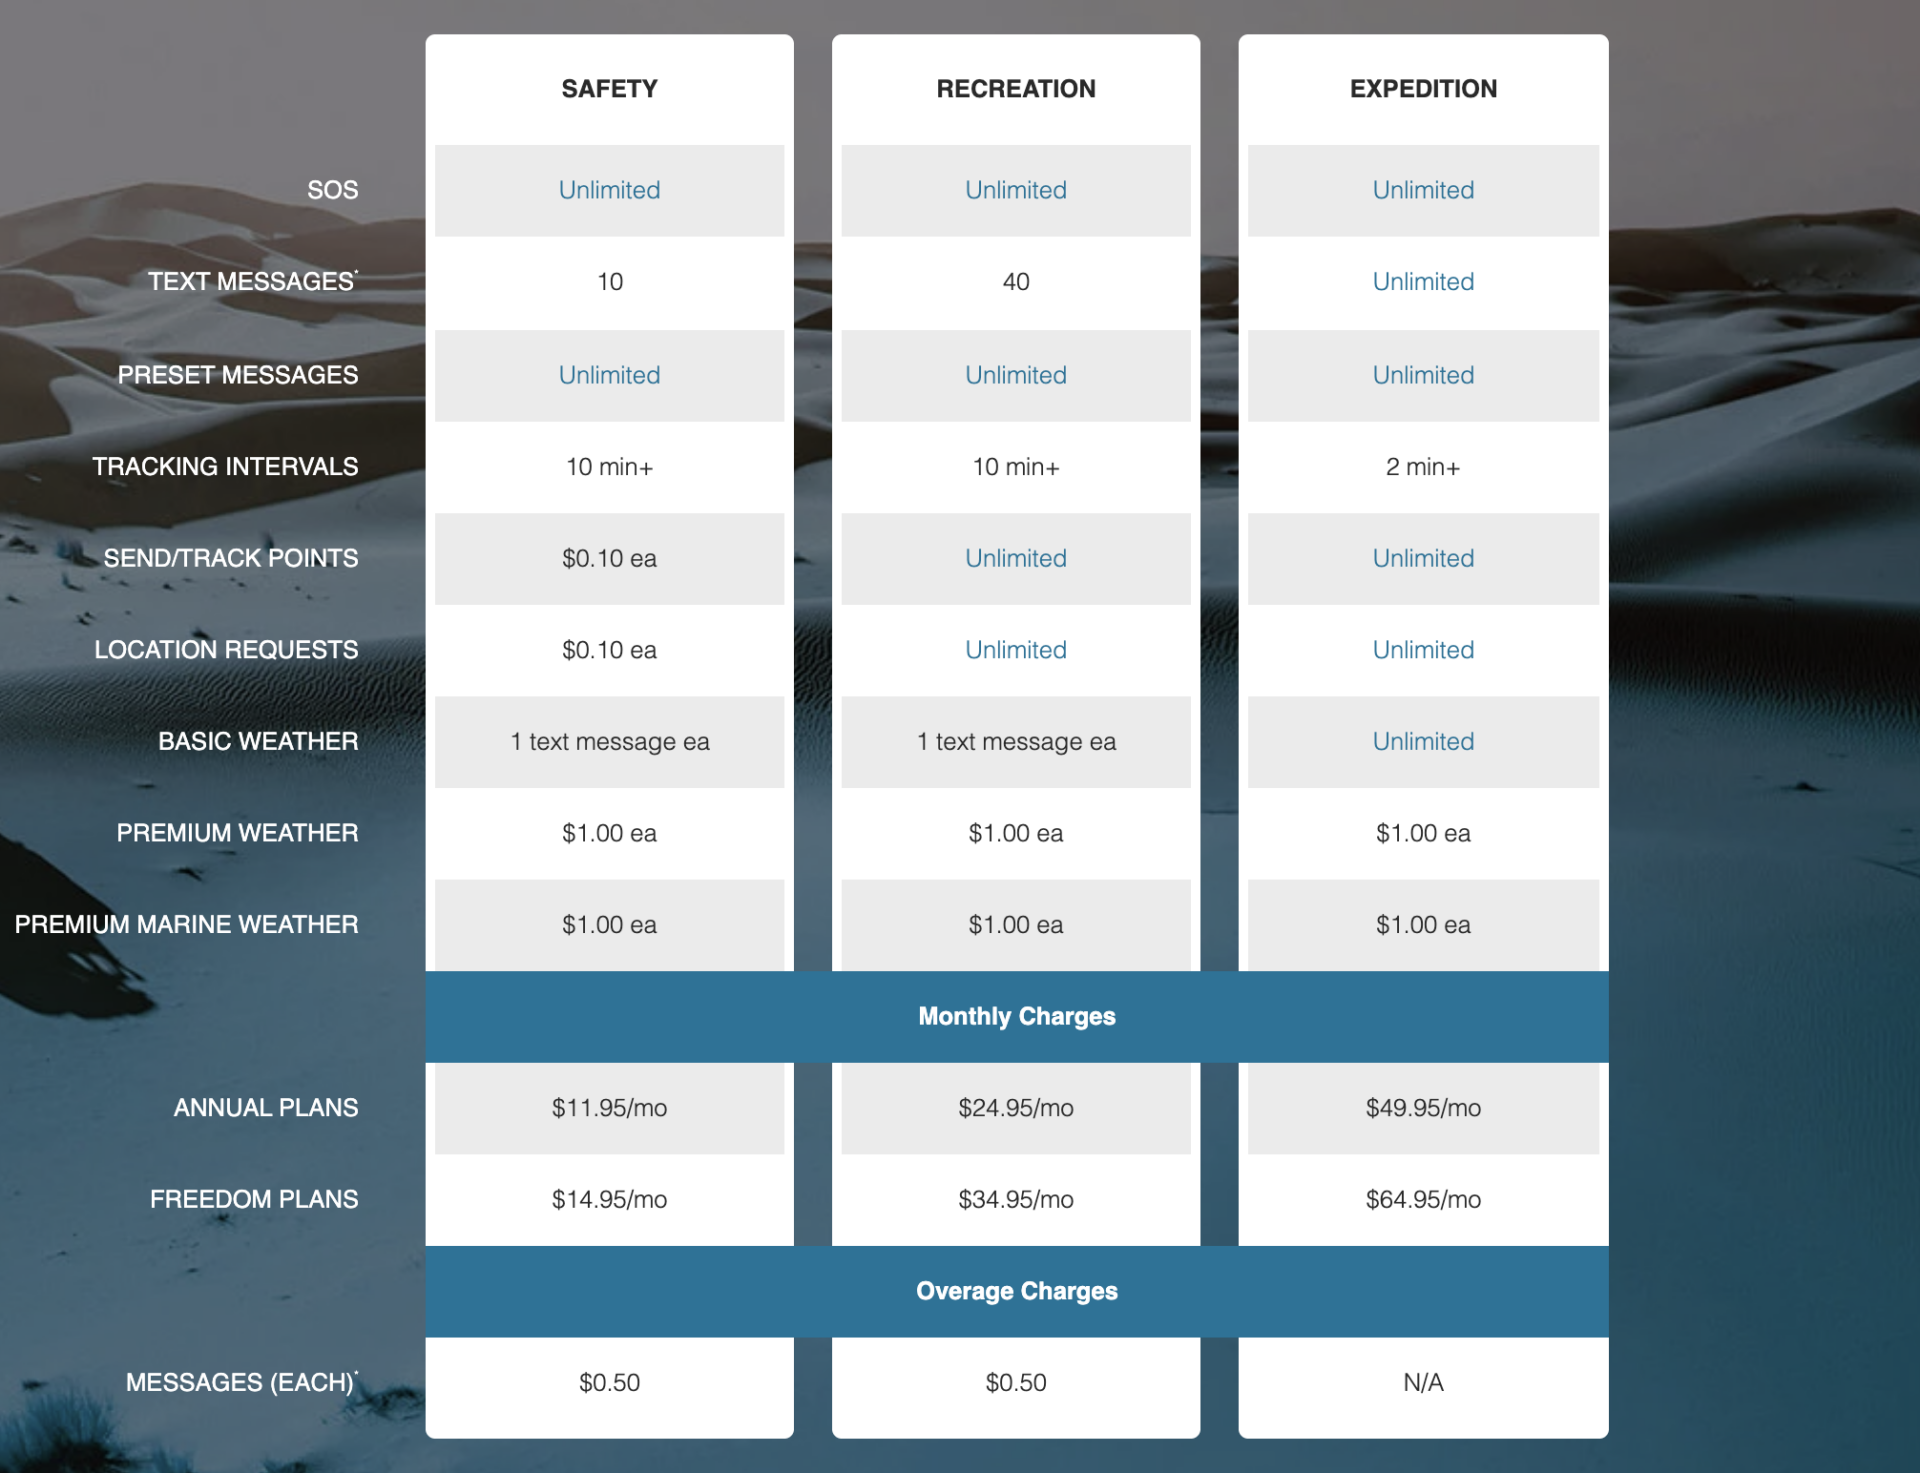

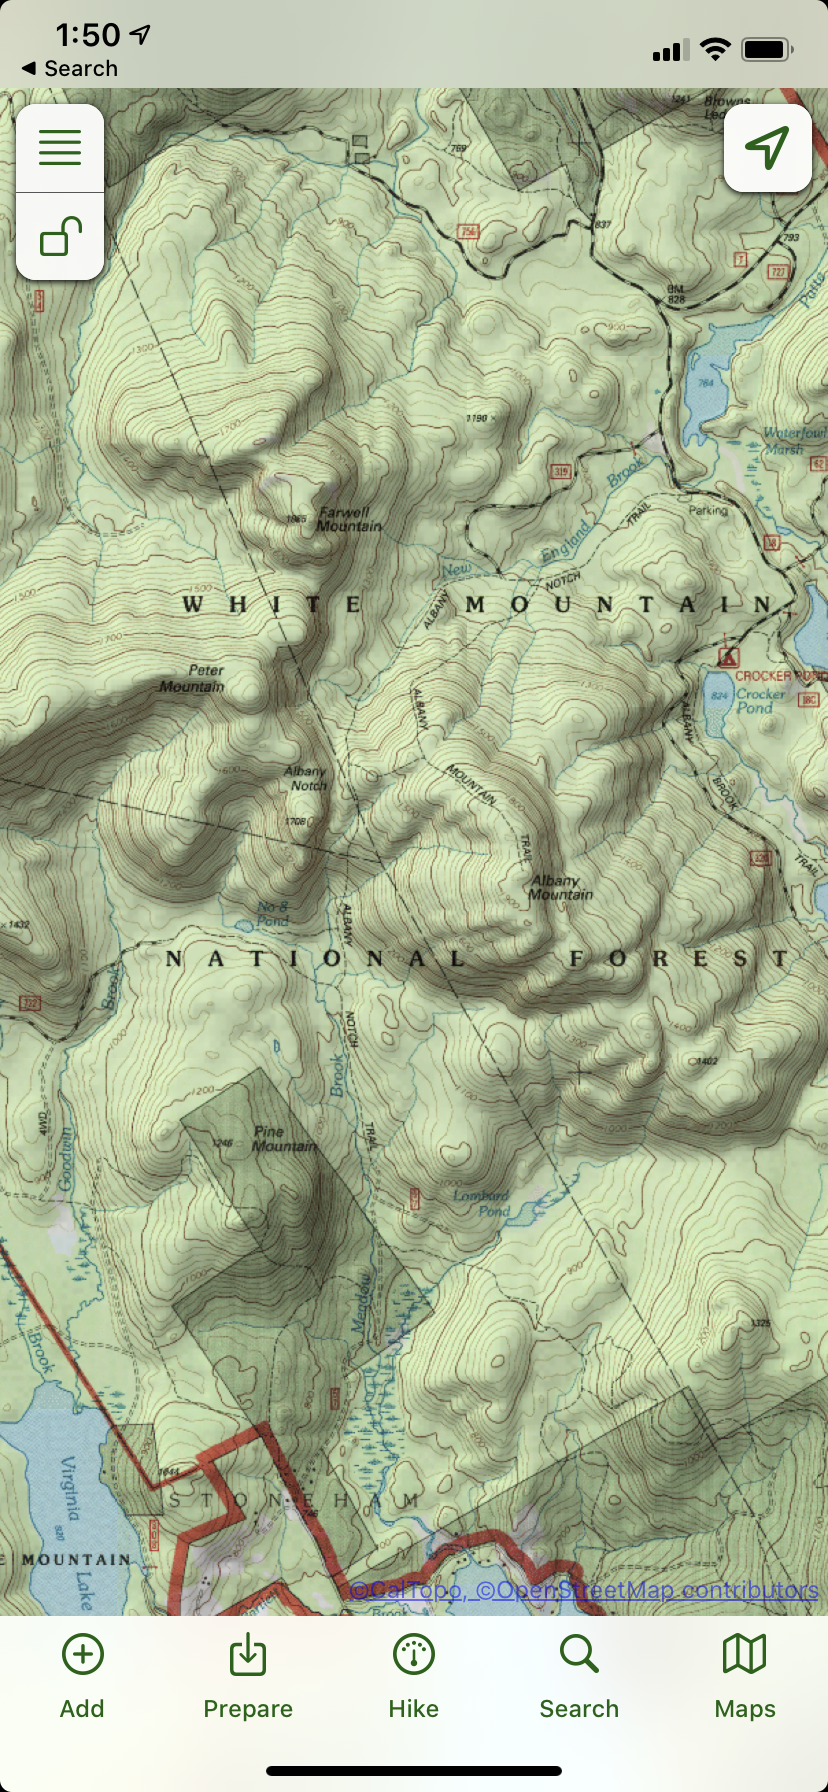
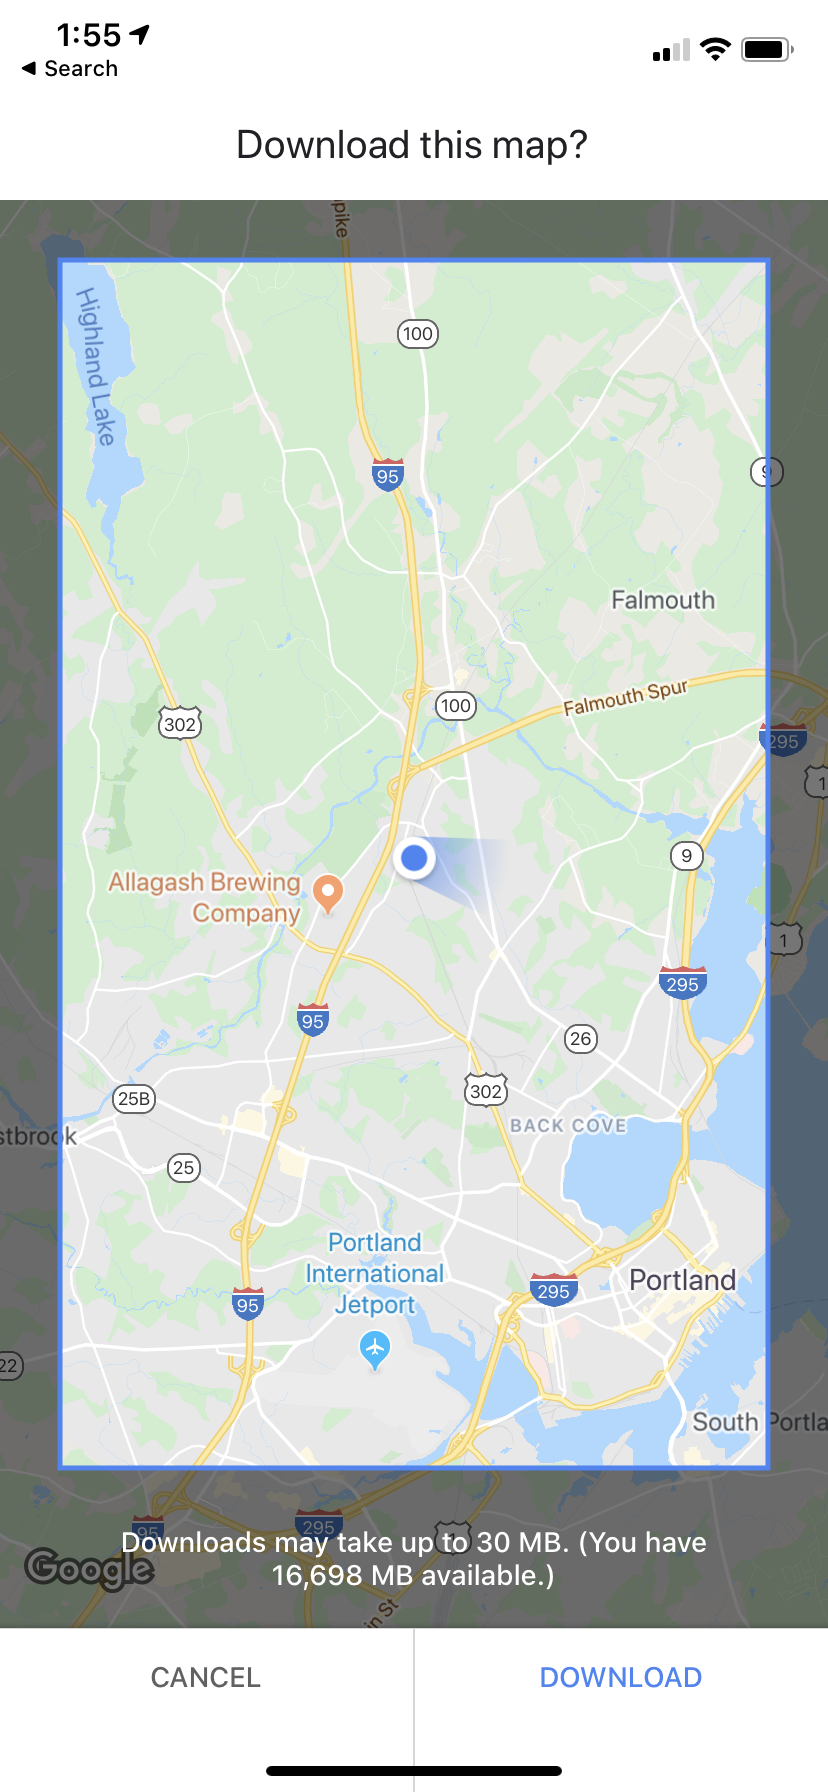

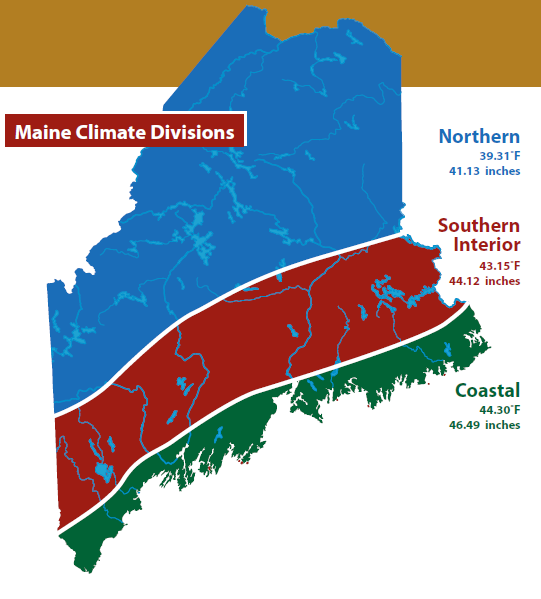

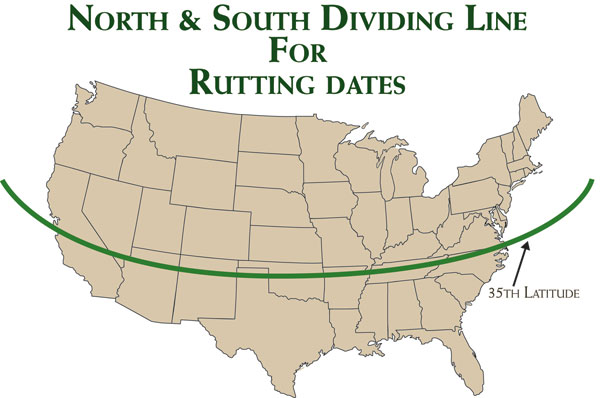
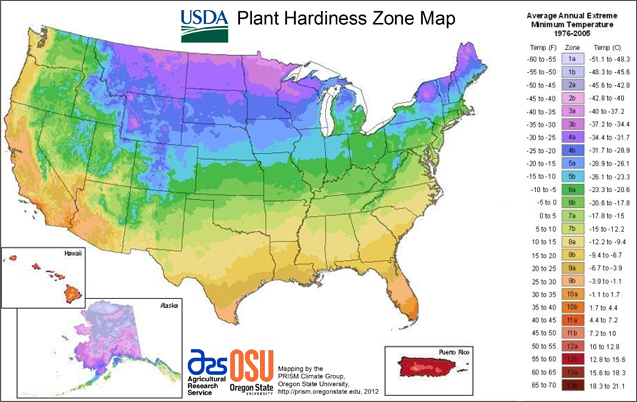
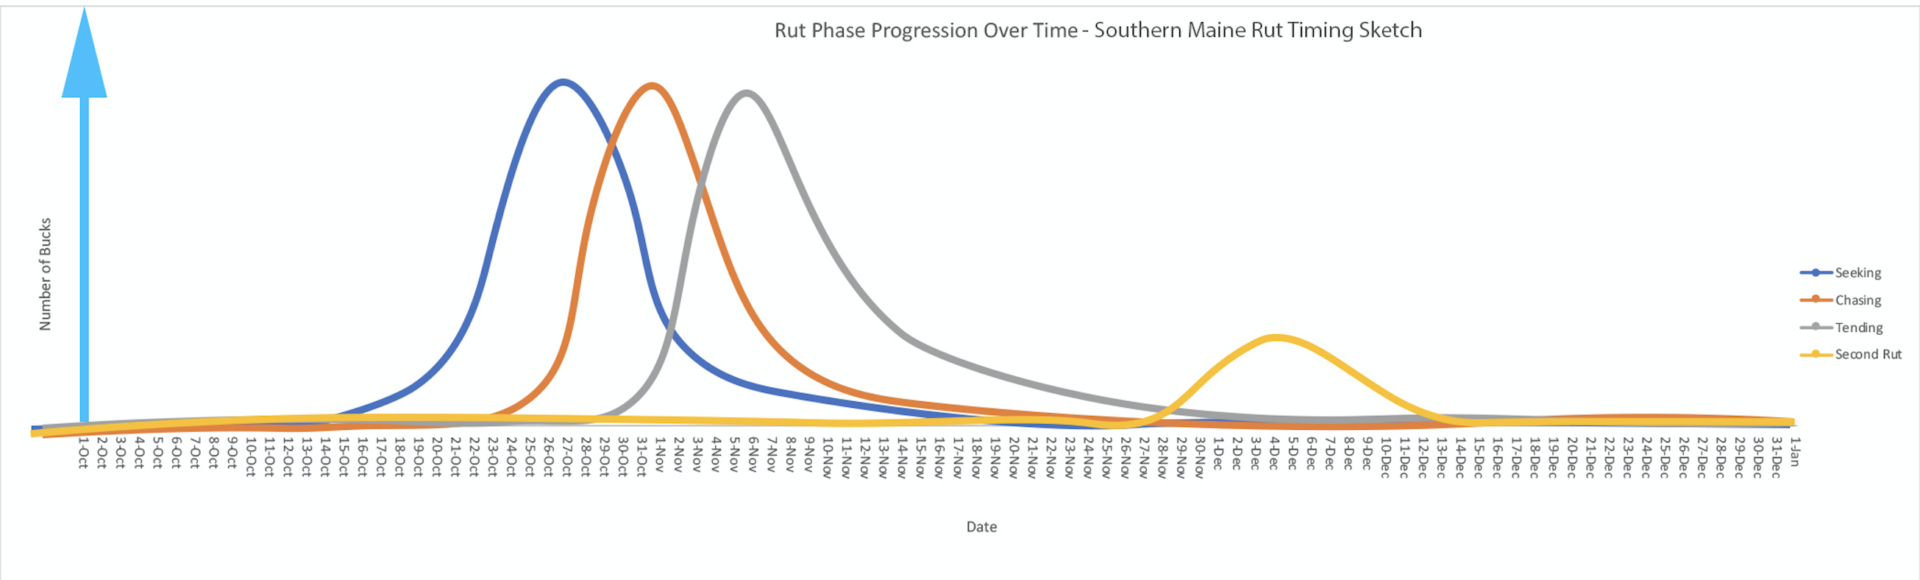
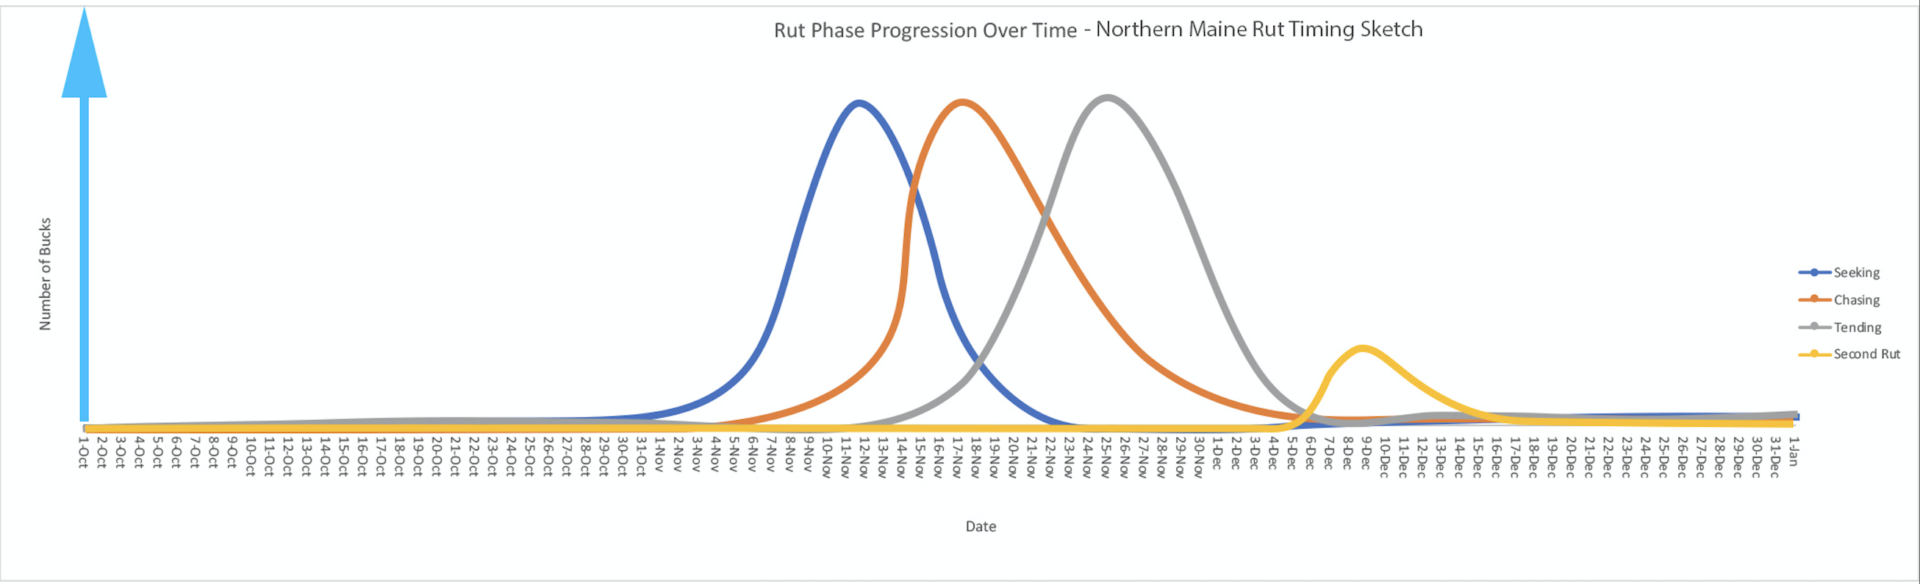

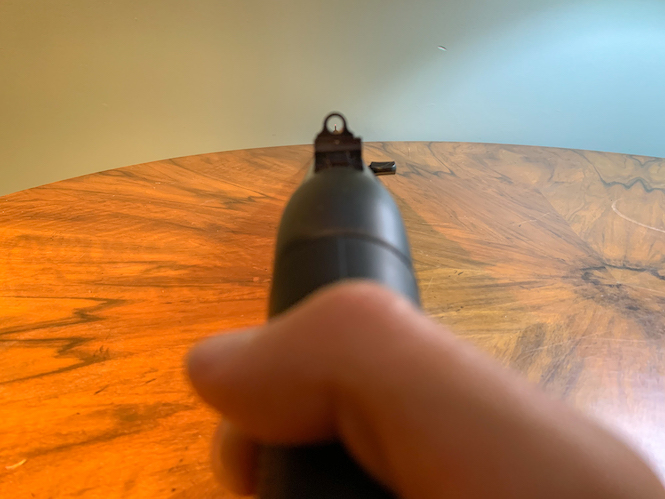
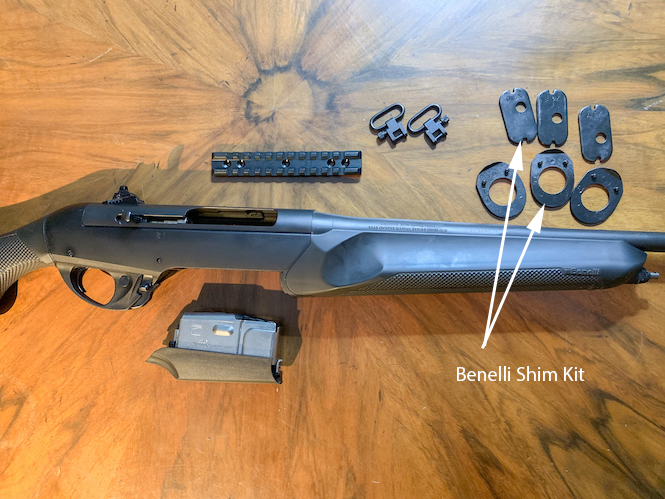
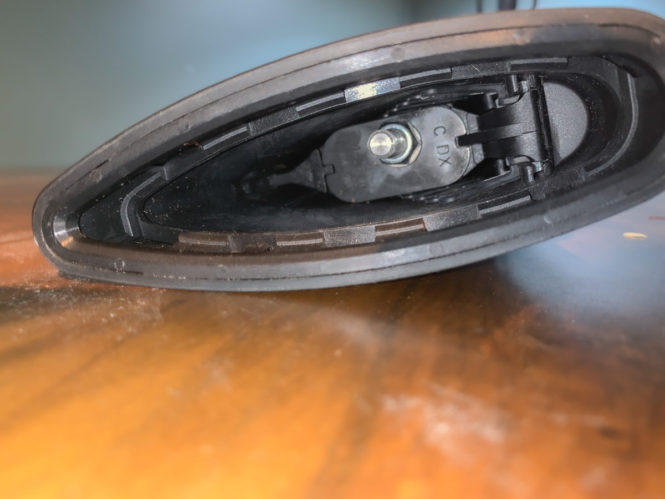

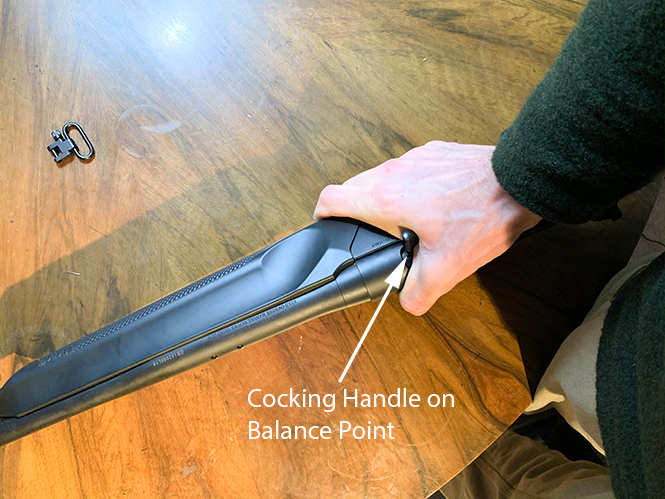
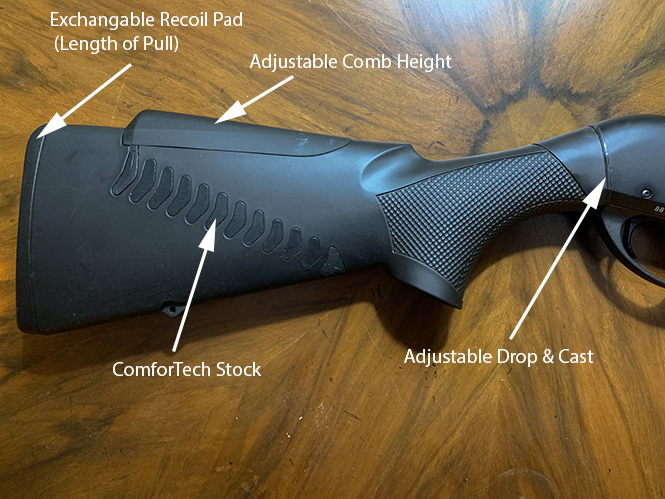
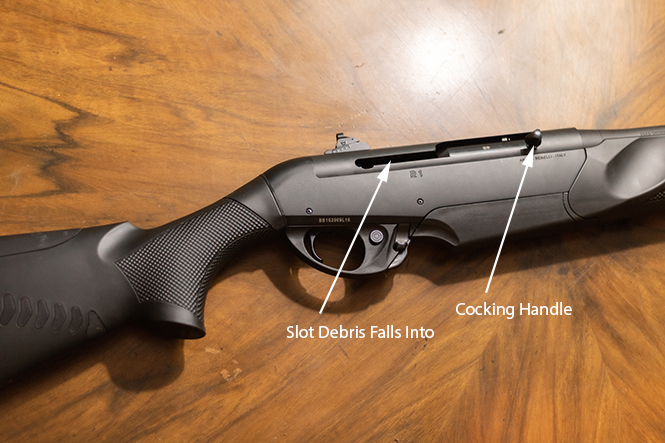

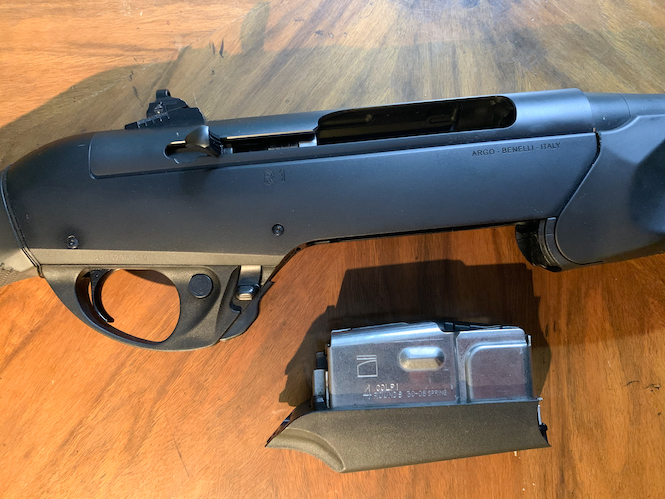

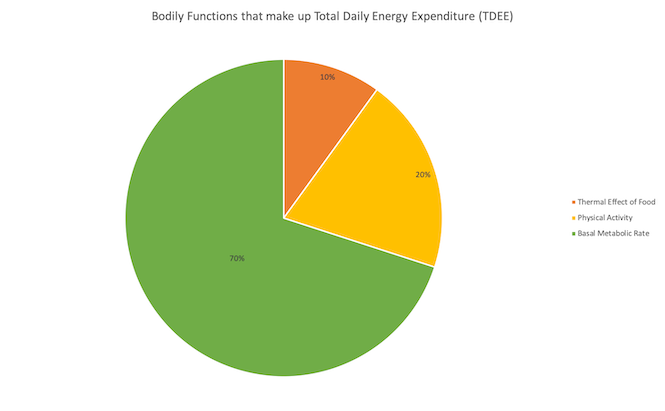

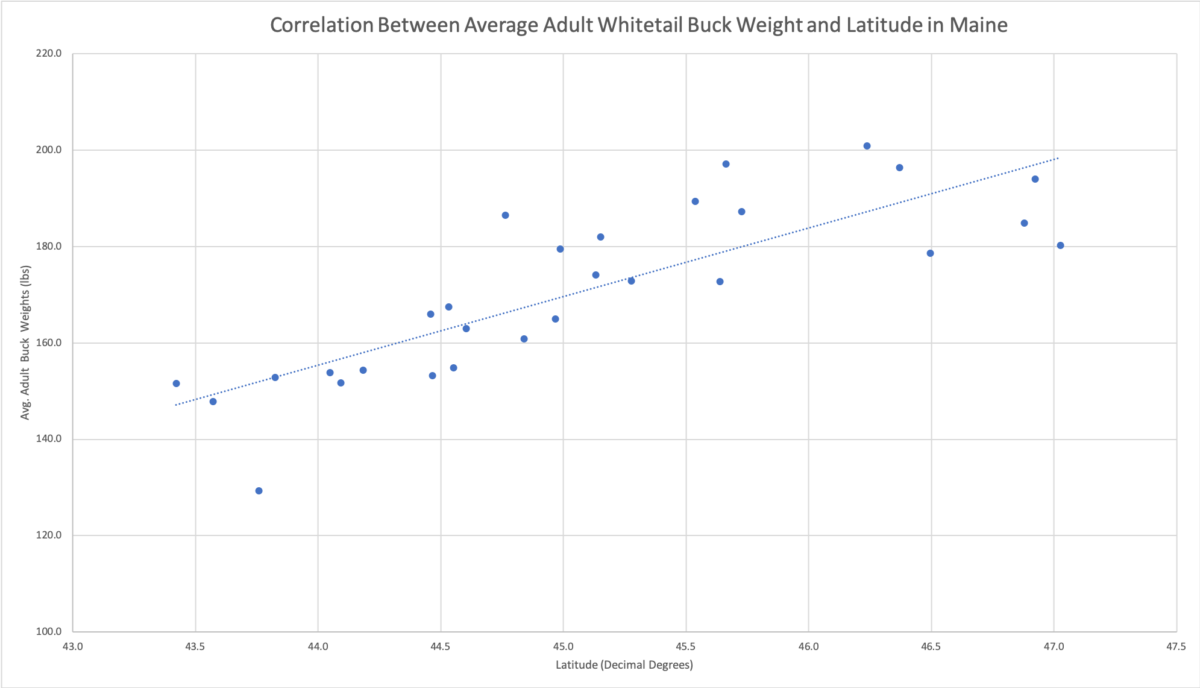
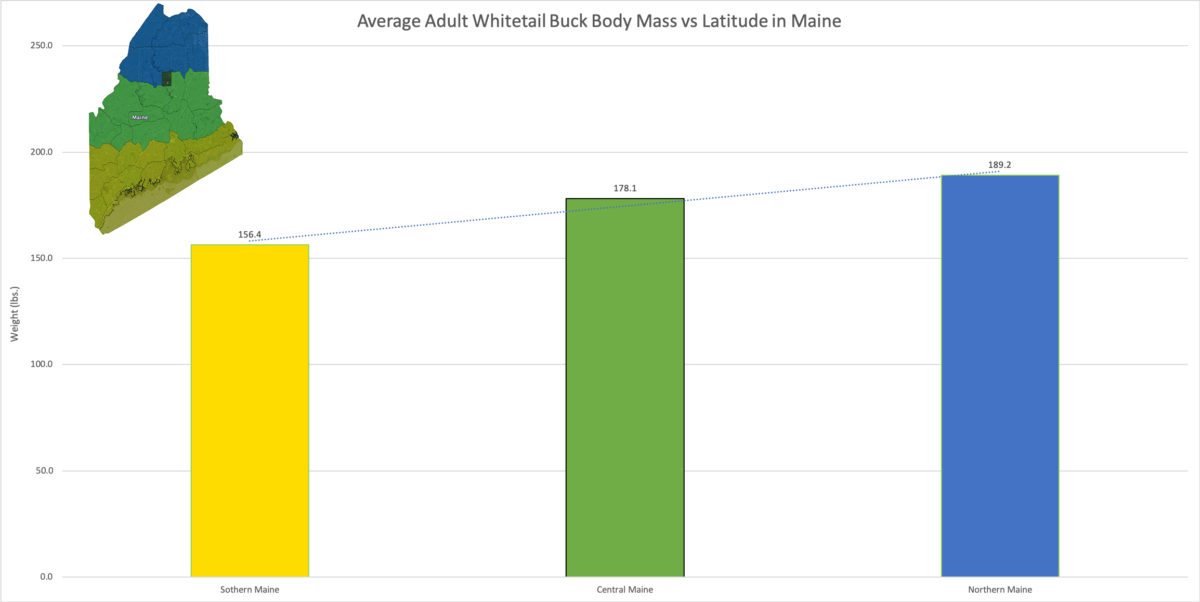

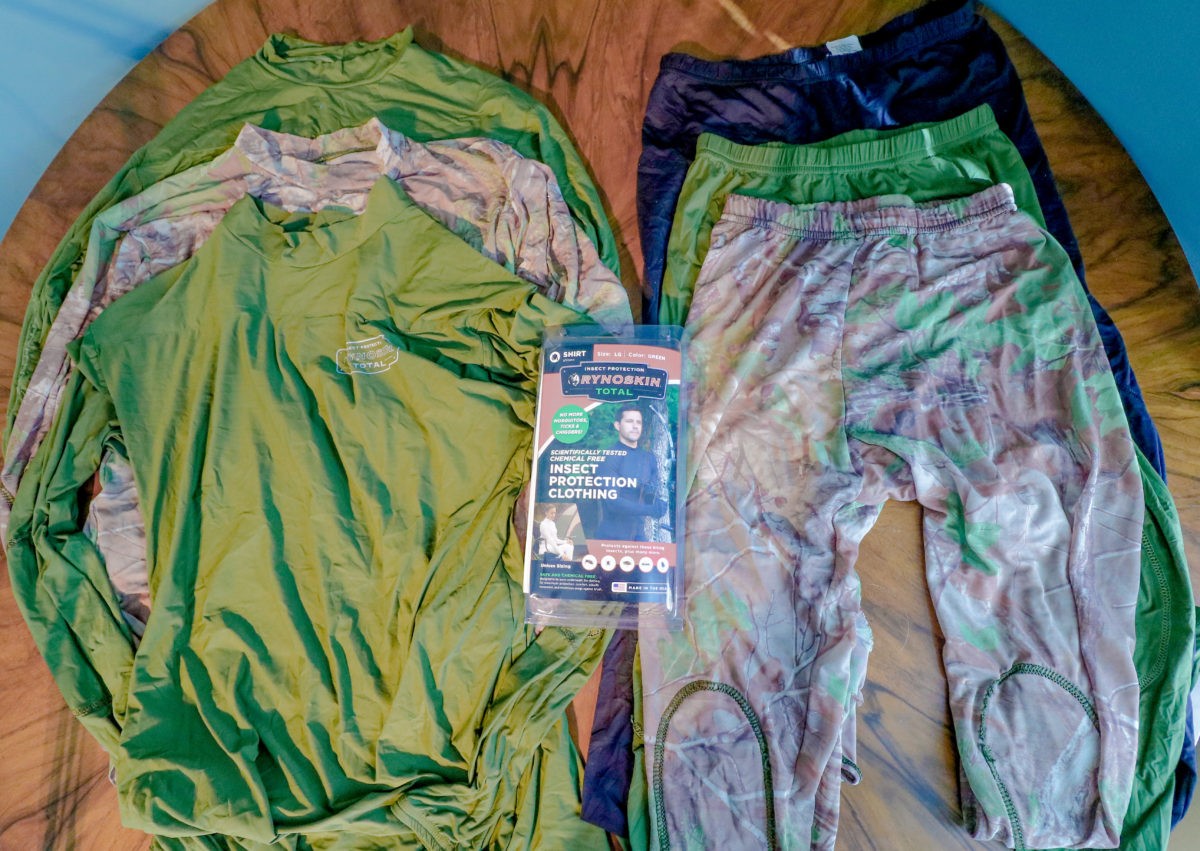
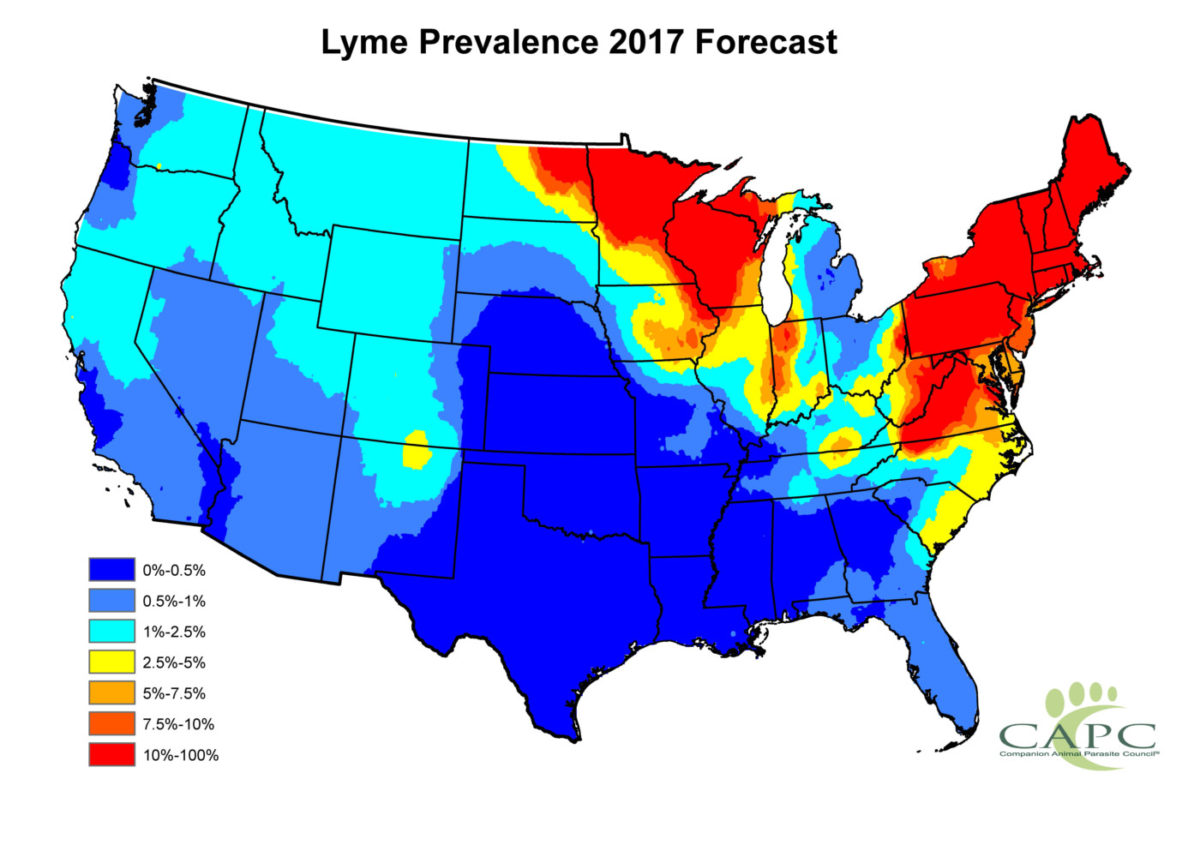
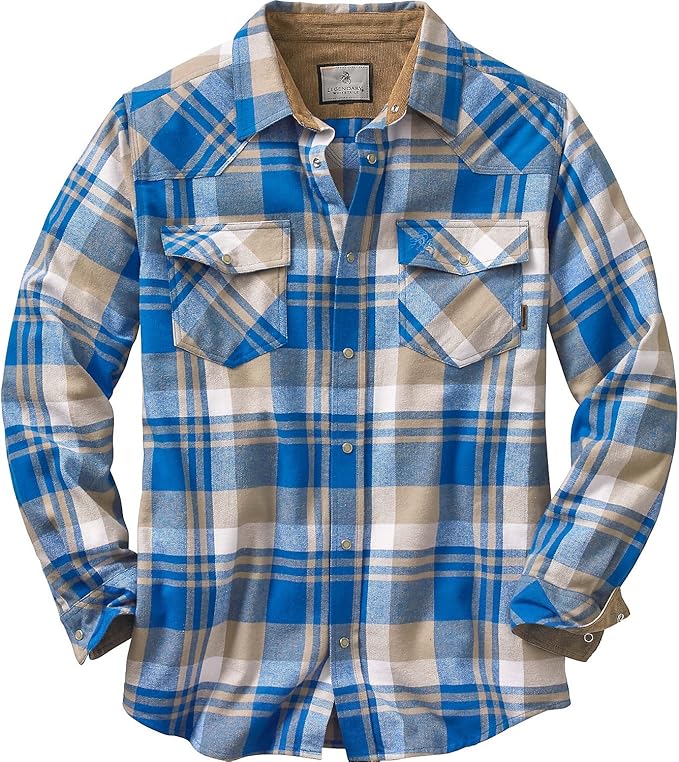
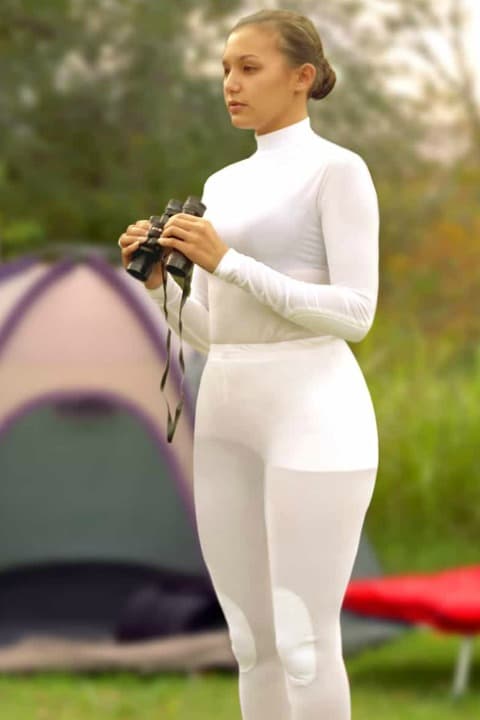
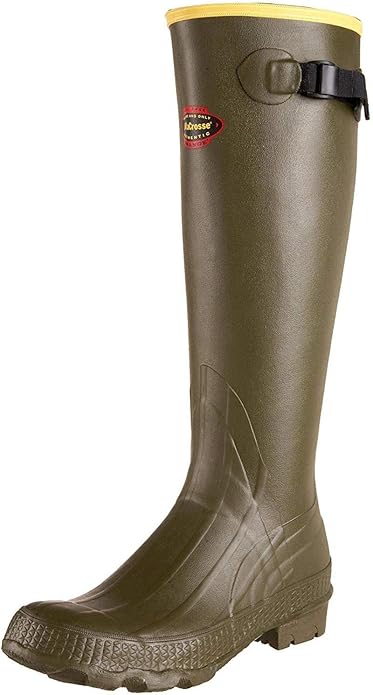
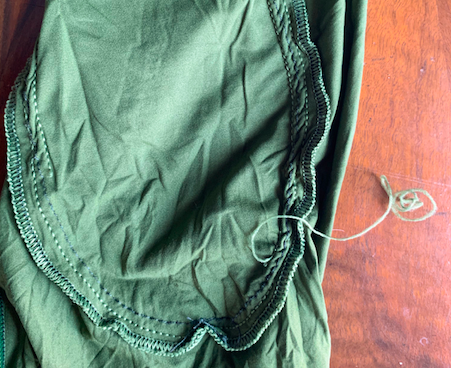
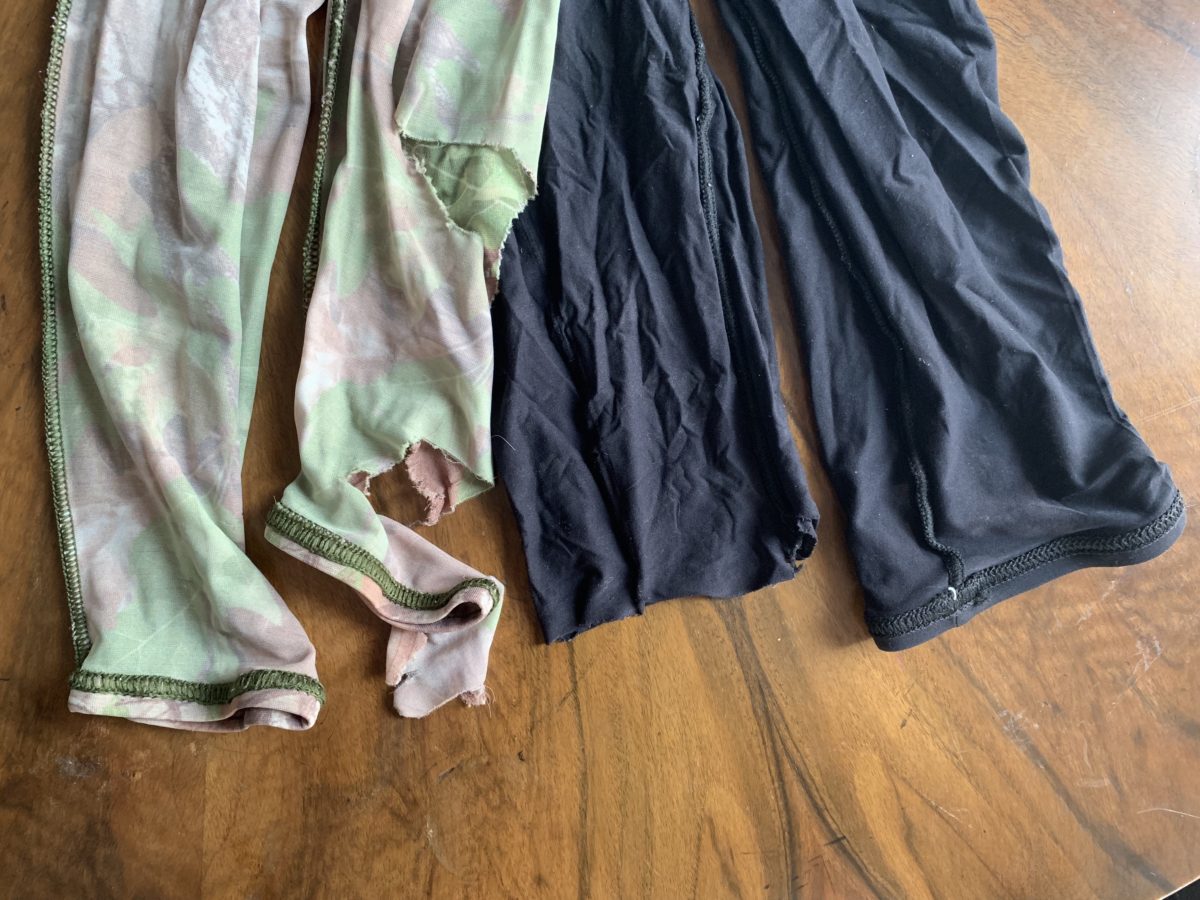
")