As a southern Mainer, I’ve spent most of my deer seasons hunting southern Maine. That changed about seven years ago, when I started tracking big bucks on snow. Following mature bucks through the woods taught me more than stand hunting ever could, especially during the rut. I saw where they traveled, how they moved between doe groups, and how often different bucks used the same exact travel corridors year after year.
many of those tracks were nearly identical, even across different seasons.
Eventually, it clicked. When there wasn’t enough snow to track, I started sitting those corridors in the north Maine woods during the rut. When it works, it really works—but it’s not for everyone. You sit all day. You might not see a deer for days. But when you finally do, there’s a good chance it’s the kind of buck you’re willing to wait for.
That was the plan for the 2025 season.
I scheduled November 12 through December 1 entirely around hunting. On days without snow, I would sit all day. If snow came, I’d track. A simple plan.
I focused on a piece of woods where I’d tracked multiple mature bucks over the years, a known corridor lined with historic rubs and signposts. Everything about it made sense. The travel patterns were proven. The sign was there. All I had to do was be patient.
Day 1 — November 12, 2025
I woke up to snow, which meant tracking.
It took a few hours, but eventually I cut a solid buck track dropping off a mountain into flatter ground. He was following a big doe. I didn’t have to follow him far before he brought me to a signpost rub I’d never seen before. He hammered the rub and made a fresh scrape right next to it—exactly the kind of behavior you hope to see during peak rut.
I stayed on him most of the day, but conditions went downhill fast. We only had a few inches of snow, and as temperatures rose, the tracks started melting. The buck was in full rut mode—wandering, searching, never settling down—and I wasn’t making meaningful progress.
By afternoon, tracking him was nearly impossible.
Day 2 — November 13, 2025
With no snow in the forecast, I switched gears and committed to an all-day sit. I tucked into a cedar swamp next to a large signpost rub and settled in.
Nothing.
No deer. No movement. Just a light dusting of snow that wasn’t enough for tracking the following day.
All day sit in a cedar swamp near a signpost rub
Day 3 — November 14, 2025
The wind shifted overnight, and while there still wasn’t enough snow to track, I adjusted my access route and hunted within about 150 yards of the previous day’s spot.
This location was different. Blowdowns mixed with old regenerating cuts created a natural funnel, exactly the kind of place bucks like to travel during the rut. I’d tracked multiple deer through this corridor in past seasons, and it was surrounded by signposts.
I hung my stand just 2–3 feet off the ground, putting my head about 8–9 feet high. That extra height makes a huge difference, it lets me see and shoot over blowdowns and small firs, extending my effective range by 20–30 yards. The year before, I’d hunted too high and learned the hard way on a nice buck that elevation can cost you opportunities.
Despite high expectations, I sat all day without seeing a deer.
I was discouraged. Three days in, I hadn’t seen a single deer—not even on the road driving in or out.
But on the walk back to the truck after dark, things changed.
We’d picked up a fresh dusting of snow while I was on stand during the day, and I started seeing tracks. First, I saw a nice buck track which I followed for a few yards which brought me to two fresh scrapes right next to each other, the track and scrapes couldn’t have been more than a couple hours old since there was no snow in them. I saw more tracks on my way out, a few does too.
For November 14 in northern Maine, that’s exactly what you want to see. I was betting more bucks would be in the area checking out these does.
That little bit of snow flipped the switch. I went to bed optimistic.
Day 4 — November 15, 2025
The wind wasn’t perfect, but it was workable. I slipped back into the same stand, which I’d left hanging overnight.
Around 7:30 a.m., a dark shape appeared in the balsam firs about 75 yards out. With just enough snow on the ground, it stood out immediately.
I got the rifle up, dialed the scope to 9x, and took the safety off. That magnification helps pick out antlers through thick fir poles.
It was a doe.
She worked her way toward me and stepped into the opening at about 50 yards. She fed calmly, occasionally glancing my way, she may have caught a swirl of my wind and for a moment I thought she might bust me, but she never did. She lingered for several minutes, then drifted off.
No sign of a buck behind her.
Still, she left fresh scent right in front of me, and she never spooked. That alone improved my odds.
Three hours later, another dark shape appeared—on the exact same trail.
My heart started pounding.
I raised the scope and immediately saw antlers moving through the firs at about 70 yards. Visibility was limited. I only had two or three shooting lanes unless he came closer—and bucks don’t linger during the rut.
The forest composition and my shooting lanes
I saw enough antler to make the decision.
When he stepped into the lane at about 65 yards, I centered the crosshairs on the rib cage and fired.
He dropped to his belly instantly, flailing and spinning. I tried to get another shot, but the movement was too violent. Then he got up and ran.
I felt good about the shot—but what I’d seen worried me.
After five minutes, I climbed down to check. Tracking was difficult. Ice crust covered much of the ground, and blood was scarce. I finally found the spot where he’d spun—scuffed ice, dirt, a few hairs, tiny drops of blood.
Once he ran, the sign disappeared.
I slowed way down and widened out, but couldn’t find blood or tracks in the ice. I ended up circling, staying in areas with better snow. About 20–30 yards from the shot site, I cut a track again. I dropped to my knees and studied it hard, I finally spotted the smallest speck of blood imaginable.
That was enough. I knew I found his track.
He threw me off once by jumping over a blowdown crown instead of running around it. But after that jump, the bleeding picked up. My confidence grew. I kept my head up, ready.
About 100 yards in, the blood really opened up.
Then I saw him.
He was quartering away and bedded under a fir tree, panting heavily. I shouldered the rifle and put a final round through him in his bed.
The Buck Laying In Its Bed Where I Shot It
As I approached, I realized he had bedded three or four times and bled heavily. I believe he would’ve died on his own in an hour—but I was grateful to end it quickly.
He ran 155 yards from the first shot.
My 2025 Maine Big Woods Buck
The Work Begins
By now it was close to noon, and I was three-quarters of a mile from the truck—the nearest road. I got to work immediately.
I dressed the buck and rigged him for dragging using 1-inch webbing tied to the antlers, with loop handles for each hand. It’s lighter, stronger, and far more comfortable than rope.
The drag took four hours.
I finally loaded him into the truck, made one more trip back for my gear in the dark, and headed to the tagging station.
Loading my buck into the truck – I used 1″ webbing for the drag (see antlers)
The buck was a solid 7-pointer, weighing 135 pounds. He wasn’t quite as big as I thought through the scope—but I was more than happy with him.
My 2025 Maine Buck Hanging From the Game Pole
Lessons Learned
1. Bucks Reuse the Same Corridors
Tracking over multiple seasons showed me something undeniable: bucks are creatures of habit during the rut. When terrain, cover, and doe movement align, they’ll travel the same routes repeatedly year to year. Sitting those corridors isn’t flashy, but it works if you commit to it.
2. All-Day Sits Are Mentally Hard — and Necessary
This style of hunting isn’t for everyone. You can go days without seeing a deer. But when movement finally happens, it often happens fast and without warning. Leaving early or bouncing between spots is the easiest way to miss the moment you’ve been waiting for.
3. Stand Height Matters More Than People Think
Hunting too high cost me opportunities in past seasons. Dropping my stand to just a few feet off the ground gave me better visibility through blowdowns and small firs, extended my shooting lanes and ultimately led to my success this year.
4. Snow Changes Everything — Even Just a Little
Even a light dusting can reveal fresh sign, boost confidence, and confirm deer movement. That small amount of snow on November 14 completely changed my outlook and ultimately kept me in the right place the next morning.
5. Read the Deer— Not the Shot
The first shot felt good, but the deer’s reaction told me everything I needed to know. Staying calm, slowing down, and trusting tracking fundamentals made the recovery possible. Rushing could have cost me that buck.
This was my girlfriend Michelle’s second year deer hunting, and coming into the season we felt like we were due.
Last year, we hunted hard—every morning and evening on weekends, plus a handful of weekdays whenever we could squeeze them in. We saw deer almost every sit. We had close calls. We had moments where our hearts were in our throats. Especially, with one 120″+ big buck we had at 10 yards. But we never got a clean, ethical shot, and the season ended without punching a tag.
This year started very differently.
We hunted just as hard, but the woods felt empty. We weren’t seeing deer during legal shooting hours, only catching glimpses right at first or last light—always just too late. If you hunted southern Maine this year, you probably noticed the same thing. There were no acorns. No apples. The woods simply didn’t have food. I’d never seen anything like it. Deer weren’t moving like they normally do, and when food disappears from the forest, deer adapt fast.
They were living on grass—whatever green they could find.
Before making that discovery, Michelle and I spent most of our time tucked back in thick stuff, in hard-to-access areas.
Hunting hard in the thick stuff with Michelle
But every night on the drive home, we’d see deer along the highway, in front lawns, crossing roads, and out in open fields. Not just some deer, we saw a LOT of deer. That started to bother me. The sign was obvious once we stopped ignoring it: the deer weren’t deep in the timber—they were close to people, feeding where grass still existed.
That realization forced me to rethink everything.
I’ve never liked hunting field edges. It goes against every instinct I have about mature bucks and daylight movement. But this wasn’t a normal year, and the deer were proving that. We needed to hunt where the deer were, not where we wanted them to be.
So we adjusted.
On November 21, we decided to hunt a field we hadn’t tried yet. Getting set up took longer than I wanted. We made noise. We left more scent than I was comfortable with. Normally, that alone would’ve been enough to ruin a sit. But the wind was strong, and I figured if deer showed up, it would be right at the end of shooting light anyway.
While scouting a spot for the stands, we noticed something that immediately changed our mood: deer droppings everywhere. The kind of sign that tells you deer are feeding there every night.
We finally settled into a spot just a foot or two off the ground on the field edge. I had barely sat down after hanging both stands when Michelle quietly said, “There’s a deer… I think it’s a buck.”
She wasn’t guessing.
A solid 8-pointer was already in the field with an hour and a half of legal shooting left.
The buck was nearly 200 yards away, and the odds were stacked against us. First, the buck had to come toward us. Next, somehow if the buck did decided to come our way, he couldn’t veer to the right of us, the shot wouldn’t be safe because of a farmhouse off to our right. Also, the buck would have to get close to us before we could shoot because from the direction he was coming, he was skylined—no backdrop. Everything about the setup made the likelihood of success low.
But then the buck started feeding.
He worked slowly toward us, head down, tearing through clover like it was the only food left on earth. He drifted right… then back left… then right again. Every few steps felt like a test. He just kept coming, basically on a string strait at us, but meandering slightly back and forth on his way.
Michelle needed to twist in her stand to line up a shot, so she rested her feet on my knees—I was set lower right beside her. Her arms started to shake from holding the .30-06 up for so long, so I supported her elbows to take some of the strain. Somehow, through all that movement, the buck never noticed us and kept coming.
Fifty yards. Forty. Thirty.
The buck stayed almost perfectly head-on the entire time—still skylined, still no shot. Then, finally, he did exactly what we needed at 30 yards. He turned broadside and started feeding left and would cross right in front of us.
Michelle struggled to find him in the scope. We’d left it cranked to 9x when he was far out, and now at 30 yards everything felt rushed. She dialed it back to 3x, the buck stopped again to feed, and I whispered, “Take the shot when you’re ready.”
The rifle fired. The buck ran—but not like a hit deer.
“Reload,” I whispered. “Reload, reload.”
She chambered another round. The buck stopped broadside at about 40 yards. Michelle fired again, hitting him in the spine and dropping him instantly. We saftied the rifle, jumped out of the ground level stands, and moved in. The buck needed a finishing shot, and Michelle placed it cleanly behind the front shoulder.
Then everything went quiet.
We stood there for a few minutes, letting the adrenaline and emotions settle, replaying the last hour in our heads before walking up to him in disbelief that her first deer ever was a big Maine buck.
The buck weighed 127 pounds on certified scales, a solid southern Maine 8-pointer for the time of year, and a memory neither of us will ever forget.
In July I took a family fishing trip to Eagle River Trout Lodge. Although, the trip was not exactly what we were expecting, we still all caught trophy brook trout, and had a great time nonetheless. This article is a review of Eagle River Lodge and our overall trip experience, along with tips, tricks, and recommendations to make your trip more successful by learning from our experiences.
Table of Contents
Airline Travel
The first real wrinkle in the trip came before we ever reached camp. Air Canada Airline delays stacked up and pushed our arrival into Goose Bay later than planned. Goose Bay is the last stop before flying in by floatplane, and by the time we touched down, the final flight of the day was already gone. Instead of heading straight in, we found ourselves checking into a hotel for an unplanned night. Morning brought another wait. Floatplanes run on weather, not schedules, and low cloud ceilings kept us grounded for a few hours until conditions finally improved enough for a safe flight.
Boarding Float Plane to Eagle River Lodge
Once the plane was finally able to fly, it was about another hour from Goose Bay to the lodge. By then, most of the morning and a good chunk of the afternoon were gone, leaving us with only a few hours to fish that evening. In total, air travel cost us roughly three-quarters of a day. If you’re planning this trip, it’s worth building in some buffer. Getting in a day early isn’t a bad idea if you want to make the most of your time on the water.
If you’ve never flown in on a floatplane before, it’s easily one of the highlights of the trip. We rode into camp in a de Havilland Beaver, the smaller of the two planes, with great views the entire way. The flight itself was right around an hour. The pilot was professional, clearly experienced and walked us through a thorough safety briefing before takeoff.
In Flight on Float Plane to Eagle River Lodge
Lodge Lifestyle
The lodge accommodates ten guests, and our group filled six of those spots. The other four people sharing camp with us were great company, and most evenings ended with everyone sitting down together for dinner and swapping stories from the day. Guest rooms in the lodge slept two people each. There may have been larger rooms, but we didn’t look into every option. The guides and cooks stayed in separate small wooden cabins, keeping to themselves until it was time to head out fishing. The lodge also has Starlink Wi-Fi, which worked reliably throughout our stay.
Mosquitoes were intense on land—bad enough that being outside without a head net and full coverage was almost unbearable. A fair number made their way into the lodge and into the rooms as well. When we arrived, we found both live and dead mosquitoes in our room and spent some time dealing with them. Better mosquito control inside the lodge would have been appreciated. That said, it was more of an annoyance than a dealbreaker.
Food quantity was never an issue. There was always plenty to eat, and the meals were solid. No one was raving about them, but no one left the table hungry either.
The Day to Day
The lodge runs on a simple daily schedule. You’re up for breakfast, then it’s straight out to fish. Guides run canoes powered by small motors, with each boat carrying the guide and two anglers. When the lodge is full, that puts five boats on the water at a time.
Eagle River WiFi and Schedule
From the lodge, it’s about an hour by boat to reach the fishing areas. At midday, everyone motors all the way back to camp for lunch, which felt a little inefficient. Between the round trip and the lunch break, it eats up roughly three hours. All us fishermen agreed that we would’ve preferred to stay out and fish than spend three hours running back to camp. The mosquitoes were so bad along the shore that none of us were especially interested in doing a shore lunch, under different conditions it would have been fun. However, a bag lunch on the boat would have been perfect. After lunch, it’s back out on the water again for the evening session.
On top of the lost time, boats had to leave the fishing areas relatively early for safety reasons. The water was shallow in places, and it wasn’t uncommon to bump rocks even in daylight, despite higher flows. Running back in the dark would have made that worse, so leaving a little early felt like the right call.
Motoring out to the ‘hot spots’ on Eagle River
On the way upriver, we’d usually fish a handful of spots, but most of what we caught there was pike. The better fishing started once we reached the main area, where the wide, lake-like stretch of water narrows down into something that feels more like a true river. The guides called this spot the “Flower Pot,” named for a small tree growing out of a rock. That transition zone is known for producing big brook trout. We picked up a few fish there, but for us, the broader lake section above it ended up being the most productive water of the trip.
The Flower Pot
Our Fishing Experience
When we went, the water levels were unusually high, most of the guides, if not all of them agreed that they had never seen flows as high as the Spring we had when we went in 2025. This made fishing tricky because the water was murky. Our guide said that the murky waters were not good because the fish can’t see as well and the dirty water is not good for their gills so they can’t breathe as good. The fast and murky waters also made it so there was never much of a hatch. So unfortunately, the river was not a great place to catch brook trout, at least not the narrow portions of the river.
It took a day or so before one of the groups discovered that all of the fish were out in the almost lake looking portion of the river where it really widens out and the flows slow down. However, casting with a fly was not the best way to fish these fish, mostly because it was very windy at times. Everyone ended up trolling streamers for that reason. One group found deep hole off one of the points of land which was a hot spot and one of the 5 boats would hook up every time, often 2 different boats would be fighting fish at the same time.
As far as our dream fly fishing trip goes for monster brook trout, trolling was not what we pictured. We were hoping to catch them on dry flies or wet flies in the river. That said, it’s never a bad day when you’re catching 3-5+ lbs brookies every 30 minutes or so, but I think everyone would agree it would be more fun casting for them.
Catching big trout in the lake-looking portion of the river
Some people in my party did end up catching fish by casting, so it wasn’t a total wash, and we did catch a fair number of northern pike. They can get close to 30 pounds but the biggest pike our group caught was probably 25 or so inches.
Eagle River Northern PikeEagle River Northern Pike
The average trout seemed to be 3-4 lbs with 5 pounders being somewhat common, 8 to 10 pounders are caught in the River as well. If I remember correctly, I think one group caught a fish close to 8 pounds in the week we were there.
Despite people having pretty good luck catching trout I only ended up having one trout bite, and I caught more non-target pickerel than others, and even one white sucker. The one trout bite I had ended up being the biggest trout I’d ever caught which was 23-inches long with about 14 inch girth, we estimate it at around to 5-6 lbs.
The Brook Trout I Caught on Eagle River
Catching these fish while trolling was wild. More often than not, they’d swim straight toward the boat after the hook-up, forcing you to reel as fast as you could just to keep tension and hope they didn’t throw the hook.
When I caught mine, I was half asleep, stretched out on the bottom of the canoe, when I felt a light tug on my fly rod. The guide saw it too. We looked at each other, then back at the rod, but nothing happened. We shrugged it off, assuming I’d picked up some grass and needed to check the fly. I started to wind in to check my line and what we didn’t realize was that the fish had been swimming along at the same speed as the boat!
Once I started winding in and the fish realized it was caught, it headed straight back toward the canoe again. When it got close, it never showed itself. Instead, it stayed deep, using its weight to its advantage. My line hung straight down, heavy enough that it felt like it was tied to an anchor. After a short but stubborn fight, the fish finally tired, and we were able to get it into the net.
Talking with the other boats later, we realized many others had a similar story where the big brook trout would swim straight at the boat.
Gear & Tackle We Used
We brought a little of everything recommended on Eagle Lake Outfitters’ gear list, but the trout didn’t seem especially picky—at least when it came to trolling streamers. One of my cousin’s biggest trout came on an oversized pike fly. I caught mine on a beat-up Mickey Finn I tied when I was ten years old, which probably tells you everything you need to know about selectivity.
Catching a big brook trout on a big pike fly
Most of the fish were caught on Mickey Finns and Woolly Buggers—black, green, and white, with bead heads, and those were the flies I leaned on the most as well. I ran a Muddler Minnow for a while too, but that mostly turned up pike. Pike were everywhere, and their teeth are no joke. If you don’t hook them cleanly in the corner of the mouth, they’ll bite your leader off in a hurry. If you’re planning to target pike, a steel leader is worth running, and it’s smart to bring plenty of extra flies—you’re likely to lose more than a few for those pike that bite when you’re trout fishing.
Final Thoughts
Overall, the trip delivered exactly what it promised in some ways and surprised us in others. The brook trout were there, and when things lined up, the fishing could be great. At the same time, high water, mosquitoes, and the daily logistics shaped the experience more than we expected. It wasn’t the classic image of casting dry flies to rising fish in a narrow river, but it was still hard to complain when heavy brookies were bending rods on a regular basis. Like any remote trip, flexibility mattered. If you go in understanding that conditions, weather, and fish behavior will dictate how you fish—and not the other way around—you’ll have a much better experience. For those willing to roll with it, Eagle River still offers the chance at the kind of brook trout most anglers only ever see in photos.
This hunting gift guide has 130+ gift ideas for hunters, sorted by price, making it easy to find the perfect hunting gift (even for non-hunters). You’ll find great hunting gift ideas for all types of hunters, at all budgets, and for any skill level. I started this gift article years ago and have kept adding to it and refining it over the years.
With my two decades of hunting experience (more About Me here) and years of conducting hands-on reviews of hunting products, I know what makes a great hunting gift.
If you don’t hunt yourself you might be lost trying to decide what a hunter would actually want as a gift. I understand you’re trying to make a thoughtful gift choice which is why I’ve written brief summaries of the gifts explaining the gift and what type of hunter they would be perfect for.
Most of these gift ideas are based on the gear I personally own or have tested. Throughout the article I will link to my gear review posts that will give you more information about a product if you wish to learn more.
This post contains Amazon and other affiliate links, which means I’ll receive a commission if you purchase through my link, at no extra cost to you. Of course, you are not obligated to use my links, but it does help fund these posts in hopes of bringing more value to you.
Table of Contents
Best Gifts For Hunters Under 25$
Cookbook – Buck, Buck Moose
This is a cookbook by Hank Shaw that is specifically for cooking four-legged antlered animals. This cookbook is one of the best gifts for hunters looking to level up their wild game cooking skills.
Electrical lighters are flameless and require no gas or butane making them an excellent choice for getting a fire started in poor conditions. This lighter is waterproof, windproof, and made from PVC and Zinc alloy for durability. It’s an interesting, unique, and functional gift making it a cool gift.
Splatterburst targets make great gifts because the bullet holes are highly visible at a distance. This makes sighting in guns a lot easier because you don’t have to walk down-range after every shot to see where you hit (you’ll still want binoculars though). These targets have thousands of reviews and a solid 5-stars.
Every gun hunter needs a place to store ammo. The Plano Ammo Box is a classic and has been around for a long time. The hard plastic is durable and the box makes a good seat if needed. The box is essentially waterproof, it can handle any weather event. It just can’t be submerged underwater. Throw a cushion on top of the ammo box for additional comfort.
A compass is a very useful tool for navigating while hunting. It can be used to get out of the woods when lost or to maintain a straight line. It is also an essential backup for any hunter using a GPS. A GPS can fail because it is electric and runs on a battery. A compass requires no battery making it very reliable and thus a great gift.
Gun socks are a silicone-treated knit fabric that will not hold moisture which prevents rust. Plus, they’re very affordable, making them a great small gift or stocking stuffer! Every hunter and gun owner wants to make sure their firearms are kept in good shape.
A duck call lanyard is a perfect duck hunting gift for someone with a lot of calls. This lanyard is worn around the neck for easy accessibility and allows a hunter to place many different calls on the lanyard. Different species of waterfowl will make different noises and having quick access to the right call at the right time is key.
This bow storage rack is made in the USA and is very sturdy. It’s much more convenient and safe to have a place to hang a bow during the hunting season than digging it out of a case or setting it on the ground. This hanger can also be used to hang guns and gear. It’s also great for allowing everything to dry after a day in wet conditions.
Don’t forget to grab an extra battery for your MOJO duck decoy. The battery life will decrease with age (which is expected) so it is always nice to have a backup battery to extend the operation time of the decoy. It’s also a great idea to have a backup battery for many other reasons such as forgetting a battery, breaking one, or losing one in the water. It never hurts to be prepared!
Every hunter with a game camera will appreciate a mobile SD card reader. Instead of wasting time by bringing the SD card back home to plug into a computer, you can just download photos and videos to your phone and put the SD card back in the camera. This saves a lot of unnecessary time dealing with SD Cards.
Buffs are versatile and can be worn in many different ways. I use mine as a facemask as well as for protection from the sun and insects. These could be great stocking stuffers.
A cold one always soothes the soul after long days of hunting. A whitetail buck cast-iron wall-mounted bottle opener would be one of the best gifts for a hunter’s home, man cave, or hunting camp.
This is an inexpensive but fantastic-sounding duck call and doesn’t require a lot of practice to get good. I’ve used these calls for 10+ years and are still my go-to duck call. They are excellent calls for both beginners and experienced hunters. Haydel is so confident you’ll like it that they offer a 100% satisfaction guarantee. If you’re looking for a great sound for a reasonable price this call is a great option and is one of the best gifts for duck hunters.
Do you know someone getting hunting withdrawal? Help them out by gifting them Hunting Simulator for PS4, Nintendo Switch, or Xbox. Hunting Simulator offers loads of options for weapons and locations. The weather is dynamic which makes gameplay very realistic. Additionally, gamers have the chance to play with others from around the world.
Slate calls are popular calls for turkey hunters because you can make realistic calls when performing both up-close quiet calls or loud calls for shock gobbles. The versatility of slate calls makes it one of the best gifts for turkey hunters.
LifeStraws are filtering straws that are very handy for hunters or outdoorsmen in general. These straws allow hunters to drink out of lakes, streams, ponds…etc. and will filter “the bad stuff” so you don’t get sick. With well over 15,000 reviews and 4.5 stars on Amazon, you can bet LifeStraws are the real deal. They are super lightweight and it beats carrying a heavy water bottle when you’re walking long distances.
All hunters are striving to become better hunters. Why not get a book so they can take their hunting to the next level? Check out my post: 10 Best Deer Hunting Books – Wisdom from the Top Big Buck Gurus. One of my absolute favorites is Bowhunting Pressured Whitetails by Chris and John Eberhart.
Bowhunting Pressured Whitetails by John and Chris Eberhart
Level up a hunter’s cooking skills with a wild game cookbook. This cookbook by the well-known hunter, Steven Rinella, offers cooking instructions and fantastic photography. Getting better at preparing wild-game meals is something every hunter can appreciate (who knows, maybe you’ll selfishly benefit as well).
The MeatEater Fish and Game Cookbook Is One Of The Best Gifts For Hunters
These grippy, fleece-lined, wool gloves are the ultimate fall hunting glove. They’re thick enough to keep your hands warm, but thin enough to safely enter a trigger guard. The added grips make sure the gun does not slip out of your hands. Because wool is a natural fiber it has many benefits such as being odor-resistant, insulating, water-resistant, moisture-wicking, excellent in snow, breathable, warm when wet, and quiet.
Every remote/backcountry hunter should have these matches in their emergency kit. The UCO stormproof matches are incredible! I own these matches and can personally attest to how well they work. They will maintain a flame even after being buried in sand or dunked in water. This match technology is invaluable when in a survival/emergency situation in remote areas.
Waterproof fire starters are another great gift for hunters who hunt in remote areas. Waterproof fire starters in combination with stormproof matches make an amazing gift combination for an emergency kit. These items greatly improve the odds of getting a fire started in poor weather conditions.
It’s helpful for hunters to minimize odor when hunting animals with powerful noses, like deer. If the wind direction starts swirling a good scent control regime can be the difference between a successful and not successful hunt. Dead Down Wind makes a great scent-killer kit which I’ve purchased many times over the years.
Neoprene duck hunting decoy gloves make great gifts for waterfowl hunters. These waterproof gloves keep hands dry when handling decoys. This can be critical when temperatures are cold, otherwise, the remainder of the hunt may be very uncomfortable with freezing hands.
These rubber gloves are my personal favorites. They have a nice soft fleece-like insulation in them that keeps my hands warm and cozy on the coldest duck hunting days which is important for an enjoyable hunt. Not only are they warm but they are also waterproof, keeping hands dry when handling decoys or anything wet out on the water. Long rubber gloves would be one of the best gifts for waterfowl hunters.
Do you know anyone who is training their dog for bird hunting? These realistically shaped and sized training dummies would make a great gift. They are scent injectable and easy to throw. They also float so training to retrieve in water is not an issue with these. There are different dummies to choose from including; ducks, doves, grouse, and pheasant decoys.
Lumenoks are lighted arrow nocks, when an arrow is shot the nocks light up making them easily visible in low light. For this reason, Lumenoks are a bowhunter’s best friend and are one of the best gifts for bowhunters. The ability to see where the arrow connects with the animal is important for effective recovery decisions.
Are you tired of getting holes in your socks? Darn Tough’s famous guarantee – “if these socks wear, tear, or develop holes, Darn Tough will replace them no questions asked. No strings. No conditions.” Every hunter needs quality socks. Because these socks are made from merino wool they are soft, moisture-wicking, anti-bacterial, durable, comfortable, and breathable.
A game hoist makes the butchering process so much easier. The 4-pulley system allows for animals to be easily adjusted to a perfect height which minimizes strain and makes the butchering process less straining. It comes with a 40’ rope and is rated for 600 lbs. There is also a 1500 lbs. option.
When you buy a GoPro you’ll want to buy accessories for it. There are many to choose from, but you can get a large bundle of accessories for very cheap. These accessories will be valuable because the GoPro will be able to be worn in any way imaginable.
A solar charger is a great gift idea for hunting in remote areas to keep phones charged after days without electricity. This charger is durable, weatherproof, and can be conveniently folded up and stored when not in use. The Qi battery bank has excellent reviews and offers a 100% money-back guarantee.
Lithium batteries make a world of difference and are an overlooked gift idea for hunters. This type of battery is much more efficient and works much better especially in cold weather making them superior for hunting products. They are especially useful for game cameras because they don’t fail like alkaline batteries will.
Getting wet and dirty from being in the elements and then repeatedly getting in your vehicle will wear out the seats. Seat covers keep their vehicle in good shape through the hunting seasons. Extra protection for vehicles is always appreciated especially during the hunting season when things can get dirty.
Blind material can be used to camouflage your boat, treestand, or for creating quick blinds when hunting mobile from the ground. It also has many uses and is a very affordable gift. I use mine to drape over the duck boat when duck hunting to break up the hard lines of the boat.
When you’re setting up on a weary game silence is key. Treestand silencing tape stops the loud twang from sticks on metal. It can be used to reduce the noise of treestand platforms, climbing sticks, buckles, bows, or any other noisy accessory that could use some sound dampening.
A fun way to keep memories while at the hunting cabin! Leave this book in your cabin or shack and fill it with memories from hunting adventures. This doubles as a great way to start connecting patterns and better understanding the animals in your hunting area as well.
A binocular harness wraps around the torso and keeps the binoculars at chest level so hunters can be hands-free when hunting. When hunters need their binoculars, they will be able to get to them effortlessly. A binocular harness is a great hunting gift because binoculars are only needed periodically, and a place to store them while maintaining quick access is helpful.
Yeti Rambler Coffee cups are popular gifts for hunters because of how well they work. This stainless steel, vacuum-insulated coffee mug will keep your drink at the desired temperature (hot or cold) for a very long time. These ramblers are nice to have during hunting trips that require a lot of driving time.
Blaze-orange is often a requirement for upland bird hunting. Even if it’s not required by law, it is never a bad idea to wear orange for safety. Gamehide makes a briar-proof semi-blaze-orange hunting vest specifically designed for upland bird hunting. It offers comfortable shoulder pads for shooting, many pockets, blood proof game pouch on the back for carrying game.
European mounts are a cost-effective way to show off a trophy. These “Little Hooker” hangers by Skull Hooker are pretty cool because you can adjust the skull up and down, as well as the side to side. The adjustability of these hangers makes them one of the best gifts for hunters looking to mount a skull.
The adjustability of these hangers makes them one of the best gifts for hunters.
Another cool and useful accessory for spotting scopes that would make a great gift is a spotting scope adapter. This adapter allows the hunter to place their phone camera over the spotting scope eyepiece and see through the spotting scope. This attachment is awesome because you can take photos and videos on your phone and review them in more detail when back at home.
This is a great starter kit for training dogs to shed hunt. It comes with a plastic antler, antler scent, and a training booklet. Starting early ensures the best results when training dogs for shed hunting. The booklet explains the three-step system that is involved and proven to work for training dogs to find sheds.
Rynoskin is chemical-free tight mesh clothing that protects against ticks, mosquitos, and other insects. Bugs have a hard time penetrating the tight mesh which makes being outdoors more enjoyable. Check out my full review here: Rynoskin Review: Insect and Tick Proof Clothing | Does it Work?
Vehicle Dog Seat Cover Gift For Hunting Dog Owners
Dog seat covers make excellent gifts for anyone who has a hunting dog. No matter what dogs are getting messy after a hunting trip. Hunting and training with a dog will usually result in a wet, muddy, brushy, and stinky pup. Seat covers keep the dog safe and keep the vehicle clean, especially after hunting trips.
Nothing is more annoying than trying to do something with a dull knife. A good quality knife sharpener will make it easy to get a sharp blade edge. This is a great option for a sharpening stone because it does not require oil, it only requires water to start sharpening.
Coleman is a well-known outdoor camping gear and equipment company with a great reputation. Many of their products are excellent for hunters as well. This portable propane cooker is perfect for hunting in remote areas or camping. There’s no better feeling than a warm meal or beverage after hunting all day in cold weather. The hunter you’re shopping for will be grateful for this gift.
Keep your drinks frosty with the Yeti Rambler Colster. This drink insulator is stainless steel for longevity and durability and vacuum insulated to keep drinks cold for a much longer time. You will be shocked at how much longer your drink will remain cold. With over 6500 reviews and a 5-star rating, you know it works well. Who doesn’t like to keep their beer cold and crisp?
Not only do clay pigeons and a clay pigeon launcher make a good gift, but they also create the foundation for a fun activity that many people can get involved in together. In addition to being a fun activity, you’ll get some good wing-shooting practice in for the upcoming hunting season.
There is nothing more uncomfortable than wet boots the next day. Instead, just place boots on this dryer and they’ll be toasty and dry for the next day. Boot dryers also kill odors and bacteria for even more scent control. This Peet boot dryer can dry every type of boot, even chest waders when folded down. I’ve personally owned this boot dryer for years and it is one of my top pieces for gear for hunting.
This power bank has a very large charging capacity and can charge electronics many times over. This particular powerbank has a huge storage capacity and can charge an iPhone up to seven times on a single charge.You never know when a GPS or phone could die for an unexpected reason so it’s nice to know you have a backup. I use my for my GoPros, heated vests, Garmin InReach, and to keep my phone charged when I’m out hunting.
A headlamp is a great gift for hunters because lights are a must at night when there’s no electricity. A headlamp keeps both hands free so you can focus on the task at hand. Just don’t skimp on a good headlamp because cheap ones will break or stop working. The Black Diamond Storm headlamp is one of the best headlamps for hunters because it’s waterproof and dustproof, has red, green, and blue light settings, and takes replaceable AAA batteries.
This Coleman propane stove is one of the most useful tools for hunters and it will last forever. The double burner design allows hunters to cook larger meals, especially when cooking for more than just one person. It offers wind-blocking panels and the burner intensity is adjustable. The reviews are amazing and it comes with a 3-year warranty.
Jet sleds are simple yet versatile tools making them a great gift for hunters. They offer easy and clean transportation of gear and harvested game. Whether the harvest is being pulled through snow or floated across a beaver pond, the jet sled can handle it. The Shappell jet sled is helpful in many other non-hunting-related scenarios as well such as ice fishing. These sleds are commonly attached to ATVs or snowmobiles for ease of transporting.
A thermos is a great gift for any hunter or outdoorsy person. Nothing lifts the spirits more than a warm beverage on those blustery cold days or a cold drink on those scorching days. Yeti is well-known for being one of the best companies for keeping drinks at the desired temperatures.
A waist pack is an excellent piece of gear for hunters traveling long distances on foot but don’t want to carry an entire backpack. Backpacks make it difficult to be stealthy, especially in thick woods. A waist pack allows the hunter to duck under trees and blowdowns with ease. I’ve done a couple reviews on hunting fanny packs and the Sitka Tool Belt is one of my favorites.
Re-sharpening a knife is time-consuming and inconvenient, with the Havalon knife you can easily replace the blade at any point. This is one of the best gifts for hunters because the replaceable blades are surgically sharp. Additionally, you can get different blades. There are regular blades, gut hooks, and saw blades for versatility and other hunting-related purposes.
This chair is an excellent choice for gun hunting from a blind. It is comfortable and has armrests and cupholders for added comfort. Be careful though, it’s so comfortable you might fall asleep! Another one of my favorite features is that the chair is very mobile because it folds up into a carrying case for transport.
A handy way to use a spotting scope for scouting is by clamping it onto the window of a vehicle. Since spotting scopes have a high zoom level they shake a lot if you don’t have something steady to put them on. The window attachment is super handy for getting steady visuals when scouting from the vehicle. This makes a great gift for hunters that seem to have everything.
Merino wool has many natural benefits, especially for those who hunt and spend a lot of time outdoors. With its insulating, breathability, and moisture-wicking properties, Merino Wool is perfect as a base layer. Softer than virgin wool, these long johns and base layers won’t cause irritation.
One of the most underrated pieces of gear is the ghillie suit. A ghillie suit is a great piece of camouflage, especially in areas that are difficult or dangerous to set up ground blinds or tree stands. They also give hunters the upper hand when hunting on public lands by allowing for more mobility. This can make a great gift for serious hunters that aren’t afraid to hunt from the ground and for those who seem to have everything.
A field dressing and meat processing kit is one of the best gifts for hunters that are looking to get into processing their own meat. A good butchering kit will help make the butchering process flow much smoother resulting in faster processing and more meat in the freezer. This 10-piece Mossy Oak kit will equip you with everything needed to field dress an animal efficiently.
Seat cushions are helpful for all types of hunters. I’ve used mine on top of my ammo box while duck hunting, on the ground for turkey hunting, and on metal treestand seats. I’ve even used my cushion as a backrest. The Fatboy Premium Seat Cushion uses layers of gel and memory foam to maximize comfort. It has quiet fabric and a buckle so it can be easily carried when in transport.
There’s nothing that will make you want to go home sooner than cold toes. Heated socks are perfect for hunters who plan on sitting in stands or blinds all day in the cold. These socks come with rechargeable lithium batteries, 3 heat settings, and heat elements that cover the entire toe area, ensuring you stay warm longer.
Waterproof duffle bags are very handy for many reasons and are one of the top gifts for hunters. They can be used in the bed of a truck on long hunting trips, or to keep gear dry in the duck boat, and an infinite amount of other scenarios where water is a factor when hunting. With a waterproof bag, there is no need to worry about the elements.
Although most tree stands come with a harness, a specialized, quality harness can make all the difference for safety and comfort while treestand hunting. Show the hunter in your life you want them to come home safely! It’s quiet, quick to put on, and is padded for comfort.
One of the worst feelings is when you are in the middle of nowhere and your car won’t start. A battery backup is a great gift because this eliminates the issue of a dead battery. A battery backup can turn a bad situation into an easy solution. The hunter you are shopping for will be very grateful to have this gift in a situation like this. It also adds peace of mind when hunting in remote places.
The extendibility of the pole saw allows you to reach branches you otherwise would not be able to reach. They are very helpful for clearing shooting lanes and preparing treestands for deer hunting. Every treestand hunter could use a quality pole saw to speed up, improve, and perfect treestand hunting setups.
Spices make a great gift for those that already own food processing equipment. Spices can be used for all types of cooking of wild-game and will surely get used. You can improve the flavor of wild game dishes greatly with high-quality spices. I suggest organic spices to go with healthy wild-meat for maximum flavor and health benefits.
Waders are one of the best gifts for hunters because they have a variety of hunting applications. I use mine for hunting ducks, geese, and deer as well as scouting and fishing. They are great for marshes and swamps that are too deep for hip boots. It is important for waders to be durable. These waders are heat welded, have a durable neoprene cross-hatch finish, and offer generous extra knee/shin padding to reinforce and prevent punctures and leaks. The TideWe MAX5 waders below are quality budget waders, you can read my review here.
A game cart makes it easy to transport heavy harvested animals making it ideal for an on-foot hunter. This cart features solid rubber wheels that won’t go flat on you in rough conditions, and a solid steel axel to hold up to the abuse of rocks or logs. This cart can double as a carrier for hunting blinds, firewood, and whatever else you find yourself dragging into or out of the woods. It’s foldable, rated up to 500 lbs., and offers a 100% satisfaction guarantee.
This is the ultimate wet environment hunting boot. The rubber can’t get over-saturated and start to seep like other materials. The Grange boots are 18-inches tall which is very handy for crossing streams, brooks, and shallow rivers. Multi-layer rubber on the heel and toe increases durability while the snug fit helps keep your feet comfortable and blister-free. Added benefits include scent-free protection and tear-resistant rubber. If you’re looking for more information on the best rubber boots, I did an extensive rubber boot comparison/review.
A blaze orange vest is often a requirement by law for hunting because it keeps hunters safe! Cabela’s Guide II vest makes a great blaze orange vest that is lightweight, quiet and has a lot of useful pockets (inside and outside) for storage which is surprisingly difficult to find in an orange vest. This is one of the best vests for big game hunting.
All bowhunters will appreciate a fully adjustable blind chair. The legs of this chair adjust which allows for perfectly leveled sitting. Additionally, the chair swivels 360º so that you can shoot out of any window of a blind easily. A comfortable chair is key for success because when you’re comfortable you can last longer in the blind. There aren’t any armrests so drawing a bow is seamless.
An electronic game call not only makes a great gift for a predator hunter, but also for a hunter of many other game species. These calls come with a function that lets you download new sounds, and download custom sounds so that it can be used for any type of hunting. This call can play 2 sounds at the same time and has a 300-yard remote range.
Jetboils are great because they boil water in under 100 seconds which is pretty incredible. They are super compact and useful tools when camping or backpacking because they are fast, lightweight, efficient, and give you a warm meal in remote areas, making the Jetboil one of the best gifts for hunting.
Shooting rests are very helpful for stabilizing a gun for both target practicing and during hunting situations. Their versatility makes them one of the best gifts for hunters. With a push of a trigger, the legs of this tripod self-extend telescopically to the perfect height on uneven terrain for the fastest target acquisition. The gun rest swivels 360º to make it easy and fluid to turn to the target.
If someone you know has a canvas tent for cold weather camping but does not have a wood stove, this could be the perfect gift. A small woodstove will keep the tent nice and toasty even in the nastiest of winter weather. Canvas tents are safe to use with wood-burning stoves. Guide Gear makes a nice small wood stove that is designed for canvas tents and has great reviews.
An arrow fletching jig is one of the best gifts for bowhunters because it allows them to customize their arrows exactly how they want them. Hunters like to be able to build their arrows because it gives them more control depending on their hunting style. One of the most common reasons to get a fletching jig is to add some helical (spin) to the fletching and to add additional fletchings to increase accuracy with broadheads.
The Bitzenbirger (below) is more pricey because it’s metal but it can be worth it because it does not chafe when you scrape the glue off as plastic ones can. You can control the steepness of the helical and has the option to evenly place 3 or 4 fletchings. There are different clamps you can buy for this jig so that you can get a left, right, or straight fletching offset.
If you know someone who’s looking for a sight for their bow this Trophy Ridge Hotwire is one of the best. It offers 2 fixed pins and a 3rd tool-less adjustable floating pin which is very helpful for practicing at long ranges. The adjustability of this sight makes it versatile and a great choice for bowhunters.
Let’s be honest, instant pots are basically the ultimate gift as long as the recipient likes eating. The instant pot can cook fantastic meals and cook them quickly. They’re especially useful for hunters because they are great at tenderizing tough meat. Instant pots are ideal for wild game stews.
Hand muffs are basically gold to hunters in frigid temperatures. When hands get cold it’s hard to enjoy yourself or think about anything else until your hands become warm. Hand muffs are one of the best gifts for hunters for this reason. The Sitka hand muff uses Gore-Tex and WindStopper layers with PrimaLoft insulation to block wind and keep hands warm.
With 12-hour battery life, this heated sweatshirt will help you stay warm with fewer layers. That means more mobility and extra heat when you need it. To top it off, this sweatshirt is washer and dryer safe. This gift would be perfect for any hunter in cold climates.
Guns are expensive, and cleaning them can be a hassle if proper cleaning gear isn’t owned. A gun cleaning kit is one of the best gifts for hunters because it makes cleaning guns hassle-free because there are specific tools for specific jobs. Otis is a well-known gun cleaning company and is not one of those cheap knock-offs. This kit has all of the tools a hunter will ever need for gun cleaning care.
Believe me, there is no such thing as “too many block targets” when it comes to archery. You can set up spare targets at different ranges, heights, or even have them moving to increase your skill and accuracy. Additionally, they get worn out over time so the more targets you have the more you can spread out the wear. The durability and versatility of this block target make it one of the best gifts for bowhunters.
Every bowhunter loves a realistic 3D target. The GlenDel Full-Rut Buck is one of the most popular 3D targets and is one of the best gifts for deer hunters. One of the best aspects of this target is the replaceable core. The replaceable core is key because it enables the target to last so much longer.
The Tactacam FTS is a cool gift, especially for hunters who seem to already have everything. It is an attachment for the Tactacam which enables it to attach to scopes and record through the scope. This means the magnification of your scope will allow the Tactacam to be magnified as well. This makes it one of the best gifts for hunters who want interesting video angles.
Tail cameras make some of the best gifts for hunters because hunters can literally never have enough. They are incredibly helpful for scouting because they let hunters know what animals are in the area. Increasing the number of cameras means better odds of finding and learning about the animals in the area, leading to more success.
Scentlok gear uses activated carbon to adsorb human odor. Activated carbon is highly effective at adsorbing, in fact, it is used extensively in a wide range of applications because of its effectiveness. This makes it very helpful for getting close to animals when hunting because animals, like deer, have a harder time picking up a hunter’s scent.
A MOJO duck decoy is one of the best gifts for duck hunters. The spinning wings from this motorized decoy can be seen and attract ducks from very far distances. The MOJO gives ducks confidence in a decoy setup, making them commit harder offering more opportunities and better shots. What hunter doesn’t want better opportunities?
Hip boots are great for situations when you know knee-high boots aren’t going to cut it. Places with varying depths of water, like swamps, are great places for hip boots and most hunters will be in swamps at some point or another. The waterproof rubber of these boots is very strong and can bust through brush with no problem.
A good meat grinder is one of the best gifts for hunters because a good grinder will save countless hours when processing your own game. The faster your meat grinder, the quicker you can get the meat in the freezer. The STX Turboforce meat grinder is an excellent choice. It can grind 180-240 lbs. of meat per hour which is quite fast for a meat grinder at this price. The grinder comes with multiple attachments so you can make burger or sausage.
A shooting rest is one of the best tools for hunters who use firearms because the reduced human error results in fewer rounds downrange to start hitting the bullseye. This saves time and money and makes it one of the best gifts for hunters. The Lead Sled isn’t any ordinary shooting rest, it is highly adjustable to fit just about any shotgun or rifle and has fine adjustment knobs.
Coveralls are the perfect gift for the new hunter who is looking to ensure maximum warmth on bitterly cold days as the full-body coverage cuts the wind and holds in heat. No heat is lost because there’s no separation between the top and bottom layers. These Redhead insulated and waterproof coveralls ensure the hunter will stay warm and dry on stand no matter the conditions.
Whether the hunter in your life is a professional videographer, or a hobbyist wanting to capture their hunting adventures, this camera arm is one of the best gifts for hunters looking for a quality camera arm. Fourth Arrow makes one of the best camera arms that is affordable yet durable. This arm will keep footage still for professional-looking video, keeping the hunting memories alive and well long after the season has ended.
ScentLok uses activated carbon for maximum odor adsorption. Activated carbon naturally adsorbs human odor because it has a huge surface area. When used properly Scent-Lok clothing is very effective at reducing odor and preventing animals from smelling the hunter. The coverall is also the best style of clothing from keeping scent from escaping the body.
Climbing sticks are easily one of the best gifts for a mobile hunter. The best climbing sticks are lightweight, durable, interlocking, quiet, and easy to transport, pieces of ladder that will get you in the most awkward of trees safely. There are also many 3rd party attachments that be added to climbing sticks for ultimate customization.
Meat smokers are one of the best gifts for hunters because they are the gift that keeps on giving. This meat smoker is easy to monitor and control and has a removable ashtray for easy cleanup. This meat smoker has three smoking racks so a good amount of meat can be smoked at one time.
There is a lot to like about the Leupold RX-1400i TBR/W. This rangefinder is one of the best rangefinders for hunting for the money because of the price and its ability to be used by both rifle hunters at long range and bowhunters at close ranges. It has angle compensation and internal ballistic profiles.
Leupold RX-1400i TBR/W – Best Hunting Rangefinder For The Money
Wool fibers are strong, insulating, odor resistant, water-resistant, moisture-wicking, excellent in snow, breathable, warm when wet, and quiet. This L.L. Bean wool jacket is one of the best wool hunting jackets because it can be used in a wide array of settings and weather conditions. In addition to the wool, this jacket has added liners to improve wind-proofing and insulation making it a very warm jacket to fight off the elements.
Warmest Hunting Boots For Cold-Weather & Winter Hunting
Nothing ruins a hunt faster than cold, wet toes. When winter hits it can be hard to maintain warm feet. These Baffin Titan boots are for hardcore cold-weather hunters that will be stationary for long periods of time. They are waterproof, breathable, scent-free, have removable liners, and more. For additional warmth, I consider getting boots sized slightly larger.
Whether you’re looking to buy for a waterfowl hunter, deer hunter, turkey hunter…etc, binoculars are a handy tool. I tested 14 different binoculars from all price ranges to see which binoculars were the best value for the money. In my opinion, the Athlon Midas binoculars were by far the best value. You can check out my video review below:
This cooler is perfect for day trips to keep lunches and drinks cold and fresh while hunting. This cooler offers a waterproof, mildew, and tear-resistant exterior and the remarkable ability to stay cold as you’d expect from Yeti. It is important for hunters to have gear that stands up to the elements, and this cooler does just that.
Layout blinds are great gifts for hunters that do a lot of waterfowl hunting, especially for geese. Hunters are able to stay hidden in plain sight by laying down in a field inside one of these blinds. The ALPS OutdoorZ Legend Layout Blind is comfortable, waterproof, and easily transportable. What separates the ALPS from other layout blinds is that it has a specially designed chair with “zero gravity” that makes laying on the ground very comfortable.
The Tactacam is one of the best gifts for hunters trying to get epic film and interesting angles. The Tactacam is an action camera that is weatherproof, image-stabilized, 4K, offers 120 fps slow motion, and has 8x zoom. The zoom is a great feature and is something that lacks in the GoPro. The Tactacam cameras are versatile and are easily mounted to scopes and bows in order to easily capture hunts.
In many states hunting with a muzzleloader allows hunters to extend their hunting seasons. What hunter doesn’t want to increase the length of their hunting season? State regulations often have specific muzzleloader seasons. You can find quality muzzleloaders for surprisingly good prices. The Traditions Buckstalker Muzzleloader is a favorite among many hunters. It’s easy to clean, easy to load, and accurate.
The Benjamin Marauder is one of the best air rifles for those looking to get into PCP air rifles. Air rifles are a cost-effective way to practice shooting and have fun doing so, which is what makes them one of the best gifts for hunters. This is a bolt-action Marauder that comes with a 10-round magazine. Once you fill the air rifle with the air you will get about 30 shots before you need to refill your gun.
This GPA has all the basic features one would need to get to and from destinations as efficiently as possible. My personal favorite part of this GPS is that the arrow points in the direction the user is facing (3-axis electronic compass). This is lacking in some of the more basic GPSs. This GPS comes with a free TOPO map and more maps can also be downloaded onto this the Garmin 64SX using Basecamp for offline use.
The new GoPro’s are fantastic for capturing hunts on film. They are one of the greatest gifts for hunters looking to get into filming hunts. The new internal computerized gimbal-like stabilization makes the footage look buttery smooth even with excessive movement. Not only do they have great stabilization but they also have 5K+ video, slow motion, and much more.
Compound bows are a lot of fun to shoot and hunt with. Additionally, in many states hunting with a bow allows hunters to extend their hunting seasons significantly. Compound bows are very accurate and are easy to learn how to shoot. You can get a high-quality ready-to-shoot compound bow bundle for a very reasonable price. This Bear Archery Cruzer G2 is a great bow because it is highly adjustable and can grow with the hunter for a lifetime.
The Sitka Fanatic clothing line has all the things you love about fleece-like warmth, comfort, and silence. It also has specifically designed pockets for bowhunting tools. This jacket has a built-in muff, a high neck to cut the wind, and a built-in treestand harness leash port. The Gore-Tex and Windstopper fabrics prevent wind from penetrating the fleece making it incredibly warm during cold hunts. These are some of the best late-season hunting gear you get buy.
A canvas tent is one of the best gifts for a DIY hunter that wants to keep costs low, but not sacrifice comfort completely on hunting trips. Canvas tents are better than plastic tents for most hunters because they’re breathable, better in snow, more waterproof, can be heated with a woodstove, and are better at holding heat. This makes canvas tents a great place to set up hunting camps for extended periods.
Chest freezers are great gifts for hunters because it offers an easy place to store a lot of meat without taking up the entire daily-use freezer in the kitchen.
When binoculars aren’t up for the task it’s time to break out the spotting scope. Being able to see animals at longer ranges than binoculars makes spotting scopes fantastic tools for scouting and hunting. Vortex makes great quality glass and you’ve got to appreciate that lifetime warranty. If you’re buying for a hunter who hunts or scouts in open landscapes, a spotting scope makes a wonderful gift.
Jackery Explorer 1000 Portable Power Station With Solar Panels
If you know a hunter who has a remote camp that does not have electricity or looking for an alternative to a generator, these Jackery portable power stations are great. They are long-lasting rechargeable batteries with many outlets and plugs to recharge anything you might need. They can be recharged via outlet, car, or solar power making them very versatile.
Jackery Explorer 1000 With Two Jackery Solar Panels
Sony makes some of the very best video cameras for hunting, the AX100 is no exception. For the price, this camera has a lot of pro features. It has a 1” CMOS sensor which allows it to film in very low light situations. It also supports 4K video and 120 FPS slow motion. This is a one-stop-shop video camera for a hunter starting to film their hunts, making it one of the best gifts for hunters.
The one benefit of DSLR/mirrorless cameras is that you can achieve a much more cinematic, customized, and professional look. They also have the ability to be much better in low-light situations than camcorders which can be very important in hunting situations. Not only can they capture video but they can take professional-quality photos as well. You might like my blog post: How To Choose The Best Video Cameras For Hunting | Filming Your Hunt.
Get one of your favorite hunting photos printed on a slab of wood. The combination of a personalized photo on a unique slab of wood picture frame makes for one of the best Christmas gifts for hunters who seem to have everything.
An antler mounting kit is a great hunting gift on its own. However, you can take it one step further and mount the antlers for someone else to make it one of the most thoughtful and unique hunting gifts for hunters who have everything.
Antlers mounts are thoughtful and unique gifts for hunters who have everything
This 14 in 1 tool is not only convenient but in my experience, it manages to reduce a lot of frustration when things go awry or fall apart. There have been many times when the leatherman has saved the day when doing repairs while out hunting, or for fashioning a stream-spanning walking stick. Their hardiness in unideal situations makes them one of the best gifts for hunters and fishermen.
The deer poop necklace – ’cause you ain’t killed crap all season’ (consider going vegan) is one of the funniest gag gifts for hunters because not only are you getting them deer poop as a present, but you’re making fun of them at the same time.
Just about every guy loves the excitement of a new video game, this one is designed for hunters. It has hundreds of creatures to hunt and interact with, dynamic weather, animal behavior, sophisticated wind systems that carry scent, and more realistic components to really immerse the player in the hunting experience making it one of the best hunting gifts for your boyfriend.
Being able to make your own jerky from wild-game is a great way to change things up as far as wild-game consumption. It’s also a great way to introduce others to eating wild-game. The Cosori dehydrator comes with 50 recipes and 6 trays for dehydrating. It’s easy to use and easy to clean.
A BBQ cooking set is one of the best hunting gifts for your dad because it offers a one-stop shop for all the barbecuing needs he could ask for when cooking wild game. The 27-piece Romanticist stainless steel grill is rust and heat resistant for long-lasting grilling.
A BBQ cooking set is one of the best hunting gifts for dad because it offers a one-stop shop for all the barbecuing needs for wild game.
Turkey hunters can get away with more movement within a blind, which makes them one of the best gifts for turkey hunters. Not only are ground blinds affordable, but they also make a huge impact on a hunter’s comfort level and success. They have adjustable shooting windows with removable mesh screening. It’s very easy to pop-up, take down, as well as travel with because it comes in a carrying case similar to that of a lawn chair.
Blinds Are Effective Pieces Of Turkey Hunting Gear
Howard Leight Sound Amplification Hearing Protection
Keeping the ears protected during repeated shooting is essential for hearing longevity. If you know someone who needs a good pair of hearing protection they’ll appreciate it, and even more so in the long term. Howard Leight earmuffs are one of the best gifts for duck hunters because they have an adjustable amplification knob so you can still have conversations with them on. When a gun fires the headphones will automatically block the noise.
A cellular camera is a unique game camera in that it can send photos and videos via text message or email so that the hunter does not have to physically go to the site to pull the SD card which has so many benefits for deer hunters. These cameras are one of the best gifts for deer hunters that want to take their hunting success to the next level.
Bow stands are a simple yet useful tool when practicing with a bow. A bow stand keeps your bow off the elements and relieves the shooter from having to bend down over and over again to pick up their bow. The Bow Buddy is one of the best bowhunting gifts. It comes with a ring to hold arrows which is another convenient feature. This way you don’t have to stick the arrows in the dirt to get them to stick up.
If you wanted to take safety to the next level you could opt for the Garmin InReach devices.
Garmin InReach Explorer+ GPS
The benefits of this GPS over other GPSs is that it offers an emergency SOS feature and texting without service. The InReach uses satellites to send and receive messages instead of cell towers. The In-Reach GPS gives peace of mind when hunting in remote backcountry situations, making it one of the best gifts for backcountry hunters.
The InReach Mini is a more affordable and compact version of the InReach Explorer+. It has similar SOS and texting features as the Explorer+ and can be paired with your cell phone so that it is just as easy to use when using the free EarthMate App.
Hunting smartwatches are one of the coolest gifts for hunters in 2025 because of their customizability and abundance of cool hunting features. For example, smartwatches are helpful tools for hunters because they have GPS, ABC (Altimeter, Barometer, and a Compass), weather, sunrise times, sunset times, moon phases…and much more.
*Price At Time of Post
**Battery Life Depends on Settings
Last Minute Gifts For Hunters
OnX Hunt GPS Mobile App Subscription
The best last minute gifts for hunters are those that can be easily either ordered online with fast shipping, are subscription-based or are common items that can be purchased at your local hunting stores. The OnX Hunt App is one of the best subscription-based gifts for hunters. OnX shows property boundary lines as well as the owners of the property to help with land access and getting permission to hunt.
Growing up in a family of hunters made hunting gifts a top choice for birthdays and holidays. My experience buying and receiving hunting gifts my whole life in combination with years of personal and combined hunting experience has taught me what makes some hunting gifts better than others. This gift guide represents some gift favorites from over the years as well as gifts I believe hunters would be excited about. Hopefully, you found this long gift guide helpful.
I sold my Remington 7600 Carbine, one of the most well-known and traditional tracking rifles to ever exist…and then I bought an AR-10, the Daniel Defense DD5V3, and here’s why…
This is not a sponsored article. All observations, opinions, and recommendations come from my own firsthand experience.
Daniel Defense DD5v3
Table of Contents
Why I Sold My Remington 7600 Carbine
I wanted to love the Remington 7600 Carbine, but winter reality killed it for me. The gun rusted fast, even with regular wipe-downs, and wet snow packed into the slide, creating a high risk that it would fail to eject ammo. The factory fit was terrible, I had to modify the stock just to get a halfway decent shoulder weld, and the whole package felt cheap, right down to the plastic chamber protector that seemed one icy day away from breaking. The safety was stiff and loud, not what you want when you’re closing the distance on a buck, and the slide bars warped enough to make the action anything but smooth. On top of that, Remington stopped selling them, which pushed prices up. I paid $850 and knew I could get $1,450 for it, so I sold it for just that. Between the maintenance headaches, poor ergonomics, and durability worries, cashing out while the market was hot was an easy call. I have heard that the older model 760’s were made with better materials/metal, but they still suffered the same ergonomic issues.
My Experience with Tracking Rifles
I’ve tried them all—lever, pump, semi-auto, and bolt—and winter keeps exposing the weak spots. Exposed hammers on lever guns are a no-go in snow and freezing rain; with numb hands they feel less safe, and I don’t want to be thumbing a hammer when it’s time to shoot. Bolt actions collect snow and needles on top of the bolt body, and the moment you run the handle, that debris falls straight into the chamber and action. My Benelli R1 semi-auto ejection port would iced up; more than once I couldn’t unload it because the port froze shut. The Remington 7600 Carbine pump issues I already laid out (rust, warped slide, snowpack in slide, bad ergonomics) sealed it.
That left me looking for a platform with a fully protected ejection port and better ergonomics. The AR pattern solves that with a dust cover and easy controls. An AR-15 felt under-gunned for tracking big-bodied deer, so I went AR-10: similar practical reach and authority to my .30-06, but with the weather protection, customizability, and ergonomics I need for Maine winters.
The Research Phase
Before landing on the DD5 V3, I did a deep dive and stress-tested my assumptions against what actually matters for tracking in snow and freezing rain. The most important factors for me were reliability, ergonomics, and weight.
I started with the SIG 716i because it checked a lot of boxes on paper, but its on-again/off-again availability and production uncertainty pushed me toward something with stronger long-term support. I compared the POF Rogue (incredibly light but with more conditional warranty terms and, in some SKUs, a fixed gas block), the Ruger SFAR (also great weight and price, but mixed real-world reliability reports that require vetting each rifle), and the SIG MCX-SPEAR (duty-grade piston, but heavy and far too expensive for what I’d gain in the woods).
The Daniel Defense DD5v3 consistently rose to the top for a winter tracking rifle because of the positive reviews on it’s reliability, good-ish weight, great handling, a simple adjustable gas block for a suppressor, proven materials (CHF, chrome-lined barrel; DLC BCG; dual ejectors), and a transferable warranty. I researched barrel length, too: the 18″ offers only marginal velocity over a 16″, not meaningful accuracy, and it costs me handiness in thick woods. I also verified that I could run a thread protector only (no muzzle device) so that I could tape the end of my barrel to keep snow out and reduce front end weight. New vs. used came down to condition and support, Daniel Defense’s transferable coverage made even a clean used DD5V3 a safe bet, so I bought a used DD5 V3 (16″). The biggest sell for me was the good reviews regarding reliability. I was willing to carry this somewhat heavy of a gun for that added reliability. What you’ll find is that all AR-10’s are generally just heavy to begin with, so an 8.3 lbs rifle is actually pretty light for an AR-10.
The Hands-on Field-Test
The Shooting Range
Before taking the DD5 V3 into the woods, I ran a couple of range sessions to learn the AR controls and confirm reliability. I bought several loads, 150-, 165-, and 180-grain—to see if they would all cycle. On the very first trip, the rifle wouldn’t fire: the firing pin wasn’t engaging. A gunsmith looked it over and, in about five minutes, corrected what appeared to be reassembly error from a previous deep clean. Frustrating (it cost me a day and a half), but I’m treating that as human error, not a design problem. Back at the range, the rifle ran flawlessly. It cycled all bullet weights without a hiccup. After zeroing, I practiced realistic tracking strings—five rounds as fast as I could at 50 yards into a paper-plate-sized target—and the gun fed, fired, and locked back every time.
Ergonomics and Customizations
One of my favorite aspects of the DD5 V3 is how easy it is to make it fit me. I didn’t love the OEM stock, so I swapped to a Magpul Slim Line and added a thicker recoil pad to gain length of pull—at 6’3″ with long arms, I run the stock fully extended and the extra pad makes the rifle shoulder perfectly.
Magpul MOE SL Stock with Improved Recoil Pad
I also removed the factory muzzle brake—the blast isn’t worth it for tracking—and installed a lightweight thread protector. That lets me tape the muzzle in snow without worry and keeps the front end lighter. The aluminum handguard can “ring” if tapped, but a few simple hair elastics around the rail killed any resonance; in the woods it’s effectively a non-issue.
DD5V3 3rd Party Thread Protector
I started with a high-quality 5-round stainless-body mag, but I’ll likely move to all plastic Magpul PMAGs to shave a little weight and because they have a good track record.
DD5V3 Controls + Mag
Fully set up with my Holosun AEMS red dot, and the previously mentioned mods, the rifle hits 9 lbs on the dot, (not great) but is basically the same as a Remington 7600 Carbine with a scope, and the 16″ barrel keeps it nimble enough that it carries easier than the weight suggests. If I one-hand carry it too long I’ll feel some wrist strain, but it’s manageable. The one upgrade still on my list is the trigger, it has a bit of travel. Even so, I’m printing 2–3″ groups at 50 yards with the red dot; with a crisper trigger I’m confident that tightens to about 2″. I haven’t mounted a scope because I prefer the AEMS for fast acquisition tracking shots, but I’m curious what a magnified optic would show for true MOA. For ammo, Federal Premium’s Barnes 165-gr TSX has been my go-to choice for tracking.
Tracking in Snow with the Daniel Defense DD5 V3
I was only able to officially track with the DD5V3 one day this year since I shot my buck tree stand hunting with my bolt action before I had great snow. I was happy with its performance during that day tracking. In semi-wet, powdery snow, the rifle ran clean. The dust cover kept snow and debris out of the chamber, and—importantly—it did not freeze. That was one of my biggest concerns going in: a frozen dust cover could block the ejection port and cost me follow-up shots. To prepare, I picked up a couple of cold-weather lubricants to test if conditions turned to freezing rain. I didn’t need them this year, so the true worst-case test is still ahead, but based on what I’ve seen so far, the rifle’s weather protection works as intended.
Daniel Defense DD5V3 In Snow
Easy to Break Down and Clean
Coming from the Remington 7600 Carbine, I was genuinely impressed by how simple the DD5 V3 is to service. I’d never owned an AR before, but after watching a quick video, I was able to separate the upper and lower, pull the BCG and charging handle, and field-strip the rifle in minutes. Reassembly was just as straightforward. Access to the parts that actually need attention—the bolt, carrier, gas key area, chamber, and bore—is direct and obvious. Compared to my Remington 7600, which requires more steps and still leaves some areas awkward to reach, the DD5 V3 is dramatically easier—easily ten times simpler—to take apart and clean thoroughly. For a rifle that’s going to see snow, slush, and pine needles, that easy maintenance is a big deal. Although, it is annoying to clean the barrel because you need to take the handguard off to get good access to it, which requires taking out 4 Allen screws.
DD5v3 Cons For Tracking
Weight adds up. Once I set the rifle up with the stock and accessories I need for proper fit, the package weighs about 9 pounds with my red dot. That’s heavier than I expected. I’d still trade a little extra weight for reliability, but I do wish there were a lighter AR that was equally dependable. For context, it’s roughly comparable to a 7.5-pound bolt gun once you add a scope.
Barrel access is inconvenient. To clean the barrel, I have to remove the handguard. That means backing out four Allen screws, and they’re awkward to reach without the right tool. Not difficult—just annoying if you clean often.
One-hand carry is only okay. The rifle handles well in tight woods, but carrying it one-handed for long stretches leads to some wrist fatigue.
Ambi safety in ice. I’m likely switching to a single-side safety to reduce parts that could freeze or stiffen in sleet. Simpler controls make sense in bad weather.
Price. I paid about $1,950 used; new tends to run around $2,700. Without selling my Remington 7600 Carbine, that would have been tough to swallow. I also didn’t want to risk $1,200 on a budget AR with known reliability issues. You get what you pay for.
Final Thoughts
So far, the rifle is working as I had hoped. I’m already more happy with this rifle than any of the others I have tried. If you’re thinking about getting an AR style rifle to track bucks on snow, I would say go for it, just make sure you get one known for reliability, because there are a lot out there aren’t reliable. So far, I can absolutely recommend the DD5v3 as a tracking rifle.
I want to push it through every possible winter scenario to see what it’s made of. This means I may try coyote hunting with it this winter or even pour some water on it, freeze it, and test it this winter at the shooting range to see what happens. I plan to update this post as I gain more experience with this rifle. Stay tuned.
Tracking big bucks in snow is one of the most demanding ways to hunt whitetails. Shots are fast, angles are unpredictable, and conditions are harsh. You’re often shooting through thick cover, on the move, and at close distances where bullet performance is pushed to its limits. Because of this, bullet construction matters more for trackers than almost anyone else.
Among the many bullet designs available today, Barnes TSX stands out as a top option for tracking big-bodied Northern bucks. Its combination of deep penetration, controlled expansion, and structural integrity align perfectly with what this hunting style requires.
Below is a clear, streamlined breakdown of why the TSX works so well for snow tracking.
This post is not sponsored in any way by Barnes, this is information based on my own experience and research.
Table of Contents
What Tracking Demands From a Bullet
Tracking exposes weaknesses that many bullets never face in typical treestand or rifle-stand hunting. A good tracking bullet must:
Penetrate deeply from any angle, including quartering, frontal.
Hold together at close-range, high-velocity impacts
Break bone without deflecting
Travel straight through dense big buck hide, meat, bone
Exit reliably to produce a 2x (or more) better blood trail than bullets not designed to exit
Very few bullets check all these boxes. The Barnes TSX is one that does.
Barnes Bullet in hand
Deep Penetration and Nearly 100% Weight Retention
Barnes TSX bullets retain nearly 100% of their weight on impact because they’re made from a single piece of copper. With no lead core to separate or fragment, the bullet keeps its full mass as it pushes through the deer. This high weight retention is one of the main reasons TSX bullets penetrate so deeply and reliably, even through heavy bone.
Trackers don’t need a bullet that dumps all its energy immediately. What matters is penetration. If a buck is double-lunged, it doesn’t matter if he runs 300 or 500 yards—he’s dead either way, and you’re already on his track. What you don’t want is a bullet that fails to break at least the first shoulder and miss reaching both lungs. That’s how you end up following a poorly-hit deer for miles.
Barnes Copper Bullet vs Fast Expanding Lead Bullet (150 gr lead, 165 gr copper).
Penetration is the single most important factor when you’re tracking. You usually don’t have the perfect shot, having the ability to shoot through both shoulders, both rear hips, and hard quartering angles will make the difference in a recovered deer or not.
The TSX’s monolithic copper design is a major advantage here:
It rarely loses weight
It keeps momentum deep into the deer
It maintains a long, straight wound channel
It exits far more consistently than most lead-core bullets
Because the bullet remains intact, it retains its ability to drive forward even after breaking heavy bone. This makes it far more dependable for tough tracking shots than bullets that fragment or shed their core.
Controlled Expansion at Close Range
Most tracking shots are inside 100 yards, often inside 50. At these distances, impact speeds are high and many bullets over-expand or break apart. When that happens, penetration drops dramatically.
The benefit with copper is that it doesn’t like to mushroom, that’s why Barnes has made hollow points in the bullets, to force to at least expand a bit. For this reason, Barnes can control how a bullet mushrooms based on the dimensions of the hollow point. The TSX bullets are engineered with penetration in mind
Barnes Controlled Expansion
The TSX avoids this problem by expanding predictably and moderately, rather than violently:
Four uniform petals open up
The shank stays intact
The bullet doesn’t mushroom excessively
Expansion remains consistent even at very high impact speeds
This balance has enough expansion to create a strong wound channel, but not so much that it slows penetration like fast expanding lead, this is exactly what a tracker needs.
Bone-Breaking Performance Without Bullet Failure
Hard quartering, front facing, rear facing, shots are common in tracking because deer rarely stop and pose broadside. Hitting bone is almost unavoidable. Many lead bullets aren’t up to the challenge because they dump all their energy into the first bone they hit.
Barnes TSX Hollow Point Tip
The TSX’s toughness allows it to:
Break bone cleanly
Maintain its shape afterward
Continue penetrating into the vitals
Stay on a straight path through the deer
Break the opposite side bone and exit the deer
This reliability is crucial when your only shot window requires punching through something substantial.
Reliable Exit Wounds for Better Blood Trails
Snow conditions make blood trailing a lot easier than bare ground, however, entry holes plug up or stop bleeding on sub-par shots. An exit wound will be much bigger than an entry wound, meaning there’s more blood coming from the exit. Additionally, with an extra hole in the deer, you’re looking at a lot more blood on the ground.
Because TSX bullets penetrate deeply and keep their mass, they tend to exit far more often than standard bullets.
For trackers, this is one of the most valuable traits the TSX brings to the table.
Low Meat Damage Despite Tough Performance
Even though the TSX penetrates deeply and breaks bone well, it typically causes less bloodshot meat than rapidly expanding lead bullets—especially at close range. The controlled expansion prevents the violent internal explosion that ruins shoulders on many other designs.
You get a clean, ethical kill without sacrificing a huge portion of the front quarters.
Lead Free!
An obvious last perk of these tough copper bullet is that they are lead free. This makes consuming deer meat less dangerous and is a perk for helping the environment be more lead free. These are both perks in my book.
How to Choose the Deepest-Penetrating Barnes Bullet for Tracking
Barnes makes several excellent copper bullets, but not all of them penetrate the same way. If your goal is maximum straight-line penetration for tough tracking shots—especially quartering-to or raking angles—you want to choose the bullet design and weight that naturally drives the deepest.
Federal Premium Barnes TSX Bullets
Here’s how to select the best-penetrating Barnes option for your rifle:
1. Choose TSX or LRX Over TTSX for Maximum Penetration
All three are great bullets, but when penetration is the priority:
TSX → Deepest penetration
LRX → Second deepest
TTSX → Slightly less penetration, more expansion
Why? The TSX has the stoutest petals and the most controlled expansion. The TTSX uses a larger polymer tip that initiates expansion faster, which increases wound diameter but slightly reduces penetration depth. The LRX is designed for longer range—meaning it opens reliably at low velocity—but its expansion window is wider, which can reduce penetration at close ranges compared to TSX.
For snow tracking, TSX is the best-balanced choice.
2. Go Heavier for Caliber to Increase Momentum
Among bullets of the same design, the heavier one usually penetrates deeper because momentum (mass × velocity) is higher.
For example, in 30-06:
180-gr TSX → deepest penetration
165-gr TSX → strong penetration
150-gr TSX → fast and flat, but less penetration
For tracking, where shots are close and angles are unpredictable, err toward the heavier TSX your rifle shoots accurately.
Final Thoughts
Tracking deer in the snow demands a bullet that can penetrate deeply, hold together on bone, expand reliably at close ranges, and produce consistent exit wounds. The Barnes TSX offers all of these qualities in one tough, dependable design.
Its monolithic copper construction, 99% weight retention, and controlled expansion make it one of the best bullet choices available for serious trackers who routinely face tough angles and tough shots in thick cover on heavy-bodied late-season bucks.
Of course, any bullet will get the job done with good shot placement. But when tracking imperfect shot placement is common, and this bullet is the solution to make those imperfect shots deadly.
If your goal is to maximize quick, clean kills and recoverability when tracking Northern bucks, a big, heavy, TSX bullet is hard to beat.
This review is specifically for deer trackers who are wondering if the Holosun AEMS would make a good optic for tracking big bucks in snow. I bought the Holosun AEMS because, based on its specs, it seemed like it would be a perfect balance between an open sight and LPVO optic. I’ve tried all different types of scopes/sights for tracking deer on snow, and so far the Holosun AEMS is my favorite. My goal was to have an optic that allowed for faster target acquisition than a peep/open sight, but in a smaller, lighter package than a rifle scope, that also required less maintenance in the field. The AEMS does just that.
What drew me to the Holosun AEMS more than any other red dot or reflex sight is its sacrificial lenses, which are replaceable, see-through glass, and flat. The sacrificial lens covers are flat, and therefore, I hoped that snow, rain, and slush would be easily cleaned off the optic and would require less maintenance while hunting.
Although it’s not perfect, I ended up loving this optic, and I will expand on why I think this sight is so great for trackers in the following paragraphs. This review goes beyond technical specifications, offering an evaluation based on my experience while highlighting the pros and cons of the AEMS for tracking bucks in harsh, snowy conditions.
Table of Contents
No Affiliation
I am not affiliated with Holosun in any way. I bought this optic with my own money to out of my own curiosity, which has removed any bias; no external incentives influence this review.
How The Holosun AEMS Was Tested
I tested the Holosun AEMS on my Remington 7600 Carbine for an entire hunting season while tracking big woods bucks on snow in the northwoods of Maine. Tracking conditions push gear to the limit, combining intense physical exertion with cold, harsh weather, making it an excellent test of durability and performance. The new Holosun AEMS X2’s also just came out which are the same footprint basically as the original AEMS with small but beneficial improvements, especially to the glass.
Holosun AEMS Pros For Trackers
Flat Sacrificial Lens Covers Made of Glass
As I briefly alluded to above, one of my favorite aspects of this optic is the flat sacrificial lens covers that protect the optic’s glass. These lens covers have great clarity, so I never take them off. I don’t see the need to; this way, my lenses are always protected from getting scratched. It also helps the elements slide right off so the optic stays clear a higher percentage of the time in inclement weather conditions. I found that rain, snow, pine needles, and other debris would often slide off the glass, keeping the reticle obstruction-free for the most part.
Holosun AEMS Glass Sacrificial Lens Covers
Snow or rain would sometimes cover the glass, but I could brush it off with my hand or glove, and it was ready to go again very quickly. From my experience, regular rifle scopes, peep sights, and buckhorn sights all require more maintenance in these tough weather conditions than the AEMS. With these other sights, I’m always breaking off a twig or using paper towels to clean them, but with this sight, it is much less of an annoyance and I felt like I could focus on hunting more than if I was going to be able to see down my sights when a buck jumps out in front of me.
Height on Receiver
A potentially overlooked pro of this optic is that the AEMS sits high on the gun, it looks a little awkward and a little goofy and your cheek weld isnt as sturdy as a peep sight. However, it was very easy for me to get used to and the benefit of having it higher is that when snow falls on your gun, it doesn’t immediately clog up the optic, like it does when you’re using a peep sight.
Holosun AEMS Mounted on Rifle (Remington 7600 Carbine)
Enclosed Emitter
The reason I was able to brush off the elements from the lens covers without affecting the red dot is because the AEMS utilizes an enclosed emitter. This means the light emitter of the red dot is enclosed within the waterproof housing. For this reason, the red dot does not get affected by the elements. Even if there was a little snow or rain on the lens, I could still see the red dot in most cases to make a shot. I recommend an enclosed emitter when hunting in general, but especially if you’re going to be in winter weather conditions.
Holosun AEMS Enclosed Emitter Reflex Sight
Long Battery Life, Solar Panels, Bright Light
First off, the red dot is very bright, even on a sunny day in the bright reflective snow the dot shows clearly when the brightness is turned up. I’ve always been skeptical of battery-operated optics because electronics can fail in harsh hunting scenarios or run out of battery at the worst times. However, the AEMS did put my mind at ease by giving it a battery life of up to 50,000 hours when using a CR2032 battery at mid-range brightness settings. This means it should last about 3-5 years on a single battery, depending on brightness level, shake-awake technology, and solar panels.
In my experience, I just manually adjusted the brightness on the AMES based on the weather conditions of that day. I often had it quite bright so that I could see the dot against the white snow, but even then, I never needed the AEMS at full brightness. For me, it’s easier to just plan on replacing the battery every year than to worry about the fancy shake-awake and solar panels; this way, I know the battery won’t die on me.
Holosun AMES Solar Panel
Scope Box, Reticle Options, Fast Acquisition
There are 3 reticle options to choose from; red dot, circle, or both. I used all of the reticles but I kept coming back to the red dot. The other reticle options seem to take up too much room in the optic housing for me.
When it comes to quick-shooting, the red dot was advantageous over iron sights because you only need to put one thing onto your target vs two things when you’re using iron sights. This makes target acquisition much faster in my opinion which is perfect for tracking deer since shots are almost always quick.
Interestingly, after I bought the AEMS, a new version of the AEMS came out which has a much bigger scope box. It’s called the Ronin AEMS Max. If you’re on the fence with the AMES because of its small size then the Max could be a good option for you. However, I will say I was first skeptical of the AEMS because I thought it was going to be too small, but I ended up really liking the size. I mounted the AEMS as close to my eye as I could because that gave me a bigger perceived scope box, and that seemed to do the trick.
That said, I am interested in getting my hands on the Ronin AEMS Max to compare the two to see what I like better.
Overall Usability and Feel
The Holosun AEMS was easy to sight in, it’s the same as sighting in a rifle scope. There are windage and elevation adjustment screws.
It’s also much smaller and lighter than a rifle scope, but it is a little bigger than iron sights. It only weighs 3.9 oz. The additional weight vs iron sights is well worth the benefits of the red dot to have that faster acquisition. It is also much lighter and less bulky than a rifle scope, making it great for tracking where I’m carrying my rifle for +/- 7 miles per day. It makes it easier to get through the brush because of the reduced bulk and it’s easier to carry on those long days tracking when you’re walking +/- 7 miles per day, every extra reduction in weight helps when carrying a gun that far.
Rifle Pros Summary In Bullet Points
Flat Glass Lens Covers
Enclosed Emitter
Bright Dot, Long Battery Life, Solar Panels
Scope Box, Reticle Options, Fast Acquisition
Easy to Sight In
Size and Weight
Holosun AEMS Cons For Trackers
Although there is a lot to like about the AEMS, there are some considerations to be aware of.
For me, the AEMS is an excellent size if you’re using the red dot reticle. In my opinion, the other two reticles (circle & red dot with circle) are too crowded in the optic for the smaller housing. For me, I don’t see a hunting situation where the red dot isn’t the best option.
I also wasn’t super impressed with the auto-brightness in hunting situations. It could have been a little brighter. It’s not bad, just not as bright as I’d hope when on the auto-brightness setting. This isn’t a deal-breaker, though, as I just manually adjust the brightness, and that works just fine.
I also wish there were a way to mount this sight lower to the receiver. One of biggest cons of the AMES is that it seems to be designed for AR-style rifles. Because of this the mount that comes with the sight sits very high on my Remington 7600 receiver and feels unnatural. Holosun makes a “low mount”, which is not the easiest to find online, and it is easy to buy the wrong mount. To avoid purchasing the wrong mount, I messaged Holosun directly to see if they could help find one that would fit my AEMS. Holosun sent me an Amazon link to the correct mount. If i’m being nitpicky, I would like to have the AEMS sit even lower to the receiver so I could have a better cheek weld, but I can’t complain too much because it still works great.
Rifle Cons Summary
Not a lot of Scope Box room if not using the red dot feature
Auto brightness is slightly too dim
High out-of-the-Box mount
Final Verdict
I’m very particular about the gear I use when hunting and am a stickler when it comes to gear performance, I guess that’s my nature as a gear reviewer. The Holosun AEMS exceeded my expectations because it does what it promises in tough situations. I plan to keep the AEMS on my rifle for this upcoming tracking season, and may purchase a second one to put on my turkey hunting shotgun permanently.
I also really like the idea of the Ronin AEMS Max and would like to get my hands on one to compare it to the AEMS. The extra field of view with the AEMS Max could improve fast acquisition despite the larger optic surface area.
If you liked this reivew and want to see how the AMES performed on my turkey hunting shotgun you can check out my non-tracking-specific review here, although a lot of the information is the same as in this review.
Over the past year, I’ve tested the Holosun AEMS (Advanced Enclosed Micro Sight) across multiple hunting seasons to assess its real-world performance. This review goes beyond technical specifications, offering an authentic evaluation based on my personal experience while highlighting the key strengths and weaknesses of the AEMS.
This post contains Amazon and other affiliate links, which means I’ll receive a commission if you purchase through my link, at no extra cost to you. Of course, you are not obligated to use my links, but it does help fund these posts in hopes of bringing more value to you!
Table of Contents
This Reviews Credibility
No Affiliation with Holosun
I am not affiliated with Holosun in any way, I bought this reflex sight with my own money because it looked like the best reflex sight for my hunting purposes and I wanted to test it out.
How The Holosun AEMS Was Tested
Target Range
Before hunting I sighted the AEMS at the range. In this review, I talk about how it performed at the range and any pros and cons while dialing this sight in for hunting season.
Turkey Hunting
The first season I tested the Holosun AEMS was during the spring turkey season. I had the optic mounted on my Benelli Supernova shotgun. Hunting turkeys was a great way to test how the optic performed in hunting situations initially. I much preferred the AEMS over a shotgun bead for turkeys.
Tracking Deer In Snow
The second hunting season I tested the AEMS in was while deer hunting in Maine. More specifically, tracking big woods bucks in the snow—one of the toughest challenges an optic can face. Tracking conditions push gear to the limit, combining intense physical exertion with harsh weather, making it the ultimate test of durability and performance.
I understand that only a small portion of hunters track deer in the vast Northwoods of New England, so even though my experience with the gun has been while tracking, the points I cover in this post will be beneficial no matter what style of deer hunting you do.
Holosun AEMS Mounted on Rifle (Remington 7600 Carbine)
Shooting Range Test
Shooting Range Pros
I shot about 40 rounds with the AEMS at the shooting range, the first 20 were to sight it in and the next 20 were to have a little fun practicing with it. I liked how lightweight it was, combined with the fast acquisition compared to a magnified scope or especially iron sights.
Sighting it in was a breeze. It has windage and elevation dials that you turn, just like a scope. It comes with a two-sided tool that makes it easy to tighten the sight to the Picatinny rail and to adjust the elevation and windage dials. However, I don’t like that they have a specific tool for this, I’d rather Holosun just use a classic screwdriver or an allen wrench for easy adjustments if you forget the tool. Overall, I was impressed and happy with my purchase.
Shooting Range Cons
The first thing I noticed was that the dot wasn’t super crisp. From using this sight, I found out that I had astigmatism, which was causing this. So, I ended up getting glasses to correct the issue. Now that I’m wearing glasses, the dot is crisper, but not as good as I expected. It is still perfectly fine for the close-quarter shots I plan to shoot in. But it would be nice if it was a little crisper.
While at the shooting range it was clear that the AEMS is not ideal for long-range shooting. But if you’re looking into this sight, that’s probably not an issue for you as red dots are made for close-quarter fast-acquisition shooting. But it’s best to be used within 100 yards, and probably more like 75 yards.
Turkey Hunting Shotgun Test
I bought the AMES for tracking deer on snow but since I had it for turkey season first, but since turkey season was coming up I decided I would get some initial impressions of the optic on my shotgun for turkey season.
Holosun AEMS Reflex Sight Review For Turkey Hunting
Shotgun Pros
I’ve always used the shotgun bead to hunt turkeys, and it’s worked fine. That said, I’ve always wanted to try a red dot for my turkey shotgun because it has benefits. I installed the AEMS on my Benelli SuperNova.
The main benefit I liked was that I could sight-in my shotgun to center my pellet spread. This is also extra beneficial if you want to increase your effective range because you can use an extra-restricted choke tube to constrict your pellet spread.
Having a red dot ensures that you don’t miss close-up shots when you have a tight pattern and that you can accurately shoot those tighter patterns at longer distances to get more pellets on target. If you’re using your shotgun bead, it can be tricky to properly center your pellet spread if it’s very constricted, leading to a miss.
When I turkey hunt with my shotgun beads I have a midrib bead and a front bead, I line both of those beads up when hunting to help with proper alignment when shooting, and it does help. However, with the AEMS, I didn’t have to worry about lining anything up. As long as that red dot was on the turkey, that’s where my pellets were going. This made shooting a little easier by having one less thing to mess up when a gobbler was in range.
Shotgun Pros Summary
More accurate at all distances than traditional shotgun bead
Don’t need to align a midrib and front bead
Center your pellet spread
Tighten your pellet spread
Shotgun Cons
The biggest con of the AMES is that it seems to be designed for AR-style rifles, for this reason, it sits very high on my SuperNova receiver and feels unnatural with the mount that comes with the AEMS. Holosun does make a “low mount” which seems hard to find online. Many of the low mounts have had manufacturing issues causing the holes to not align with the holes on the AEMS properly so they have a lot of poor reviews.
To avoid purchasing one of these mounts I messaged Holosun directly to see if they could help find one that would fit my AEMS. Surprisingly, they messaged me back the next day saying they would send me one for free and all I needed to do was send a photo of my AEMS with the serial number, so I did, but they ended up sending me the same mount I already had… After communicating further with Holosun they said they didn’t have a low-mount available in the warehouse and sent me an Amazon link of what to purchase.
I purchased this low-mount and it was exactly what I was looking for. I was able to reduce the height of the sight so it felt more natural to look through the sight.
You might be wondering if the extra bulk and weight are noticeable compared to a regular shotgun bead. It’s not really, the AMES is so light that you won’t even recognize the added 3.9 extra oz of weight. It does add some bulk, but not much. You might find the red dot getting caught in thick brush compared to a bead, but it’s no worse than a rifle with a scope.
Shotgun Cons Summary
Stock AMES mount is too tall
Needed to purchase “Low-Mount”
Customer service miscommunication
More bulky than a traditional shotgun bead
Deer Hunting Rifle Test
My main purpose for purchasing the AEMS was to use it to track bucks in the snow in the big woods of Maine. These conditions are tough on optics and electronics so I was excited to see how it would perform during all-day hunts in snow and freezing rain for days on end.
Rifle Pros
Flat Sacrificial Lens Covers Made of Glass
There is a lot to like with the AEMS for tracking deer in snow. One of my favorites is the sacrificial flat lens covers that protect the optic’s glass. These lens covers have great clarity and so I never take them off, I don’t really see the need to, this way my lenses are always protected from getting scratched. It also helps the elements slide right off them so your optic stays clear a higher percentage of the time in inclement weather conditions. I found that rain, snow, pine needles, and other debris would often slide off the glass keeping the reticle obstruction-free for the most part.
Holosun AEMS Glass Sacrificial Lens Covers
Snow or rain would sometimes cover the glass, but I could brush it off with my hand or glove, and it was ready to go again very quickly. From my experience, regular rifle scopes, peep sights, and buckhorn sights all require more maintenance in these tough weather conditions than the AEMS. With these other sights, I’m always breaking off a twig or using paper towels to clean them, but with this sight, it is much less of an annoyance and I felt like I could focus on hunting more than if I was going to be able to see down my sights when a buck jumps out in front of me.
Enclosed Emitter
The reason I was able to brush off the elements from the lens covers without affecting the red dot is because the AEMS utilizes an enclosed emitter. This means the light emitter of the red dot is enclosed within the waterproof housing. For this reason, the red dot does not get affected by the elements. Even if there a little snow or rain on the lens, I could still see the red dot in most cases to make a shot. I recommend an enclosed emitter when hunting in general but especially if you’re going to be in tough weather conditions.
Holosun AEMS Enclosed Emitter Reflex Sight
Long Battery Life, Solar Panels, Bright Light
First off, the red dot is very bright, even on a sunny day in the bright reflective snow the dot shows clearly when the brightness is turned up. I’ve always been skeptical of battery-operated optics because electronics can fail in harsh hunting scenarios or run out of battery at the worst times. However, the AEMS did put my mind at ease by giving it a battery life of up to 50,000 hours when using a CR2032 battery at mid-range brightness settings. This means it should last about 3-5 years on a single battery depending on brightness level, shake-awake technology, and solar panels.
In my experience, I just manually adjusted the brightness on the AMES based on the weather conditions of that day. I often had it quite bright so that I could see the dot against the white snow, but even then I never had the AEMS at full brightness. For me, it’s easier to just plan on replacing the battery every year than to worry about the fancy shake-awake and solar panels, this way I know the battery won’t die on me.
Holosun AMES Solar Panel
Scope Box, Reticle Options, Fast Acquisition
There are 3 reticle options to choose from; red dot, circle, or both. I used all of the reticles but I kept coming back to the red dot. The other reticle options seem to take up too much room in the optic housing for me.
When it comes to quick-shooting, the red dot was advantageous over iron sights in my opinion because you only need to put one thing onto your target vs two things when you’re using iron sights. This makes target acquisition much faster in my opinion which is perfect for tracking deer since shots are almost always quick.
Interestingly, after I bought the AEMS, a new version of the AEMS came out which has a much bigger scope box. It’s called the Ronin AEMS Max. If you’re on the fence with the AMES because of its small size then the Max could be a good option. However, I will say I was first skeptical of the AEMS because I thought it was going to be too small, but I ended up really liking the size. I mounted the AEMS as close to my eye as I could because that gave me a bigger perceived scope box, and that seemed to do the trick for me.
That said, I am interested in getting my hands on the Ronin AEMS Max to compare the two to see what I like better.
Overall Usability and Feel
The Holosun AEMS was easy to sight in, it’s the same as sighting in a rifle scope. There are windage and elevation adjustment screws.
It’s also much smaller and lighter than a rifle scope, but it is a little bigger than iron sights. It only weighs 3.9 oz. The additional weight vs iron sights is well worth the benefits of the red dot in my opinion to have that faster acquisition. It is also much lighter and less bulky than a rifle scope making it great for tracking where I’m carrying my rifle for +/- 7 miles per day. It makes it easier to get through the brush because of the reduced bulk and it’s easier to carry on those long days tracking when you’re walking +/- 7 miles per day, every extra reduction in weight helps when carrying a gun that far.
Rifle Pros Summary
Flat Glass Lens Covers
Enclosed Emitter
Bright Dot, Long Battery Life, Solar Panels
Scope Box, Reticle Options, Fast Acquisition
Easy to Sight In
Size and Weight
Rifle Cons
Although there is a lot to like about the AEMS, there are some considerations to be aware of.
For me, the AEMS is an excellent size if you’re using the red dot reticle. In my opinion, the other two reticles (circle & red dot with circle) are too crowded in the optic for the smaller housing. For me, I don’t see a hunting situation where the red dot isn’t the best option.
I also wasn’t super impressed with the auto-brightness in hunting situations. In my opinion, it could have been a little brighter. It’s not bad, just not as bright as I’d hope when on the auto-brightness setting. This isn’t a deal-breaker, though, as I just manually adjust the brightness, and that works just fine.
Rifle Cons Summary
Not a lot of Scope Box room if not using the red dot feature
Auto brightness is slightly too dim
Holosun Customer Service
As stated above in the shotgun section, Holosun did respond to my questions via email and were quick to respond. They even sent me a free mount, albeit not the right one. Overall, they were able to help me get what I needed.
The Holosun website also appears outdated, missing some of their newer products (like the Ronin AEMS Max) and does not function well. It’s slow and laggy, making it feel like a spammy website and a little sketchy to buy from. I’m hoping they update their website for better user experience soon.
Final Verdict
I’m very particular about the gear I use when hunting and am a stickler when it comes to gear performance, I guess that’s my nature as a gear reviewer. The Holosun AEMS exceeded my expectations because it does what it promises in tough situations. I plan to keep the AEMS on my rifle for this upcoming deer hunting season, and may purchase a second one to put on my turkey hunting shotgun permanently.
I also really like the idea of the Ronin AEMS Max and would like to get my hands on that to compare it to the AEMS. Having extra field of view with the AEMS Max could make fast-acquisition even better despite more optic surface area to catch debris and added weight.
I’ve been saddle hunting for almost a decade, one of my first blog posts ever was on the O.G. Aero Hunter Tree Saddle in 2018. I used that Aero Hunter for two years before writing that post. In my decade of using saddles, I’ve tried many different brands. You can read my reviews of them here: (Aero Hunter, JX3 Hybrid, Tethrd ESS, Drayad Drey, and Cruzr XC). I say this to illustrate that I believe I have the experience to give you a quality review of how the Lone Wolf Custom Gear .75 (LWCG .75 or .75) works as a hybrid saddle platform.
Saddles are great in many aspects which is why I have been exclusively hunting in them for 10 years. However, in my experience, they aren’t perfect. Their comfort for all-day hunts is lacking – hip pinch is a common problem for me. Next, shooting weak side is tough, and hunting from awkward trees can be difficult because you are subject to the pull of gravity since you’re suspended.
I bought the LWCG .75 primarily for a hybrid saddle-hunting platform. I was looking for something to add more comfort for all-day hunts. I also wanted a large platform so I could stand on it and more easily shoot on my weak side. Below I explain my thoughts on the LWCG .75 as a hybrid saddle platform.
This post contains Amazon and other affiliate links, which means I’ll receive a commission if you purchase through my link, at no extra cost to you. Of course, you are not obligated to use my links, but it does help fund these posts in hopes of bringing more value to you!
Table of Contents
Pros of The LWCG .75 as a Hybrid Saddle Platform
Can Maneuver Completely Around The Tree
Just like with a ring of steps or another saddle platform, you can still move completely around the tree by using your steps in conjunction with the .75 saddle platform. I attach my Bullman ring of steps using the silent EWO OCB to the bottom of the LWCG .75. The OCB gets surprisingly just as tight as a rachet strap which allows you to put side pressure on the LWCG .75 without it kicking out. This will enable you to shoot in all directions and keep the tree between you and the deer for extra concealment.
Lone Wolf Custom Gear .75 Used In Conjunction with Saddle GearOver-Center Buckle (OCB) and StrapWhere To Place OCB Strap on LWCG .75
Easier To Shoot Weak Side Shots
Weak side shots are also much easier with the hybrid approach because if a deer comes in on the weak side you can just stand up on the .75 platform and spin around with minimal movement, and thus your weak side shot becomes your strong side shot. If you’re just using a saddle, weak side shots are tricky because they involve a lot of movement, strain, and practice to get the shot off accurately.
Sit, Stand, or Lean
Another huge advantage of using the hybrid approach is that you can stay comfortable longer. This is because you have the option to stand and completely take the weight off your saddle. For example, I do get some leg/hip pinch in my saddle and for all-day sits, I can get fidgety when I get uncomfortable. But with the .75 I could completely remove the hip pinch by standing for a while.
Also, if I wanted to I could turn around, flip the LWCG .75 seat down, and sit in it like a regular hang-on treestand. In this scenario, my saddle would be acting as my safety harness.
Sitting In LWCG .75 Seat while using a saddleLeaning in a saddle using the LWCG .75 as a platformStanding on the LWCG .75 with a saddle
You Need A Harness Anyway, Why Not Use A Saddle?
Another point for the hybrid approach is that when you’re using a hang-on stand you need to be harnessed in for safety anyway, so you might as well use a saddle as your harness so that you can take advantage of the benefits of a saddle and a hang-on.
Big Trees
I did find that it was harder to shoot 360º when in larger trees with the .75. In these scenarios it was nice also having a saddle so that I could use it if needed to maneuver around the tree for more shooting options.
No Knee Fatigue
Another big comfort upgrade with the hybrid approach is that you can use the flipped-up .75 seat as your knee cushion instead of grinding your knees into the tree bark. You’ll want to add a cushion to the backside of the seat but when you do your knees will be fatigue-free (unlike the photo below) but you get the idea.
No Knee Fatigue in LWCG .75 hybrid approach
Cons of the LWCG .75 as a Hyrbid Saddle Platform
Takes Time and Noise To Setup Extra Gear
The biggest con for me is the time and noise of setting up the saddle gear. I found once I got the .75 setup in the tree, I was ready to hunt and I didn’t want to spend the extra time and noise it took to also get the saddle setup in the tree, especially in the dark during morning hunts.
Heavier and Bulkier To Pack In
The next biggest con for me was the heavier and bulkier gear to pack in. Since I was using the saddle gear less and less, the extra saddle gear felt unnecessary, especially the bulky ring of steps. I found the advantages of the saddle did not usually outweigh the extra work of carrying it in. As a long-time saddle hunter, I was even surprised at my decision to use the saddle equipment less and less.
Looking The Wrong Way In A Saddle When Sitting
If you get fatigued in your saddle and you want to sit down and use the .75 as a regular hang-on treestand, you will face the exact opposite way of how you set up in the saddle. Most of the time this is an issue because that means it is the least likely place you expect deer to be coming from. I found that using my .75 as a regular hang-on treestand was not that feasible in almost all situations. When I did, I felt like I could easily miss an opportunity at a deer.
Platform Cables Are In The Way
On the .75 there are cables that attach from the platform to the post to keep the stand safe. These cables are a little in the way when you’re trying to maneuver around the ring of steps and get back onto the platform. Although not the best, it wasn’t too bad I was still able to maneuver quite well with practice.
LWCG .75 Cables can get in the way when using as hybrid saddle platform
Awkward Trees and Fighting Gravity
If you setup in a tree that is leaning then it can be hard to use the .75 with saddle equipment because it can be hard to get back onto the platform depending on how gravity is acting on the leaning tree. It’s also just uncomfortable when one knee is fighting gravity all day in an uneven tree. In these situations, it was just easier to just use the .75 by itself so I didn’t have to worry about fighting gravity like in a saddle.
Small Trees
I’m often hunting swamps where there are normally small awkward trees. In these scenarios, it doesn’t make sense to use a saddle. Saddle movement is more easily noticed in small trees compared to a hang-on. When hunting in these situations I’m also somewhat skylined, the least amount of movement is most valuable to me. Additionally, in small trees, I can shoot 360º just using the .75 so the saddle becomes irrelevant when hunting in smaller trees. In my opinion, the .75 by itself is the superior choice for hunting in areas that have small and even medium-sized trees.
Side Pressure and Kick-out
When running the LWCG .75 as a saddle platform I found that it did not have great side-pressure resistance with just one strap (like it is most popularly used). For example, when you’re trying to go around the tree on your ring of steps the side pressure on the platform will lift and kick-out off the tree.
However, as I mentioned above, a solution for this is using anEWO OCB strap at the bottom of the stand which my Bullman ring of steps are attached to. This OCB strap did a good job of tightening the bottom of the stand, allowing for side pressure. The OCB is silent and tightens just about as well as a ratchet strap.
LWCG .75 side pressure with OCB Buckle
Final Thoughts
My purpose in buying the LWCG .75 was to determine if using it in conjunction with my saddle equipment, as a hybrid approach, would provide me with the ultimate hunting setup by having the best of both worlds. What I found even surprised me. Not only did I not prefer the hybrid approach, but I didn’t even prefer my saddle equipment anymore. My conclusion with this experiment was that the LWCG .75 on its own was what I found myself gravitating to for its simplicity in setup, versatility in awkward trees, and comfort for all-day hunts.
If you’re a saddle hunter who is looking for a hybrid method, I recommend trying the .75. The cons of using the .75 as a saddle platform are not much different than any other saddle platform or ring of steps. You may be surprised, like me, to find that you actually might prefer using the .75 by itself like I did.
This review provides an in-depth evaluation of the Lone Wolf Custom Gear .75 Hang-On Stand (LWCG .75 or .75), based on over 30 days of field testing across an entire hunting season, including approximately 10 all-day hunts. Through testing, I’ve found that the attention to detail of this stand is remarkable. You can tell LWCG has worked hard to find every little nuisance concerning a hang-on treestand and has attempted to solve the problem.
Some of the highlights of this stand include modern modularity features like climbing stick integration, integrative bow holders, backpack-compatible shelf, and built-in attachment points. Not to mention the added comfort from the custom parts you can order combined with the adjustable platform and seat angles. Hanging is also quick and easy due to its lightweight design and the versa button/cam buckle strap combo.
While minor issues such as occasional instability with the cam-over feature and some initial aluminum noise exist, the stand’s overall performance makes it a top contender for mobile hunters prioritizing a balance of comfort, mobility, and versatility. This review also shares valuable tips for setup and highlights the importance of customizing the stand for a perfect fit.
This post contains Amazon and other affiliate links, which means I’ll receive a commission if you purchase through my link, at no extra cost to you. Of course, you are not obligated to use my links, but it does help fund these posts in hopes of bringing more value to you!
Page Contents
Customizing Your Stand With Custom Parts
As the name suggests, Lone Wolf Custom Gear offers one of the most valuable features for treestand hunters: customization. You can tailor your stand to fit your body type and hunting style, ensuring maximum comfort during long hours in the field. Comfort is essential when treestand hunting for whitetails, making it critical to select the right customizations for your needs.
When I first purchased my stand, I was uncertain about what custom options to choose. However, after extensive research – reading reviews and watching countless YouTube videos – I determined the best configuration for my body type and preferences.
As someone who is 6’3″, weighs 155 lbs, and wears size 11 boots, I prioritized keeping my stand as low-profile and mobile as possible without sacrificing comfort. After consideration, I chose the Standard Option for both the seat style and post height. The .75 setup struck the perfect balance between minimalism and usability. After extensive use, I’m very satisfied with my decision—it’s lightweight, functional, and comfortable.
Important Note: If you customize your stand beyond the standard setup, be aware that Lone Wolf Custom Gear climbing sticks may not integrate properly with the treestand. Personally, I don’t carry my climbing sticks integrated with the stand, but I appreciate having that option since I opted for the standard setup. If this feature is important to you, make sure to carefully review compatibility before purchasing.
LWCG .75 vs the 1.0 and .5 Stand Comparisons
Lone Wolf Custom Gear offers several variations of their hang-on treestands, the main ones I looked into for being the most mobile were the .5, .75, and 1.0 models. The 1.0 Stand is essentially a .75 with a slightly wider platform, providing more footroom while maintaining the same length. On the other hand, the .5 Stand features a shorter platform but retains the same width as the .75.
After weighing my options, I chose the .75 Stand because it struck the perfect balance for my needs. The additional footroom compared to the .5 made it significantly more comfortable for longer hunts. At the same time, the .75 retains a slim profile, making it easier to carry without snagging on branches or sticks—something I imagine could be more of an issue with the wider 1.0.
I’m happy with my decision to go with the .75, as I don’t think I could have gone any smaller. Even with the .75, my toes hang slightly off the end of the platform. The .5 would likely have been too cramped for my preferences and hunting style.
Field-Tested Pros of The LWCG .75
Pro #1: Lightweight
The .75 is by far the easiest stand I’ve ever hung in a tree. It’s so lightweight that you can easily use one hand to hold up the treestand while your other hand wraps the strap around the tree. The aluminum, spiderweb-like construction keeps it strong yet feather-light, far outperforming heavy, traditional steel treestands. Based on LWCG website specs, the base stand weighs 7.5 lbs and has 1.13 lbs of accessories, for a total of 8.6 lbs. In reality, it is closer to 8.2 lbs. With my 8.8 lbs backpack, the total weight os 17 lbs.
Lone Wolf Custom Gear .75 WeightLone Wolf Custom Gear .75 Weight with Badlands Backpack
LWCG Website Treestand and Accessory Weights:
Base Stand weight – 7.5 lbs
Stand cam Strap (included)- 5 ounces
Stand cushion (included) – 4 ounces
Lower Cam strap (optional) – 5 ounces
Backpack straps (included) – 7 ounces
Waist support (optional) – 6 ounces
Pro #2: Adjustability and Comfort
In my opinion, one of the best features of the whole LWCG hang-on treestand line is that they can move the platform up/down so that your stand is 90º to the ground so you’re always standing on a flat platform no matter the type of three that you’re in. Additionally, once the stand is hung you can adjust the seat up/down so that you’re sitting at the angle that is most comfortable to you depending on what angle your platform is at.
The teeth on both the platform and the post work exceptionally well. When setting the stand on crooked trees, applying force locks the stand securely at a 90º angle to gravity, even if some of the teeth aren’t fully in contact with the tree. Despite this, the design ensures a stable and reliable hold, allowing you to hunt confidently in awkward or uneven setups. I’ve used this stand in small, crooked swamp trees and have been impressed with how it keeps the platform parallel to the ground, even when the tree isn’t. This feature provides both comfort and stability, which are essential for long hunts.
Pro #3: Hanging The LWCG .75
The versa buttons that the straps attach to make it easy to get the stand attached with minimal movement and noise. You just attach the loop of the strap to the versa button, then swing it around the tree and attach the other loop to the versa button. Then pull the strap slack through the cam buckle as snug as you can reasonably get it and you’re almost done.
Lone Wolf Custom Gear Versa Button and Cam Buckle Strap Loops
Next you need to cam the stand over to really tighen it to the tree. I always first use my hand to fold the platform up, then push the treestand down as hard as I can, and then cam the platform back over. Sometimes this is good enough and you’re all set. Other times I would have to get onto the stand and cam it down the rest of the way by using my bodyweight. I do this by lifting the platform with my foot, using my knee on the back of the seat to push the post down with my bodyweight, and then camming the platform back down to create a tight, secure lock against the tree. The pros of this is that it’s fast and easy. The cons of this method is that it’s loud and sketchy. I talk more about the cons of this in the cons section of this post below.
Pro #4: Packability and Portability
This stand doubles as a backpack, thanks to its integrated straps and modular design. The seat folds to a 90º angle and locks in place, creating a sturdy shelf for your backpack during transport. I paired mine with the Badlands Rise backpack, which fits perfectly on the shelf. It’s also lightweight enough for morning and evening hunts, but just big enough so that it holds all my essentials for all-day hunts, including my Lone Wolf climbing sticks.
LWCG .75 Backpack Shelf with Backpack AttachedWearing LWCG .75 backpack with Shoulder Straps
Stick Integration
The .75 includes slots for integrating LWCG climbing sticks, but I prefer to carry mine in my backpack. For those who like to integrate their sticks, this feature could be a great convenience.
LWCG Double Step Sticks Integrated into LWCG .75 Stand
Attachment Points
The stand has multiple attachment points for securing gear. I use the included strap to fasten my backpack to the stand for transport using the attachment points. This way I never forget my treestand strap. I’ve also experimented with paracord and a Nite Ize CamJam, but the strap remains my go-to option.
Cam Buckle Strap Loop Attached to Stand Attachment Point
Pro #5: It Can Also Be Used As A Hybrid Saddle Platform
The .75’s lightweight and compact design makes it a versatile choice for hybrid hunters. You can use it as a traditional hang-on stand or pair it with a saddle for added flexibility.
In my experience, after using the LWCG .75 Stand a few times with my saddle gear, I was surprised to find myself phasing out the saddle equipment entirely. Having used saddle gear exclusively for 10 years, this shift was unexpected, but the .75 won me over. For morning and evening hunts, setting up the saddle gear felt like unnecessary extra effort, time, and noise. Eventually, I even stopped bringing it on all-day hunts.
Pro#6: Bow Holder Attachment
The optional bow holder attachment allows you to keep your bow upright and within arm’s reach, making it easy to grab when a deer appears unexpectedly. I hunted most of the season without this attachment but felt paranoid about missing opportunities, so I ordered one. Unfortunately, it arrived after bow season ended, but I’m confident it will be a great addition next season.
Pro #7 Changing/Adding Clothes
One benefit I rediscovered using the hang-on style treestand is how easy it is to layer clothing, change socks, or add toe-warmers compared to in a saddle. The ropes and straps of a saddle setup make these tasks cumbersome, but the open platform of a hang-on stand makes it simple.
Pro #8: Aluminum Noise
Compared to a saddle, which is primarily fabric, the LWCG .75 does produce more noise. However, I was pleasantly surprised by how minimal it was. The only noticeable instances of noise occurred when I accidentally banged a buckle against the stand, which was more user error than a design flaw.
Despite initially thinking silencing materials would be essential, I didn’t feel the immediate need to add any during the season. That said, I plan to apply some silencing materials in specific areas next year to further reduce potential noise.
One reason noise wasn’t a significant issue is the slim profile of the .75. The stand is narrower than my body profile, allowing me to block most twigs and branches while walking. Additionally, carrying a backpack on the opposite side of the stand further helped shield it from brush, minimizing and deadening unwanted sounds.
Pro #9: Excellent Platform Grip
The grip on the platform of the .75 is great. It has ridges/grooves in the frame so that your boots have good traction so you don’t slip. This is important in rainy, snowy, or icy conditions. Many other stands on the market don’t have this important feature.
LWCG .7 Platform Grip
Field-Tested Cons of The LWCG .75
Con #1: Cam-Over Feature
One aspect of the LWCG .75 that I didn’t fully love is the cam-over feature. This involves lifting the platform up with your foot, using your knee to push the post down with your weight, and then camming the platform back down to create a tight, secure lock against the tree. While this method provides a solid hold, it can be loud and feels a bit sketchy, especially on trees that aren’t perfectly straight. I’ve even had the .75 almost slide off the tree during the cam-over process on certain angled trunks.
To mitigate any risks, I always ensure both my lineman’s belt and tree strap are securely attached before attempting the cam-over. That said, I’ve found that in some cases, the entire body cam-over feature isn’t entirely necessary. I can achieve a secure enough bite into the tree simply by camming the platform into place by hand, rather than using my full body weight. This approach feels safer and still provides a reliable setup.
There are also other methods of getting a secure fit, for example, you could use two cam buckle straps instead of just one. Or you could even use a ratchet strap.
Con #2: Seat Cushion Placement
Although I like the seat cushion material, the placement of the cushion isn’t perfect. When you fold the treestand into its shelf position the tree bracket teeth fold into the seat cushion. Over time I expect that the teeth will bite into and start tearing the seat cushion. You can mitigate this a little by installing the seat cushion so it’s further away from the teeth, but then the cushion hangs over the seat, which has worked well for me.
Lone Wolf Custom Gear Seat Shift to Prevent Damage
I am surprised how well the seat cushion held up though after using it all season with the teeth folded into it. There is no damage to it so it seems like the cushion will last longer than I was initially anticipating.
Lone Wolf Custom Gear Seat Damage
LWCG .75 Tips and Tricks
Tip/Trick #1: Seat Cushion Position
Make sure you put the seat cushion on so that the brown part is facing up, so you’re sitting on it. The black part with the logo should be faced into the treestand. If you don’t do this the seat will be very squeaky against certain fabrics.
How To Put The Seat Cushion on LWCG .75
Tip/Trick #2: Wasit Belt
For this first season, I toughed it out without using a waist belt because the stand does not come with one. However, I highly recommend it because my shoulders were burning for my longer hikes into my spots, especially during all-day hunts when I have the extra weight of water and food. But I still think it would be worth it for morning and evening hunts.
I haven’t bought mine yet but I’ve been doing some research, the LWCG waist belt is only 50$ which is a good deal compared to some of the other options I’ve found, so I might go with LWCG. However, I also found some more expensive but more comfortable options. I’ll list those (non-affiliated) options below:
Out of the approximately 30 hunts in this stand, around 10 or so were all-day hunts during the rut. As a historically hardcore saddle hunter, I was so impressed with how comfortable this hang-on stand was. I was able to sit in this stand all day with no problems. Periodically, I would stand up to give my butt a break from sitting so long and let the blood flow come back to my limbs but that was about it. I felt like I was able to be more still in this hang-on than in my saddle since I was more comfortable and I’ve tried and owned the most comfortable saddles on the market.
Cushion Thickness
The seat cushion is the perfect thickness for me so I could go a long time without my butt getting fatigued but if you’re bigger than me you might want to double up on the seat cushions. But I would recommend buying another LWCG seat if you do this because they work so well. It’s some kind of memory foam that is also very water-resistant which is great for comfort and being in poor weather conditions. It also has pre-cut holes in the right spot so you can stack the two cushions easily.
Platform Size
The .75 stand was a little small for all-day hunts. It would have been nicer to have the 1.0 stand for a little more width because I feel like I don’t have a lot of footroom, especially during cold conditions when I wear bigger insulated winter boots. However, it was just big enough for me. I don’t see myself upgrading to the 1.0 though because I like the slimmer profile for carrying the stand in quietly since it fits within my body frame. The trade-off is that I have less footroom but I’m okay with that for the extra mobility.
LWCG .75 Platform Room While in Seated Position
Lone Wolf Custom Gear Customer Service
I’ve had to contact LWCG Customer Support a few times while using their equipment. While their response times aren’t the fastest, I’ve found them to be helpful and reasonably quick to get back to you. That said, since hunting season is their busiest time of year, response times may slow down during this period.
As a small business, LWCG likely has to carefully plan production to avoid overstocking, which means some items may sell out during hunting season. Additionally, many of their staff may be out hunting themselves, which could further impact availability and response times.
One great feature LWCG offers is their 14-day free return policy, allowing you to ensure the gear fits your needs and expectations before fully committing.
Pro Tip: If you’re considering purchasing LWCG gear, plan ahead and buy well before hunting season begins. It can take them 7-10 business days to ship items, which means it can be 2 to 3 weeks before your gear arrives at your door. This gives you time to get any questions answered by customer support, test the stand, make returns if necessary, and ensure that the equipment you want is in stock.
Final Thoughts – Do I Recommend The LWCG .75?
As a decade-long saddle hunter, I was genuinely surprised by how much I enjoyed the Lone Wolf Custom Gear .75 Stand. Its modern lightweight build, modular design, and ease of use make it an excellent choice for mobile hunters seeking versatility without sacrificing comfort. The stand’s slim profile and thoughtful features, like the optional bow holder and excellent platform grip, enhance its practicality for both short and all-day hunts. While minor drawbacks like the cam-over feature and limited platform size may require some adjustment, these issues are easily outweighed by the stand’s overall performance and adaptability.
Ultimately, the LWCG .75 strikes a near-perfect balance between portability and functionality, making it a standout option for hunters who value mobility and comfort. If you’re willing to invest the time to customize it to your needs and plan your purchase ahead of hunting season, I highly recommend giving it a try—it’s a game-changer for both saddle and hang-on hunters alike.


")


")
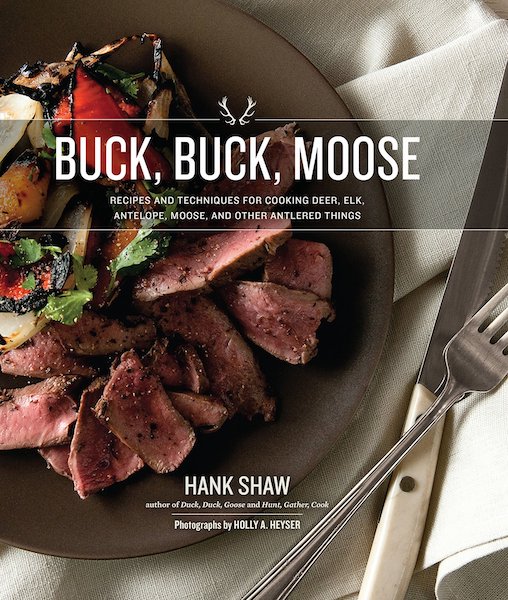
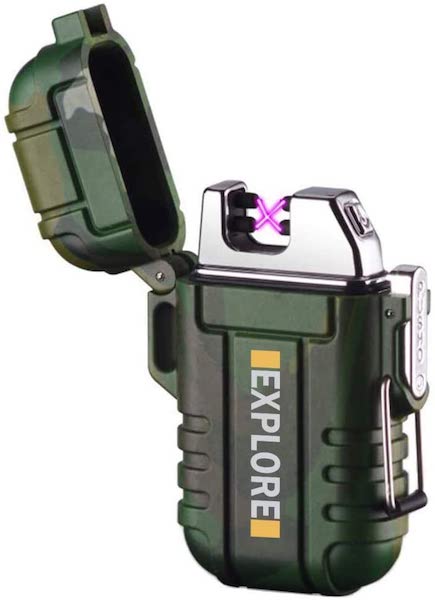
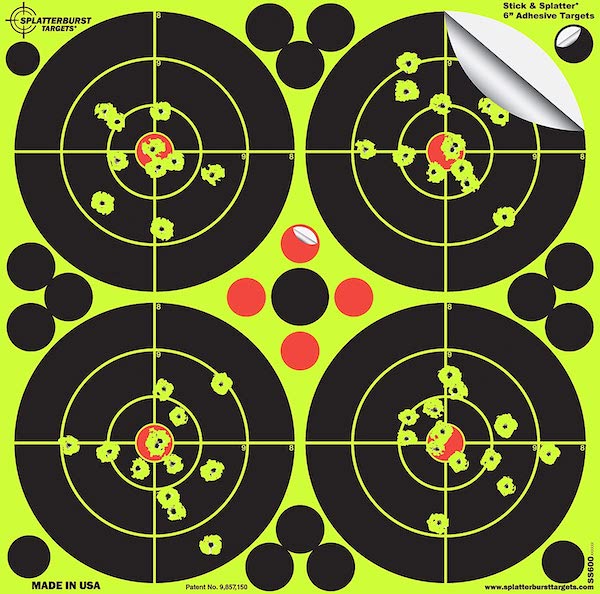
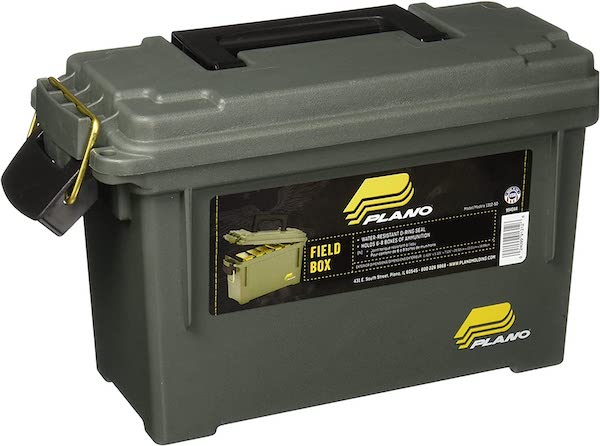
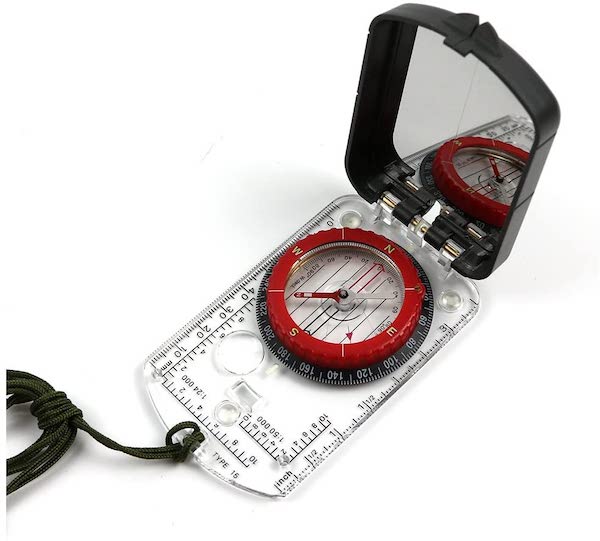
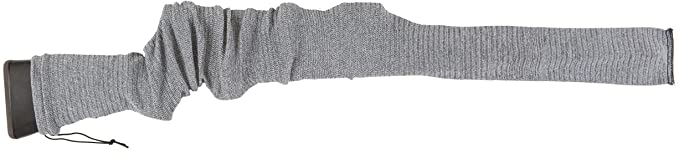


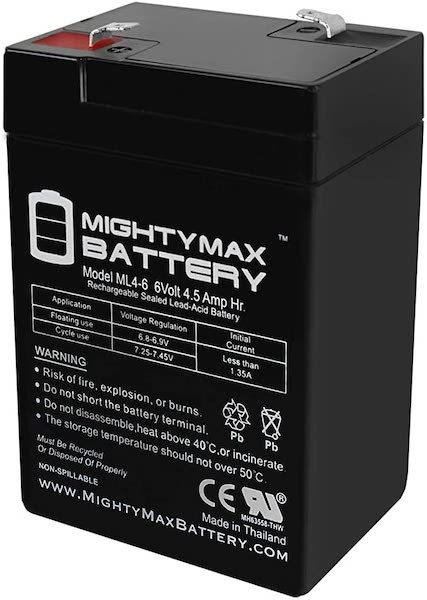
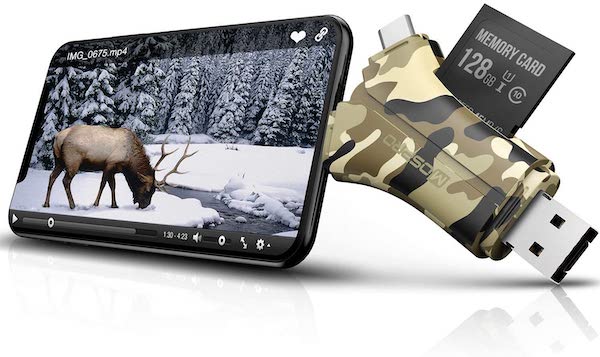
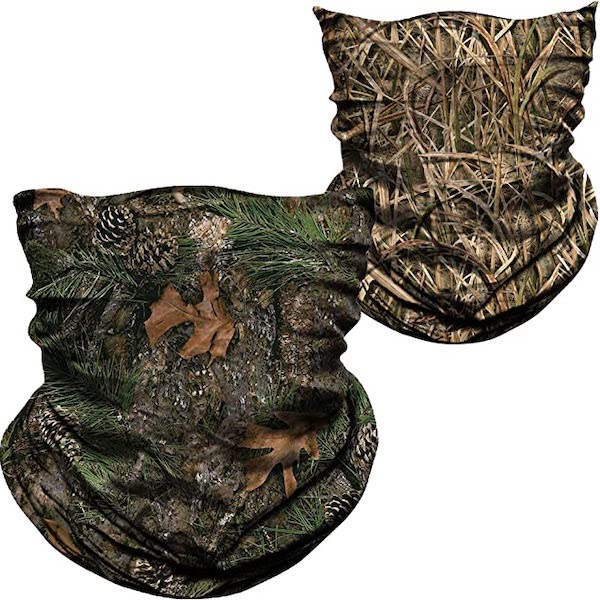
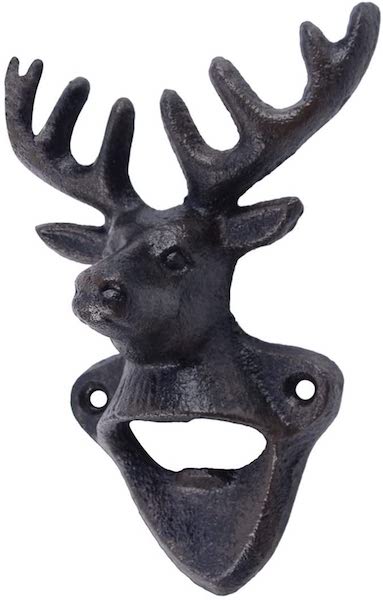
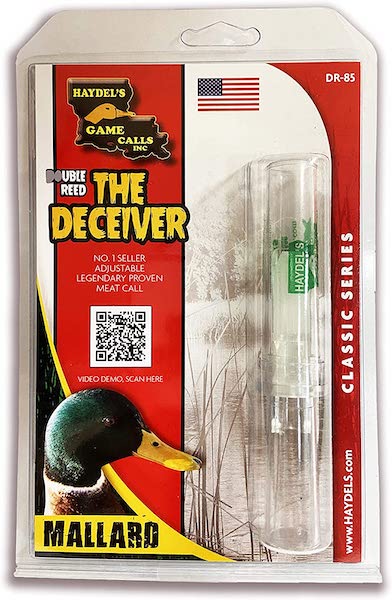
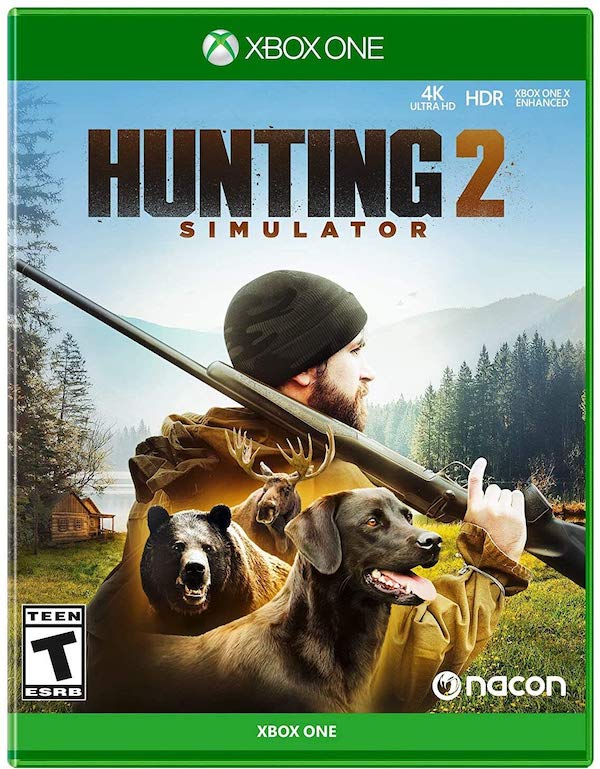
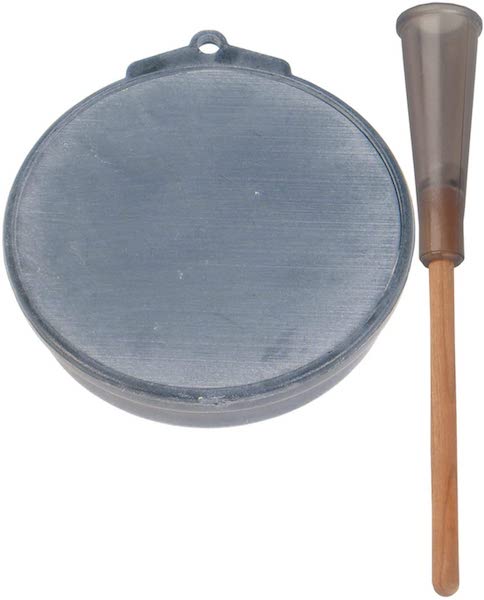
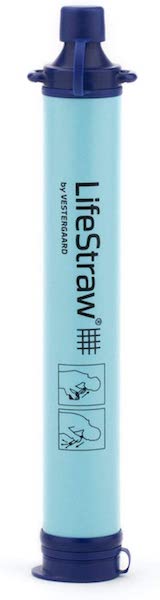
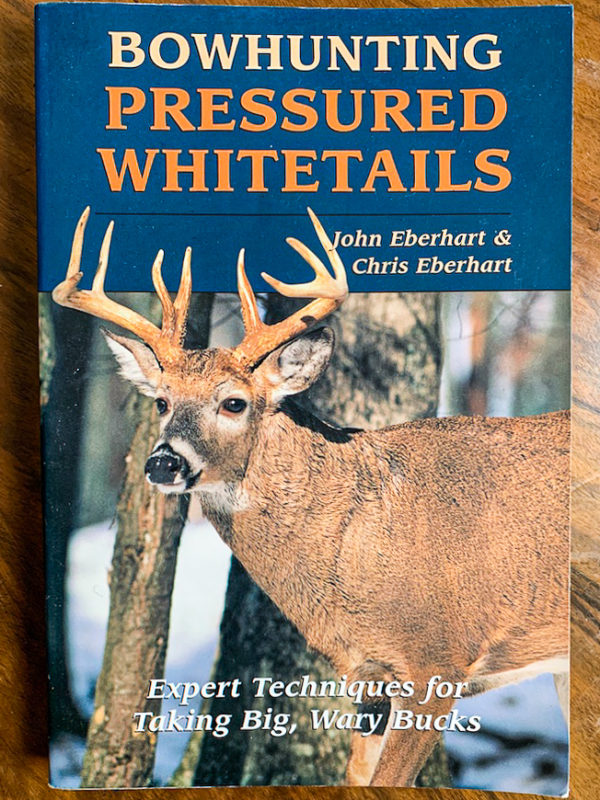
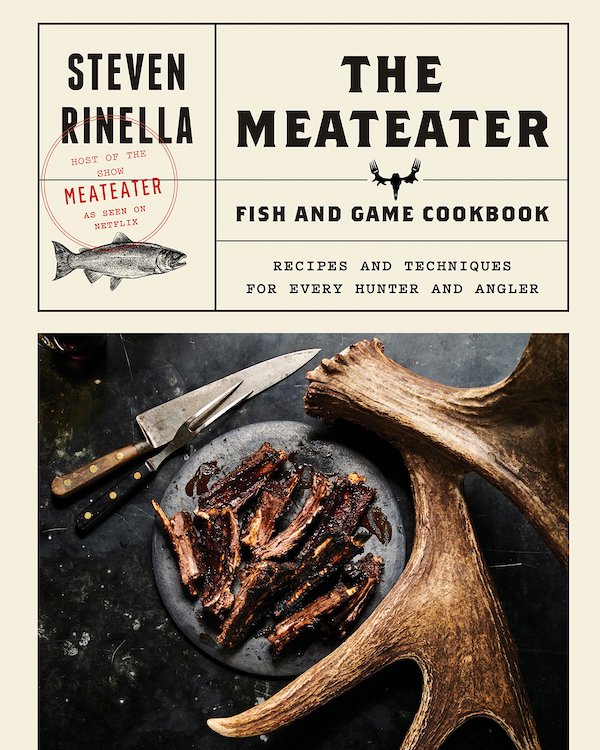
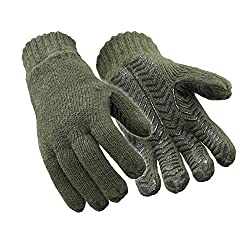
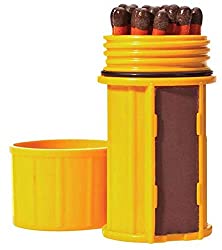
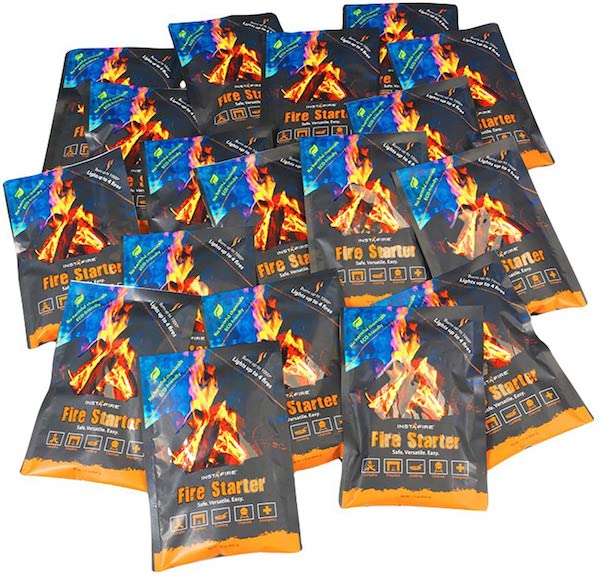
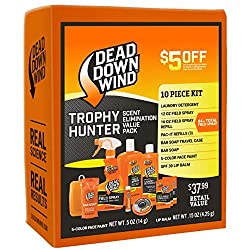
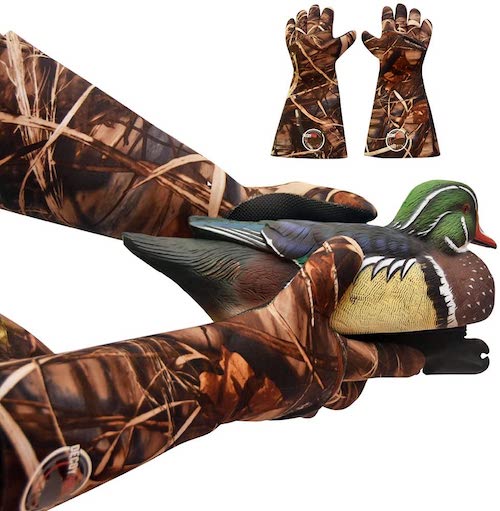

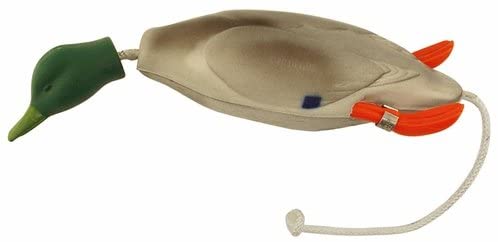
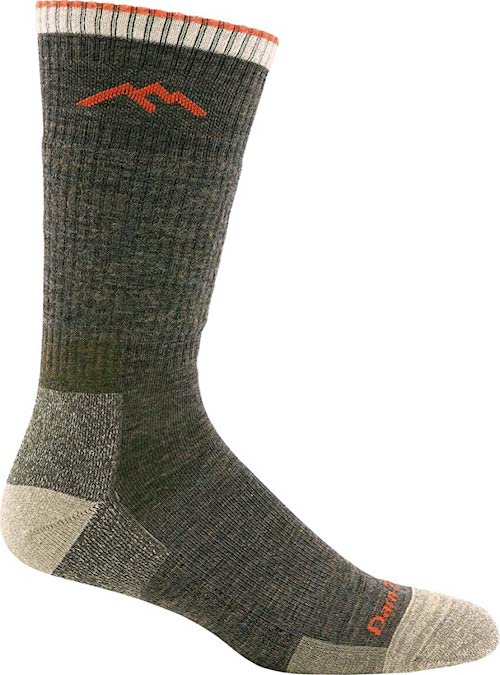
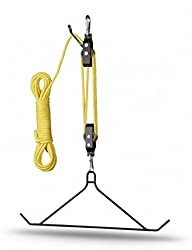
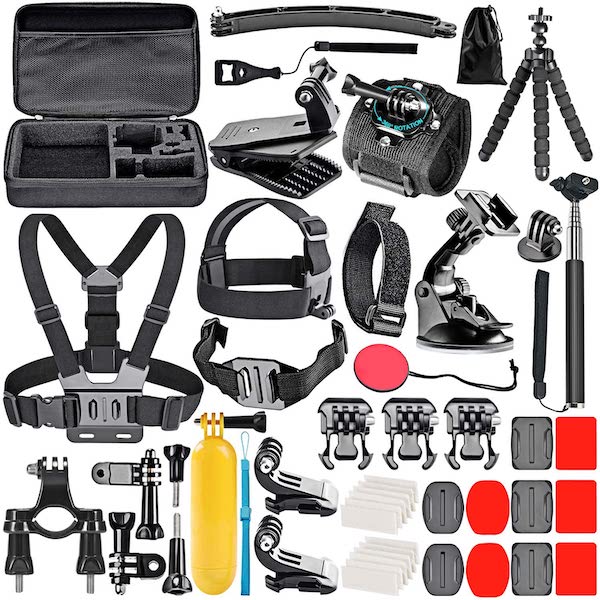
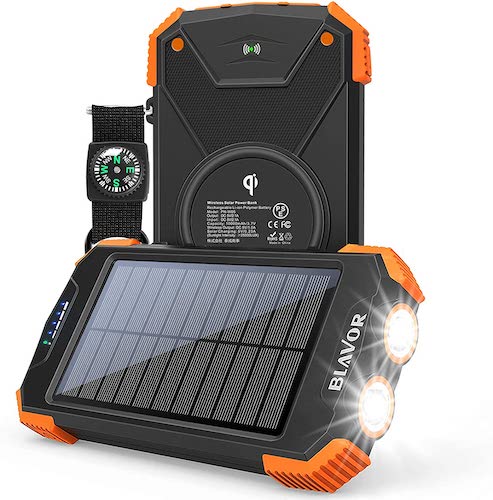

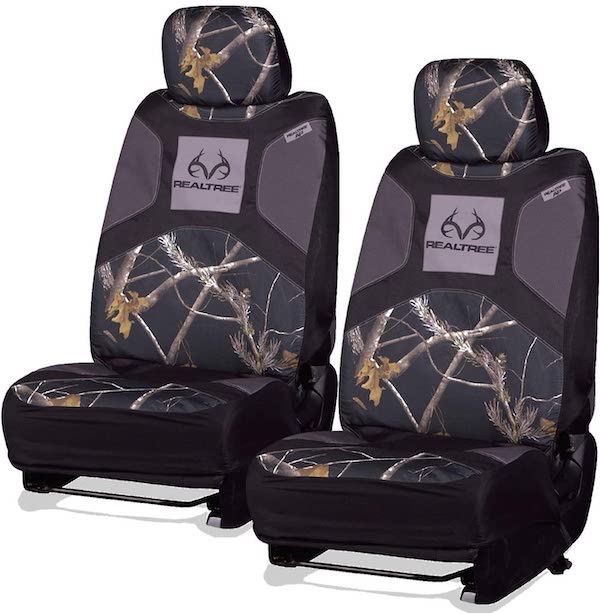
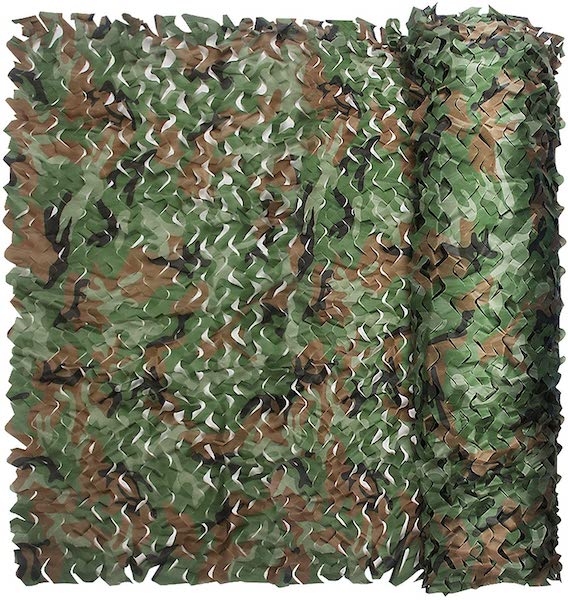
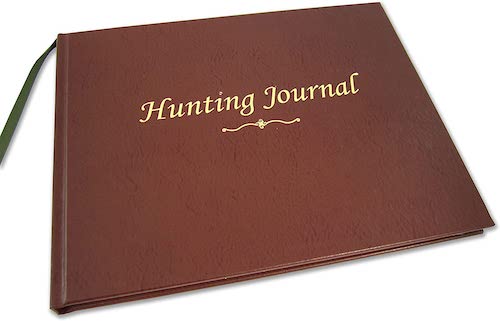
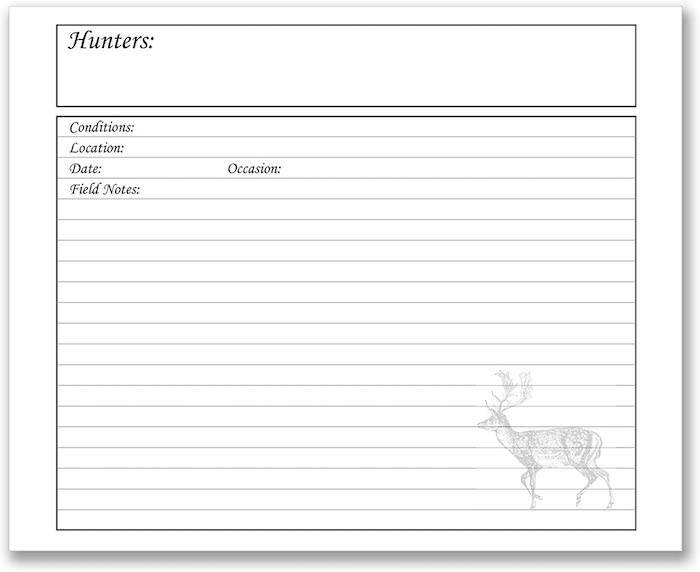
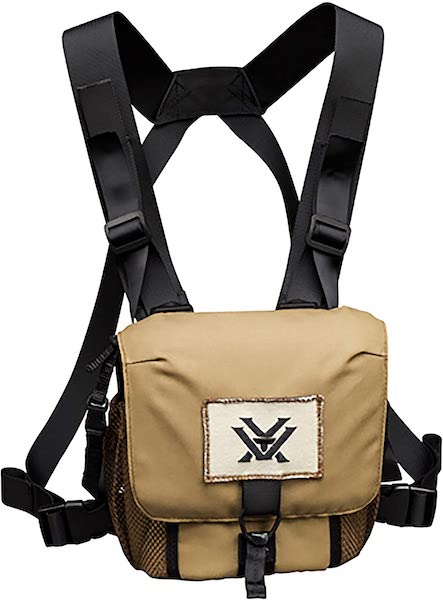

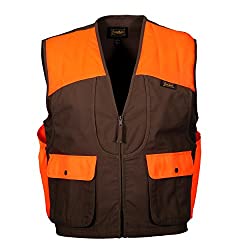
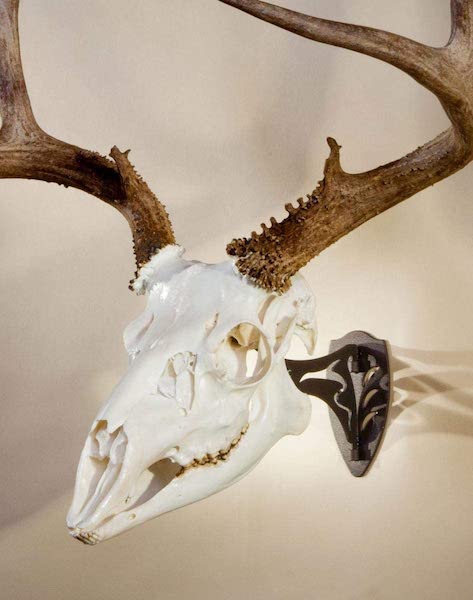
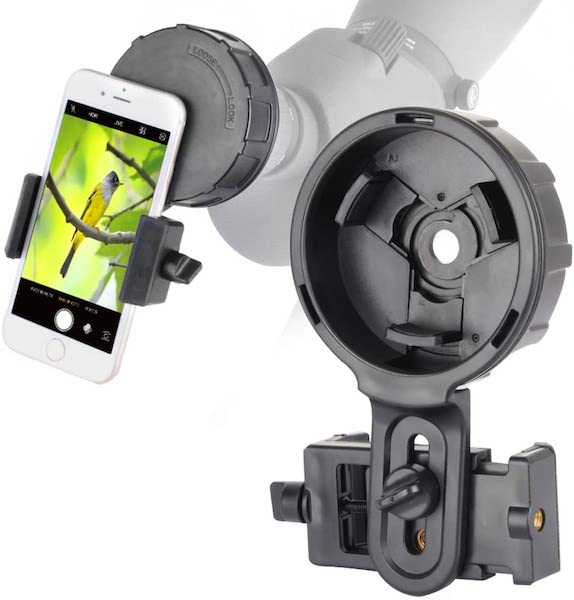
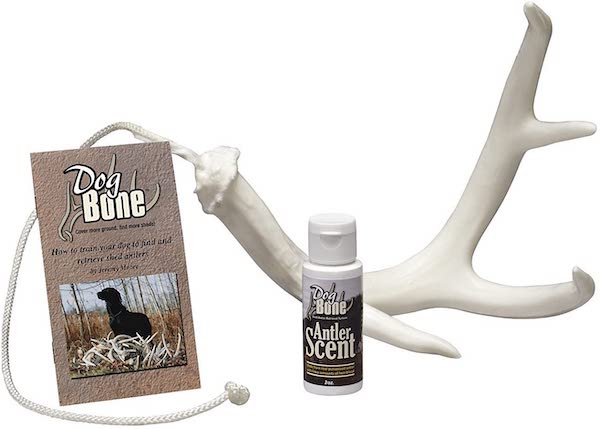
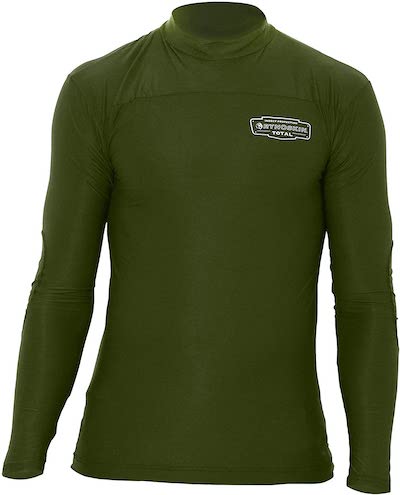

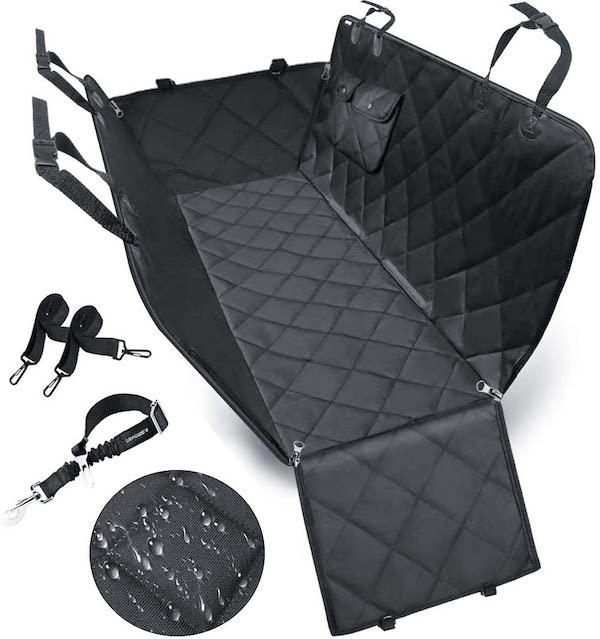
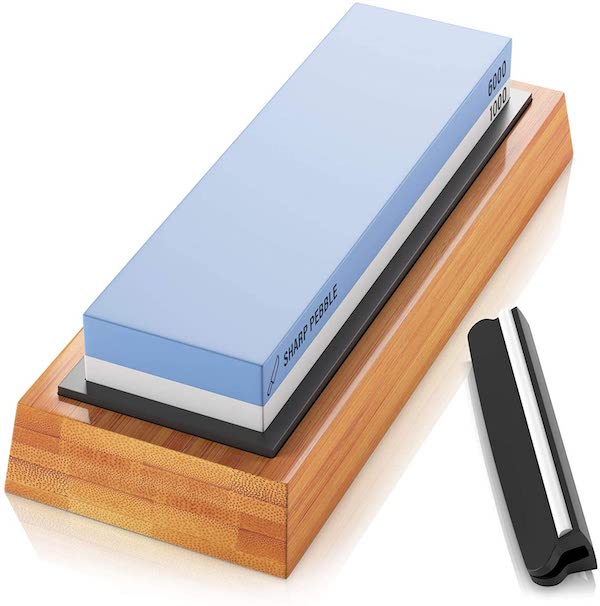
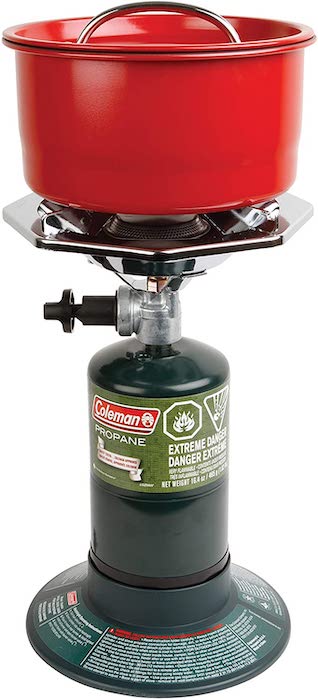
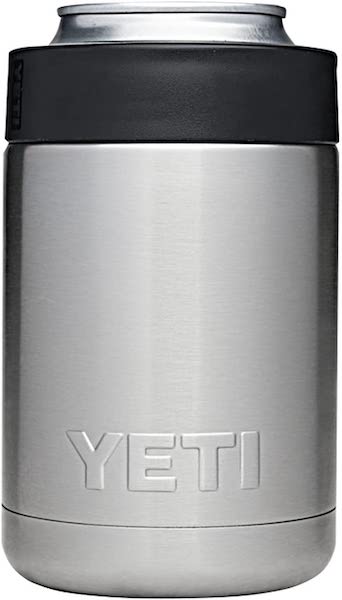


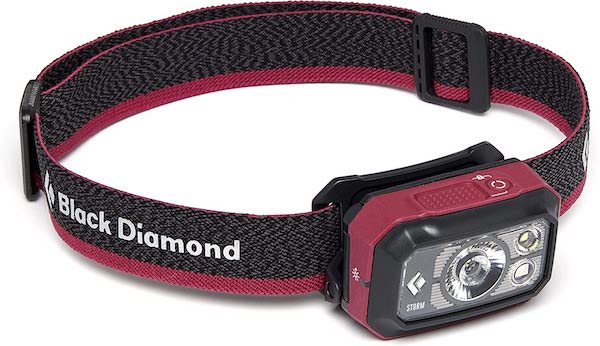
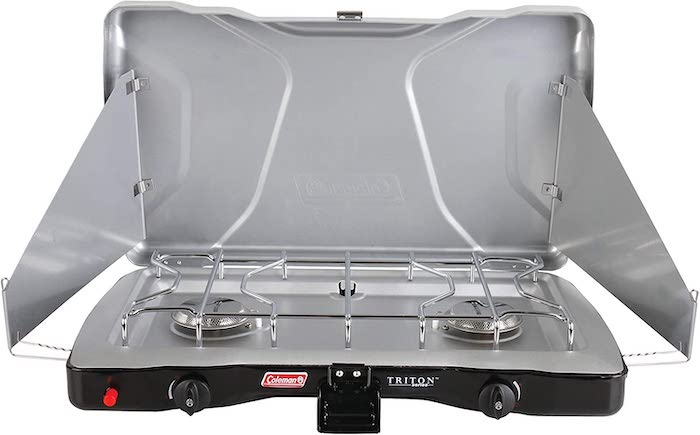

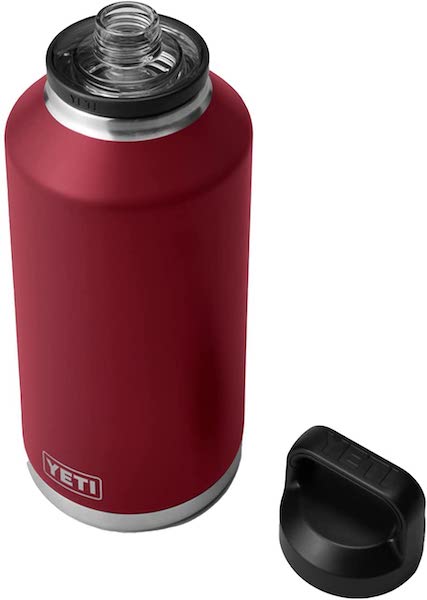

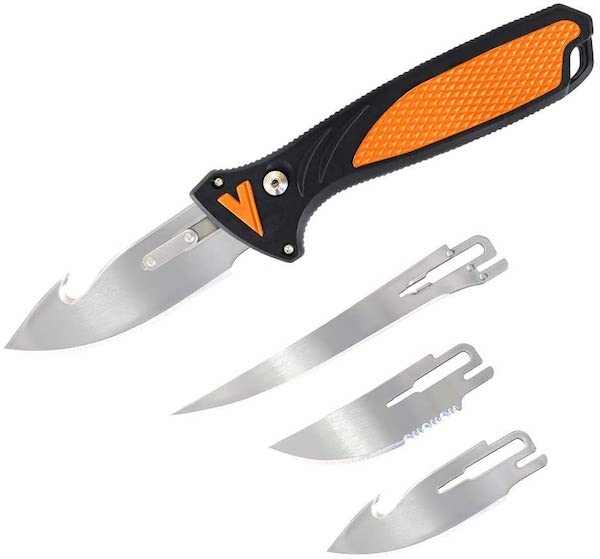
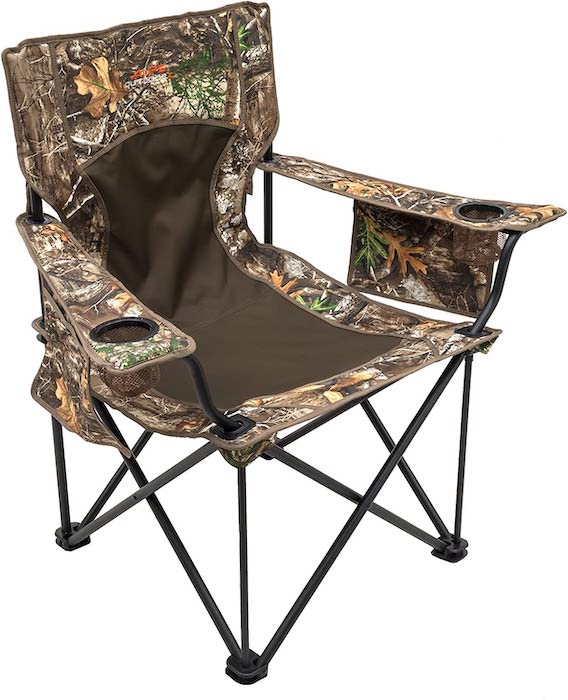
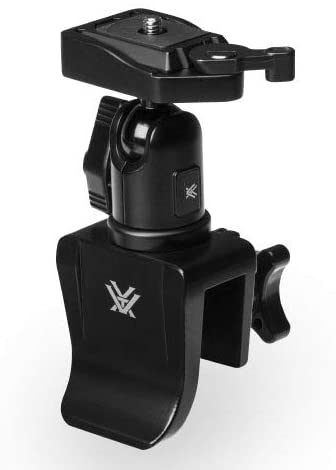

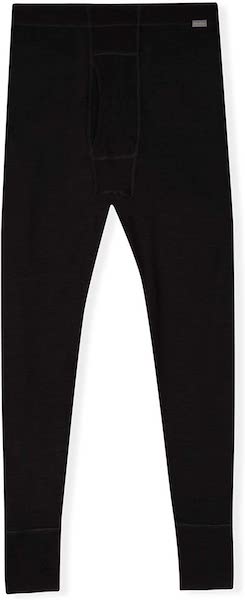
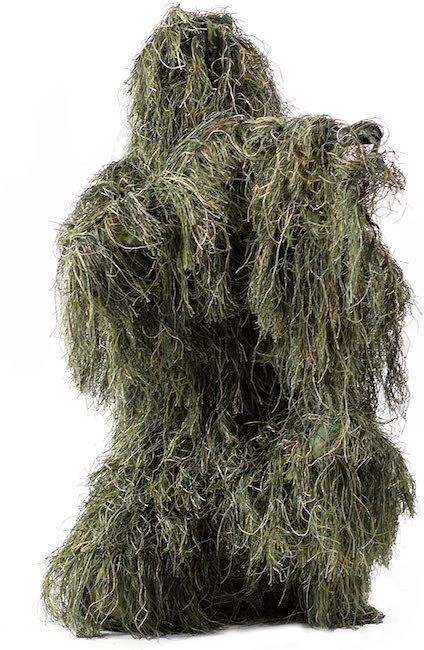

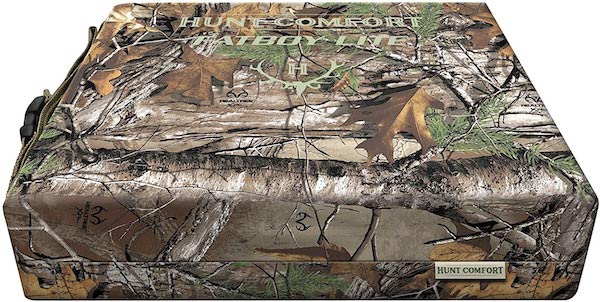
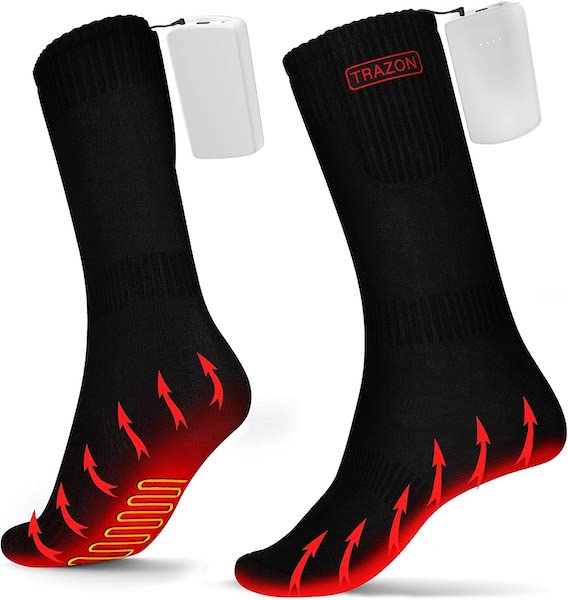


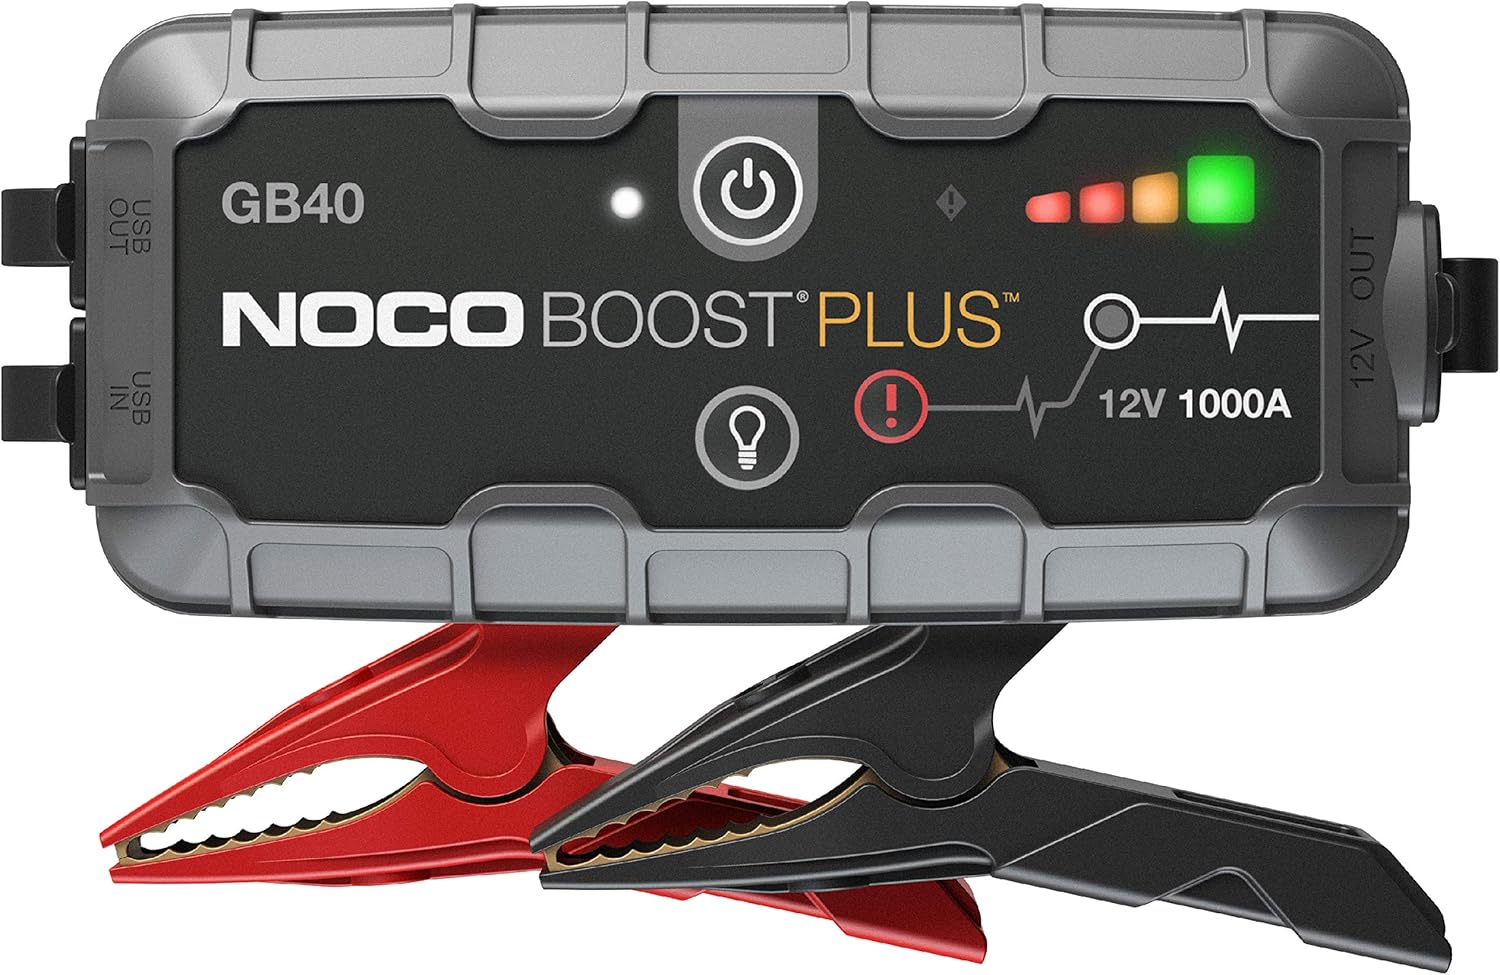


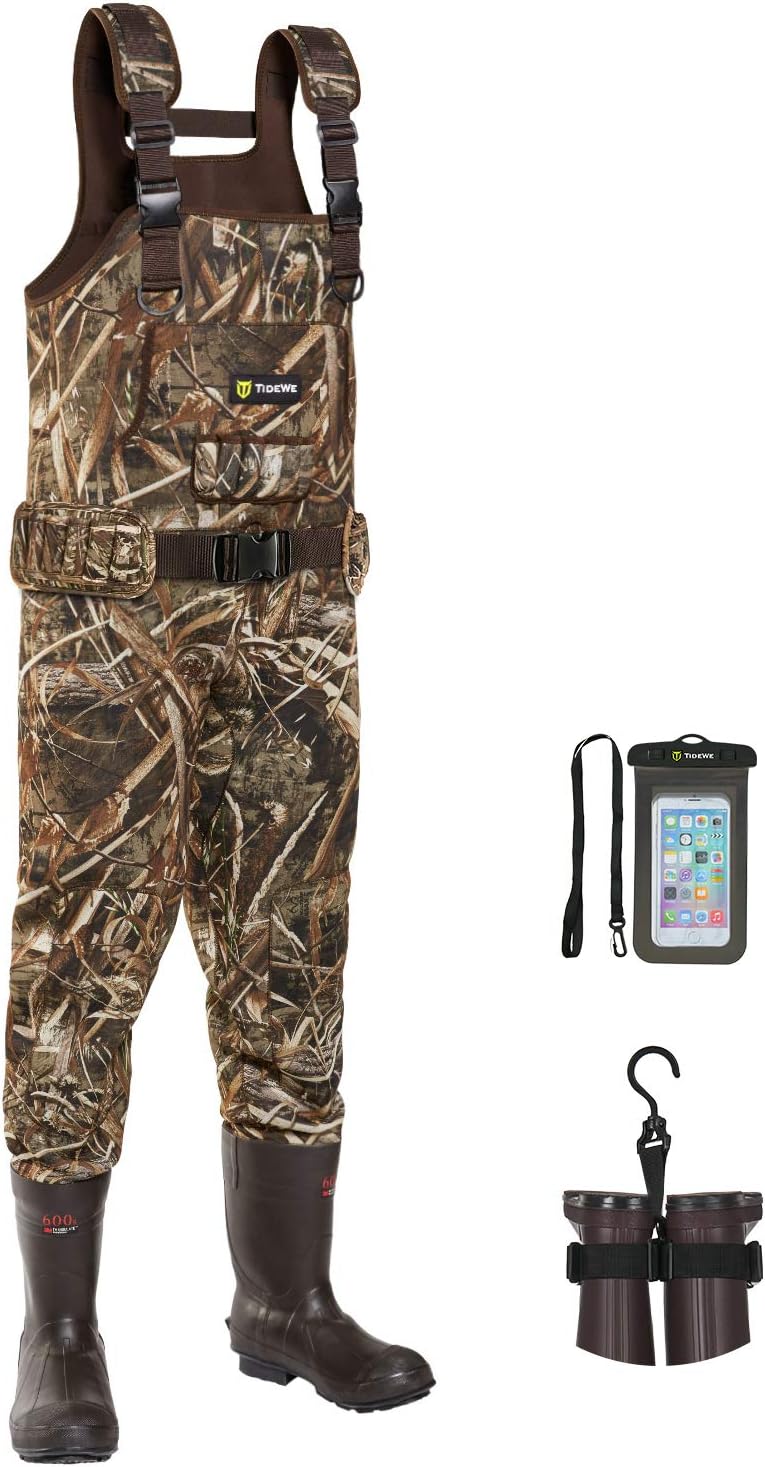
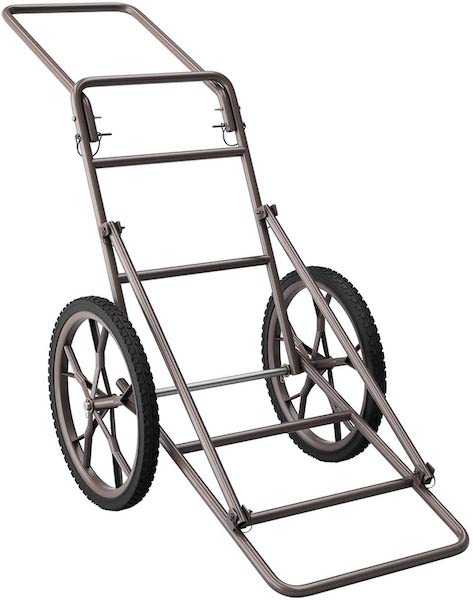
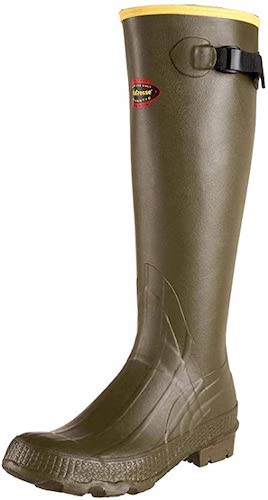
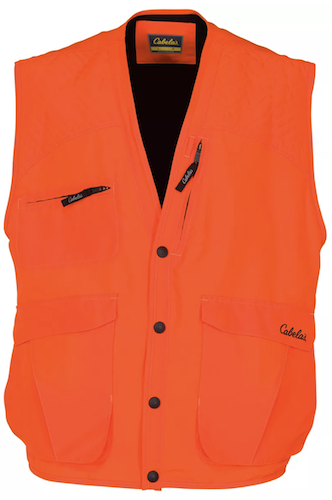
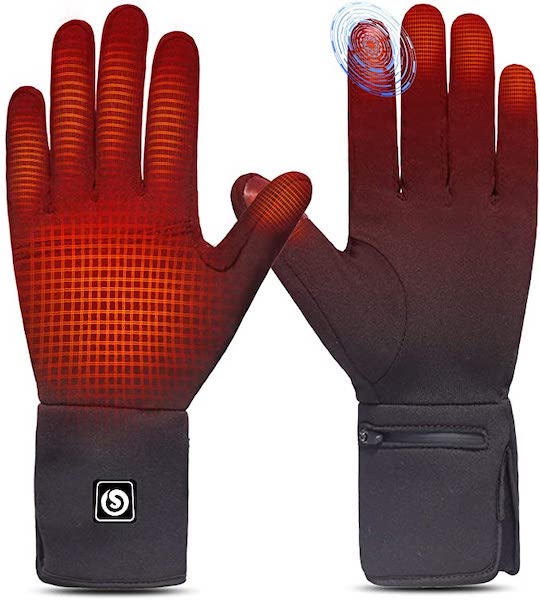
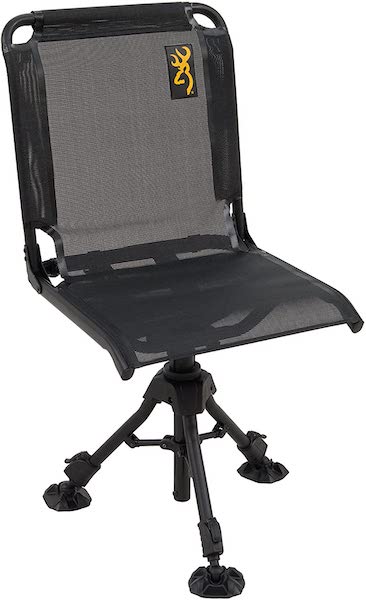
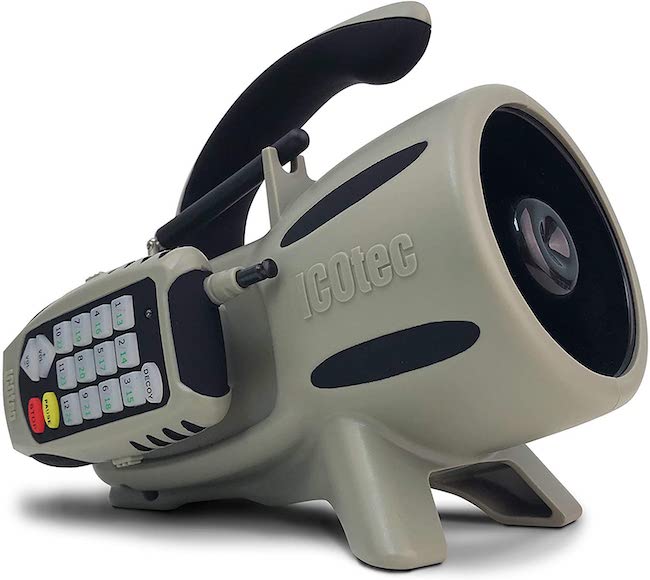
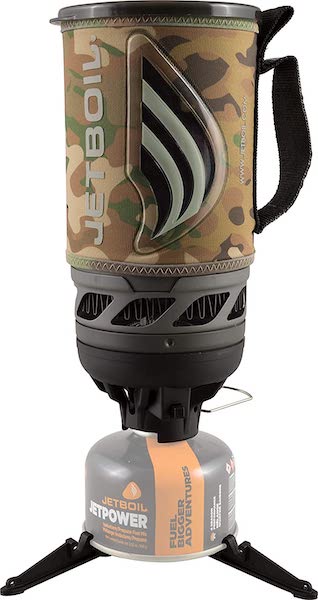
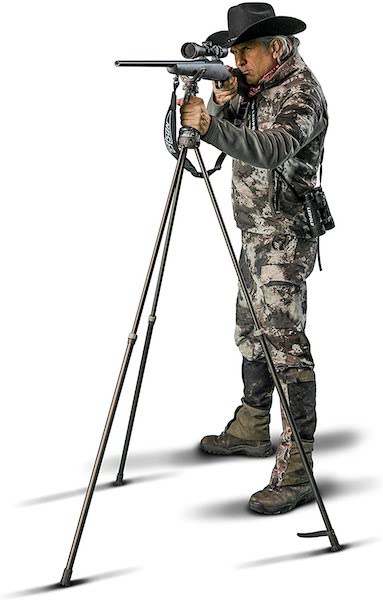
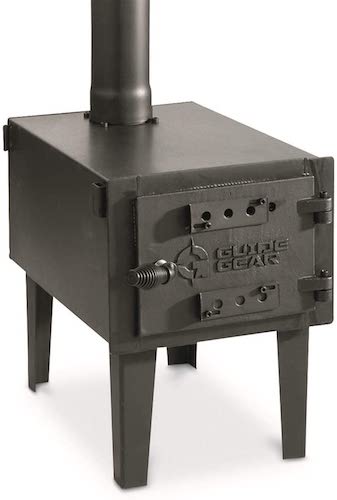

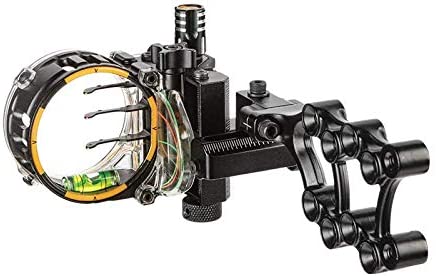

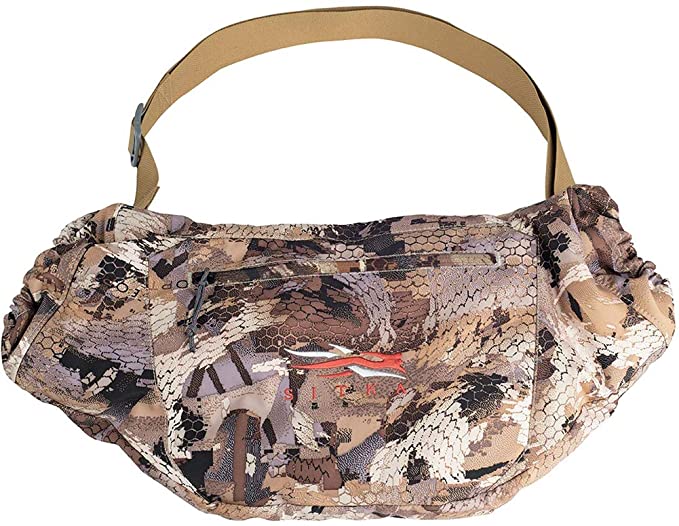
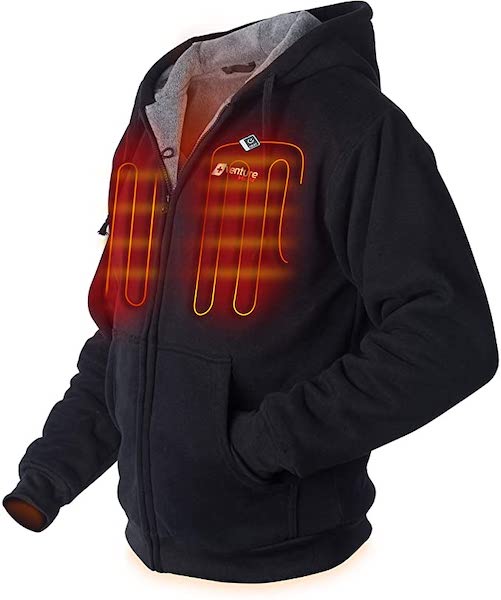
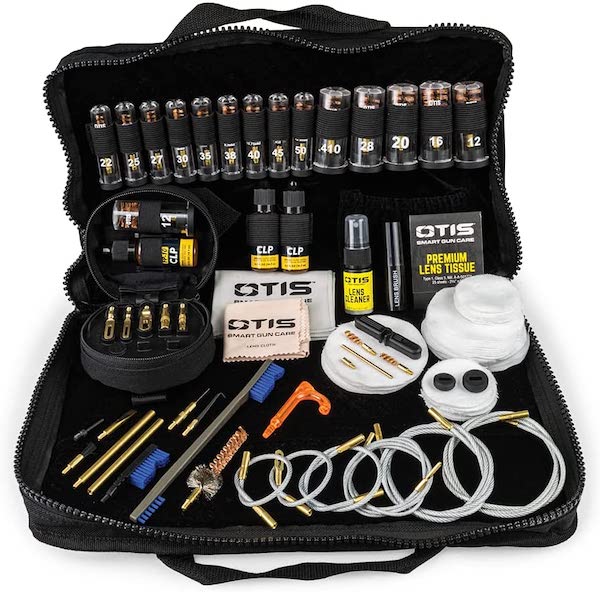
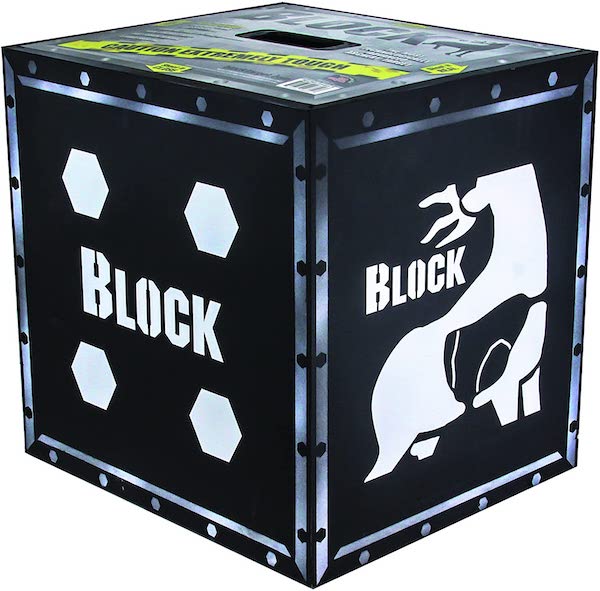
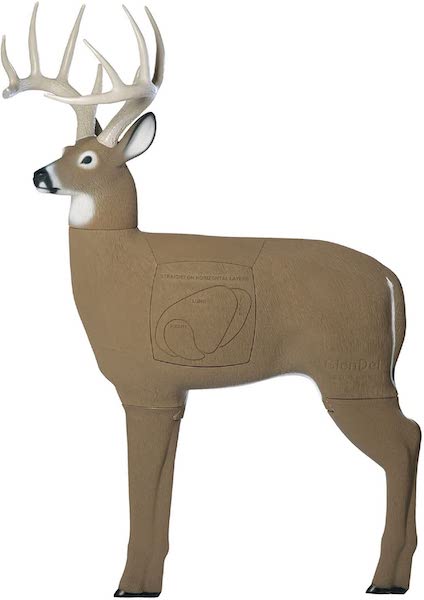
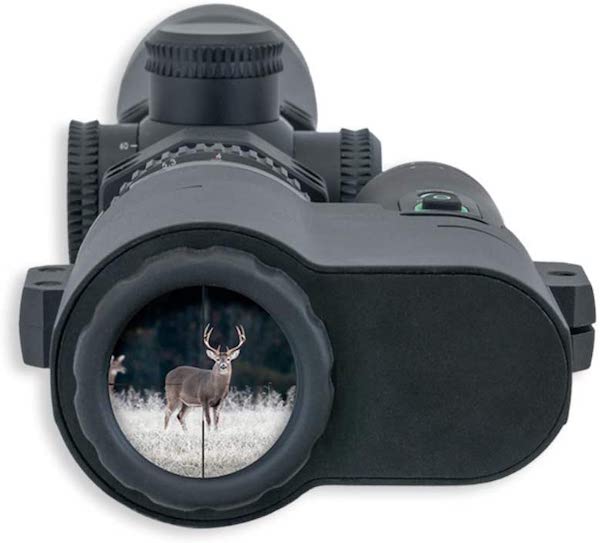

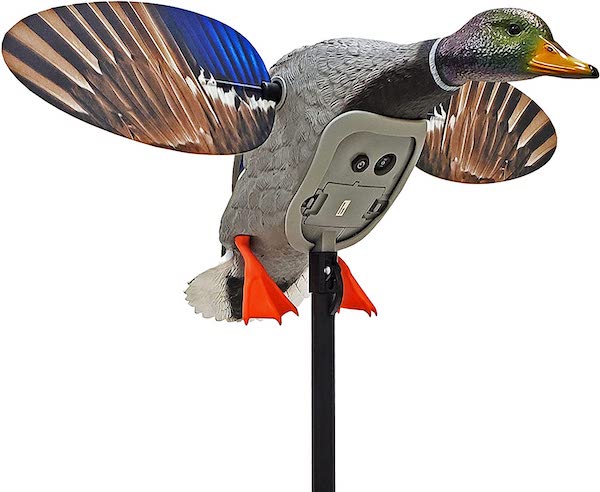
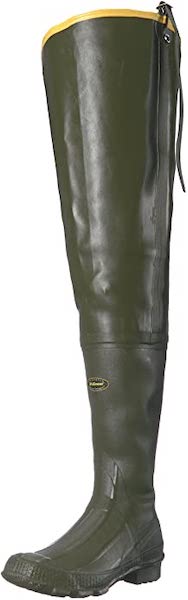
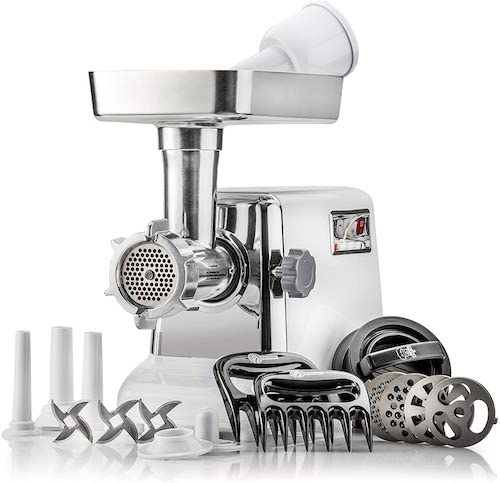

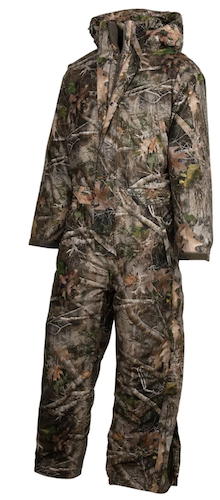
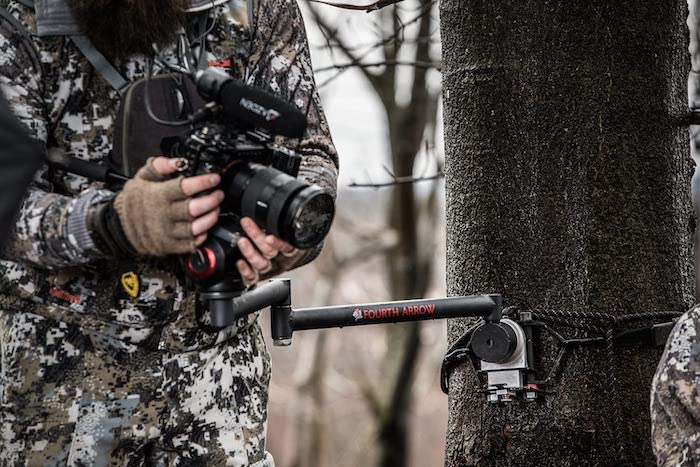
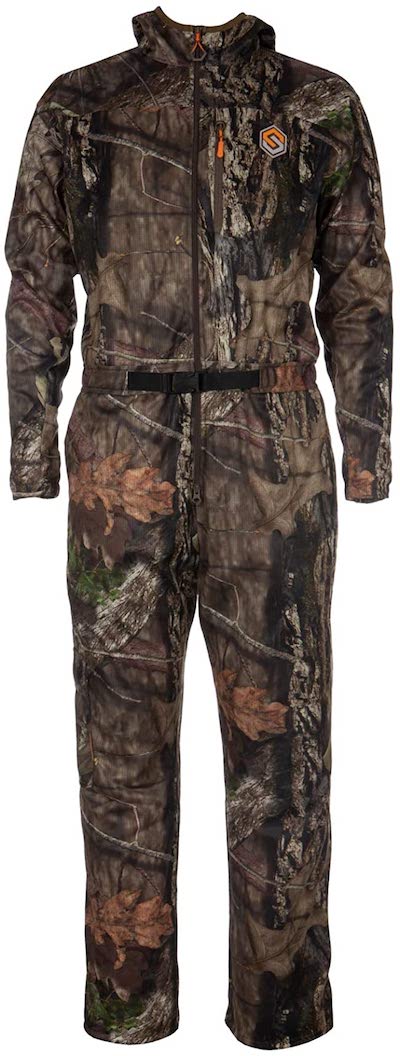

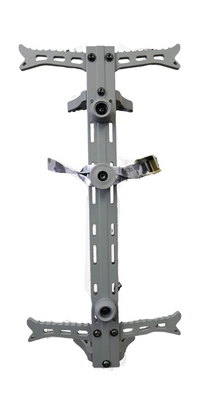
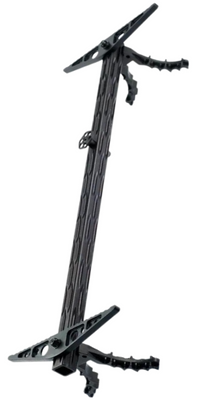
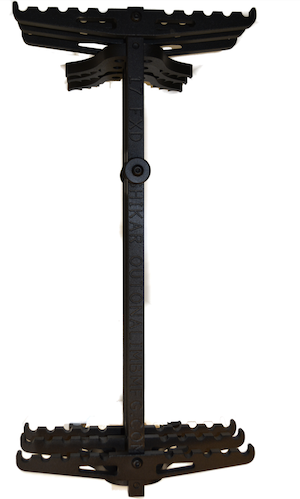
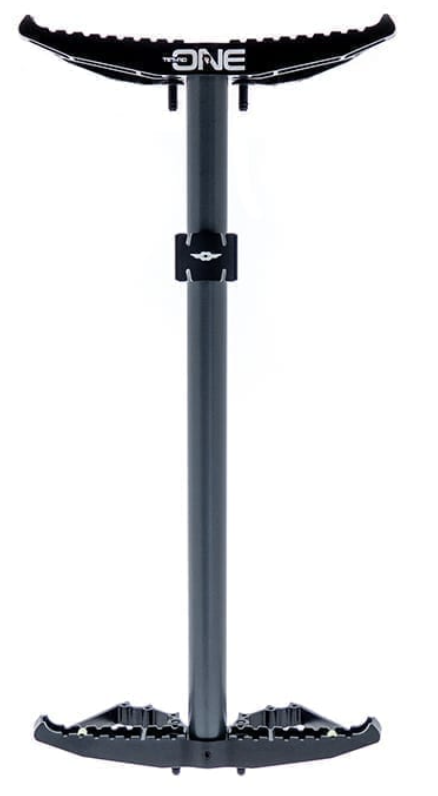
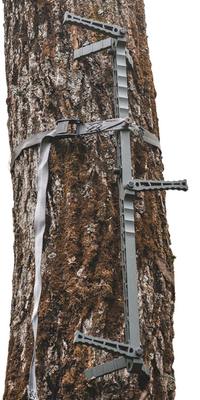
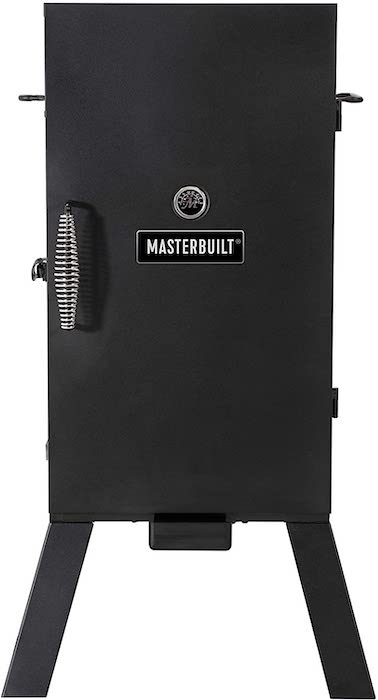
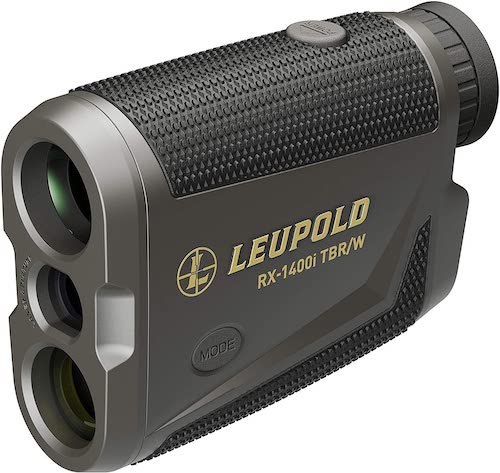
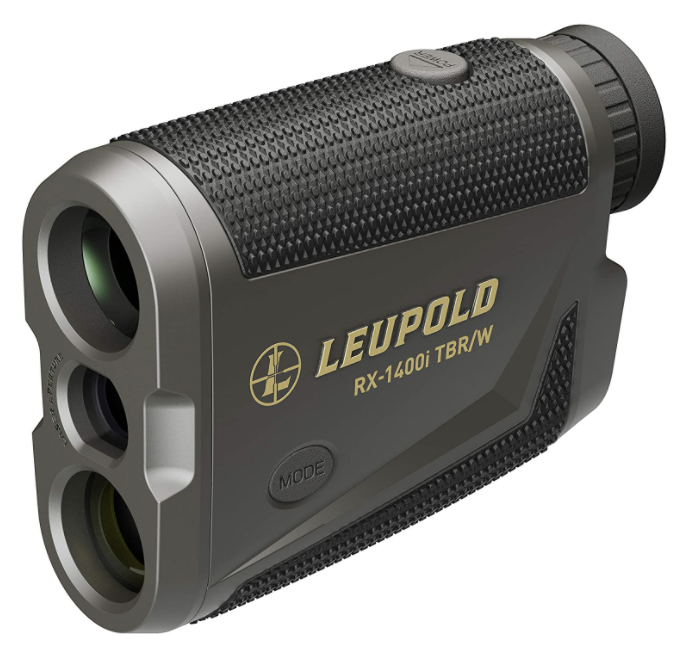
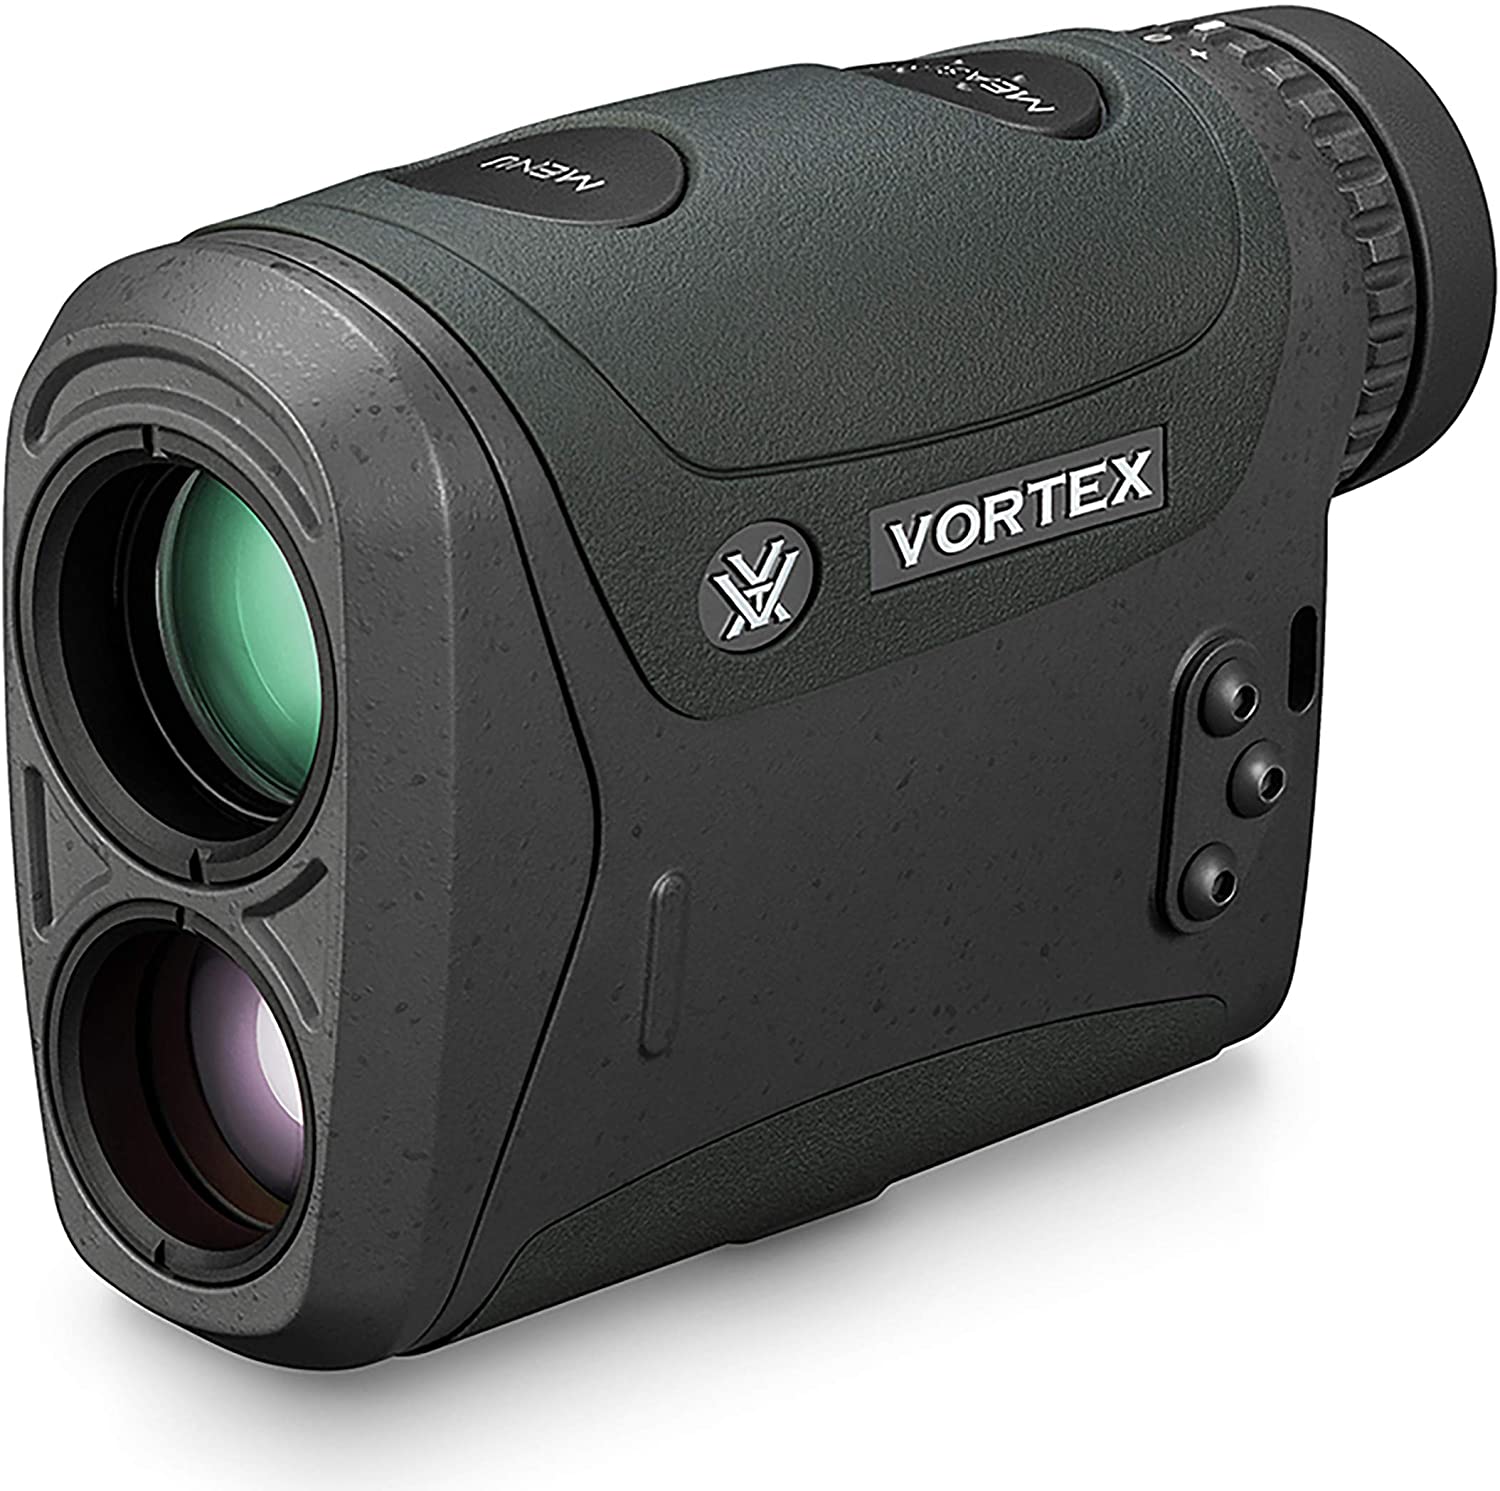


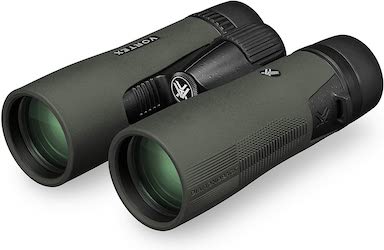
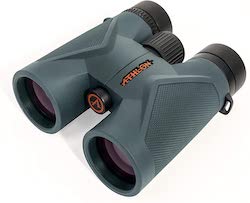
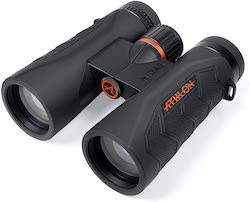
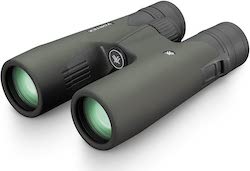
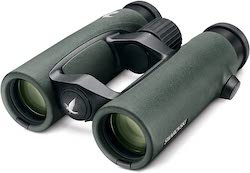
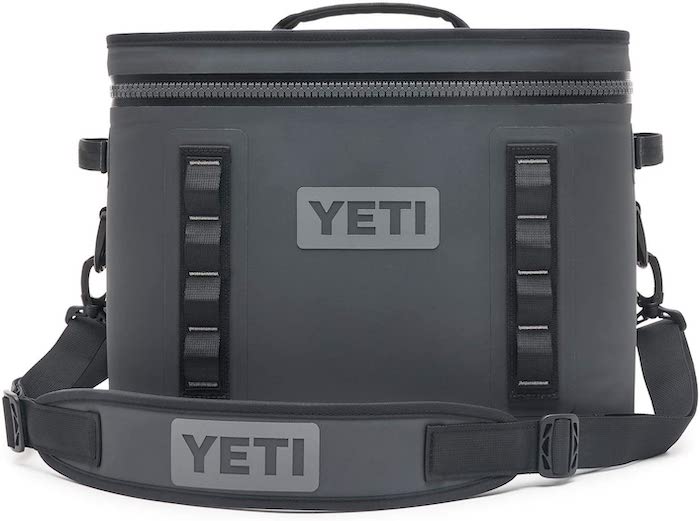
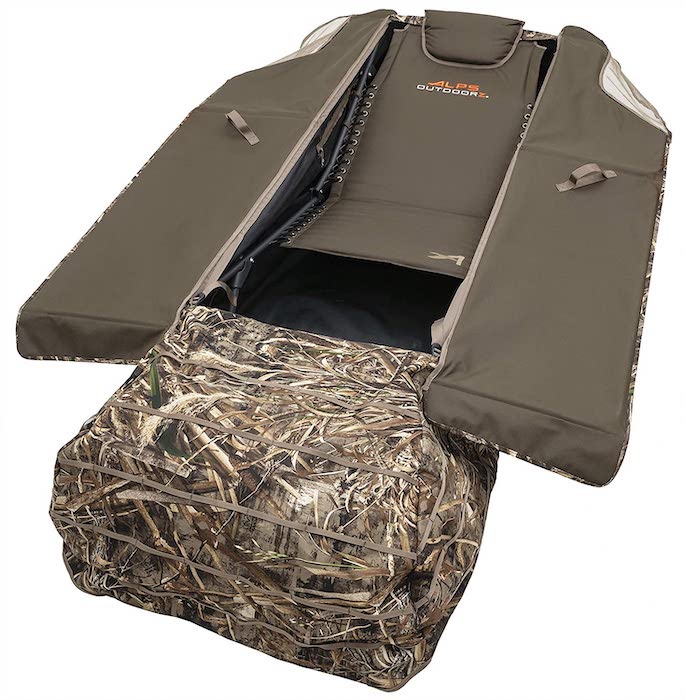
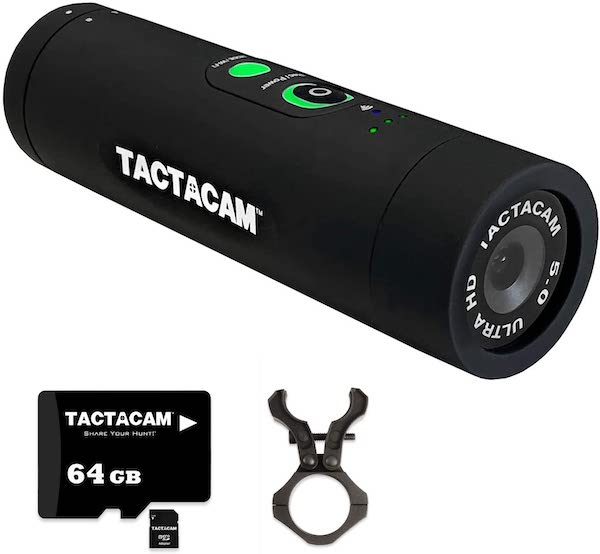
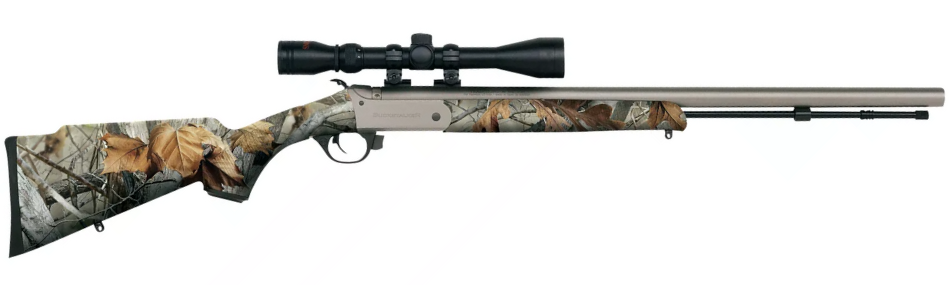

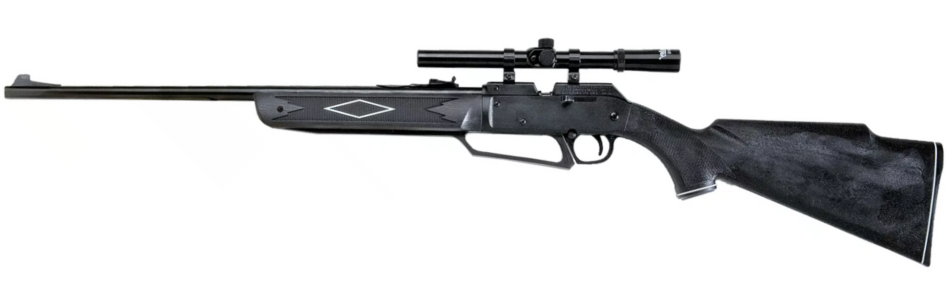
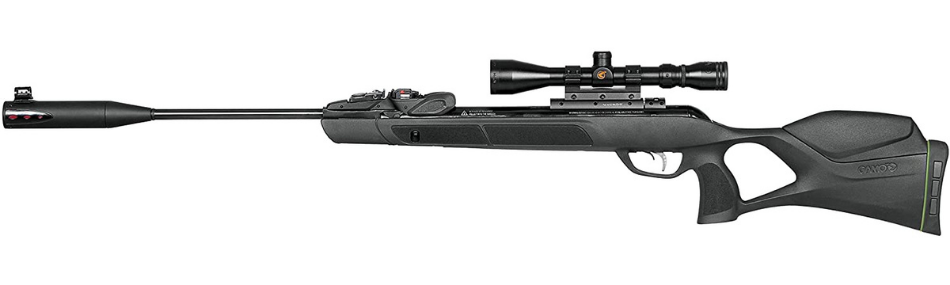
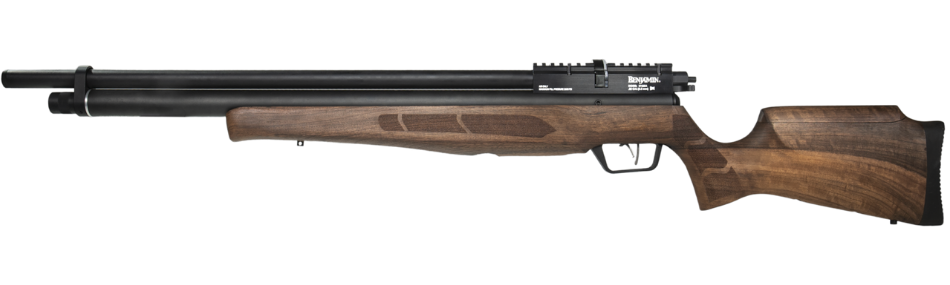

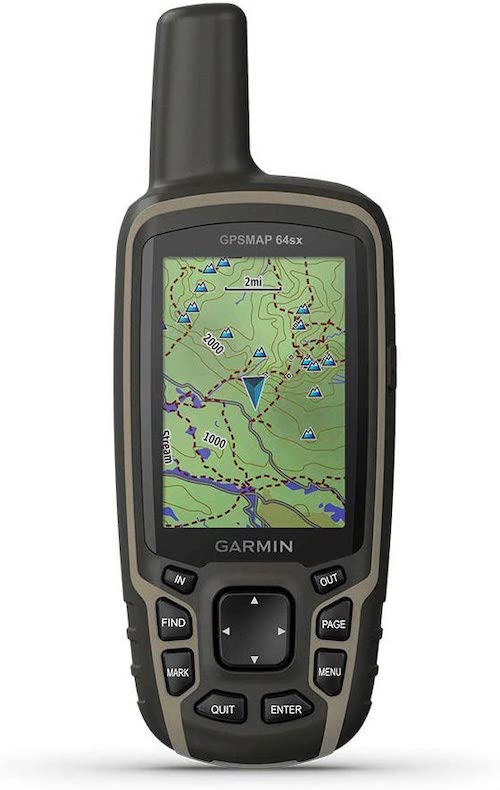
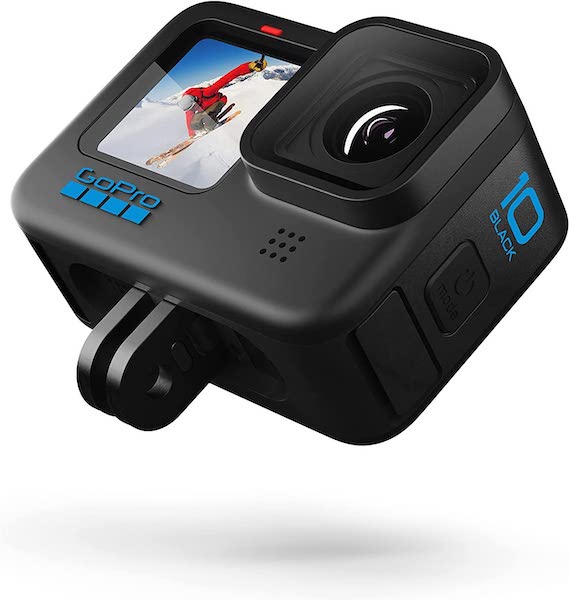
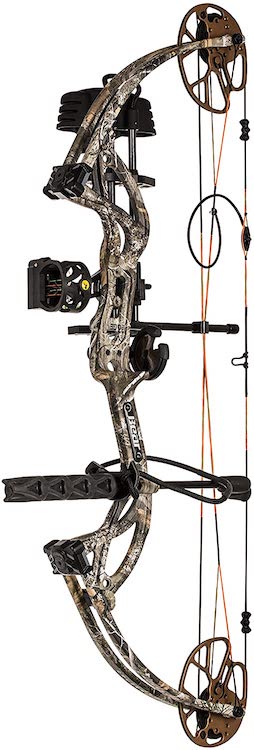
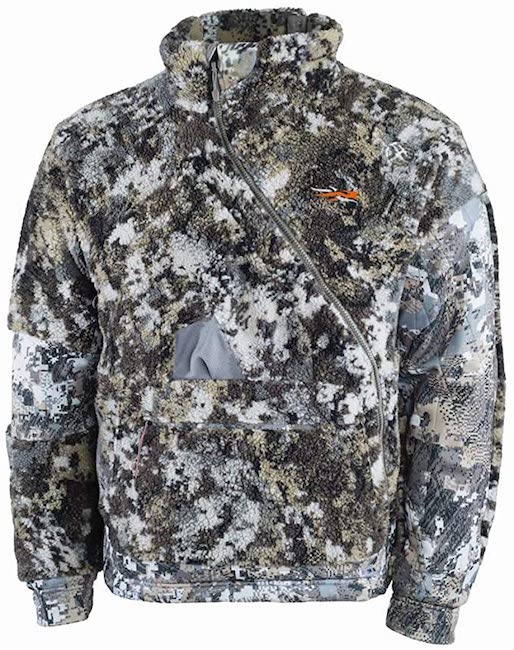
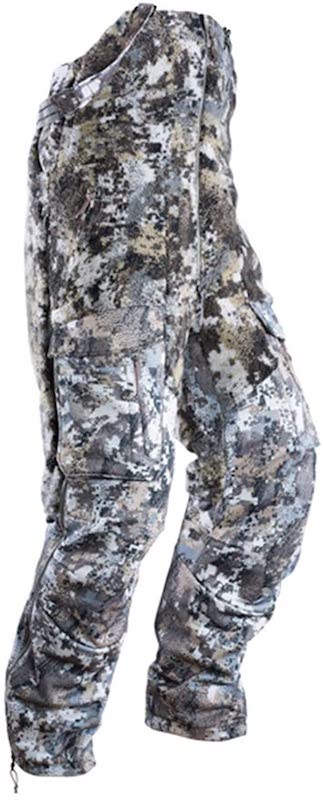
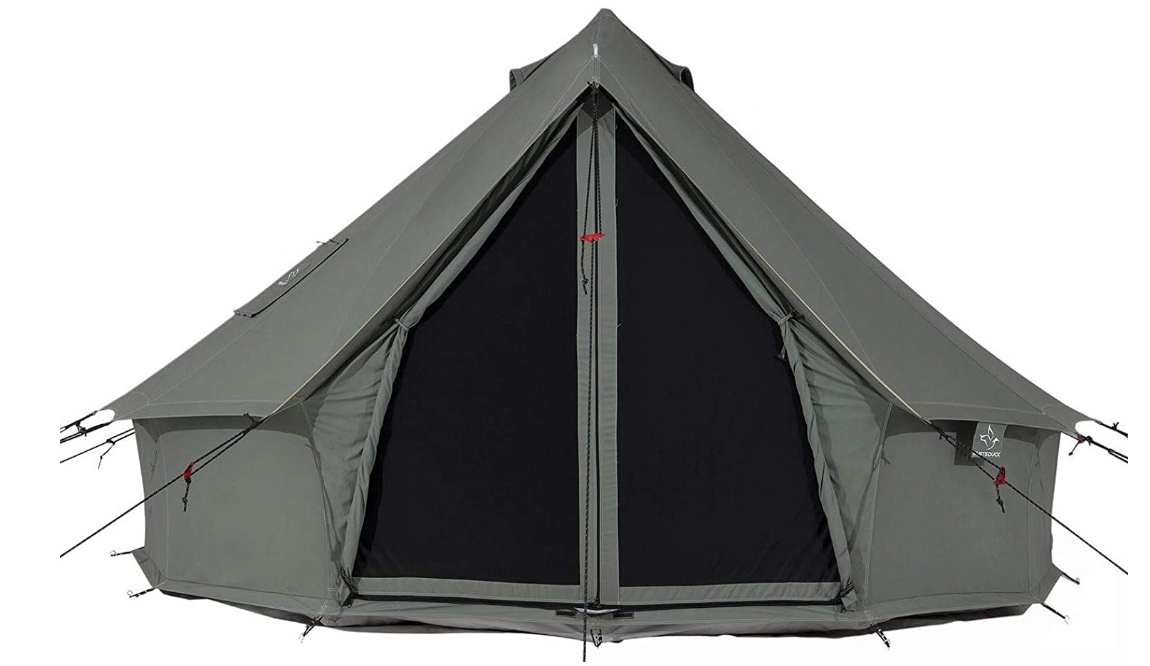

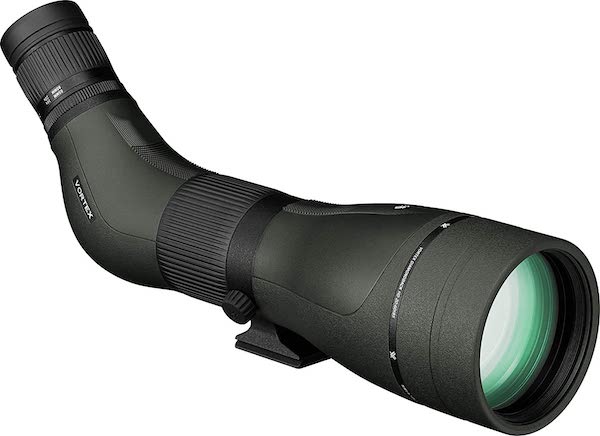


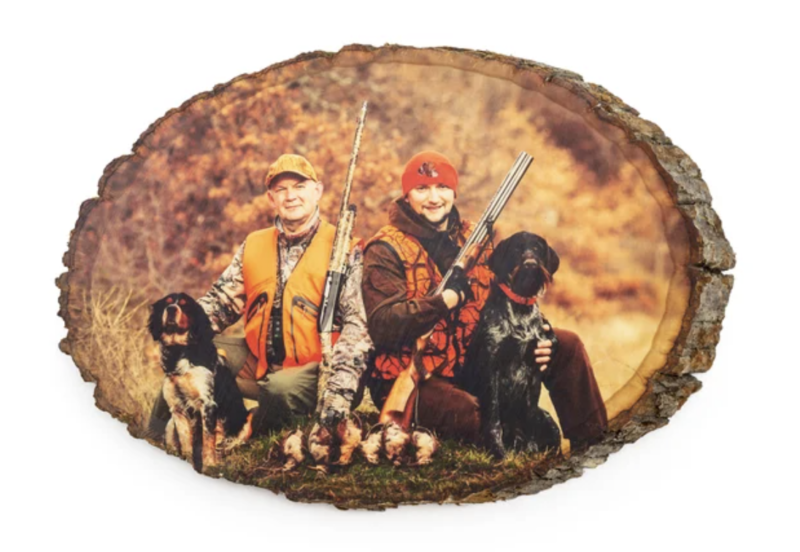
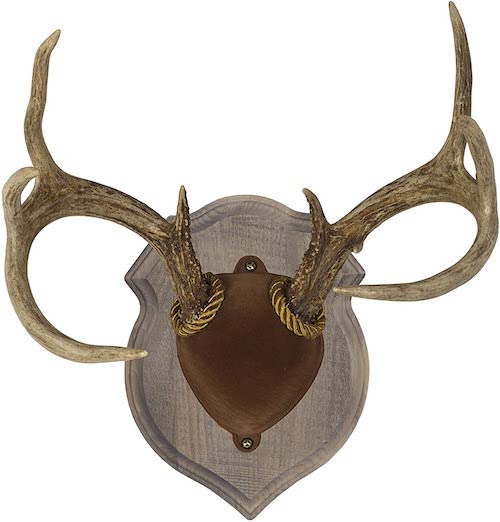
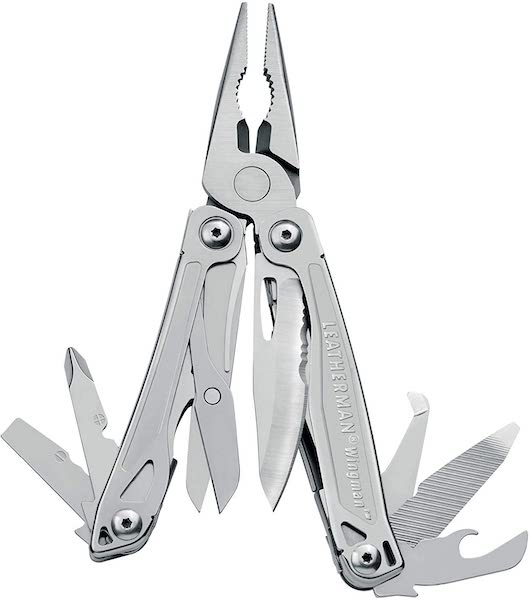

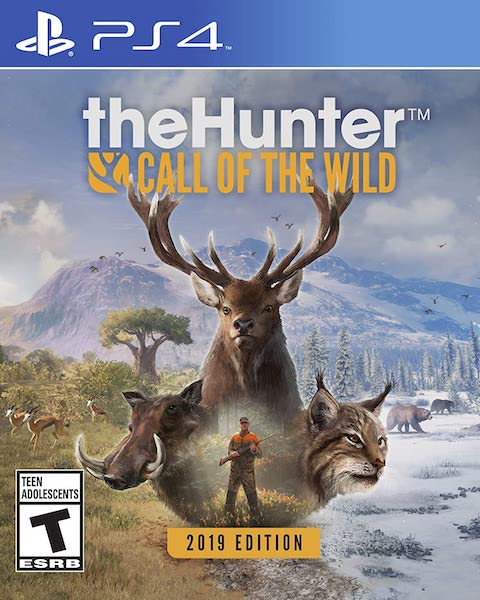


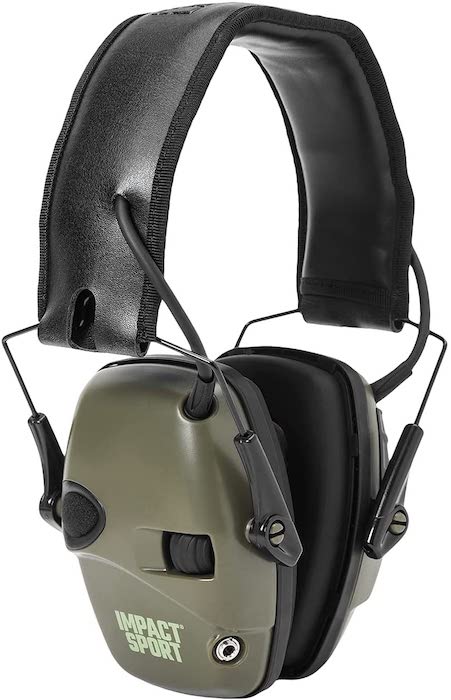
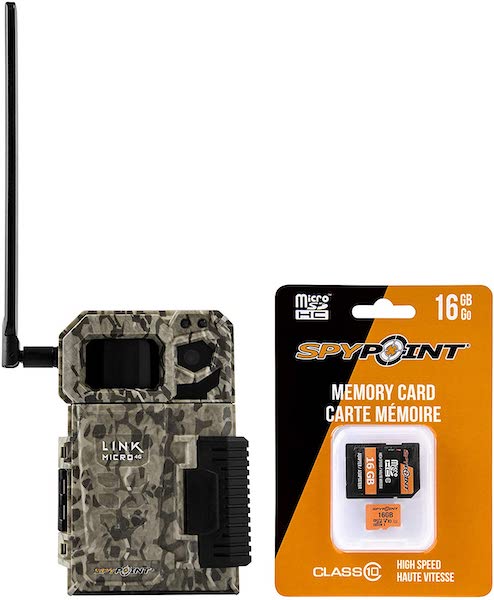
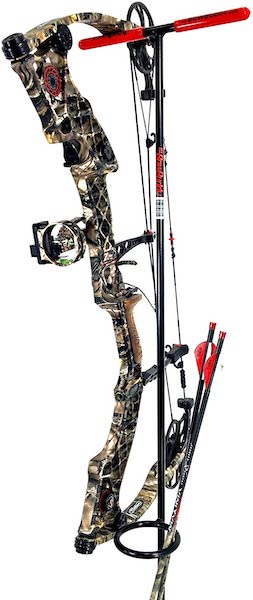
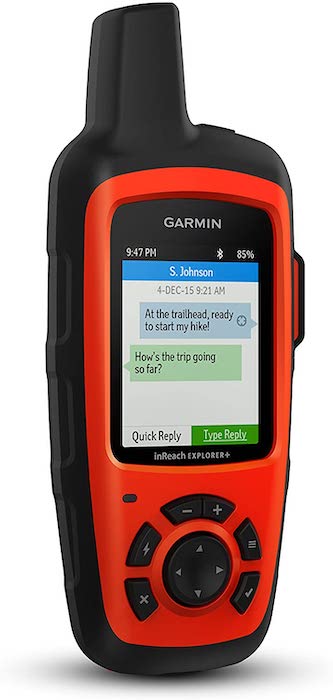
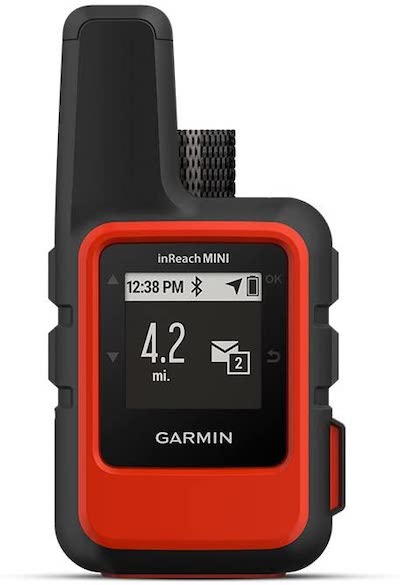
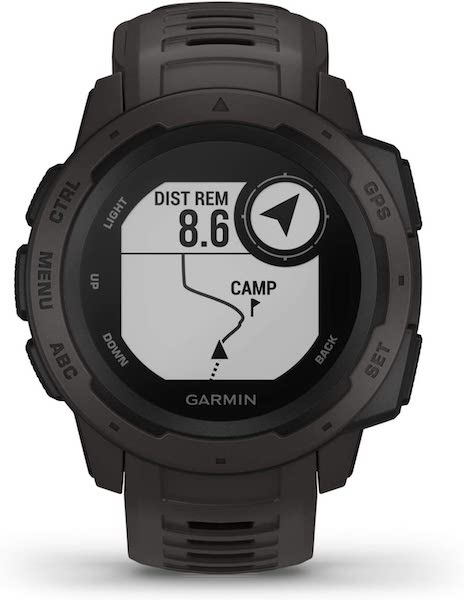
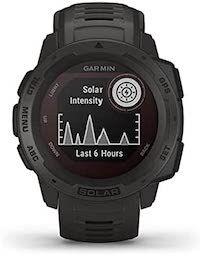

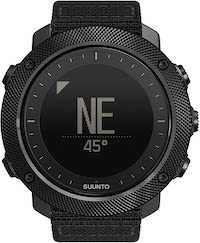
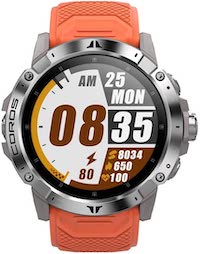
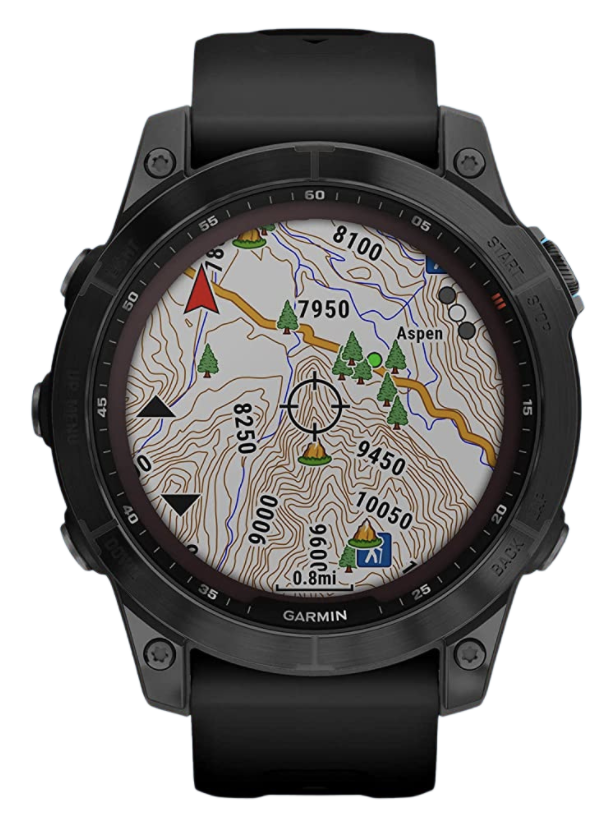

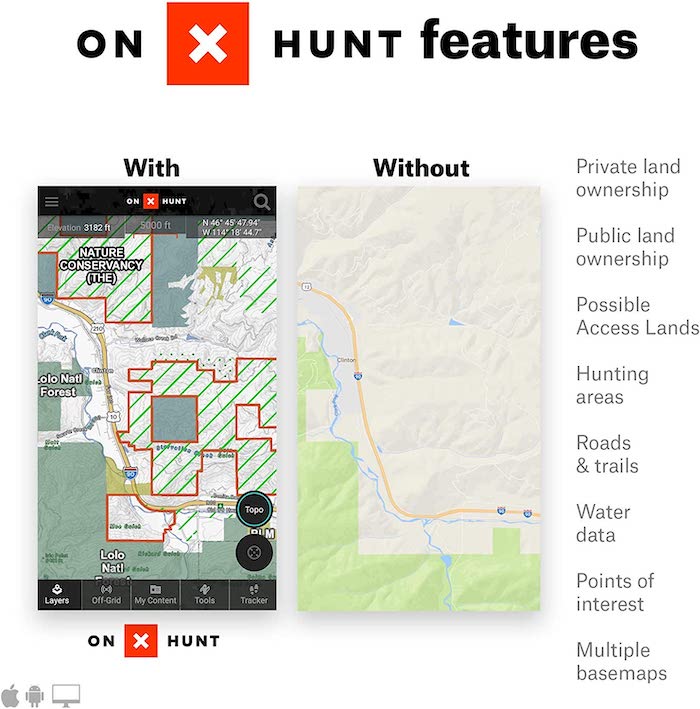
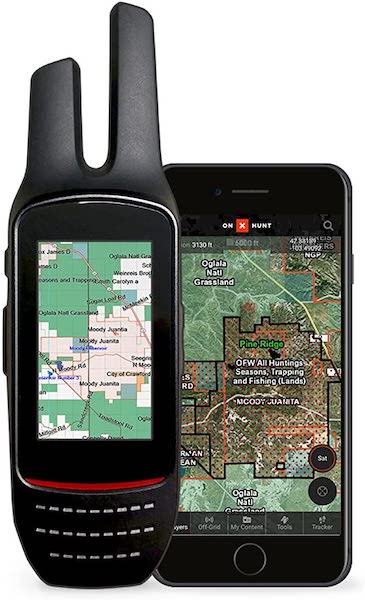


")


