Home Blog Page 9

Beaver Trapping Gear For Beginners – What You Need To Start

0

In this post, you’ll learn what beaver trapping gear you’ll need to get started trapping beaver. For those new to trapping beaver, it can be overwhelming trying to find the right equipment in order to be successful trapping beaver. In this post, I will be going into detail on the equipment and strategy that I use in order to trap beavers successfully.

This post contains Amazon and other affiliate links, which means I’ll receive a commission if you purchase through my link, at no extra cost to you. Of course, you are not obligated to use my links, but it does help fund these posts in hopes of bringing more value to you!

Beaver Trapping Gear
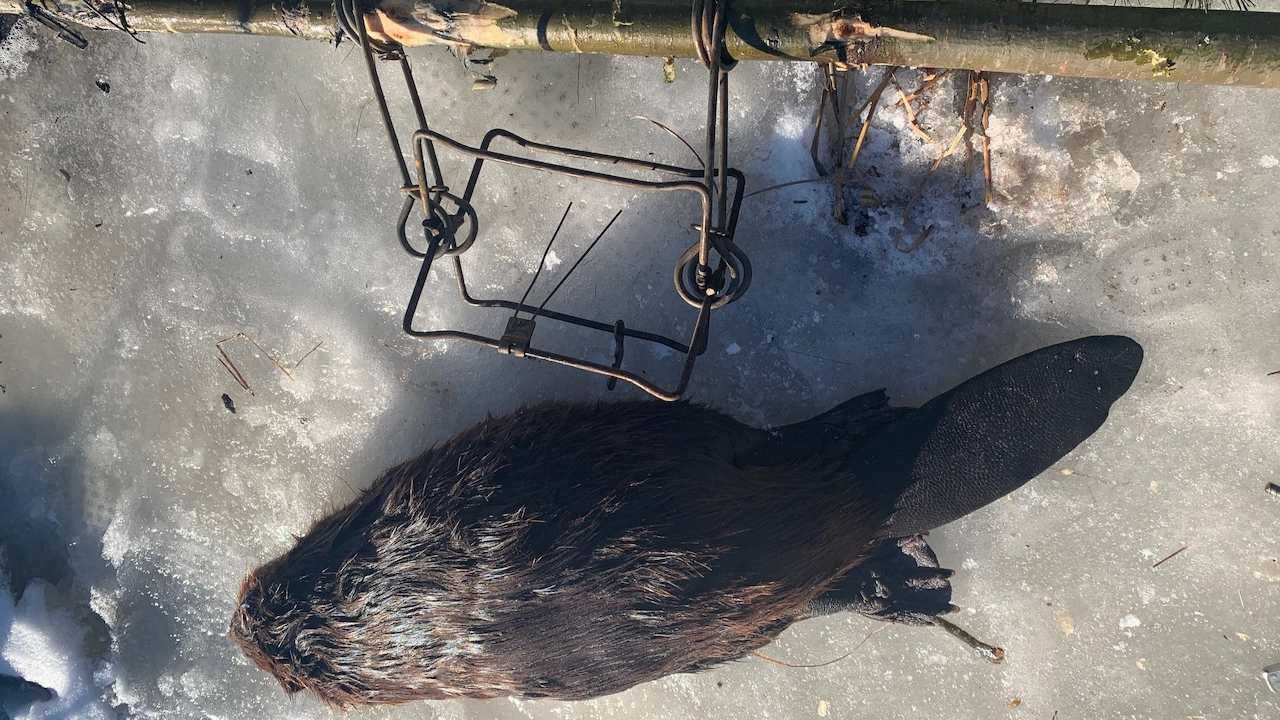
Beaver Trapping Gear For Beginners | Beaver Trapping 101

#330 Conibear Body Gripping Trap

The first thing you’ll need is traps. #330 conibear traps are the go-to for trapping beavers because they are large (10″x10″) and have strong springs which are able to catch the largest of beavers. Since these traps have strong springs, they require a fair amount of strength to set. You’ll want trap setters for both safety and for making it much easier to set the traps.
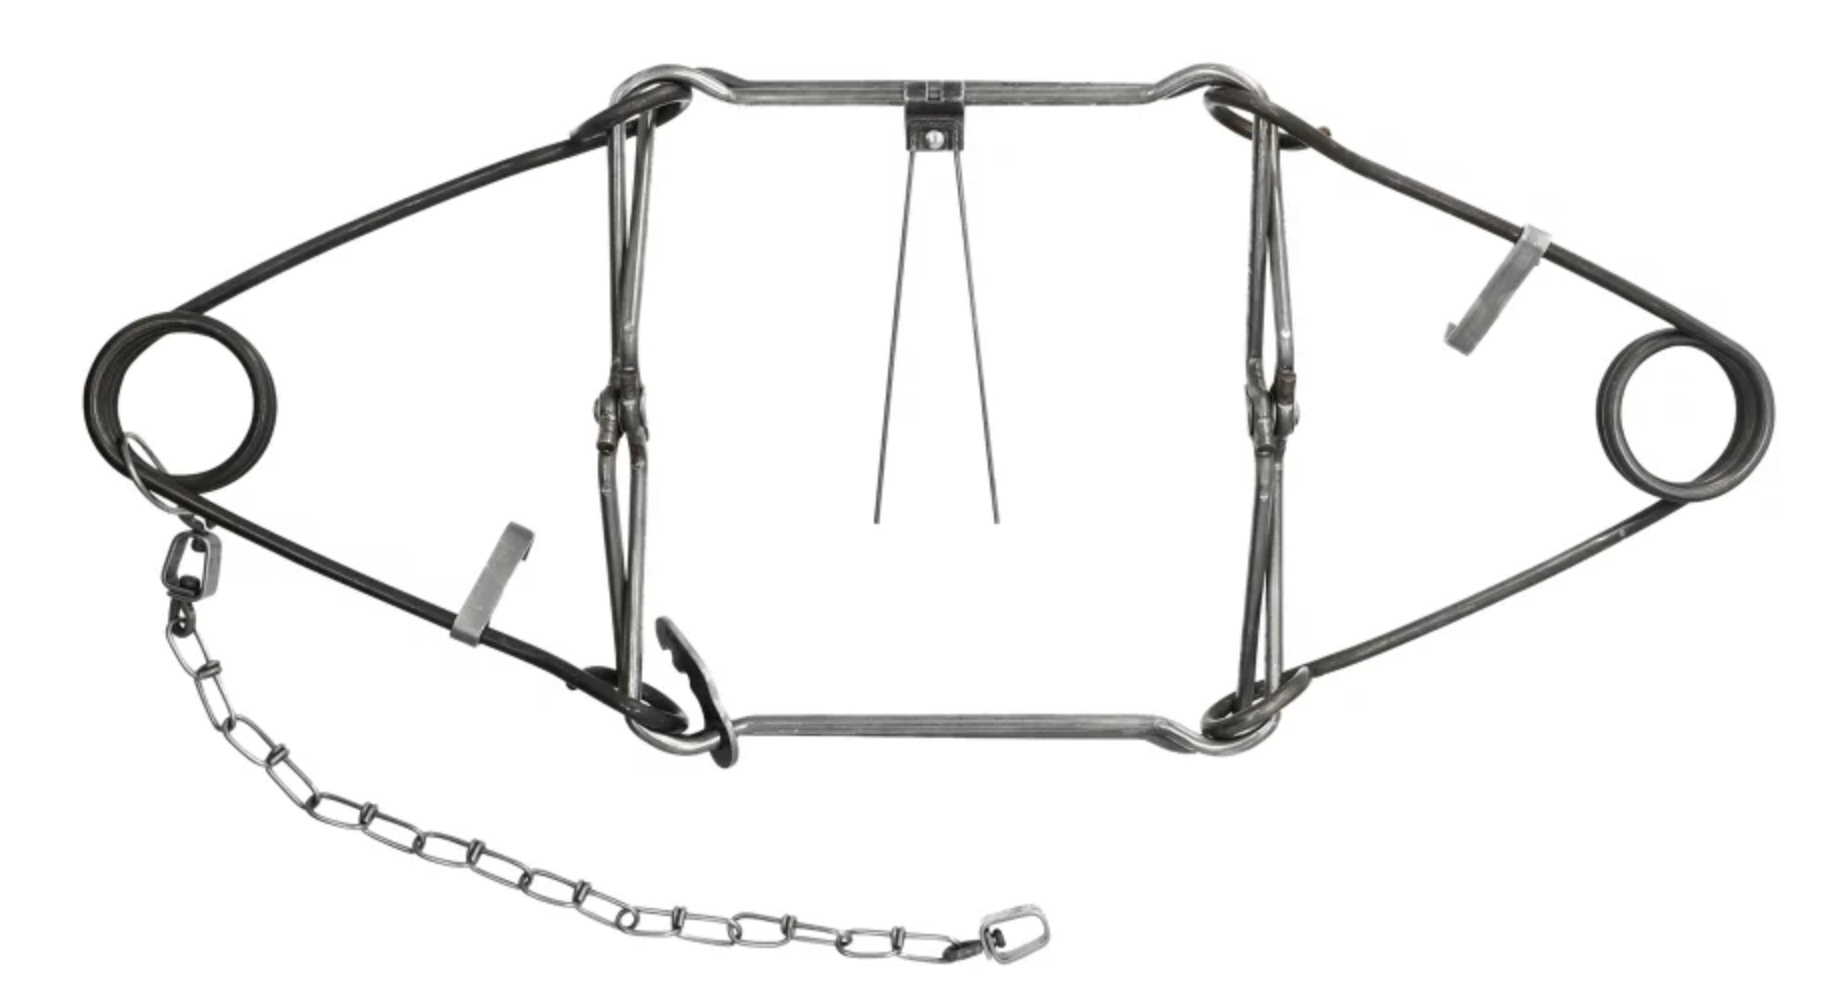
Bridger 330 Magnum Bodygripper Trap

Check Cabela's Price

Foothold Traps

For foothold traps, you’ll want a large diameter trap because beavers have large back feet. To catch the entire foot, you’ll want something at least around 7 inches in diameter. The two traps that I’ve had really good luck with and that also have good reviews are the MB-750 and TS-85.

MB-750 and TS-85 Beaver Foothold Traps

Conibear Trap Setters

Conibear Trap Setting Sticks

These sticks are used to compress the springs of conibear traps like the #330 trap above. At first, these traps may seem tricky to use but once you get the hang of them these trap setters are much faster at setting traps than the caulking gun and are less tiring when setting multiple traps. They also make setting conibear traps much safer and easier.

Beaver trapping gear - Conibear trap setting sticks
Beaver trapping gear – Conibear trap setting sticks

Check Amazon's Price

Caulking Gun Conibear Trap Setters

This conibear trap setter works very well for beginners because it’s the easiest, safest, and most portable option. The only downside is that they take longer to set multiple traps and if you are setting multiple traps you will tire your forearms out. I recommend learning how to use the trap-setting sticks.


Beaver trapping gear - Conibear trap setters

Check Amazon's Price

Conibear Trap Safety

This is a must-have piece of gear for trapping beavers with conibear traps. These are used to hold conibear traps in place once they are set so you can maneuver and place traps without being worried about setting the trap off on yourself. Once you get the trap where you want it you can take this safety off. I don’t set traps unless I have one of these. It’s not a bad idea to carry more than one in case you lose or drop one in the water.

Beaver Trapping Gear - Conibear Trap Safety Mechanism
Conibear Trap Safety Mechanism

Check Cabela's Price

Chest Waders

Chest waders are a staple for trapping beavers because you’ll be kneeling down in the water when your setting traps. Hip boots won’t cut it most of the time or will at least make trapping much more difficult. Chest waders with buckles are much better than velcro because they stay on your shoulders better. I like neoprene because beaver trapping is usually in colder weather. Neoprene stands up well against the cold weather and water.

TideWe Realtree MAX5 Waterfowl Wader Review

Check Amazon's Price

3-in-1 tool (Trowel, Hammer, Holes Sets)

Since hole sets aren’t needed for beaver trapping it really only a 2-in-1 tool. That said, these tools were specifically designed for trapping because they reduce how many tools you need to bring into the field which helps cut down on weight which is important when you’re checking a lot of traps. So even a 2-in-1 tool is helpful.
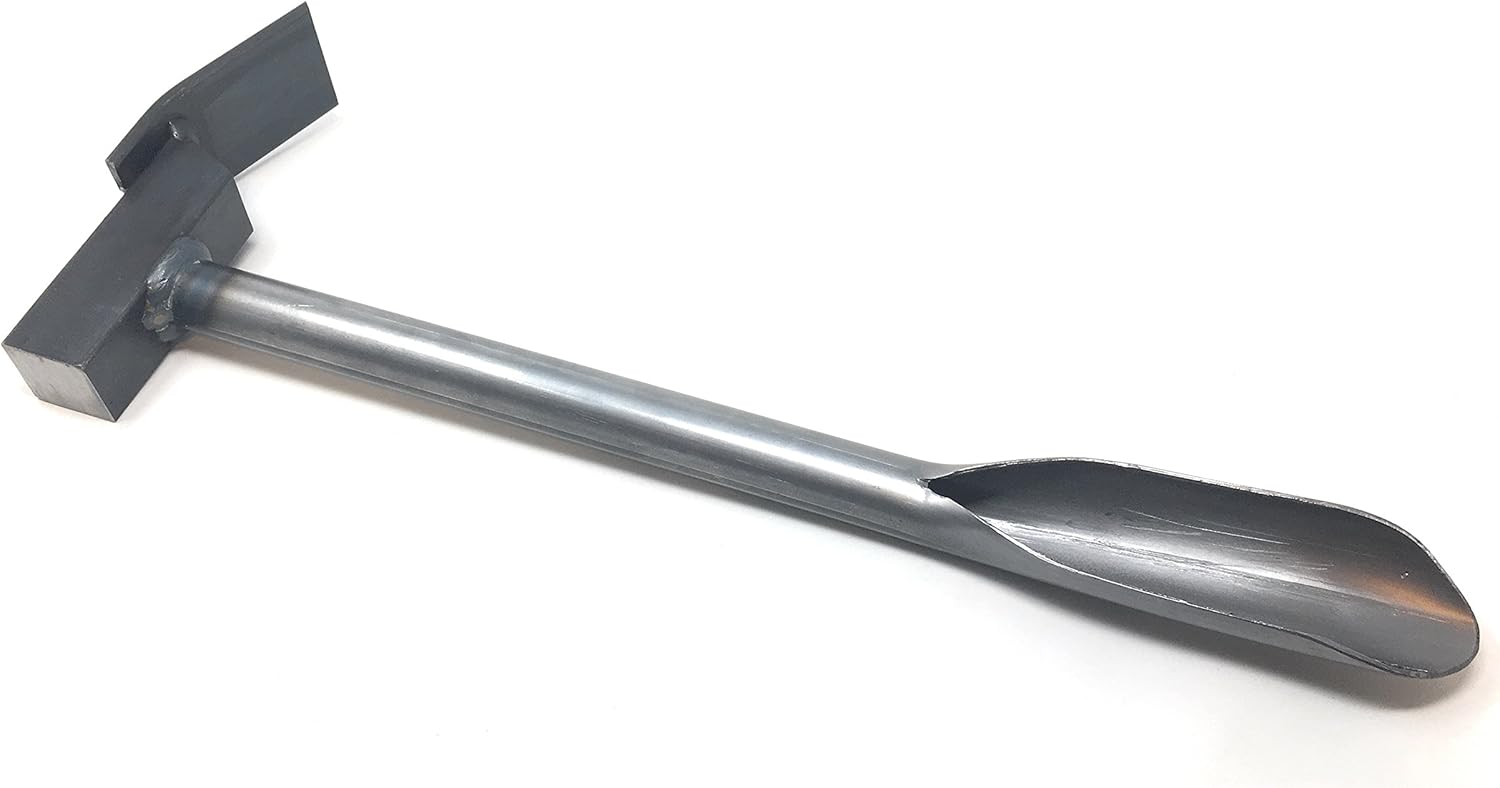
Beaver Trapping Gear - 3-in-1 Tool

Check Amazon's Price

Beaver Lure/Castor Gland

Beaver castor is secreted from their castor gland. They use castor to mark their territory. Since beavers are territorial, castor gland scent can be used to pique curiosity and their territorial instincts. This scent is best used in the spring when beavers are naturally leaving their scent on castor mounds.
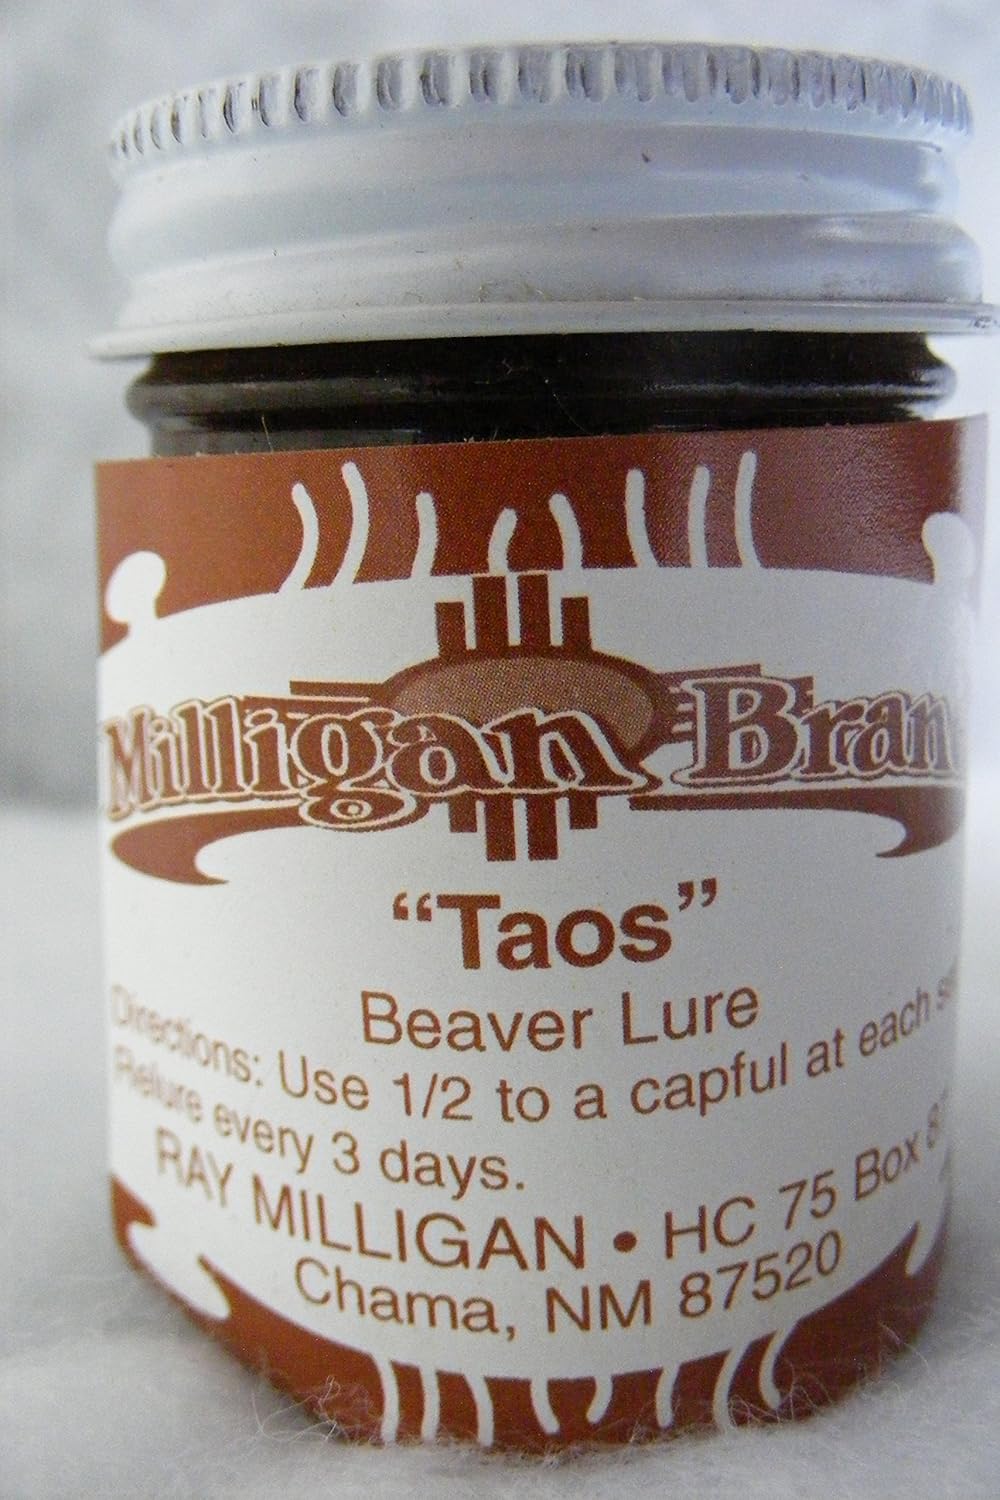
Check Amazon's Price

Trapping Pack Basket

A trapping basket helps carry gear and beaver catches. Basically, they’re for carrying more messy gear like rusty traps and beavers. I prefer to carry my smaller tools in a separate bag tool bag to keep things cleaner. You’ll really need one of these for bringing beavers back to the vehicle since you’ll have other tools you’ll be carrying. Otherwise, you’ll be making multiple trips to get everything.
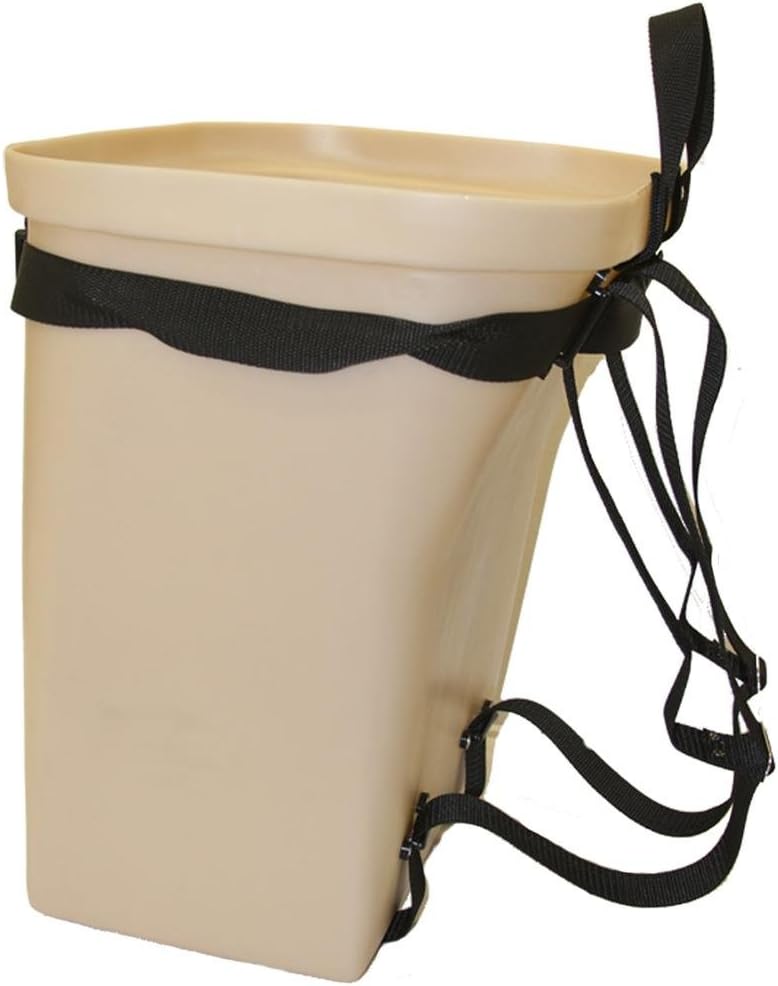
Beaver Trapping Gear - Plastic Pack Basket

Check Amazon's Price

Write-On Metal Trap Tags

Trap tags are required by law so that the authorities can tell who traps belong to. Over time tags will wear or get mangled with use. This pack of 50 tags will last a while.
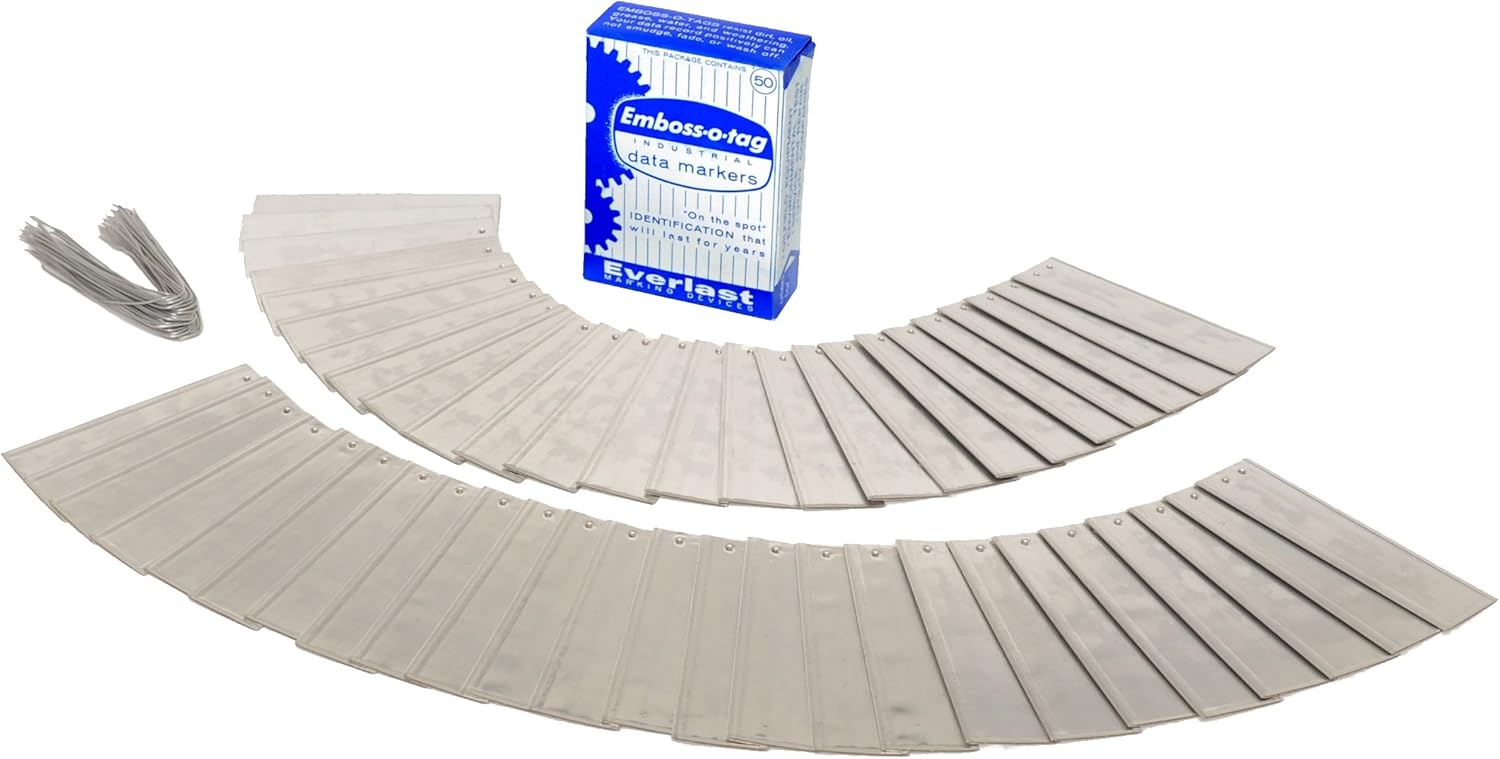
Check Amazon's Price

20-Gauge Wire

Wire can be used for multiple purposes to secure traps in place. Mostly though, it is used to keep traps from being lost if a beaver doesn’t get caught properly. I’m usually using wire when the mud is too soft to hold T-Bar stakes. I also commonly use wire for under-ice sets. I will place a log horizontally across the chiseled hole where the trap was placed in. This way if a beaver chews through the pole your trap is attached to it won’t be lost and you’ll still get the beaver.

Check Amazon's Price

Wire Cutters or Pliers

You’ll need something to cut the 20-gauge wire. Wire cutters or pliers will work. Pliers can also be used as a spare tool if needed, they can come in handy. I will use them instead of my fingers in colder weather for better dexterity when I’m wearing gloves.
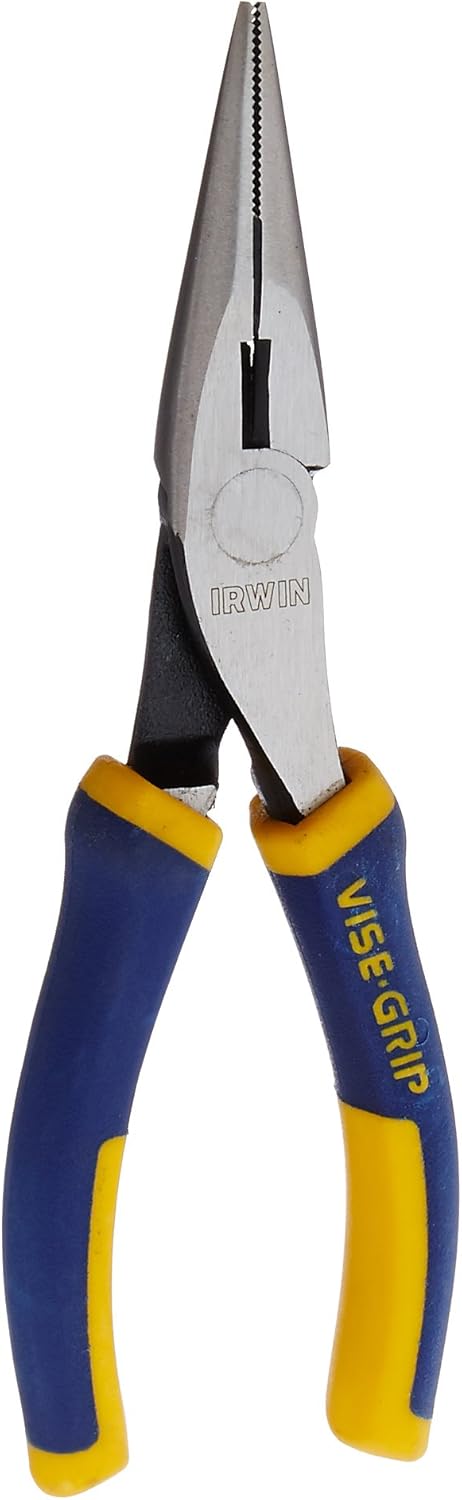
Check Amazon's Price

Leatherman Multitool

All trappers can make use of a Leatherman multi-tool. Made in the USA and with a 25-year warranty, this 14 in 1 tool is not only convenient but in my experience, it manages to reduce a lot of frustration when things go awry or fall apart. There have been many times where the leatherman has saved the day when doing repairs.

Their hardiness in unideal situations makes them one of the best tools for trappers. They also have a lot of useful applications outside of trapping. Plus, you won’t have to buy regular pliers to cut wire.
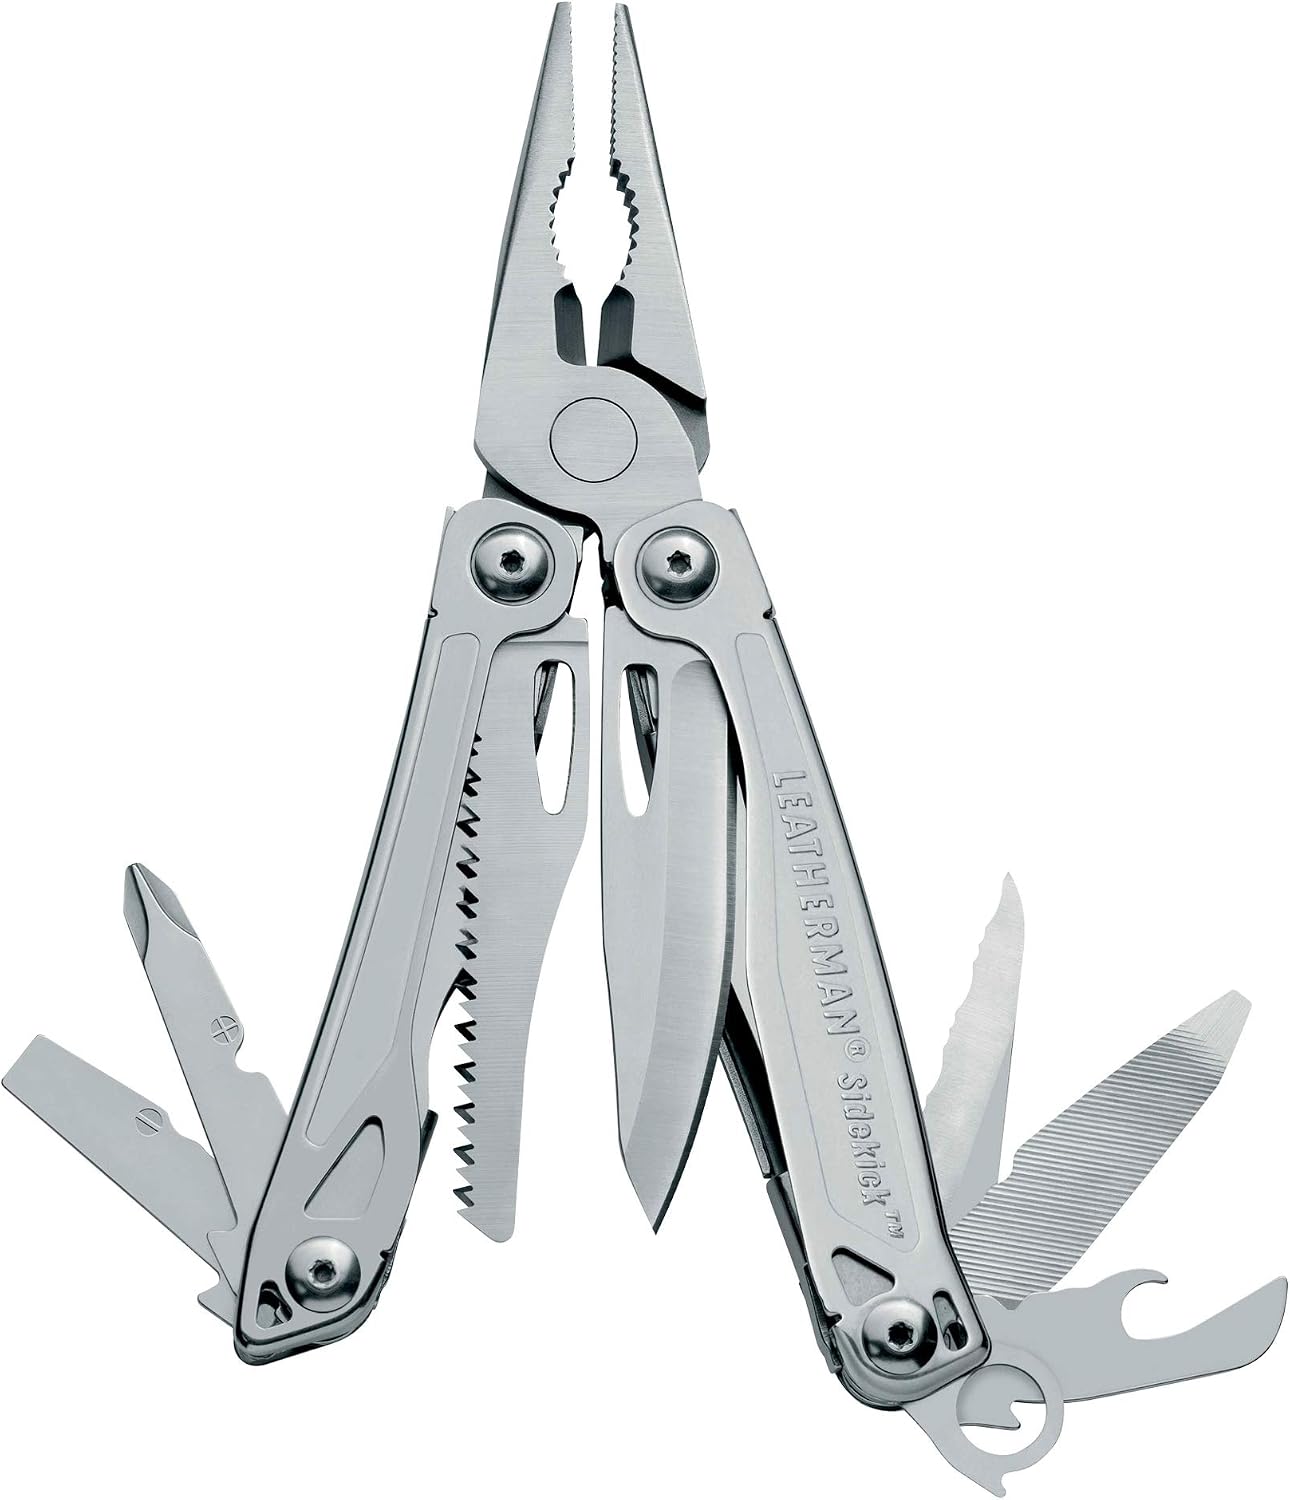
Beaver Trapping Gear - Leatherman Multitool

Check Amazon's Price

24-Inch T-Bar Stakes

I use these stakes almost every time I set a trap. These are what I will use to anchor my trap most of the time instead of wire if the soil isn’t too soft. I will place one of these in one of the springs of the conibear traps to anchor it. I also use these on drowning sets to anchor the drowning rods to the ground. They are a must-have in my beaver trapping gear.
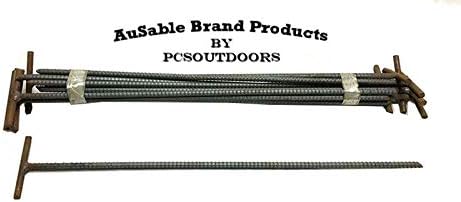
AuSable Brand 24" x 1/2" T-Bar Trap Anchor Stakes - Landscaping, Camping & Trapping (12 PK.)

Check Amazon's Price

Long Rubber Gloves

These gloves are great for beaver trapping because they go almost to your shoulders, keeping your hands warm and dry especially in the cold. They also protect you against any pathogens in the water and any potential beaver diseases. They are another must-have in my beaver trapping arsenal.
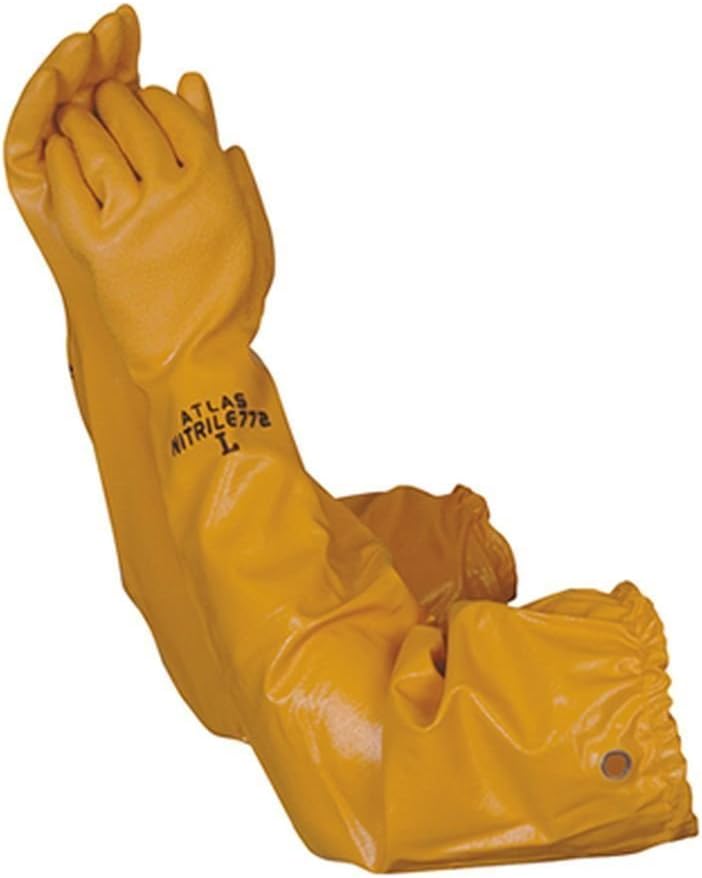
Beaver Trapping Gear - Long Rubber Gloves

Check Amazon's Price

Hammer

A hammer is needed for driving T-bar stakes into the ground. A 2 or 3 lbs hammer works well, especially for punching through the frozen ground along shorelines.
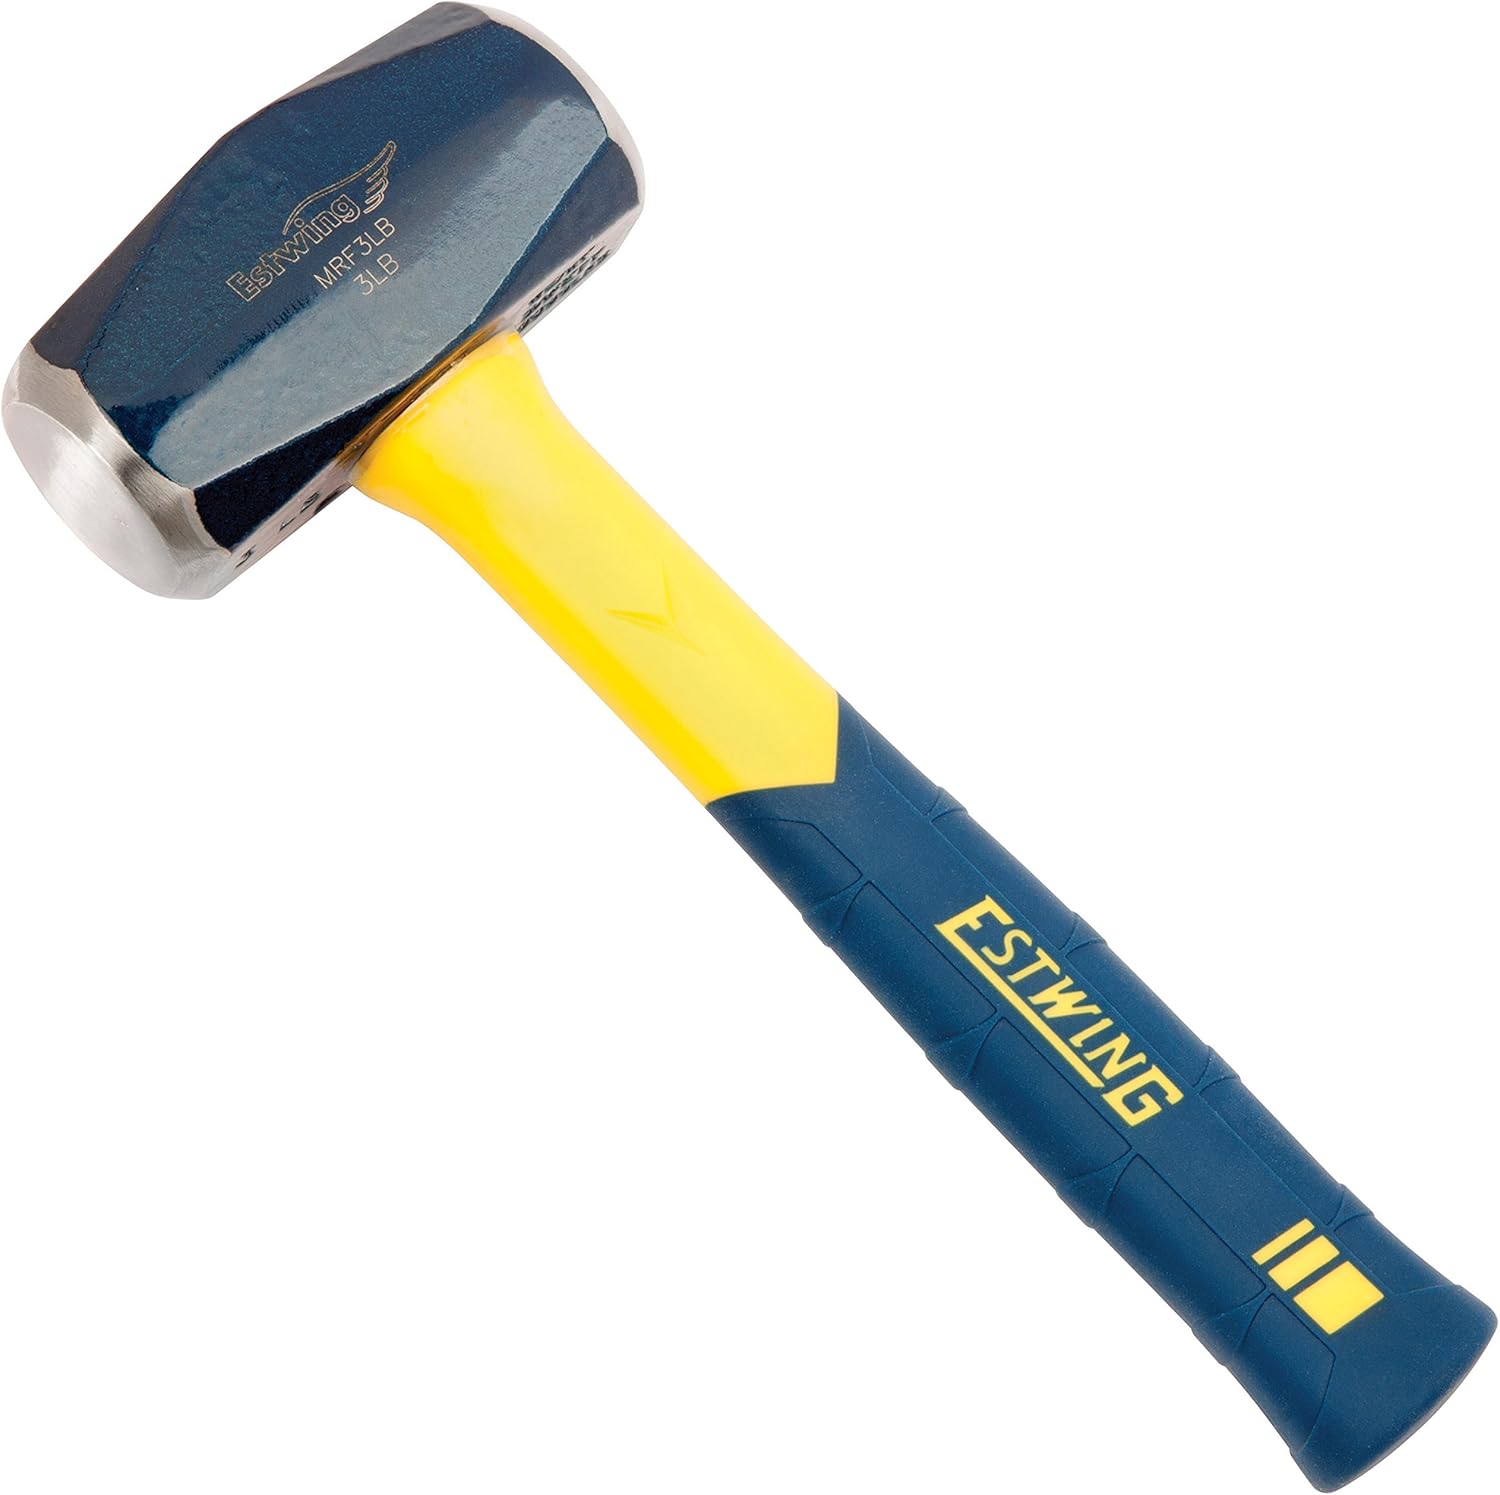
Check Amazon's Price

Hatchet

A hatchet is pretty much a must-have tool because it will allow you to create trap poles and make stakes to secure trap into place. A lot of the time you need a hatchet to widdle down a stick to the perfect size so it will work for your specific application. Often, you can use the back of the hatchet as a hammer too.
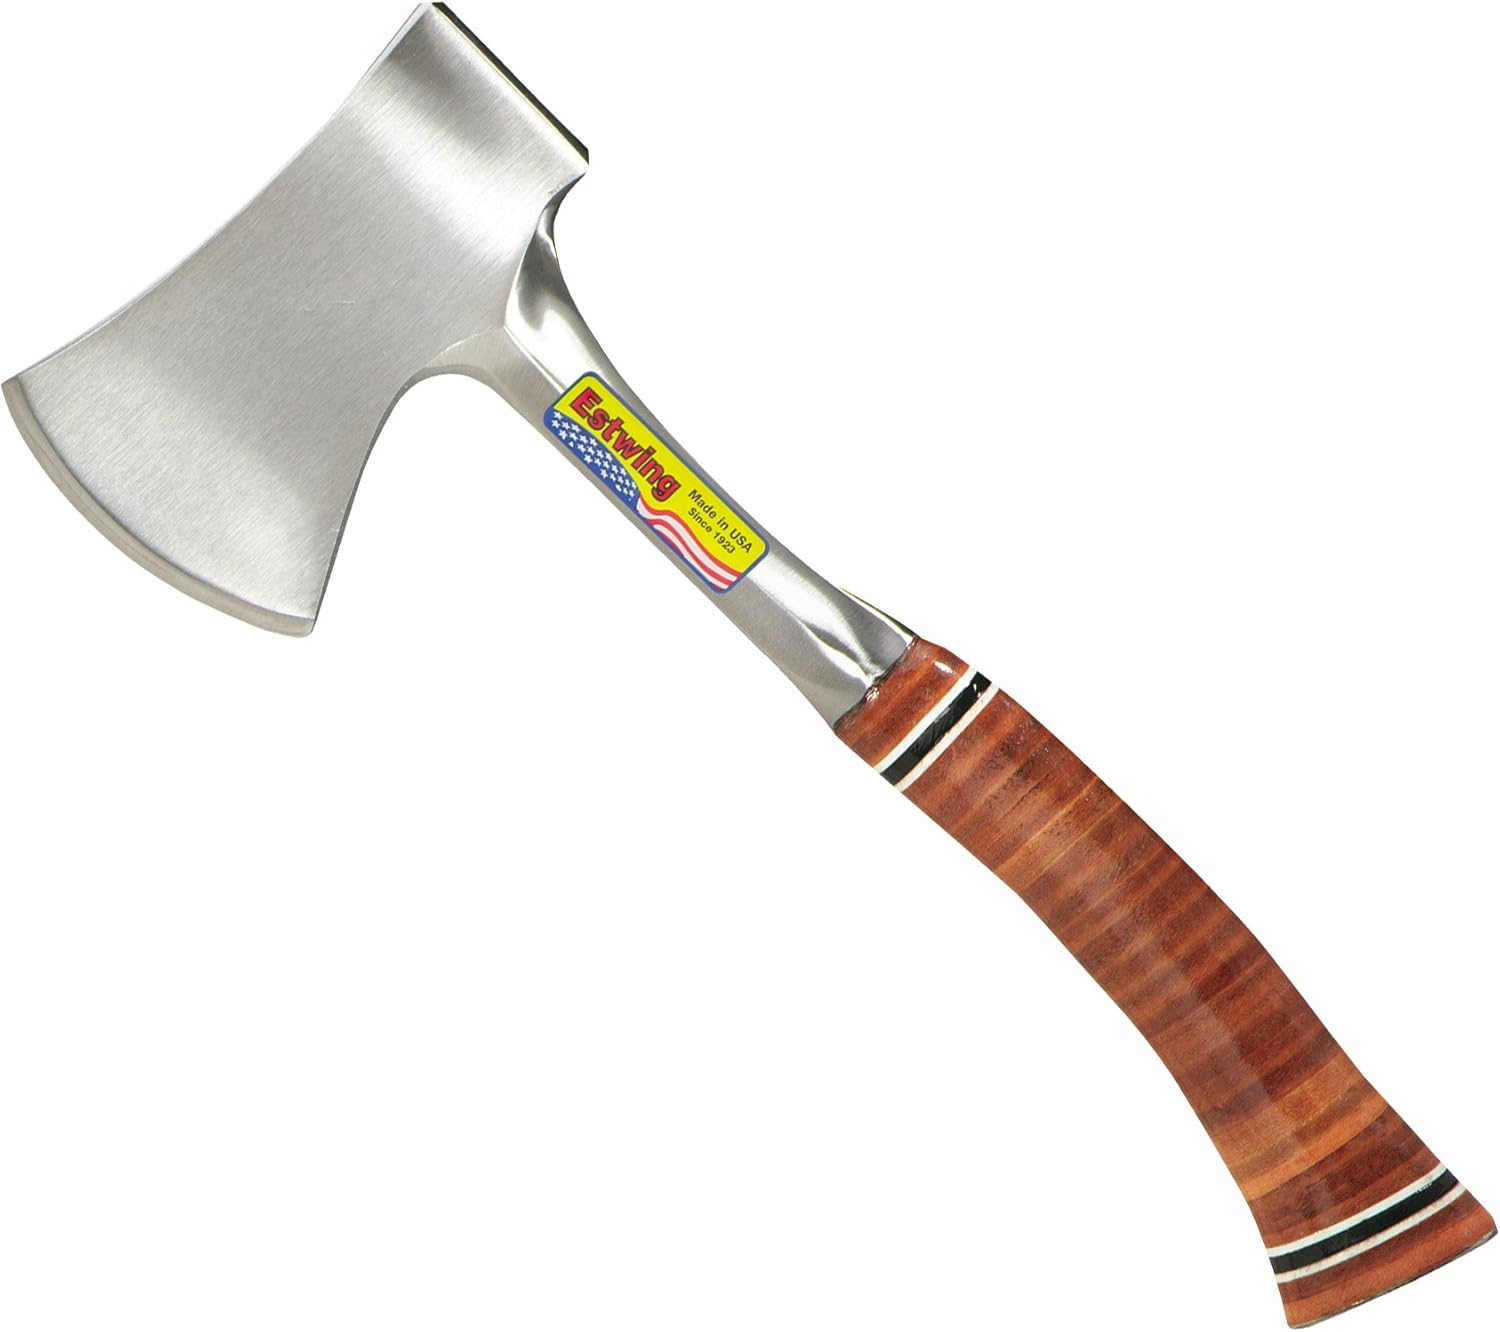
Check Amazon's Price

Trowel

A trowel can be used for moving earth to perfectly get a trap situated and for creating castor mound sets. Manipulating the earth around a trap to get a perfect fit is important because it’s the fine details that result in a successful catch or not.
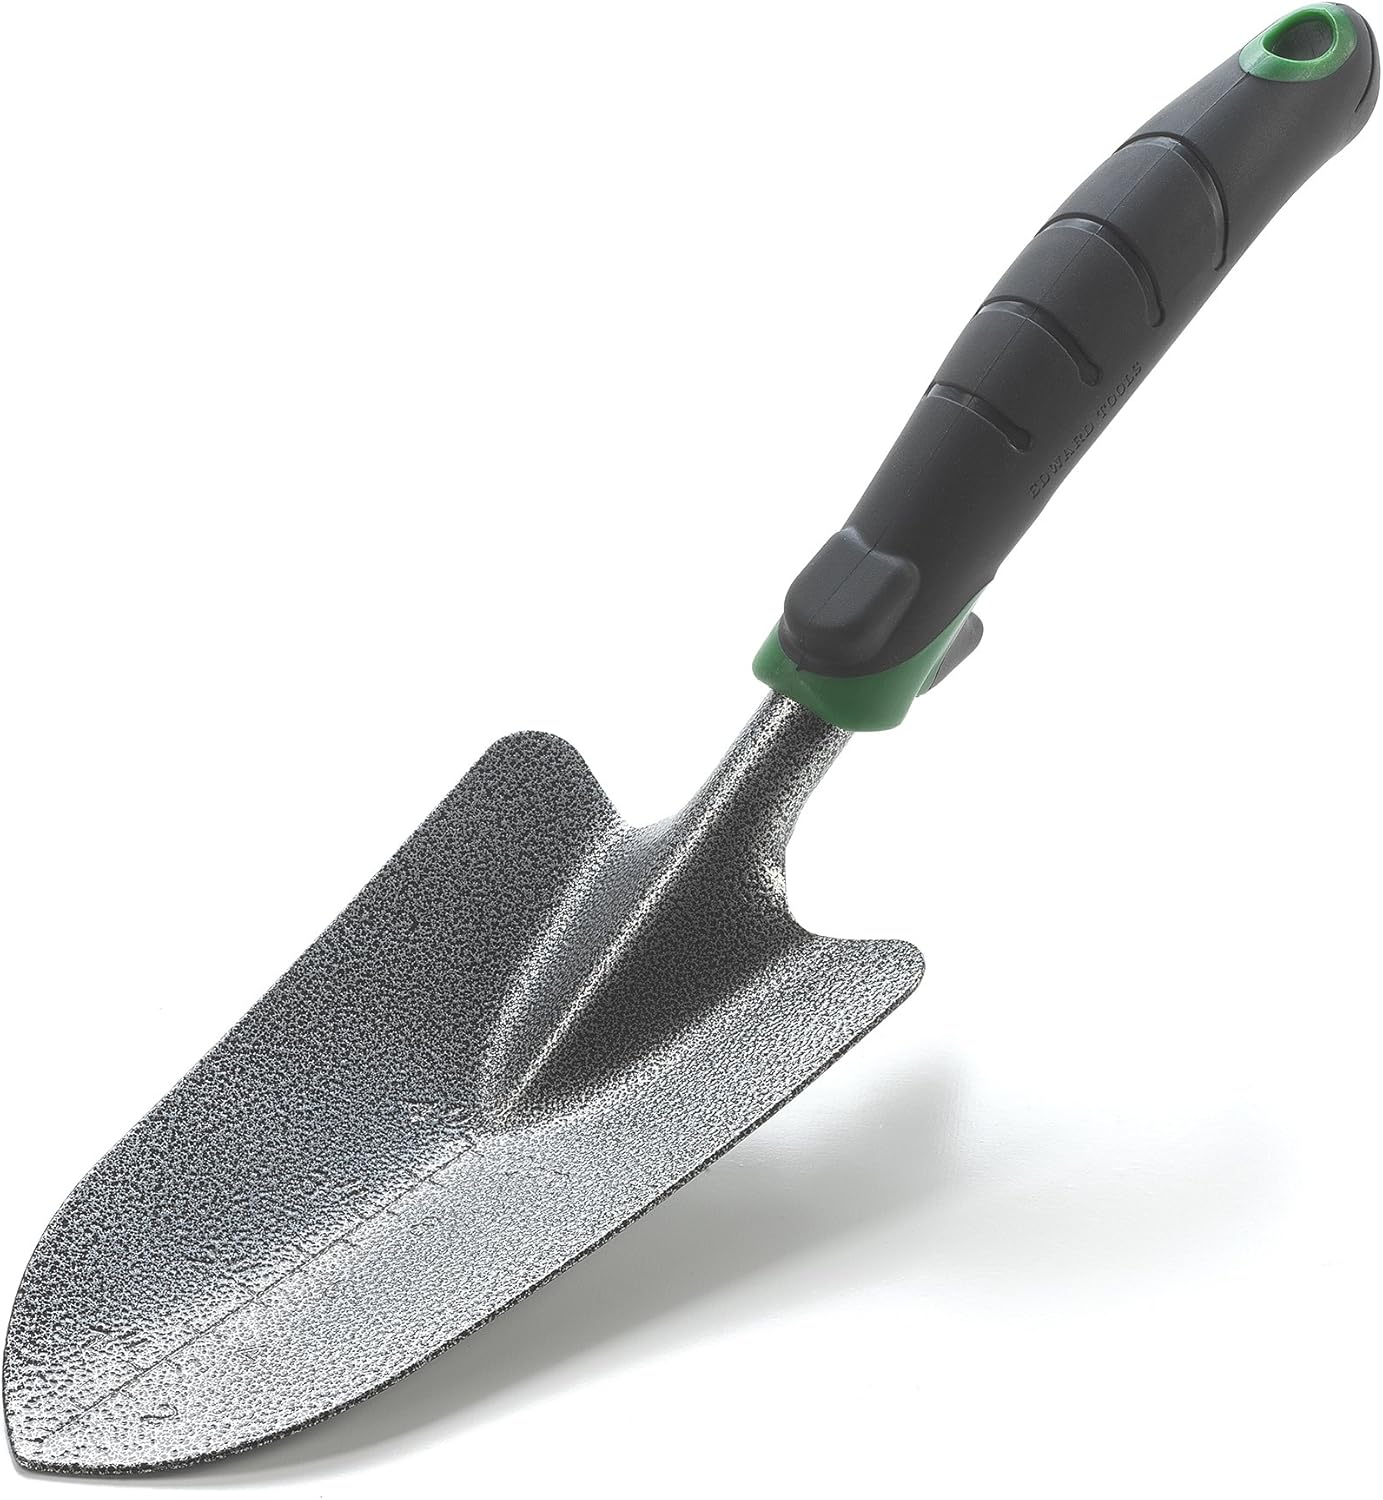
Check Amazon's Price

14-Inch Bolt Cutters

Bolt cutters are used to cut the chain of traps to add useful gear to the chains. For example, adding more swivels and trap anchors to the trap chain.

Check Amazon's Price

Trap Swivels

When working with foothold traps you may need to add more swivels to the trap chain depending on your laws. Here in Maine, we need 3 swivel points on the chain and the traps only come with two. To add a swivel you must cut one of the chain links and replace it with a swivel. Bolt cutters are needed to add these.

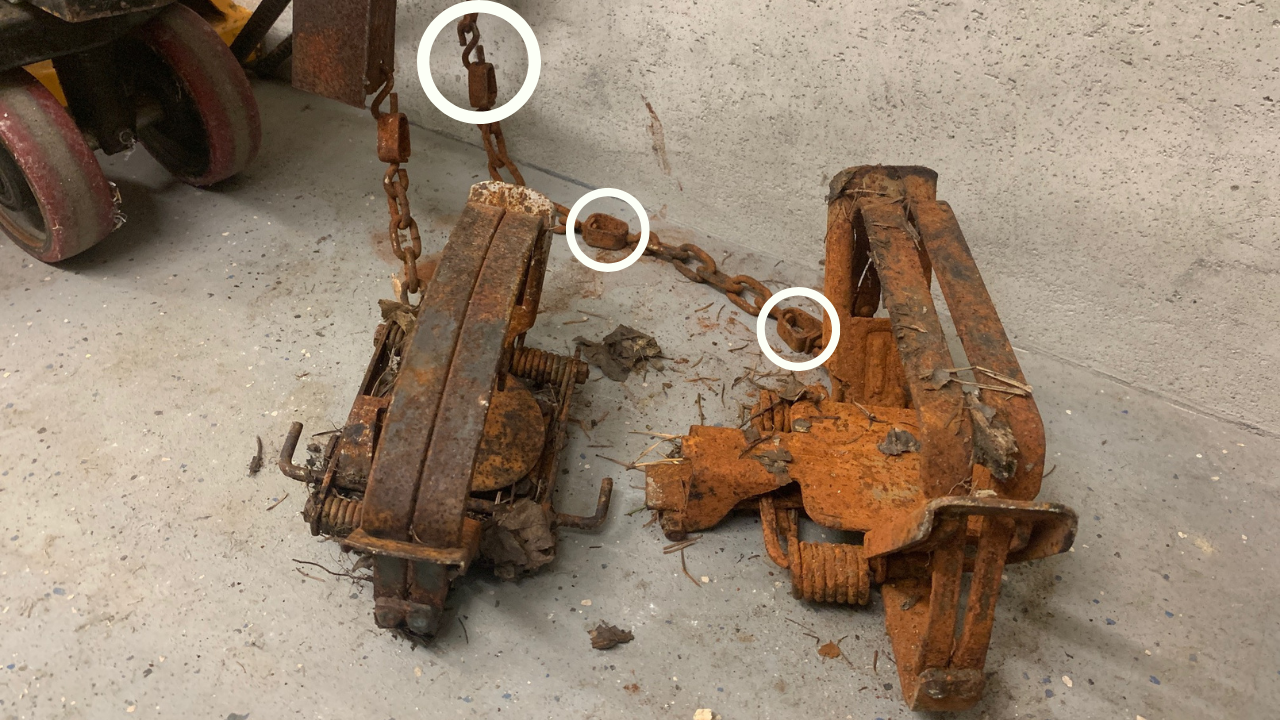
Check Amazon's Price

Beaver Foothold Traps with Trap Chains and Swivels

Metal Shovel

I always bring a metal shovel in the truck with me but I don’t always end up bringing it. A metal shovel is handy when there’s snow to remove a fresh layer of snow covering the under-ice traps. It’s also good for light chiseling if the ice isn’t very thick to get to my traps.
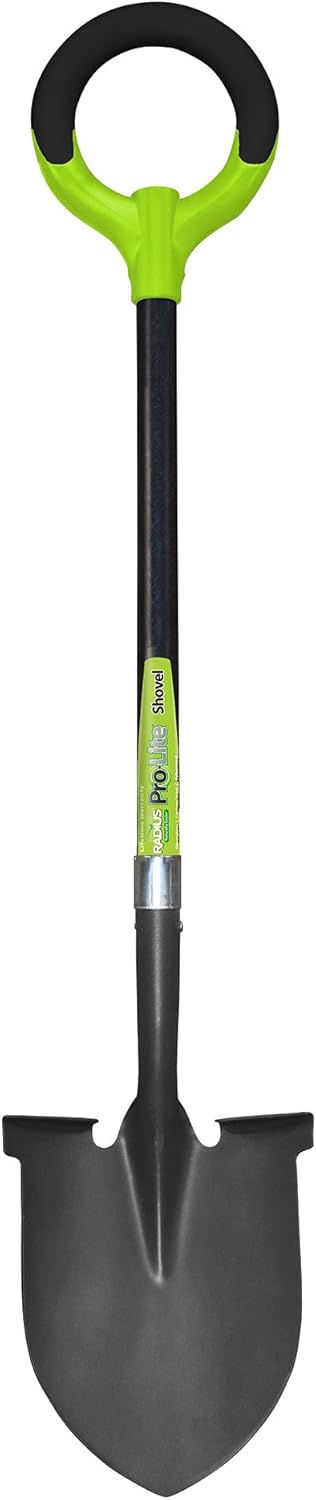
Check Amazon's Price

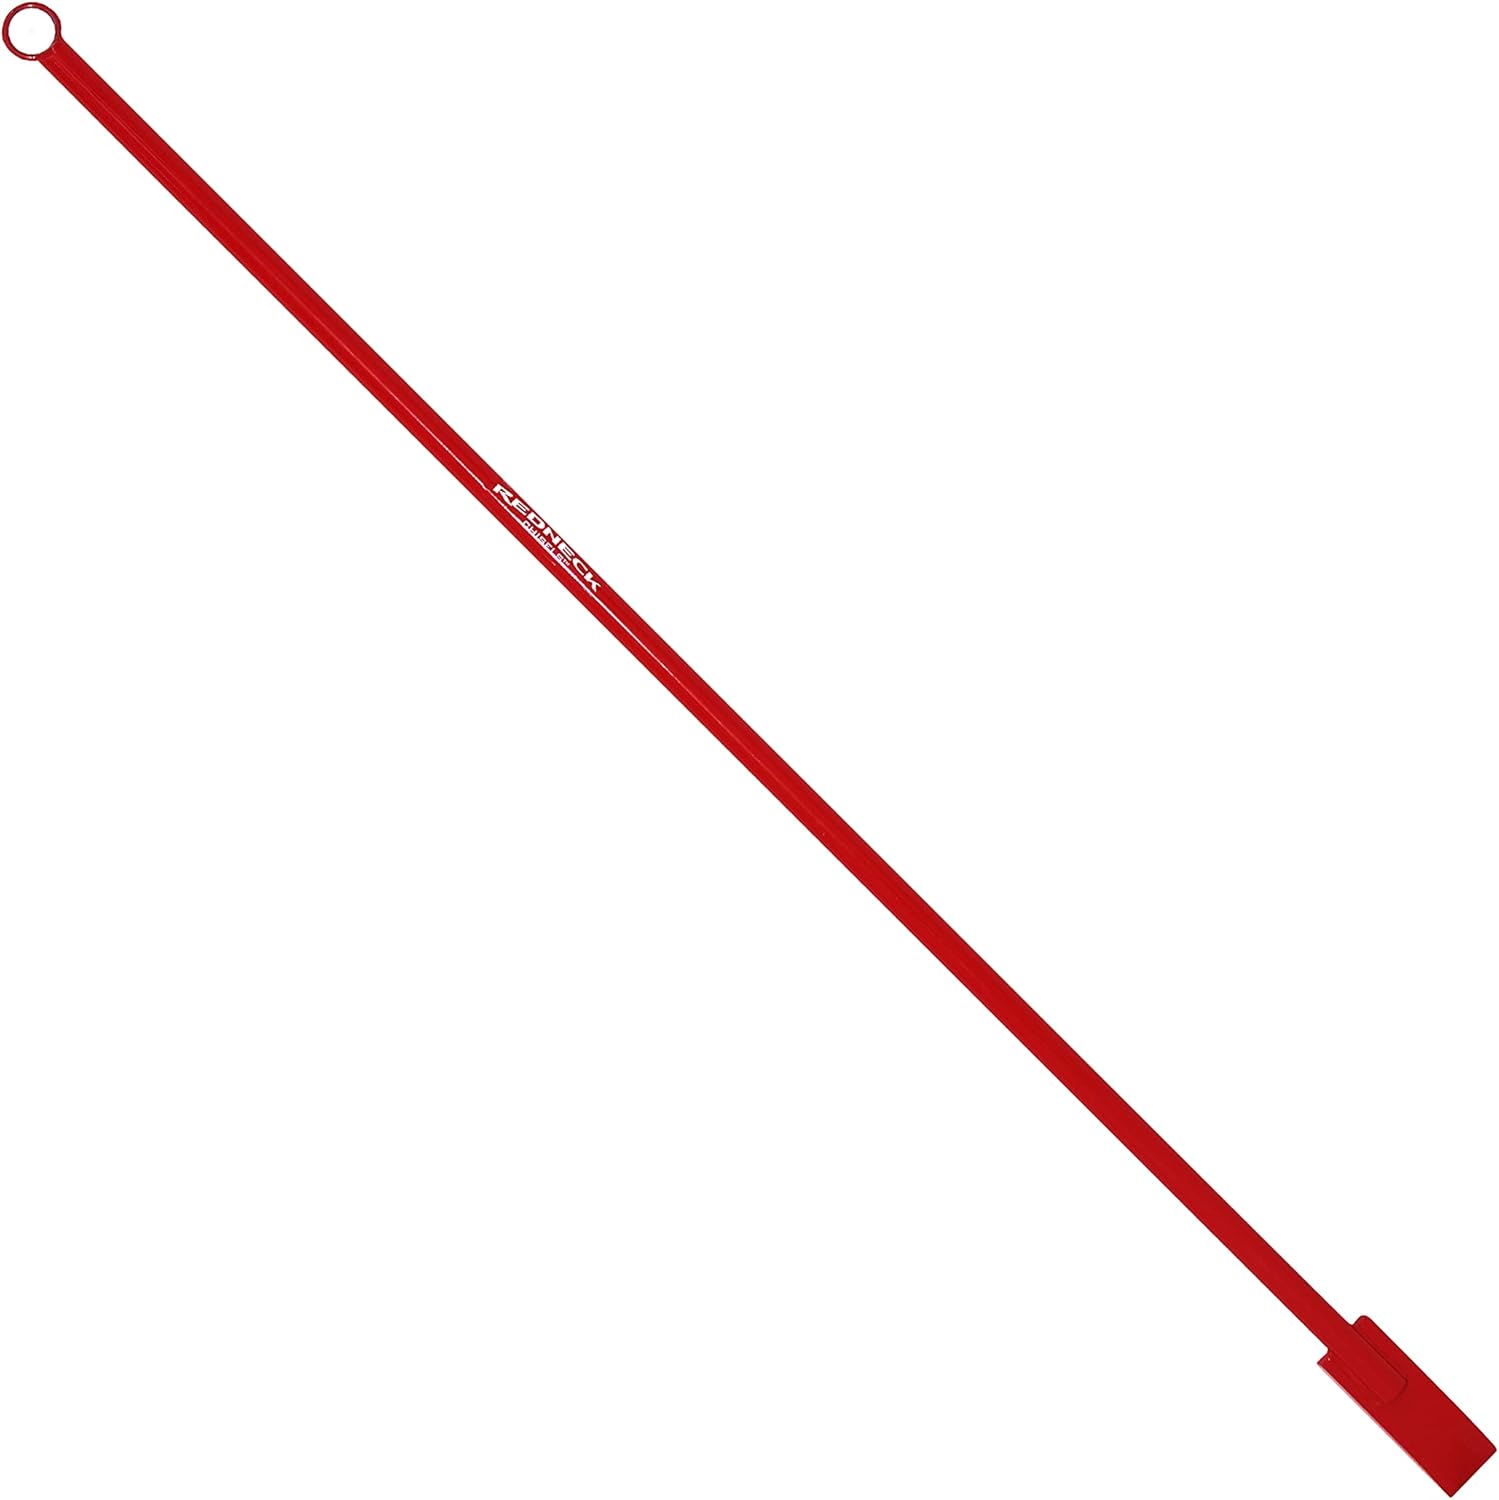
Chisel

When it gets colder a chisel is needed to get to under-ice traps that have a few inches of ice. A chisel is needed when ice is too thick for a metal shovel. 
Check Amazon's Price

Jet Sled

A jet sled is invaluable when there is snow on the ground. I even use mine on the bare ground when I have a lot of gear I have to carry a long way even though it’s harder to pull it’s still worth it. More gear is usually involved when trapping beavers when there is snow so a jet sled is worth every penny. It’s also easier for transporting beavers than with a pack basket.
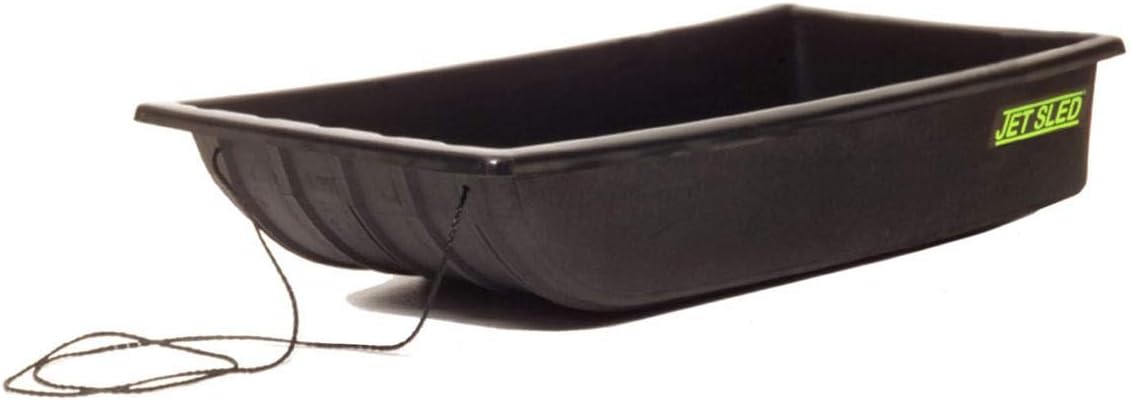
Must Have Beaver Trapping Gear - Jet Sled

Check Amazon's Price

H-Stand

These stands are used to hold conibear traps up in very mucky/muddy soil. In this type of soil, traps will get buried by sinking into the ground. The H-Stands keep traps at a perfect height so that the beavers swim right through the trip instead of over the trap. 

MB-330-SH 20

MB-330-SH 20″ Support Stands

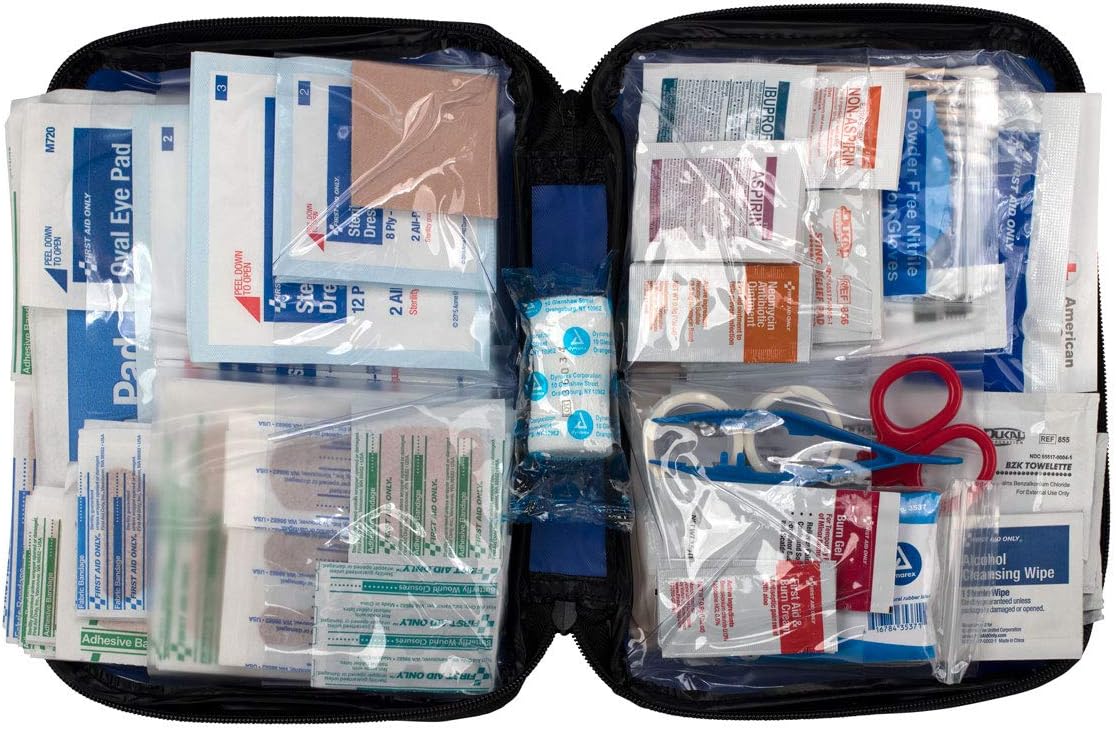
First Aid Kit

It’s always a good idea to have a first aid kit when trapping, especially for beginners. Trapping gear can be dangerous if handled improperly by a beginner and even if handled properly accidents can happen. Having a first aid kit is a good idea.
Check Amazon's Price

Method of Dispatch

Sometimes when trapping you don’t get a clean catch that results in a kill. In these circumstances, you’ll need a tool to dispatch the beaver. If you’re looking to keep the pelt in as good shape as possible you might buy some sort of club that is used to hit the beaver on the back of the head. Another option would be to use a small-caliber rifle which will also result in minimal pelt damage. A high-powered air rifle or .22 handgun would work.

This .22 caliber Gamo Swarm Magnum 10X Gen2 air rifle would have no issues dispatching a beaver up to 15-20-yards with an ethical shot to the head. You should have no issues getting closer than that with a beaver that is caught in a trap. This is one of the best air rifles for dispatching because it is one of the fastest air rifles on the market, shooting .22 caliber pellets up to 1300 FPS, and at an affordable price.

Gamo Swarm Magnum 10X Gen2 Air Rifle
The Gamo Swarm Magnum 10X Gen2 Air Rifle shoots .22 caliber pellets up to 1300 FPS making it one of the best air rifles for small game and varmints on the market.

Check Amazon's Price Check AirGun Depot Price 

My YouTube Video: How I Use Some of The Above Trapping Gear

Conclusion

Hopefully, this post has helped you figure out what you’ll need for beaver trapping gear. This is the gear that I use when I am beaver trapping and it works well for me. If you can’t afford to buy everything on this list at one time, don’t worry. You can buy the essentials and slowly work your way to the other gear as you progress as a trapper.

Looking For More Information On Trapping? Find Me On:

How To Trap Beavers For Beginners (Sets & Gear)

0

This post will cover how to trap beavers for beginners. You’ll learn everything from beaver trap sets to gear/equipment that is needed to have success trapping beavers. I’m a licensed professional Animal Damage Control Agent (ADC Agent) and professional wildlife ecologist and have been successfully trapping beavers in my time as ADC Agent. I have some useful tips and tricks to help get you started. Let’s jump in…

Study Local Trapping Laws

As a beginner, you should first become very familiar with your local beaver trapping regulations. Going through the lawbook can be tedious, especially when you want to get outside and get your traps out, but following the law is very important when beaver trapping for both the beavers and the trapper.
Some laws that might apply in your state:

  • Submerged Traps
  • Trap Tags

Beaver Trapping Gear For Beginners

You don’t need all of this beaver trapping gear to get started, but most of the gear is helpful to have when trapping beavers. Each area you trap in will be different therefore it is nice to have all the gear so you don’t have to keep going back to the store.

  • Chest Waders
  • Rubber Gloves
  • Trapping License
  • 2 or 3 lbs Hammer
  • Trowel
  • Shovel
  • Castor Gland
  • 16-Gauge Wire
  • Wire Cutters/Pliers
  • Hatchet
  • Pocket Knife
  • 24″ T-Bar Stakes
  • H-Stands For Traps
  • Trap Tags
  • Body Gripping Traps
  • Foothold Traps
  • Trap Safety
  • Trap Setters
  • Pack/Gear Basket
  • Jet Sled
  • Dispatch gun/club
  • Wooden Grade Stakes

How To Trap Beavers For Beginners

Determining What Trap To Use For Beaver Trapping

I would suggest using #330 Conibear traps for beginners. These traps require very little work to make them ready for trapping beavers out of the box. Conibear traps are spring-loaded traps that will clamp down and often immediately kill a beaver by breaking its spine. These are very ethical traps when used right because there is often no suffering.

Foothold traps are also an option by requiring you to make a drowning rod, which can be time-consuming especially if you don’t have the right tools. I’ve found these traps to work well when beavers have learned to avoid conibear traps.

For foothold traps, you’ll want a bigger trap because beavers have large hind feet. I use the TS-85 and MB-750 models.

Conibear #330 Trap Set For Trapping Beavers

Practice Using Your Gear Before Heading Out

If you have little experience with beaver trapping gear, I would suggest practicing with the equipment first so it will be easy for you once you get in the field. This is a good idea because safely using traps takes time to figure out. It’s best to practice under ideal circumstances so you can be as safe as possible while you’re learning.

There’s more involved than just setting up the traps. There are ways to maneuver the traps when setting them up so that you completely reduce the risk for getting yourself caught in the trap. However, you might not learn these skills unless your practice first. Additionally, you should learn to use the safety equipment in conjunction with the traps to further prevent accidents in the field.

Figuring Out Where To Trap Beavers

Once you’ve bought your conibear traps it’s time to get them in the water. Beavers aren’t too secretive, they leave very obvious sign most of the time. You’ll often see some combination bank dens, food caches, beaver houses, and beaver dams. These are good indicators that beavers are using the area. You can often see these areas by using Google Earth imagery.

Before you start trapping you will need to gain permission to trap on properties. Instead of asking permission first I often go on scouting missions without bringing my traps. The areas I have chosen to scout have been found using Google Earth imagery based on where I believe beavers would be found based on habitat. If an area looks like it has beavers, I will then go and ask for permission to trap on the property. Asking permission after I’ve scouted saves me time because what’s the point of asking permission if there are no beavers?

That said, each scenario is different. I do ask for permission first if I’m planning to scout in a more populated area. Additionally, some states require you to get permission first before even walking on a property.

Pinch Points / Stream Channels

Using pinch points and skinny stream channels is the best way for beginners to trap beavers because there is a high likelihood that a beaver will get caught. These types of spots are still my favorite beaver sets. Beavers love skinny channels because they utilize them for traveling an area easily.

I will set my #330 Conibear trap so that it is completely submerged, then I will place a stick on top of the trap (aka dive stick) so that beavers will want to naturally swim under the stick and into the trap. I will use other sticks to funnel the beavers into the trap and to keep them from getting around my traps. Basically, I want the beavers to think that the easiest way to get from Point A to Point B is through my trap. I have had great success with this method.


How To Trap Beavers For Beginners

How To Trap Beavers Under Ice

My method for trapping beavers under the ice is very similar to trapping beavers without ice. I look for pinch points for small channels. Then I chisel a hole in the ice in the middle of the channel. I will do my best to block beavers from swimming on either side of my traps with sticks.

The main difference is how you place your traps. To catch beavers in icy conditions the water will need to be deeper otherwise it will freeze all the way through and no beavers will use it. For this reason, you will find yourself placing traps in deeper water. To use your conibear traps under ice and in deeper water, you will need to create a pole to put your conibear trap on (see photo below).

With a pole, you can adjust your trap to the appropriate height. Once you determine the correct height you can fasten your trap to the pole using wire. To create a pole you place the pole through both of the springs of the trap.

How To Trap Beavers Under ice
How To Trap Beavers Under Ice

Trap-Shy Beavers

If you continually trap beavers out of an area the remaining beavers will become trap-shy. It is impressive how smart they are at avoiding traps once they are onto you. To catch these trap-shy beavers it is important to mix things up. For example, you may need to deploy different trapping methods like using a foothold trap, or foothold downing sets (make sure they’re legal in your area).

Camouflage Your Traps

When beavers have smartened up to your traps and are trap-shy you will need to camouflage your traps a lot better. Using natural vegetation from the surrounding area will help keep your traps more camouflage.

Lure & Attractors For Beaver Trapping

Beaver Castor

Beaver castor is secreted from their castor gland. They use castor to mark their territory. Since beavers are territorial, castor gland scent can be used to pique curiosity and their territorial instincts. This scent is best used in the spring when beavers are naturally leaving their scent on castor mounds.

That being said, I try not to use castor scent unless it’s a last resort because I don’t want beavers to associate the scent with my traps. For example, if you catch one or two beavers using the scent, other beavers will learn that the scent is associated with dead beavers. Thus, they will start avoiding your traps. But if you don’t use scent and instead rely on pinch points, then you are more apt to catch them off-guard for longer. Especially if you move the traps around.

Aspen Sticks And Shavings

You can also shave sticks of trees that beavers will eat Aspen sticks that have been shaved down to show the bark can attract beavers both visually and entice them to toward food. I haven’t used this method as much because I’ve found sticking to pinch points has worked well for me. In areas where there are no good pinch points, sticks that have been shaved may work.

Conclusion

Hopefully, this post has helped you learn how to trap beavers. The process of learning to trap beavers is a lot of fun. The strategy behind setting traps and then seeing if your sets were successful is rewarding. 

Looking For More Information On Trapping? Find Me On:

How To Confidently Choose The Best Hunting Binoculars

To confidently choose the best hunting binoculars it is important to understand binocular terminology. This way you can make an informed decision based on what type of hunting you’ll be using the binoculars for. Once you understand the basic concepts of how binoculars and optics work, you can make the best decision for your particular hunting scenario.

 This post will help you find the right binoculars for any scenario and explain WHY.

How To Choose Hunting Binoculars

To get the most out of your hunting binoculars you will want to match binocular specs to what you plan to use them for. For example, weight, magnification, low-light capabilities…etc are all things to take into consideration when choosing binoculars. Each type of binocular has its pros and cons or ‘trade-offs’ and should be considered when buying binoculars. When these trade-offs are understood, you will be able to make the best purchase decision for your specific use, this way you’ll get the most value of your binoculars.

What Do The Numbers On Binoculars Mean? (8×42, 10×42, 10×50…etc)

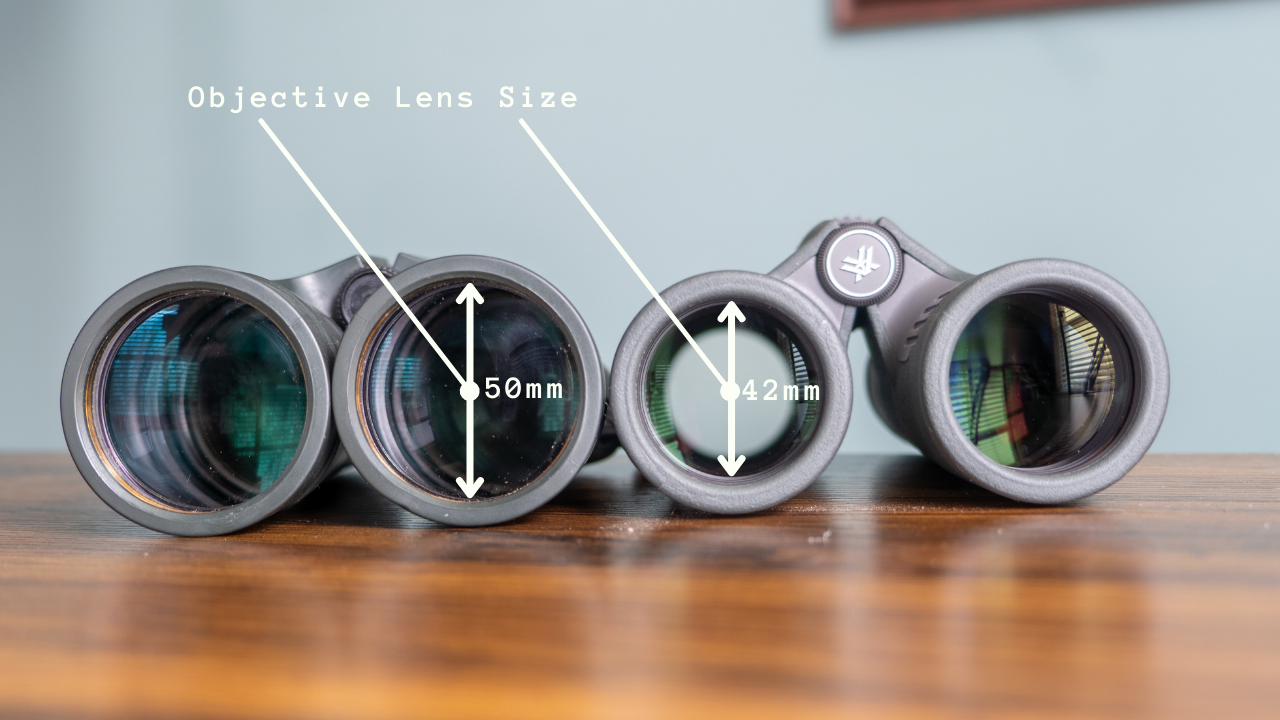
The numbers on binoculars tell you the magnification and objective lens size. For example, on 8X42 binoculars, the magnification is 8X or 8 times the distance you can see with your naked eye.  The 42 stands for how big the lenses are in diameter measured in millimeters of the end opposite of which you look through. In other words, the measurement of the light-gathering end of the binoculars. So you could also think of the numbers on binoculars as (8x)(42mm).

Parts of a Binocular | How To Choose Binoculars Parts of a Binocular | How To Choose Binoculars

Binocular Magnification Explained

Which Binocular Magnification Is Best For Hunting?

Your goal should be to arrive at a perfect balance between binocular magnification and objective lens size that will best fit the type of hunting you will be doing.

  • 8x — The standard magnification. Brings images close enough to see clearly but not so close that shaky hands are an issue.
  • 10x — Those with steady hands or lots of experience tend to like the extra power, but shaky hands can be an issue for some.
  • 12x — Most will need to brace their elbows to avoid a shaky image at this magnification; it is generally reserved for specialty uses, like hunting out west where a lot of scanning is done.

See Further!

The main pro for binocular lens magnification is that you can see further. For example, an 8×50 binocular can see 8 times further than your naked eye, a 10×50 can see 10 times further than the naked eye…etc.

Increased Binocular Magnification Considerations

There are some considerations to take into account before you buy a high-magnification binocular.

Perceived Shakiness of Hands

Higher binocular magnifications are harder to use off-hand because of increased hand jitters. Of course, your hands aren’t actually shakier because of having a higher magnification, it’s just that higher magnifications enhance small movements resulting in increased perceived shakiness.

A 12x magnification or larger really should have some sort of stabilization devices such as a monopod or tripod. The higher the magnification, the increased importance of better stabilization methods.

Field of View

Higher magnification binoculars also have a smaller field of view. With a higher-power lens, you may not see objects in your peripherals. While you’re busy looking into the deep depth of the landscape, there could be something 40 yards from you that you don’t notice. It will be harder to see with a higher power because your field of view is tighter.

How To Choose Binoculars | Binocular Field of View Explained How To Choose Binoculars | Binocular Field of View Explained

Binocular Magnification and Low-Light Performance

As you increase binocular magnification the lenses of the binoculars become more narrow. The narrowing of the lenses reduces the light-gathering capabilities of the binoculars. The lens narrowing allows you to see further, but reduces light gathering capabilities, and also is the reason your field of view shrinks. You can offset this low-light issue caused by higher-powered binoculars by choosing a larger objective lens size.

Binocular Objective Lens Size Explained

Binocular magnification is not the only thing that should be considered when buying hunting binoculars, objective lens size is just as important.

Objective Lens Size Explained | Objective Lens Size Comparison Objective Lens Size Explained | Objective Lens Size Comparison

Objective Lens Size Explained Objective Lens Size Explained

What Does Binocular Objective Lens Size Mean?

The objective lens is the end of the binoculars that you don’t look through. This is the side that actually gathers light. It is important to know the objective lens size because it is the low-light gathering potential of the binoculars, giving you a better image in low-light situations and often a crisper image overall.

On 8×42 binoculars, the 42 stands for the diameter of the lenses opposite of which you look through, measured in millimeters. In other words, it’s the measurement of the light-gathering end of the binoculars.

As your objective lens size increases, you’re able to draw more light into the lens. This allows for better low-light capabilities. However, there are also some considerations to make before you buy hunting binoculars with big lenses:

You have to be careful buying large-diameter lenses in conjunction with high magnification lenses. Glass is heavy. More glass = more free-hand shakiness.

For example, A 10×50 is better than a 10×42 in low-light situations (all things being equal) but the 10×50 will be a heavier binocular. This is good for those who need to see better in low-light but may need to consider stabilization methods like a tripod to keep them steady.

If you go with a 10×42 then you are sacrificing low-light capabilities because your lens size is smaller and can’t gather as much light but at least you can see further and it’s lighter and less bulky.

It’s all a trade-off, you can fine-tune your binoculars to the exact situations which will allow you to choose the best binoculars for you.

Will you be using them free-hand most of the time? Or will you be able to rest them on something or a tripod when hunting? These are some questions you should ask before buying binoculars.

How To Calculate Binocular Low-Light Performance

Exit Pupil Size

The exit pupil size is an easy calculation that will tell you how well a binocular will do in low-light situations. A higher result means better low-light performance capabilities of the binoculars.

Exit Pupil Size = (Objective Lens Size ÷ Magnification)

Binocular Magnification, Objective Lens Size, and Exit Pupil Size Relationship Chart

Binocular Magnification (x) Objective Lens Size (mm) Exit Pupil Size (Low-Light Performance) Type of Binocular
7 50 7.14 Full
8 25 3.13 Compact
8 28 3.50 Compact
8 32 4.00 Mid
8 42 5.25 Full
8 50 6.25 Full
10 25 2.50 Compact
10 28 2.80 Compact
10 30 3.00 Mid
10 42 4.20 Full
10 50 5.00 Full
12 42 3.50 Full
12 50 4.17 Full
15 50 3.33 Full
15 56 3.73 Full
20 50 2.50 Full
20 70 3.50 Full
20 80 4.00 Full

So as you can see, all things being equal, 7×50 binoculars will have the best light gathering capabilities out of these examples by far. If lens magnification and size are all that matters, then why not buy cheap binoculars, right? Not so fast. Not all binoculars are created equal. 

Testing Binoculars in Low-Light

Types Of Binoculars & Objective Lens Size

There are three types of binoculars: compact, mid-sized, and full-sized. binoculars are categorized into these types by their objective lens size. For example:

  • Objective Lens Size 30mm or less — These are referred to as compact lenses, these lenses sacrifice some light-gathering performance for their smaller size and lighter weight. They are good when weight is a factor.
  • Objective Lens Size 42mm — These are mid-sized lenses, they are big enough to provide bright images even in low light, still quite small and portable, and offer good free-hand stability.
  • Objective Lens Size 50+mm — These are large full-sized lenses that are heavy. They can be tricky to use freehand because of their weight. They’re generally reserved for low-light situations or to help offset the reduced light as a result of highly-magnified lenses.

What Makes Some Binoculars Better Than Others?

Understanding magnification, lens size, and how they relate to each other are the most important aspects to know when learning how to choose binoculars, but there are some finer details to know.

Quality Glass = Better Light Transmission

Not only does light have to get into the binoculars, but the light also needs to pass through the glass effectively. If a binocular has poor glass quality it will not be able to utilize the light efficiently. Thus, it will not perform as well as a binocular with glass that transfers light more efficiently.

Lens Coatings

You don’t want any reflection from your binoculars. Reflection from your lenses will deflect the light that you want entering your lenses. The best lenses will have coatings on them so that reflection is minimized to the furthest extent possible. This will allow as much light as possible to enter the binoculars so that you can see better in low-light.

Extra Low-Dispersion (ED) & High-Definition (HD) Glass

Extra low-dispersion glass (ED) also known as High-definition (HD) is, as the name implies, focuses the light color spectrum better. This reduces chromatic aberration. Chromatic aberration is the color-fringing (weird fuzzy coloring) that can occur at the edges of contrasting objects or landscapes. ED glass can also improve overall image clarity.

glass quality is important to understand for buying the best binoculars for hunting for the money Photo from Gear Expert

What Makes Binoculars Expensive?

Quality-made binocular glass makes a difference in how binoculars will perform. The best binocular glass isn’t created by automated manufacturing to the same extent, at least not yet. To achieve the best binocular glass, is made in-house with a lot of research and development. Because of this binoculars take longer to produce and require more employees, this is the reason some binoculars are so much more expensive than others.

Best Binoculars For The Money

Fortunately, high-quality binoculars are more affordable now that binocular manufacturing technology has improved. If you have an old pair that you’ve been using, it’s probably time to upgrade. You’ll notice a tremendous improvement. I tested 14 binoculars, at different price points ($250 to $2500), to determine the best binoculars for the money. I cover everything from entry-level to high-end binoculars and everything in between in the video below.

I tested 14 binoculars, at different price points ($250 to $2500), to determine the best hunting binoculars for the money. I cover everything from entry-level to high-end hunting binoculars and everything in between.

Are Expensive Binoculars Worth The Money?

There is a point of diminishing return when buying binoculars. You can obtain 80% of the quality by spending 10x less money.  For example, the Athlon Midas binoculars cost +/- 250$, whereas the Swarovski EL’s cost +/- 2500$. So for 10x less money, you can still have at least 80% of what those expensive binoculars offer.

For me, if 250$ binoculars are even 70% comparable to 2500$ binoculars, that’s good enough for me. I put my binoculars to the test in all types of weather and through rough habitats and I don’t want to be worried about losing, dropping, scratching, or forgetting expensive binoculars.

Conclusion

I hope this article has helped you determine how to choose binoculars for your specific uses. That said, it’s a great idea to head to the store to get some of the binoculars in your hands and up to your eyes so you can get a better feel for how they will work for you.

I have also tested just about all of these binoculars in this review, hopefully, it has narrowed your search for the right binocular quicker. Out of the 14 binoculars I tested, I believe the Althon Midas binoculars are currently the best for the money. I currently use the Midas binoculars and would recommend them to anyone beginner or expert.

I found the Athlon Midas binoculars to be the best value binoculars because they offer, in my opinion, 80% of the value when compared to the most expensive binoculars that cost 5x-10x more money.

Find Me On:

Jackery Explorer 1000 Review | Real-World Remote Camping Review

In this Jackery Explorer 1000 review, we’ll dive into the specs, pros, and cons of this Jackery portable power station so you can decide if it will best suit your portable power needs.

Portable power stations have come a long way in the past decade. In the past, batteries couldn’t do much more than charge your small devices a few times. Now, these more efficient batteries can last a lot longer and power larger devices. For this reason, they are becoming more popular and are now a tool to consider instead of, or in tandem with, a gas-powered generator.

The Jackery 1000 is a great option for camping, off-grid living, glamping, overlanding, tailgating…you name it. Pretty much if you need lots of power and there’s none around, the Jackery 1000 will likely be able to keep up with what you’re asking of it.

With that being said, let’s jump into what this power station is capable of.

This post contains Amazon and other affiliate links, which means I’ll receive a commission if you purchase through my link, at no extra cost to you. Of course, you are not obligated to use my links, but it does help fund these posts in hopes of bringing more value to you!

This Review’s Credibility

My Credentials

I’m a professional ecologist, registered hunting guide, and outdoor content creator. I’ve personally owned the Jackery Explorer 1000 for about a year now and have used it a few times for off-grid remote-style camping and remote hunting trips. As a content creator, I need to be able to keep my camera gear and laptop charged while in remote settings. 

In the video below, I briefly show my Jackery Explorer 1000 camping setup while I am on a remote Maine moose hunt. If you click on the video it will automatically bring you to the part where I show my Subaru Forester camping setup and Jackery portable power station set up with solar panels.

I spent a lot of time researching portable power stations to determine which would be the best for me. With all of the other options on the market I ended up choosing the Jackery Explorer 1000 and I’m going to share why I made that choice.

No Affiliation

I am not affiliated with Jackery in any way. This Jackery Explorer 1000 review is based solely on my personal experience with this portable power station in the field.

Jackery Explorer 1000 Review (Field-Tested With Solar Panels)

Why I Chose The Jackery Explorer 1000 For Remote Camping

I chose the Jackery 1000 because after researching the best portable power stations, I determined that this model of Jackery was the best value power station based on the specs and online reviews. I usually don’t need the best equipment on the market at really high price points, but I also don’t like to buy cheap equipment that is going to break which causes more frustration.

Based on my research the Jackery Explorer 1000 was very well built, could power/charge a lot of devices at once, could charge devices even while in use, was super easy to use, and had 3-different ways to charge it.

What I Liked About The Jackery Explorer 1000 While Remote Camping

Having 3-ways to charge is important for me because there isn’t always enough sun to get a full charge. That said, having solar panels was an awesome option to recharge the Jackery battery while I was away from camp. This way the Jackery would get significantly charged by the time I got back to camp at the end of the day.

When I’m creating content in remote settings I need to be able to recharge all my gear at night so that it’s good to go in the mornings. Buying the Jackery battery helped me save some money because instead of buying a BUNCH of batteries for my camera gear (camera, drones, power banks…etc), instead, I could just have one big battery and just recharge the few batteries I needed for each day.

The Jackery never let me down when it came to charging batteries for all of my camera gear. I’m usually gone for one-week trips and it’s not uncommon for me to have enough battery just from using solar for the whole week. That said, I haven’t used it for larger appliances yet, I’ve used it mostly for just camera gear and my laptop.

I also lost my AC charger and asked Jackery if they could send me a link so I could buy a new one, they got back to me right away and shipped one to me for free which was awesome! Their customer service is really great, and many others have said the same thing.

Pros

  • Very easy to operate
  • 3-way to charge the battery
  • Solar Panels Are Awesome
  • 2-Year Warranty
  • Great Customer Service
  • Free 30-Day Returns
  • Free Shipping
  • Quiet compared to a generator

What I Didn’t Like About It

The Jackery 1000 Internal Fan

There is not much I can say about things I didn’t like about this power station, however, there were a few areas I would like to see improved. The fan was my biggest complaint because when charging equipment the fan would periodically kick on for about 3 seconds and then shut off. The fan is pretty quiet so this might not be a problem for most people, but I car-camp so I’m often sleeping in my car. With the battery inside the car, it would wake me up once in a while. It wasn’t a huge deal but enough so that it’s worth mentioning.

The Jackery 1000 Temperature Operating Limits

Another thing I found out after purchasing the battery is that it has temperature operating limits of between 14º F and 104º F. This is a pretty good range for most people, but I live in Maine and it can get cold. Additionally, the inside of vehicles tend to get hotter or colder than the outside environment, so you might need to be careful if you store your Jackery battery in your car all day.   

Charge Cycles – How Many Years Will The Jackery Explorer 1000 Last Before It Needs To Be Replaced?

Like all battery-operated portable power stations, the batteries will eventually become less effective over time. Jackery claims that this battery should handle approximately 500 charge cycles (from empty to fully charged).

This does not mean your battery will stop working after 500 charge cycles, it just means it won’t be able to hold as much charge as it did when you first bought it.

Of course, how well you maintain your battery will also play a role in how long it will last (like storing it properly). I wish that this number was higher, other batteries on the market have much higher charge cycles.

Cons

  • Periodic Loud Fan Noise When It’s Working Hard
  • Temp Operating Limits 14 F and 104 F
  • Only 500 Charge Cycles (To 80% Capacity)

Jackery Explorer 1000 Specs and Overview

Jackery Explorer 1000 With Two Jackery Solar Panels

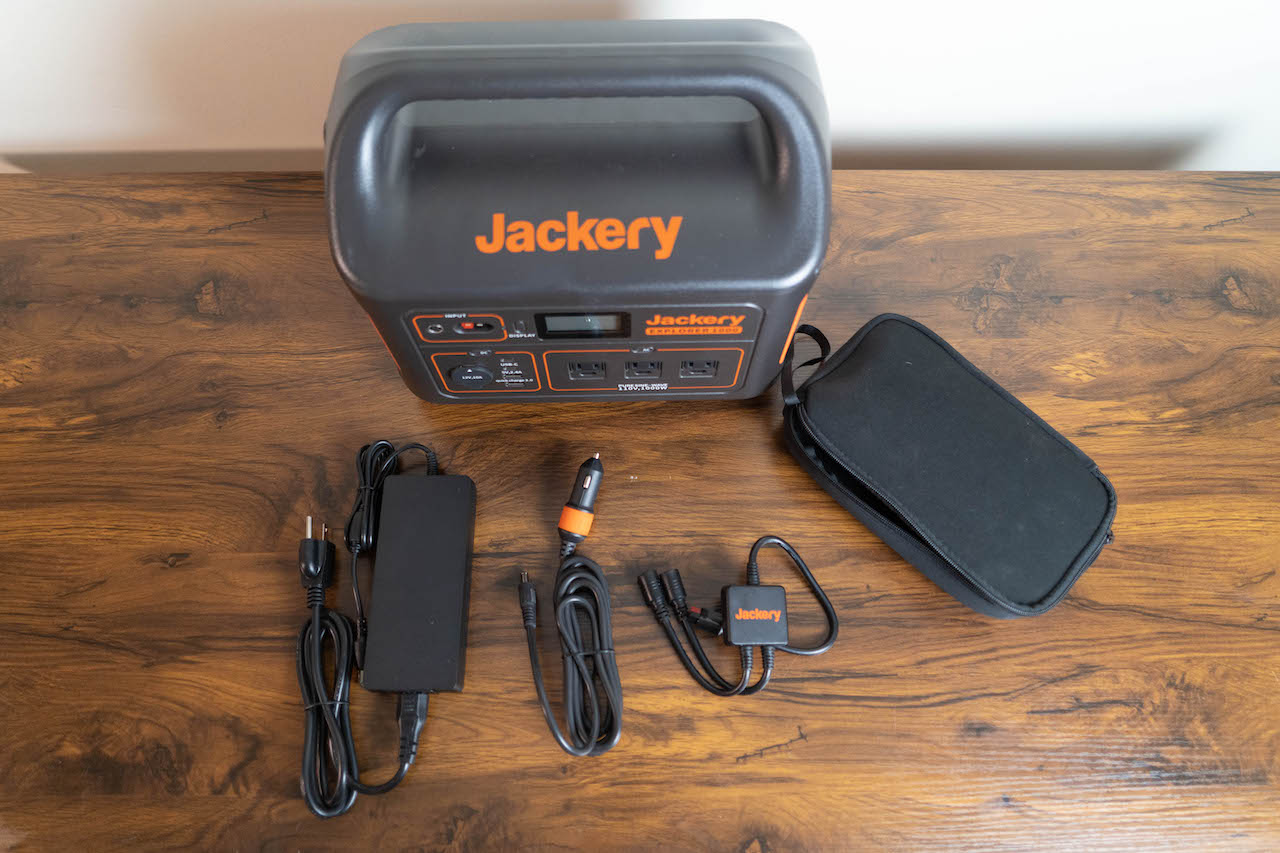
Unboxing – What Comes With The Jackery Explorer 1000?

  • Jackery Battery
  • Duel Solar Panel Charger/Splitter
  • AC Charging Cable Block Charger (Outlet Charger)
  • DC Charging Cable (Car Charger)
  • Two 100W Solar Panels
Gear That Comes With Jackery Explorer 1000

Build Quality & Design

The Jackery 1000 is has a strong hard plastic housing which no doubt also serves to reduce the weight if this power station. The power station weighs in at 22 lbs, which is not bad considering how much you get out of it for power vs other models on the market. This power station is a rectangular cube in shape and has a nice carrying handle on top for easy transporting.


Jackery Explorer 1000 Front View


There are also fan vents located on either end of the Jackery which aid to keep the battery cool under intense charging loads. You can see the perforated sides of the Jackery which draws cool air in from one side and blows the warmer air out the other side.


"<yoastmark


"<yoastmark


"<yoastmark

Ports and LCD Screen

The front of the Jackery battery is the only side that you’ll be interacting with the device because everything is located on the front (except for the built-in flashlight). The other sides (top, back, and bottom) are solid plastic.

Jackery Explorer 1000 Plugs and Ports


Jackery Explorer 1000 LCD Screen Close Up

3 AC Ports

  • (Pure Sine-Wave 110V, 1000W)

5 DC Ports

  • 12V, 10A Car Outlet Port
  • Two USB-C Ports
  • Two USB-A Ports

Two Inputs For Charging

  • Outlet Charging Input Port
  • Dual Solar Panel Input Port

Jackery Explorer 1000 Battery Specs

Capacity: 1002Wh Capacity / 1000W of Power (2000W Surge Power)

Charge Cycles: 500 cycles to 80% capacity

Charge Time: 7.5 to 17 hours depending on charging method

How Long The Jackery 1000 Last On A Full-Charge?

The Jackery Explorer 1000 has 1002 Wh of storage capacity. Using this number you can approximately calculate how long your Jackery will last while charging any device: Working time = 1002Wh* 0.85 / operating wattage of your device (approximate only).

Below are some approximate run times for different appliances to get you in the ballpark. Of course, these times will vary depending on device energy consumption.  

Jackery Explorer 1000 Run Times For Different Appliances Infographic
Jackery Explorer 1000 Run Times For Different Appliances (approximate only)


How Long Does It Take To Fully Charge The Jackery 1000?

  • 7.5 hours via AC wall charger
  • 14 hours via DC Car charger
  • 17 Hours via one solar panel
  • 8 hours via two solar panels

Jackery Solarsaga 100W Solar Panel Review

Jackery Solar Panel Unfolded

Check Amazon's Price

From my time using the Jackery Solarsaga solar panels, I don’t have any complaints, they just work really well. They’re very well-thought-out and make using them very easy, fast, and enjoyable.

For example, they’re super compact and can be folded up into basically 2 ft squares. When they’re folded they hardly take up any room because they’re so thin. This makes them easily packable when you’re not using them or when there’s no sun.

They also have magnets in the orange end pieces (shown in the photos below) which keep them together, and the magnets work really well.

When you’re ready to use them you just pull the magnets apart to open the panel, then pull out the built-in solar panel stand, then plug the cord (located inside a pouch on the panels) into the Jackery Explorer 1000. The photos below will show you more exactly what I am talking about:


Jackery Solarsaga 100W Solar Panel Plugged Into Jackery Explorer 1000
Jackery Solarsaga 100W Solar Panel Plugged Into Jackery Explorer 1000. This is how you plug in a single panel, for double panels you would use the splitter attachment that comes with the Jackery Explorer 1000 and plug it into the back and red input (below).


Jackery Explorer 1000 With Two Solar Panels Plugged In
Jackery Explorer 1000 With Two Solar Panels Plugged In via splitter


Back of Unfolded Jackery Solar Panel
Back of Unfolded Jackery Solar Panel With Built-In Stand


Jackery Solar Panels Width
2 Jackery Solar Panels Folded – Thin Width For Easy Transport


Jackery Solar Panels Folded Length
Jackery Solar Panels Folded Length – 2ft Long (magnets hold the panels together and work well)

Conclusion

Hopefully, this real-world Jackery Explorer 1000 and Solarsaga 100W solar panel review has helped you determine if this portable power station system is right for you. I believe it is one of the best portable power stations for the money right now. You can get this power station without the solar panels but I’ve found them very useful, especially for longer trips.

Find Me On:

17 Best Climbing Sticks For Hunting Compared [2025]

In this post, I list the best climbing sticks for hunting currently on the market and compare their specs so you can choose which sticks will best suit your specific hunting style.

The best climbing sticks for you will depend on your own personal hunting style and the hunting equipment you choose to bring in the field. That said, some climbing sticks are all-around better than others. By the end of this post, you should have a good idea of which climbing sticks are best for your specific hunting setup.

This post contains Amazon and other affiliate links, which means I’ll receive a commission if you purchase through my link, at no extra cost to you. Of course, you are not obligated to use my links, but it does help fund these posts in hopes of bringing more value to you!

This Climbing Stick Review Credibility

No Affiliation

I’m am not affiliated with any of these climbing stick companies. I created this review based on my own curiosity and personal experience with the hope that this consolidated climbing stick specs and research and will help you more easily make your decision.

My Credentials

I’ve been saddle hunting and mobile hunting for over 6 years with success and have a good idea of what works in doesn’t work for the mobile hunter. In addition to personal experience, I have extensively researched and compared each of these climbing sticks and their specs to determine the best climbing sticks for hunting. Because I’m a gear nut, I’ve done this review for my personal interest but hope that it brings some value to you too.

I currently own the Original Lone Wolf 3-Step climbing stick models and have been using them since the beginning. I love them, but with the new innovations in climbing sticks, I am personally looking to upgrade. What better time to create a review on the best climbing sticks for hunting?

How Climbing Sticks Were Chosen For This Review

I don’t personally own all of these climbing sticks, so most of my information was gained via the internet and comparing multiple articles and videos, and finding the pros and cons of each individual stick.

After researching different climbing sticks using multiple online sources and cross-referencing them, I decided to review climbing sticks where multiple sources overlapped in recommendations. I also chose to review new and innovative climbing sticks that I believe have great potential. 

To keep these climbing sticks on a level playing field I chose to do my best to review mostly 2-step 20″ step models for the ultimate mobility in the field. Not all steps are 20″ so it is important to notice the differences before purchase. I also included a couple of 3-step options worth mentioning.

Climbing Stick Comparison Chart

Below I have created a climbing stick comparison chart of all the climbing sticks mentioned in this post so that you can easily refer back to the specs of each climbing stick. Personally, I like to see what each stick looks like first and then look at the specs compared. I’ve linked to each of the climbing sticks below so you can easily find them.

Top 5 Climbing Sticks For Hunting

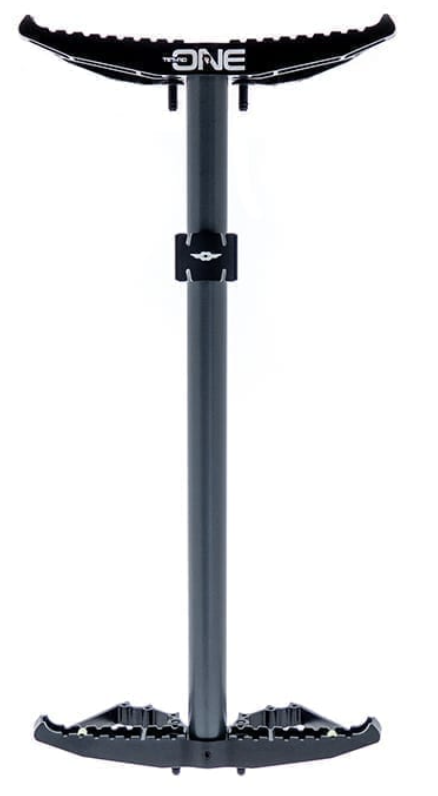
Hawk Helium 20'' Hunting Climbing SticksEWO Ultralight Climbing Stick For HuntingShikar FXD Climbing Stick For HuntingTethrd One Climbing StickD'Acquisto Series Full Climbing Sticks
ModelHAWK HeliumEWO UltralightShikar FXDTethrd OneD'Acquisto Full Sticks
AwardBest BudgetBest ValueWell-RoundedBest MobileBest Full-Sized
Price Per Stick*28.0090.00115.00110.00115.00
Weight Per Stick (lbs)2.51.61.61.02.4
Stacking Height Per 4-Sticks (in) 9.3108.17.34.6
Stacking Length Per 4 Sticks (in) 2723.522.021.536.0
Step To Step (in)171820.017.314.0
Footroom (in)3.54.94.03.54.5
AvailabilityShop AmazonShop EWOShop OOALShop TethrdShop Lone Wolf CG
*Price at the time of this post


Full-Review Climbing Stick Comparison Chart

Scroll left and right →→ on this chart to see all of the information. You can also sort this chart by the information that is most important to you by clicking on the headings.

Brand Price Per Stick Weight Per Stick (lbs) Stacking Height Per 4 Sticks (in) Stacking Length Per 4 Sticks (in) Step to Step (in) Footroom (in)
Timber Ninja C-1 (20" Sticks)120.001.29.320.018.03.5
Timber Ninja A-1 (20" Sticks)85.001.69.320.018.03.5
Tethrd One Stick (18.5" Sticks)110.001.07.321.517.33.5
EWO Ultralight (20" Sticks)90.001.610.023.518.04.9
Lone Wolf Stick 3-Step Original (32" Sticks)52.502.59.039.515.04.0
Lone Wolf Full Sticks (3-Step D'Acquisto) (28" Sticks)115.002.44.636.014.04.5
Lone Wolf Double Step (17" Sticks)100.001.54.920.517.03.6
Lone Wolf Compact (17" Sticks)100.001.54.824.817.04.9
Shikar Climbing Sticks (20" Sticks)100.001.54.830.520.04
Shikar FXD (20" Sticks)115.001.68.122.020.04
Beast Gear Sticks (24" Sticks)100.001.710.024.522.03.9
Muddy Pro Sticks (20" Sticks)47.503.010.027.518.34.4
Novix Minis (17" Sticks)42.501.49.124.515.04.1
Stacked Outdoors (21" Sticks)37.502.410.321.117.05.9
API Outdoors Hunt'n Sticks (2-Step Mod) (20" Sticks)33.332.39.525.520.04
XOP Mini 2-Steps (22" Sticks)32.502.510.532.015.05.3
HAWK Helium 20" Climbing Stick (20" Sticks)28.002.59.327.017.03.5
*Price at the time of this post *Measurements Rounded To Tenths


Best Climbing Sticks For Hunting Mobile

*Please Note That Climbing Stick Specs Might Be Slightly Different Depending On Size And Specific Model So Keep That In Mind Before Purchase*

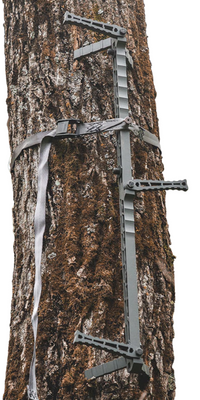
Timber Ninja C-1 (Carbon) Climbing Sticks

Timber Nijas C-1 (Carbon) Climbing Sticks
Timber Ninjas C-1 (Carbon) Climbing Sticks. Photo from here

Specs

  • Price: 120$ per stick
  • Weight: 20″ 1.2 lbs / 24″ 1.4 lbs 
  • Lengths: 20 or 24 inches
  • Carbon Fiber Tube
  • Polymer Double Step
  • Polymer Versa Button
  • Grade 8 Hardware
  • 300lb weight rating (3rd Party Tested)

Pros

  • Light, Quiet, and Hunt Ready 
  • Quieter than most other sticks out of the box
  • Optional Cam Buckle or Static Cord for attaching
  • Optional Retractable Cable Aider Option (+15$)

Cons

  • The most expensive climbing stick in this review
  • Don’t nest perfectly, some wobble
  • Stick is very close to tree
  • Steps will flex 

Timber Ninja A1 (Aluminum) Climbing Sticks

Timber Ninja A1 (Aluminum) Climbing Sticks
Timber Ninja A1 (Aluminum) Climbing Sticks. Photo from here


Specs

  • Price: 85$ per stick
  • Weight: 20″ 1.6 lbs / 24″ 1.9 lbs
  • Lengths: 20 or 24 inches
  • AluminumTube
  • Polymer Double Step
  • Polymer Versa Button
  • Grade 8 Hardware
  • Hunt Ready 

Pros

  • Optional Cam Buckle or Static Cord for attaching
  • Optional Cable Aider Available (+15)
  • Style Identical to Timber Ninja C1 (Carbons)
  • Relatively Inexpensive
  • Great price to weight ratio

Cons

  • Aluminum (not carbon)
  • Heavier than Timber Ninja C1 (Carbons)
  • Option aider is not retractable (but still seems to work well)
  • Doesn’t nest perfectly, some wobble
  • Stick is very close to the tree
  • Steps will flex 


Tethrd One Climbing Sticks

Tethrd One Climbing Stick
Tethrd One Climbing Stick. Photo from here

Specs

  • Price: 110$/stick (3-pack) or 120$/stick
  • Weight: +/- 1 lb with the rope attachment method
  • Length: Only One Size
  • 18.5″ total height – Single One Stick
  • 17″ step to step – Single One Stick
  • 20.5″ total height – 3 Sticks Stacked
  • 8.5″ Step footbed.
  • Aerospace-grade Titanium & Aluminum construction

Pros

  • Lightest climbing stick in this review
  • Zero moving parts to eliminate fiddle factor
  • Included vinyl sound tube barrier
  • User-replaceable ropes
  • Pack very well

Cons

  • Tethrd does not offer a 4-pack for 110$ each
  • Only one length stick offered (17 inches)
  • Hollow, thus noisy unless spray foamed or stealth strips added
  • Not a lot of foot room
  • No aider options

Eastern Woods Outdoors – EWO Ultralight Climbing Sticks

EWO Ultralight Climbing Sticks
EWO Ultralight Climbing Sticks. Photo from here

Specs

  • Price: $90 per stick
  • Weight: 1.56 lbs
  • Length: 18, 20, 22, 24 inches
  • FeatherStick – 1″ machined 6061 aluminum tube with proprietary fluting to reduce weight and retain strength.
  • Ultralight DoubleSteps (Angled or Straight) (2)
  • Ultralight Stick Standoffs (2)
  • AlumiButton
  • Plastic End Caps (2)

Pros

  • Many different size options
  • Great Price to weight ratio
  • Great build quality
  • Solid all-around stick

Cons

  • Stacking Height Is Pretty High
  • Likely will need stealth strips to dampen noise

3-Step Lone Wolf Climbing Sticks (Originals)

Check Amazon's Price Check Cabela's Price 

Specs

  • Price: $52.50 per stick (set of 4)
  • Weight: 2.5 lbs per stick
  • Pivoting V-Brackets adjust to match the natural contour of the tree
  • Fits 4″ – 22″ tree diameter. (Strap extensions available)
  • 300-pound weight rating
  • Single tube design
  • Reversible Steps
  • Stick Length: 32″
  • Distance between steps: 15″

Pros

  • Very affordable
  • Long Stick Length
  • Get extra high in trees with aiders

Cons

  • Heavy (compared to two steps)
  • Bulky (compared to two steps)
  • Does not have double-steps

Lone Wolf Full Sticks – D’Acquisto Series Full Climbing Sticks (3-Step)

Lone Wolf Full Sticks – D’Acquisto Series Full Climbing Sticks (3-Step)
Lone Wolf Full Sticks – D’Acquisto Series Full Climbing Sticks (3-Step). Photo from here

Specs

  • 2.4lbs
  • 28″
  • 300lb weight rating
  • Available in Standard length or micro
  • Compact stick stacking system
  • Asymmetrical concealment pattern
  • No-slip step design
  • Hammered titanium finish
  • Increased foot clearance
  • Rope fastening optional available
  • Integrated climbing grip
  • Reversible steps
  • Micro versa attachment buttons
  • Cam strap – 5 ounces
  • Loop strap without buckle – 2 ounces
  • Rope – 3 ounces (6mm)

Pros

  • Long Stick Length To Get Higher In Trees
  • Very compact (same profile as their shorter Compact Sticks)
  • Get extra high in trees with aiders
  • Thin rubberized coating for stealth
  • Rubber bushings that prevent sticks from clanging together when pulling apart or putting together
  • Much improved functionality upgrade over the 3-Step originals
  • Lots of footroom

Cons

  • Heavy (compared to two steps)
  • Bulky (compared to two steps)
  • Does not have double-steps

Lone Wolf Custom Gear Double Step Sticks

Specs

  • Price: 100$ per stick
  • Weight: 1.75 lbs for 20″ / 1.5 lbs for 17″
  • Lengths: 17 or 20 inches
  • American Made 6061 Metal™
  • 250lb weight rating
  • Compact stick stacking system – only 2.5″ profile for a 3-pack
  • Asymmetrical concealment pattern
  • No-slip step design
  • Hammered titanium finish
  • Increased foot clearance
  • Rope fastening optional available
  • Micro versa attachment buttons

Weights & Measurements (17″ length variant)

  • Overall Step length for 17″
  • Base stick weight – 1.5 lbs / 18 inches long
  • Top step length – 10 1/2″
  • Bottom step length – 4 3/4″
  • Overall Step length – 17″
  • Ultra-thin 1/2″ profile

Fastening Options

  • Cam strap – 5 ounces
  • Loop strap without buckle – 2 ounces
  • Rope – 3 ounces (6mm)

Pros

  • Pretty Light
  • Ultra-thin 1/2’’ profile – very compact
  • Best packing stick in this review
  • Pack very well even with cable aiders
  • Durable one-piece design
  • Improved Standing Room

Lone Wolf Custom Gear Double Step Climbing Sticks Bolt Bracket

Cons

  • No pivoting tree bracket
  • The bottom can slip off tree, versa button too high on stick
  • Will need to add noise dampening tape
  • Might need larger straps than what comes with sticks
  • Still not a lot of foot room

Lone Wolf Custom Gear Compact Sticks

Lone Wolf Custom Gear Compact Sticks
Lone Wolf Custom Gear Compact Sticks. Photo from here

Specs

  • Price: 100$ per stick
  • Weight: 1.5 lbs 17″/ 1.9 lbs 20″
  • Lengths: 14, 17, or 20″
  • American Made Metal™
  • 300lb weight rating
  • Available in Standard length or micro
  • Patented Compact stick stacking system
  • Asymmetrical concealment pattern
  • No-slip step design
  • Hammered titanium finish
  • Increased foot clearance
  • Rope fastening optional available
  • Integrated climbing Grip
  • Reversible steps
  • Micro versa attachment buttons
  • Cam strap – 5 ounces
  • Loop strap without buckle – 2 ounces
  • Rope – 3 ounces (6mm)

Pros

  • Lightweight
  • Compact -Each stick packs down to a 3/4” profile
  • Pivoting tree bracket

Cons

  • Does not utilize double-steps
  • Some fiddle factor

The Shikar Climbing Sticks

The SHIKAR Lightweight Climbing Sticks

The SHIKAR Lightweight Climbing Sticks
The SHIKAR Lightweight Climbing Sticks. Photos from here

Specs

  • Price: about 100$ per stick
  • Weight: 14″ – 1.38 lbs, 17″ – 1.5 lbs, 20″ – 1.63 lbs, 22″ – 1.75 lbs
  • Available Lengths: 12, 14, 17, 20, 22 inches
  • 100% American Made
  • 300 lb weight rating
  • 17 1/8 inches step to step
  • Offered in both single and double steps
  • Double step sticks are 27” when folded
  • Width of steps are 4.5” to center of stick
  • Rugged no-slip design on steps
  • Each stick has a built-in aider attachment hole located at the bottom of the stick
  • Variety of attachment methods available
  • The optional platform available adds only 8oz to the stick.

Pros

  • Different top step options available (step vs platforms)
  • Different straps available
  • Relatively customizable
  • Rotating tree brackets
  • Stack very well together, low profile

Cons

  • Can only stack sets of 2 together
  • Very long when stacked together
  • Fiddle factor
  • Steps will flex

Shikar FXD Climbing Sticks

The SHIKAR FXD (Fixed) Climbing Sticks & Saddle Platform Steps
The SHIKAR FXD Climbing Sticks. Photo from here

Specs

  • Price: about 115$ per stick
  • Weight: 17″ – 1.44 lbs, 20″ – 1.56 lbs, 22″ – 1.63 lbs
  • Lengths: 17″, 20″, or 22″
  • 100% American Made.
  • FXD sticks have shorter attachment button so standard pull straps are a tight fit.
  • 300LB weight rating.
  • 17 1/8 inches step to step.
  • Comes 17″, 20″ and 22″ lengths.
  • Offered in both single and double steps.
  • Width of steps are 4.5” to center of stick.
  • Rugged no slip design on steps.
  • We offer a cable aider bolt kit upon request.
  • Variety of attachment methods available.
  • Optional platforms available to top of stick – adds as little as 8oz to the stick.

Pros

  • Stack and pack pretty well

Cons

  • They don’t side stack in pairs of two like regular shikars
  • The steps will flex
  • V-Bracket will grip into tree before stick is fully set

Beast Gear Climbing Sticks

Beast Gear Climbing Sticks
Beast Gear Climbing Sticks. Photo from here

Specs

  • Price: $100 per stick
  • Lengths:
    • Beast Standard Stick
      • 24″ total height (22″ between steps)
      • 2.2 lbs with fastening strap
      • 1.9 lbs without fastening strap
    • Beast Mini Stick
      • 20″ total height (18″ between steps)
      • 2 lbs with fastening strap
      • 1.7 lbs without fastening strap
  • No Moving Parts
  • Antler ™ Foot Design
  • Non-staggered In-line Stacking™ Design
  • 9″ Double-Sided Angled Step™ Design
  • Made from 6061 Aluminum
  • Delrin ® Beast Button
  • Grade 8 Bolts
  • 300 lb weight rating
  • Patent Pending Design
  • All sticks include a fastening strap
  • Made in the USA

Pros

  • Strong build quality
  • Great all-around stick

Cons

  • They don’t pack very tight
  • They set pretty close to the tree

Muddy Pro Climbing Stick

Check Amazon's Price

Specs

  • Price: $47.50 per stick
  • Weight: About 3 lbs per stick
  • Length: 20 Inches
  • Each Step has Built-In Teeth for Extra Grip
  • Aluminum Bark Biters Attach to Tree
  • Aluminum
  • Width: 9.25”
  • Rope Cam Attachment System
  • Weight Rating: 300 Lbs.

Pros

  • Inexpensive to buy
  • The rope cam system is fast and quiet (Cam Cleat)

Cons

  • Heaviest climbing sticks in this review
  • Noisy
  • Bulky

Novix Mini Climbing Sticks

Novix Mini Climbing Sticks For Hunting
Novix Mini Climbing Sticks For Hunting. Photo from here

Specs

  • Price: 42.50$ per stick
  • Weight: 1.4 lbs per stick
  • Length: 17 inches
  • Weight rating 300 lbs

Pros

  • Pivoting V-Bracket
  • Double-step model available
  • 3-step stick model available

Cons

  • Short step to step length

Stacked Outdoors Climbing Sticks

Stacked Outdoors Climbing Sticks For Hunting
Stacked Outdoors Climbing Sticks For Hunting. Photo from here

Specs

  • Price: $37.50 per stick
  • Weighs 2.35 pounds
  • 21″ long
  • 17 ¼” step to step distance
  • Longer tree straps than our competitors
  • Tree straps include large hand loop for easier grip and tightening
  • Heavy-duty cam buckle and polyester strap
  • Constructed of a fiber-reinforced custom polymer
  • Weight limit 300 pounds
  • Meets industry standards recognized by TMA (Treestand Manufacturers Association)

Pros

  • Not super noisy
  • Best foot room of any stick in this review
  • Double step
  • Inexpensive

Cons

  • Bulky even when stacked
  • Heavy
  • Big
  • Some flex

API Outdoors Hunt’n Sticks (2-Step Mod)


API Outdoors Hunt'n Climbing Sticks
API Outdoors Hunt’n Climbing Sticks

Check Cabela's Price

Specs

  • Price: $33.33 per stick
  • Weight: 2.34 lbs
  • Length: 32 inches

Pros

  • Can be moded to a 20″ stick easily
  • Very inexpensive
  • Double Steps
  • Solid build

Cons

  • Still a bit heavy and bulky

XOP Locking 2-Steps Short Climbing Sticks

XOP Locking 2-Steps Short Climbing Sticks
XOP Locking 2-Steps Short Climbing Sticks. Photo from here

Specs

  • Price: $32.50 per stick
  • Weight: 2.53 lbs per stick
  • Length: 22” Length of each stick
  • Weight Rating: 350 pounds
  • Material- 6061 aluminum

Pros

  • Patented Lock tight stick stacking system so no strap is needed
  • Pivoting V-Bracket
  • One of the most inexpensive sticks in this review
  • Good amounts of foot room

Cons

  • Advertised as 2 lbs but are closer to 2.5 lbs per stick
  • Unnecessarily long, tall, bulky, and heavy
  • 22-inch stick, but only 15 inches step to step

HAWK Helium 20″ Climbing Sticks

Check Amazon's Price

Specs

  • Price: $28.00 per stick
  • Weight: 2.5 lbs per stick
  •  Construction – Aluminum
  • Stick Length – 20″
  • Step Width – 10″
  • Weight Rating – 300 lbs.

Pros

  • Least expensive climbing sticks in this review
  • Uses suction cups to stack sticks together for fast and quietly use

Cons

  • Suction cups can have issues
  • Foot room isn’t bad but isn’t great

Conclusion

Hopefully, this post has helped you determine which are the best climbing sticks for your hunting style. There are different sizes of most of these climbing sticks, so it is worth looking into if you see some sticks that intrigue you.

Find Me On:

Maine Moose Hunting Video | Gramp Shoots Big 52″ Rutting Maine Bull!

0

In this post, I share a Maine moose hunting video where my Grandfather (aka Gramp) shoots a big 52″ Maine bull moose.

Maine Moose Hunting Video

I filmed Gramp’s Maine moose hunting trip, which occurred at the end of September. The September season coincides with the rut here in Maine making it a fun hunt to draw a tag for. Drawing a Maine bull tag during the September season only happens a few times in a lifetime so we were excited to put a moose in front of him so he could get his first moose. I hope you enjoy this home-video-style moose hunt.


Maine Moose Hunting Trip Progression

The one-week hunting season started slow but as the week progressed we started seeing more rutting activity. Day 3 is when the magic happens. We weren’t looking for any particular caliber of bull, we just wanted to get a bull on the ground and we were fortunate enough for this big guy to come in halfway through the season. Lots of great memories, enjoy!

Calling In A Rutting Big Maine Bull To Close Range

We ended up calling in a big 52-inch bull to him at 40 yards. You could tell the bull was pissed by how he grunted and was raking trees as he slowly meandered in our direction. It was a lot of fun to call in such a large animal into such close range. There were 6 of us on this trip to the remote North Maine Woods.

Moose Hunting Catch and Cook

There is a catch and cook at the end of the video using the moose meat, it was nothing fancy we just threw some meat on the smoker to cook for several hours and it came out tasting great!

Conclusion

I’ve learned some tips and tricks from my years of moose hunting you may also enjoy this post: How To Hunt Maine Moose During The Rut – Tips For Finding Rutting Bulls

If you want to follow me along throughout my hunting seasons, the best way is by subscribing to my YouTube Channel.

Find Me On:

My Maine 2021 Hunting Season Plans, Trips, and Goals

0

If you’re wondering what my 2021 Maine hunting season will look like this year, this post is for you. In this post, I have linked a video where I talk about my 2021 Maine hunting season plans, trips, and goals.

I plan to go on a Maine moose hunt, Maine goose hunt, and then do a lot of deer hunting. I’m hoping to get it all on film. My video below goes into detail on my 2021 hunting season and what it will look like.

If you want to follow me along throughout my 2021 hunting season, the best way is by subscribing to my YouTube Channel.


Do Does Drag Their Feet In Snow? | Reading Deer Track Drag Marks

Since toe dragging can be used as an indicator to judge the maturity of a buck, hunters often mistakenly think that only bucks will drag their toes. But this is not true, all deer will drag their feet in the snow. That said, with experience toe drag marks in snow can be used to help determine the age class of a buck you are following if you also consider the other indicators of a big buck track.

Do Does Drag Their Feet In Snow?

Does and young deer drag their feet starting around 4-inches of snow. Smaller and younger deer tend to drag their feet in this amount of snow because it takes too much effort to lift their legs all the way up over the top of the snow for each step. For this reason, they will drag their feet a bit through the snow. As snow depth increases so will the drag marks.

Do Does Drag Their Feet In Snow? | Tracking Deer In Snow
These are doe tracks, notice the toes starting to drag in about 3-inches of snow.

Doe vs Buck Toe Dragging In Snow?

Does and young bucks usually will not usually be dragging their feet much in two inches of snow or less. If you see drag marks in a couple of inches of snow it could be an old buck as long as you’ve also taken into consideration the other factors that help to determine big buck tracks.

Old bucks will often but not always drag their feet in much less snow. These older bucks are stiff and lazy and will be conserving as much energy as possible. For this reason, they tend to drag their feet in less snow than other deer in the herd.

Do Bucks Drag Their Feet In Snow?

If you see a big buck track, but do not see drag marks, that is not necessarily an indicator that it is a small deer. It just means that deer may be sprier or likely a mature buck that is on the younger side, for example, a 3.5 or 4.5-year-old. Bucks that are getting old, 5.5+ years are more likely to drag their feet in shallower snow because they are starting to get past their prime.

Big buck track dragging toes in snow
These tracks are made by big bucks, but notice the one set of toe-dragging tracks on about 1-inch of snow. This is a sign of an older buck.

Conclusion

Next time you see drag marks in the snow, make sure you carefully analyze the track. Just because you see drag marks in the snow does not mean those tracks belong to a buck. Hopefully, this clears up any confusion about deer track drag marks in the snow and will bring you more success this hunting season.

Find Me On:

Taping The End Of A Gun Barrel Is Perfectly Safe – Here’s How & Why

0

Taping the end of your gun barrel is perfectly safe. The air from the explosion of the fired bullet is faster than the bullet itself and will blow a hole through the tape before your bullet reaches the end of the barrel.

Why Tape The End Of Your Gun Barrel?

The reason for taping the muzzle of a gun is to keep elements like mud, snow, rain, and ice from obstructing the end of your gun. It may seem counter-intuitive to then put something over the end of your gun barrel to prevent this, but there is a big difference between taping the end of your gun and getting your gun clogged with debris.

The air created from bullet has no problem putting a hole through thin tape. The reason for using tape is to keep elements out of the barrel that could clog your barrel making it so air cannot escape. This would blow up your barrel.

Taping Rifle Barrels

Although I always tape the ends of my rifle barrels when I’m tracking in snow, I rarely tape my rifle barrels when hunting from a treestand or when I’m hunting in less-severe weather conditions. There is much less of a reason to tape-up rifles in these conditions because rifle cartridges are weather-sealed so the bullets will not malfunction and it is unlikely that you will be clogging the end of the gun.

A Rifle Barrel With Tape

Taping Muzzleloader Barrels

Where tape really shines is when you’re using a muzzleloader. This is because muzzleloaders have powder that can be exposed if water gets into the barrel. If this happens it may cause the gun to misfire or not go off. I always keep my muzzleloader taped up throughout the muzzleloader season in all hunting conditions and situations.

Does Taping Your Gun Barrel Affect Accuracy?

Taping the end of your rifle barrel does not affect the accuracy. Since the tape will have a hole blown through it by the air, before the bullet reaches the end of your barrel, the bullet is not affected by the tape as it travels out of the barrel.

Best Tape To Use On The End Of Your Barrel

Electrical tape works great for taping the end of your rifle barrel. When it gets cold you might need to warm it up a bit in your hands before you apply it so it won’t be as brittle and so it can stretch. This allows it to get the right fit.

Some people have good luck with putting balloons over the end of their barrels, especially for muzzleloaders that have bigger barrels which allow for a tighter fit. Although I’ve never tried balloons I feel like the electrical tape is more durable in the brush. It also does not leave bad residue as other types of tape can.

If you’re going to put something on the end of your rifle barrel it must be easily blown through by the air that’s generated upon firing. If you put something that the air cannot push through then you have a safety hazard.

Is Taping The End Of A Gun Barrel Safe?

How To Tape Your Gun Barrel

Tape is plenty easy for the air to blow a hole through. I make an ‘X’ across the end of my barrel and then tape the loose ends around the barrel itself.

Putting A Piece Of Tape On Horizontally


Single Piece Of Tape Installed Horizontally


Another Piece Of Tape Added Vertically


Both Pieces Of Tape Installed Forming an X
Both Pieces Of Tape Installed Forming an “X”


Last Piece Of Tape Wrapped Around The Barrel To Hold The Tag Ends Down


Rifle With Electrical Tape Fully Installed At The End Of The Barrel

Conclusion

Taping the end of your gun barrel is perfectly safe, just make sure that the air created from the firing of a bullet can punch a hole through what you place on the end of your barrel. A gun will have no problem punching through a thin piece of tape or two.

Looking For More Information? Find Me On:

Big Buck Tracks – What Do They Look Like? (With Photos) | Buck Track ID

Big buck tracks have some key features that separate them from smaller deer tracks. However, if you’re not careful you might mistake a smaller deer for a big buck track. Here’s how you can be sure you’ve found a big buck track:

Key Identification Features Of Big Buck Tracks

Factors That Make Deer Tracks Look Bigger Than They Actually Are:

First, you’ll want to consider these factors because these can cause you to misjudge a track:

  • Ground Density (Soft vs Hard)

Soft ground can make tracks look bigger than they are because they sink in further. When a deer track sinks into the ground the toes can appear more splayed and the dew claws will appear more clearly. In these situations it is important to use the other indicators below to gauge if the track was indeed made by a big buck.

  • Behavior/Demeanor

Stride length of a deer track will vary depending on what the deer is doing. If he is well rested and actively seeking does then his stride will appear long, if that same deer is feeding his stride length will appear short. If possible it is always a good idea to follow the tracks to get an average stride length.

  • Running vs Walking Tracks

A running track can look like a big buck track but when in reality it may just be a doe or small buck. This is because when a deer is running there is more momentum when the track is made. This causes the toes to splay and the dew clays to show. It is important to establish whether the deer is walking or running when the track was made to get an accurate determination.

  • Temperature

In snow conditions, temperature plays a big role in the size of a track. For example, if the temperature is above freezing and the tracks are melting, the track will round-out making it looking bigger than it actually is.

Deer Track That Looks Bigger Than It Actually Is
This is a photo of a running deer track that looks big. You can tell a running track because the hooves will be close together (note the track just above my hand). The dew claws are pretty close together and the deer appears to have slipped forward slightly upon impact. This track could still be made by a big buck but more information is needed for an accurate determination.

After You’ve Considered The Above Factors, it’s time to consider the following:

  • Track Length

The length of the track is a great indicator of a big buck track simply because big buck tracks will be bigger than the rest of the deer herd. I’ve found tracks that are around 4.5-inches in length or bigger have potential to be a big buck track. However, there is more to consider than just track length.

  • Track Width

Track width is probably a better indicator than track length but they often go hand-in-hand. A track that is around 3-inches is width is usually made by a big buck. The wideness of a track is usually a direct correlation to weight.

  • Splayed Toes

When I am referring to splayed toes I am talking about the gap between the toes. Splayed toes also goes hand-in-hand with track width. The heavier a buck is the more is toes will spread out to hold the weight of the deer.

  • Dew Claws

The dew claws are the two digits that are located behind the toes of a deer. Both does and buck have dew claws but usually only big bucks will leave clear dewclaw marks. It is possible to see the dewclaws of does and smaller bucks in soft mud and snow. That said, the dewclaws will be much more pronounced and wider than those of smaller deer. On big bucks the dewclaws are also tilted at a 45-degree angle and setback from the toes further than lighter deer, which will be closer to the toes and more strait.

  • Swagger/Gait

Another indicator of weight is the swagger or weight of a deer because a wide swagger means a big chested buck, or a fatter buck. The toes of these bucks will be pointed outwards rather than strait ahead.

  • Stride Length

The stride of a deer is also an indicator of weight because it measures the overall length of the deer. A longer stride means a longer buck which means a heavier deer.

  • Toe Dragging

In snow, big bucks will drag their feet because they are heavier, older, stiffer, and are trying to conserve as much energy as possible when they walk. This is accomplished by not lifting their feet any higher than is absolutely necessary. All deer will drag their feet in deeper snow but big bucks will drag their feet in very little snow. Big bucks will also drag their feet more in deeper snow, leaving cross country ski-like trails in their wake.

What Do Big Buck Tracks Look Like?

Big Buck Tracks In Snow

My article below: How to Track Big Woods Bucks in Snow – The Art of Reading Deer Tracks goes into detail on how to differentiate big buck tracks from smaller deer tracks in snow. You can apply these same concepts to big buck tracks in mud, sand, wet ground…etc.

Big buck track dragging toes in snow
Toes dragging is a sign of an older buck. Can you see the toe dragger in this group of tracks? The other tracks are also made by big bucks but one set of tracks is likely made by an older buck.

Big Buck Tracks In Mud

Big Buck Tracks With Swagger
This buck has a wide swagger/gait, notice the toes pointing outwards – indicating a big chested buck.
Big Buck Track In Mud with splayed toes and dew claws
Big Buck Track In Mud with splayed toes and dew claws. This track is about 5″ long and 3″ wide. Notice how far the dewclaws are setback from the toes.

Big Buck Tracks In Sand

Big Buck Track On Sand
This is one of the biggest buck tracks I have ever seen. This buck is so heavy that his toes are bowing outwards. Also note his far setback dewclaws even on hard powerline sand.
Big Platter Foot Buck Tracks On Hard Sand
These are tracks made by the same buck. The tracks are so splayed they barely look like deer tracks. The fact that these tracks were made on hard powerline sand is even more impressive.

Big Buck Tracks On Wet Ground

Big Buck Track On Wet Ground
Big Buck Track On Wet Ground – You can see the dew claws by my thumb if you look closely.
Buck Track In Mud
This track isn’t as long as some of the other tracks but it is still wide and the dewclaws are showing. The ground conditions here are pretty hard under the immediate surface. This is the track of a big buck.

Big Buck Tracks vs Small Deer Tracks

Notice the difference between the bigger buck track and the smaller deer track in the photo below. There are no dew claws showing and almost no toe splaying on the track to the right.

Big Buck Track vs Doe Track Comparison
Big Buck Track vs Small Deer Track Comparison

Do All Big Bucks Have Big Tracks?

Not all big bucks have big tracks, but the vast majority do. A small track can sometimes be from a big buck with small feet, and a big track can be made by a smaller deer with big feet. This is where using other indicators is helpful for confirming if a track is made by a big buck.

Putting It All Together

A big buck may have some or all of the characteristics described above. Of course, the more indicators a buck is showing, the better chance you’re on a big buck’s track.  After you’ve seen a few of what I call the 10% tracks (meaning only 10% of deer have tracks that big) and applying these concepts in this post you’ll easily be able to identify big buck tracks and differentiate between big buck tracks and other deer tracks.

Looking For More Information Deer Hunting and Tracking? Find Me On: