April is probably my favorite time to scout for whitetails because the snow is close to gone, the weather is still cool, and the bugs aren’t bad, and I’m itching to get out there. This makes April one of the most productive months for scouting because you can get a lot of miles covered comfortably while seeing the deer sign from the previous year.
When To Scout Deer In April
Usually, I don’t start spring scouting for deer until the snow is just about gone. It is much easier to walk and takes less effort to scout when the snow is gone versus when there is a lot of now. Additionally, I like to see the ground under the snow so I can check for sign made during the prior season’s rut timeframe, mostly scrapes.
I don’t particularly care where deer are during April other than it’s interesting to know. This is because where deer are in the winter is rarely the same as where they will be during the summer and fall. The deer will shift from their wintering range as food sources change and cover increases with spring/ summer greenery.
How To Scout Deer In April
First, I find properties that I think are likely to hold bucks using Google Earth Pro or OnX WebMap Desktop application. They are both good options for e-scouting. To learn how I e-scout you can check out my article: Tips For Scouting Deer Using Google Earth. I also have a YouTube video where I describe some of this as well.
Rut Sign
Once I find 10 or so properties I like to go to the site and start scouting them, looking for the previous season’s rut sign, particularly big buck sign like scrapes and tall rubs. It may take going to a lot of properties before finding something exceptional. I would say 1 out of every 10 places I go to I find a great location, and maybe two more decent areas.
If you find a lot of rut sign then chances are it will be a good spot to hunt during the rut the following year. If the sign is made in an open area, you may need to find some thicker cover where the deer feel more comfortable moving during daylight hours. Often rut sign is made at night, so that is something important to be aware of.
Other Clues
I am still keeping my eye open for any other clues on the landscape. For example, oak trees, apple trees, other treestands, human pressure, big tracks, deer trails…etc. These other clues may help you determine what time of year is best to hunt these spots. A lot of these little clues can help you determine how deer move through an area throughout the seasons.
Bedding Areas
Once I’m in a spot with good sign I will start trying to figure out the bedding areas. This is largely influenced by the landscape. If it’s hilly, bucks are probably bedding on points of ridges. If its wet, bucks are probably bedding in the thick swamps.
I will use imagery to guess where deer might be bedding based on the sign I am seeing and go search those areas to see what I can dig up. If there is high-quality bedding in areas near the rut sign there’s a good chance those bedding areas will be used during the hunting season. I will prepare trees as close to the bedding areas as possible without feeling like I will spook deer out on my way in.
You’ve Found Great Rut Sign, Now What?
Prepare Your Trees
I used to bring everything I needed with more to prepare a tree for my tree saddle. Now, to save weight and energy I don’t bring much on my first scouting mission. If after scouting the property I determine a property is worthwhile to hunt I will take a GPS point on where I want to hunt.
If trees need to be prepped, which often they do, I will come back with more gear another day and get the location or locations prepped. I usually keep all of my gear in my vehicle when I’m scouting so sometimes I will go back to the vehicle if I’m not too far away and prep the tree that day.
If allowed I will fully prepare a tree for saddle hunting with screw-in-steps. I do this in the springtime because I want to make all my disturbances during this time when bucks have plenty of time to settle back down on the intrusion.
It also makes getting into the tree so much quieter during the hunting season. I do use mobile hunting equipment, I hunt from a tree saddle and use climbing sticks to get into trees most of the time. However, I do think that when you’re getting up into a tree with all that gear in a bedding area it can harm you.
For example, on morning hunts you have to get up much earlier because it takes time to get set up in a tree and if a deer walks under you while you’re still setting up it can spook the deer. Additionally, in the afternoons when deer are in their beds, they can hear you shuffling up a tree. Although they may not know exactly what you are they may just wait until quitting time before walking by you.
Enter your best spots into a spreadsheet so you can remember them all. I would also add a column of what wind directions you can take advantage of in certain spots. Additionally, I’d enter what time of year they would be good for and any other notes you might think are important for the site.
Rinse and Repeat
Once I’ve gone through the 10 or so areas that I wanted to scout I will get another list of 10 or so properties and repeat the process. I now have way more properties and areas to hunt than I know what to do with. But every year I found a few properties that are better than my best properties from previous years. Also, some properties aren’t as hot some years depending on changes in environmental facts, like food availability so it’s good to have a variety of properties to fall back on.
Additional Benefits of Scouting Deer In April
Look For Sheds
If you’re a shed hunter April is also a great time to be in the woods because there your odds of finding shed antlers is higher than any other time of the year. Also, the sheds haven’t been on the ground too long so they’ll still be in good shape.
You’re Also Scouting For Turkeys
I’ve found some of my best turkey hunting spots while scouting for deer in April. This is because when you’re looking for deer you find overlooked turkey honey-holes that you would have never found. At this time of year, fields are turning green and turkeys are using these fields to feed in and display. Mark these spots on your GPS because the turkeys will likely be in these areas during the beginning of the hunting season too. Since you’re scouting for deer and turkey at the same time, this time of year is a very efficient time to scout.
Final Thoughts
Depending on where you’re located the snow may melt slower or faster. The best time to scout is just when the snow has melted. For example, April is usually a good bet in my home state of Maine, especially in southern Maine. In northern Maine, you’re better off waiting until May generally because snow remains in the northern areas longer. But if you’re in Massachusetts or New York your best time to scout may be earlier, like March. So pay attention to snow depths in the areas you plan to scout.
This GumLeaf Field Welly review is based on the rigorous use of these boots in the last year while I used them for my job as a wetland surveyor and throughout the hunting season. Because I’m often swimming through thick brush and thorns my job was an excellent way to see what these boots are made of. Comfort, fit, sole quality, durability, longevity, and more topics are covered in this review.
The Field Welly Boots are not the only type of boot Gumleaf makes. They have more options to choose from on their website. I chose to buy the Field Welly’s because they are the lightest and simplest boots in the GumLeaf lineup. After using them almost daily over the last 365 days, here are my thoughts on these boots.
*I first wrote this article after wearing these boots for a few months and said I would update it once I had worn them for a full year. This post has now been updated to reflect my experience after using these boots for a full year.*
I bought these boots with my own money for this review and am not sponsored by GumLeaf.
This post contains Amazon and other affiliate links, which means I’ll receive a commission if you purchase through my link, at no extra cost to you. Of course, you are not obligated to use my links, but it does help fund these posts in hopes of bringing more value to you!
Why Are GumLeaf Boots Special?
The Gumleaf boots claim to fame is that they’re handcrafted boots made out of 85% real rubber, which is a high amount of rubber compared to other rubber boots on the market.
The benefit of having more rubber content in the boots is that they last longer before they start to crack. Almost all boots on the market use clay and plastic filler in their rubber which makes them crack.
Gumleaf states that these boots if cared for properly, should last 10+ years. It’s been stated that sole will often wear out before the rubber cracks, which is impressive, if true.
However, I’ve only owned these boots for a year so in my experience that remains to be seen, although I am hopeful it’s true. If this is true, then these boots, although expensive, will pay for themselves and cost less in the long run. You’ll make your money back because you’re not buying cheap rubber boots with low rubber content every year or two.
GumLeaf Field Welly Review – 1 Year Later
I did a video review on 8 different rubber boots, and the GumLeaf Field Welly’s were one of the boots. This video was also created after I used the boots for 1-year and summarizes what you’ll find in this article. The video is linked to the GumLeaf part of the video so you’ll jump right to it:
Field Welly Price
These boots are 285$, 2-3x more expensive than most rubber boots on the market that have more plastic/clay filler. However, because of the longer life of these boots, the idea is that they end up being cheaper in the long run. I bought the GumLeaf Field Welly boots because I was tired of my other boots cracking after 2-3 years but mostly because I wanted a tall, lightweight, completely rubber boot that had good traction and a good sole that would last.
I bought the size EU43, which is approximately a size 11 US. These boots are 17.5 inches tall. I believe there is a slight variation depending on your boot size.
Field Welly Weight
As I mentioned above, I own the EU43 size, which is approximately a size 11 US. At 17.5 inches tall they weigh 2 lbs 6.7 oz per boot, 1086g, or 2.39 lbs. This is competitively lightweight for a tall full-rubber boot.
GumLeaf Field Welly Review: These Boots Weigh 2 lbs 6.7 oz per boot
Comfort
I’ve tested many rubber boots and I can confidently say that the Field Wellys are one of the most comfortable if not the most comfortable rubber boots I’ve ever worn that are full-rubber and this tall. What makes them most comfortable is their outsole which we will dive into later in this post.
GumLeaf Field Wellys Reviewed Compared to Other Rubber Boots
Fit
When ordering your boot size it will be in EU instead of US measurements because these boots are made in the EU. The conversion from EU to US is close but isn’t perfect so be sure to get boots that fit perfectly.
The first pair I bought almost fit but I ended up returning them to get a smaller pair to see if they would be better or worse. They ended up being perfect. It is important to get a perfect fit with these boots so the heel isn’t loose in the heel pocket which would cause blistering.
Each EU size will move your big toe 1/3 to ½ an inch forward. It’s best to have your big toe just under that raised toe cap.
Sole Quality
After a year of wearing these boots, my favorite aspect is that they are fitted with a soft and flexible Vibram sole. This gives these boots great traction compared to my long-time favorite rubber boot, the LaCrosee Grange. Additionally, the flexible sole still allows you to feel the environment underfoot which is important for being stealthy when hunting.
GumLeaf Field Welly Sole Flexibility
At first, I was worried that the sole of this boot was going to be too tall causing a high center of gravity, which would lead to ankle rolling. I was happy to find out that I liked these soles much more than I thought. My foot sits far enough down where my foot’s center of gravity is not a problem and I do not get the feeling that I will roll my ankle when side-hilling.
GumLeaf Field Welly Review: Vibram Outsole
Durability
When you put your hands on these boots for the first time you can tell right away they are made out of a higher content of rubber. The rubber is more supple and soft compared to cheaper boots with higher plastic/clay content.
Over the last year conducting wetlands work for my job, I’ve been able to test these boots through the dense prickly bushes and shrubs.
I found that these boots overall did pretty well, but not perfect. Thorns are a weakness for the softer more supple rubber. Thorns do make their way into the rubber and even drag through the rubber, creating non-leaking cuts.
I also ended up with a hole in the back of my boot about halfway up that I will need to patch.
Non-Leaking Thorn Damage
There are some scuff marks from branches and bushes around the toe and ankle of the boot but I would expect this and is not concerning at this point. So it’s just the thorns that give these boots problems.
Field Welly Scuff Marks from Field Testing
Overall, these boots are fairly durable, more durable than neoprene for sure. I would have been more impressed if the thorns had not cut into the boots.
In my experience, low-content rubber boots are more slippery and harder to puncture because they are more plastic and thus more durable. Thorns also don’t drag through the plastic rubber as easily, they’ll just slide off or break off instead.
Longevity
The rubber is still holding up well and has not cracked, I expect the rubber to last a lot longer based on the claims. However, I’m not sure it will matter if the boots keep getting cut up because I will need to replace them anyway. At the rate of being cut, I can see them lasting 1 or 2 more years. I guess it depends on how much AquaSeal I’m willing to use before I want to replace them. I’m hoping to keep updating this post through the life of these boots so people know how long they will last.
Keep in mind that I am using these boots every day for work and I am walking 5-10 miles per day through some of the toughest bushes and thorns. I will say When I know I’ll be working in bad thorn country I have opted to wear my Grange’s to maintain the longevity of the Field Welly’s and reduce the patching.
That said, most people will not be abusing their boots to the same degree. If I get 2 years out of them I would expect someone who uses them just on weekends and who will generally be avoiding nasty thorn bushes will last them longer. Just be careful of barbed wire!
Care & Suggestions
After getting the cuts on my boots I wanted to take measures to prevent the cuts from getting worse and leaking so I reached out to the owner at GumLeaf for suggestions. He recommended using AqualSeal FD so I bought some. Instead of just covering the cuts, I covered the entire toe of the boot.
AquaSeal FD Application
For me, the toe area takes a lot of abuse so I figured I’d give it extra protection. After the application, I was impressed with how it came out. I would even recommend putting some on a brand-new pair for protection. It looks a little ugly but that doesn’t bother me.
I may even put some around the ankle where wear tends to also occur. After a full year, the AquaSeal is holding up pretty well, it is starting to chip a little bit around the edges but nothing to be concerned about. I may do another application before this wetland field season.
Granger’s Rubber Boot Care
It is also suggested by GumLeaf to treat the high-content rubber boots with rubber boot oil called Granger’s Rubber Boot Care a few times per year to maintain the health of the rubber. This prevents the rubber from drying out and cracking in the long run. I have been doing this periodically and so far the rubber looks good.
Review Conclusion
As of right now, the Gumleaf Field Wellys are my favorite rubber boots. For me, a tall lightweight rubber boot with good traction and good sole comfort is what I am looking for. The extra comfort and traction I get from these boots compared to the LaCrosse Grange’s that I normally wear is worth the decrease in durability and increase in price.
I’ve tried a lot of rubber boots as you’ll see in my blog post Best Rubber Hunting Boots or the YouTube video above. Nothing quite checks all of the boxes like the Field Wellys do.
I hope that with my addition of the AqualSeal FD, these boots will last me a minimum of 5 years. My reason for this is that my second favorite pair of rubber boots are the Lacrosse Grange boots. They last me 2 years on average for 100-120$. So, after 5 years the Field Wellys will have paid for themselves.
Even if they don’t last me as long and I end up paying a bit more I’m not going to be too disappointed. I’m willing to pay to replace these boots every two years just to have the comfort and traction of the Vibram sole.
Thanks for reading, hopefully, you found this GumLeaf Field Welly Review helpful.
Questions & Community
If you have more questions about GumLeaf boots or questions in general you can ask them on Facebook. You may also find answers to your questions on my YouTube Channel.
I live in rubber boots as a professional wetland scientist and outdoorsman living in the wet landscapes of Maine, thus having the best rubber boots is important. For this reason, I have put a lot of time into thinking about and trying different rubber boots. Over the years I’ve learned what makes rubber boots good and what makes rubber boots, well…not so good.
I also have first-hand experience seeing how different brands of rubber boots (myself and co-workers’) have held up with rugged use over the years. Collectively, between the rubber boots I’ve tried for work and hunting (Lacrosse Footwear, Le Chameau, GumLeaf, Muck Boots, Bogs) and observing coworkers’ boot performance (Cabela’s, Dryshod, XtraTuf), I’ve been able to identify the rubber boots perform the best over time and the reasons why they perform the best.
In this post, I share my top tips and suggestions when buying rubber boots, I’ve also included a spreadsheet at the end of the article with the height and weight of all the boots (that I personally weighed and measured).
Rubber vs Neoprene Boots, Which Are Better?
From my experience, rubber boots are superior to neoprene boots for most hunting applications.
Rubber Benefits
Less Bulky
Weight to Durability Ratio
Better Durability vs Thorns & Dense Shrubs
Less Patching Required
Neoprene Benefits
Warmer (Better Calf Insulation)
Comfort (sometimes)
Lightweight
Best High Rubber Content Boots
Most rubber boots on the market today are made out of a mixture of rubber and clay filler. The clay filler that is added to these boots is what makes all of these boots crack over time. Some boots crack faster than others depending on the % of rubber it has.
A higher rubber content means that boots do not crack as easily and will last much longer than the average rubber boot. These high rubber content boots are mostly made in Europe and are shipped to the U.S. These are some of the best rubber boots you can buy.
High rubber content rubber boots are likely the best way to save the most money on rubber boots in the long run because should last at least 2x-3x longer because shouldn’t crack.
Gumleaf Field Wellys
The GumLeaf Field Wellys are handcrafted boots in Europe and are made of 85% real rubber which prevents cracking. I’ve used these boots for over a year now and the rubber is holding up well against cracking. However, the softer and more supple rubber is less durable than boots with higher clay/plastic content. They are still more durable than neoprene though.
That said, they are one of the most comfortable full-rubber boots that I’ve worn, their Vibram sole is very cushioning for long days on your feet. For me, the extra comfort and traction are worth the reduction in durability.
They are also surprisingly lightweight for a rubber 17.5-inch tall boot, weighing in at 1086g or 2.39 lbs per boot.
These rubber boots are another high rubber content boot that is handcrafted in Europe. It takes 9 months of training before a professional boot maker can craft these boots. Only the best rubber and materials are used in these boots so that they will last. For me, the biggest downside was the weight. They are 18-inches tall and weigh in at 1462g or 3.22 lbs per boot. It was hard to justify the weight and price even though they were higher-quality materials. That said, a lot of people like them.
The boots below have none or very little neoprene in them for those who like boots that are almost entirely made of rubber. I especially like these all-rubber boots for upland bird hunting because they are more durable than neoprene and can better withstand thorns.
Lacrosse Grange Boots
It’s tough to beat the Lacrosse Grange boots because no other companies have been able to develop an 18-inch tall boot this thin while allowing the boot to still be very durable. They’re also so lightweight (1048g or 2.31 lbs per boot) that you barely even notice them. Another huge benefit of this boot is that they have an ankle-tight fit so that your heel does not slip up and down in the heel pocket (which causes blisters in other boots).
Additionally, they are very low-profile, so it’s much harder to roll your ankle in these rubber boots than in those with taller traction. Because the traction is slim you can feel the ground underneath your foot when hunting. This allows you to walk much quieter in the woods because you can feel the sticks underneath your feet.
I hunt everything with these boots from deer, turkey, and waterfowl, to upland birds. They are versatile boots for a budget-friendly price.
My go-to Rubber Hunting Boot. The Lacrosse Grange rubber boots are the best for lots of walking and being mobile.
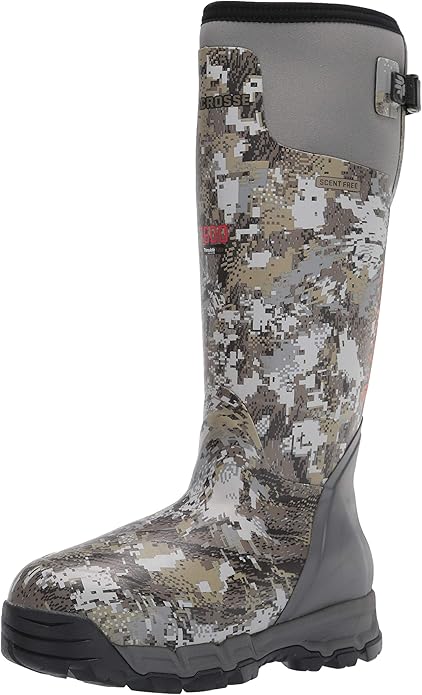
Lacrosse Alphaburly Pro
The Alphaburly Pros are Lacrosse’s top-tier rubber hunting boots and are expensive. They have great traction and offer 3 levels of insulation that you can buy so you can stay warm no matter the weather or temperature. The sole is a bit stiff and tall making it not the most comfortable for some people (I don’t particularly like the feel of them). People with larger legs seem to like this boot more. They’re also relatively heavy boots, even the uninsulated boots are heavy (1290g or 2.84 lbs per boot). These aren’t the boots for me because of their weight and stiffness but I can see why people with larger legs might find them comfortable.
Xtratuf is known for its boat shoes and boots. Recently, they’ve jumped into boots that are designed for land terrain. Their Altitude Legacy is their first boot model with this purpose in mind. They are a lot like the Grange boots but have better traction and are better suited for hunters with larger legs/calves. Just be aware that these boots are only 15 inches tall and are slightly heavier than the Grange. The rubber is nice and flexible adding to comfort. The rubber is thin and floppy though and not sure if it will be as durable as the Grange boots. The traction is also a little tall which can make stabilization when side-hilling a little trickier.
Another excellent rubber hunting boot is the Lacrosse Burly boot with Air Grips. These boots are foam-insulated and provide a little more warmth at the cost of weight than the Grange boots. These boots weigh in at 1197g or 2.64 lbs per boot. I bought these boots to replace the Grange and Field Welly’s once temperatures start to dip to the point where those boots aren’t warm enough to use.
They also make great winter hunting boots because the air grips offer good snow traction. These boots have many similar characteristics to the Grange boots such as durability, tight ankle fit, 18 inches tall, low profile, and you can still feel the environment underfoot with the air grips quite well.
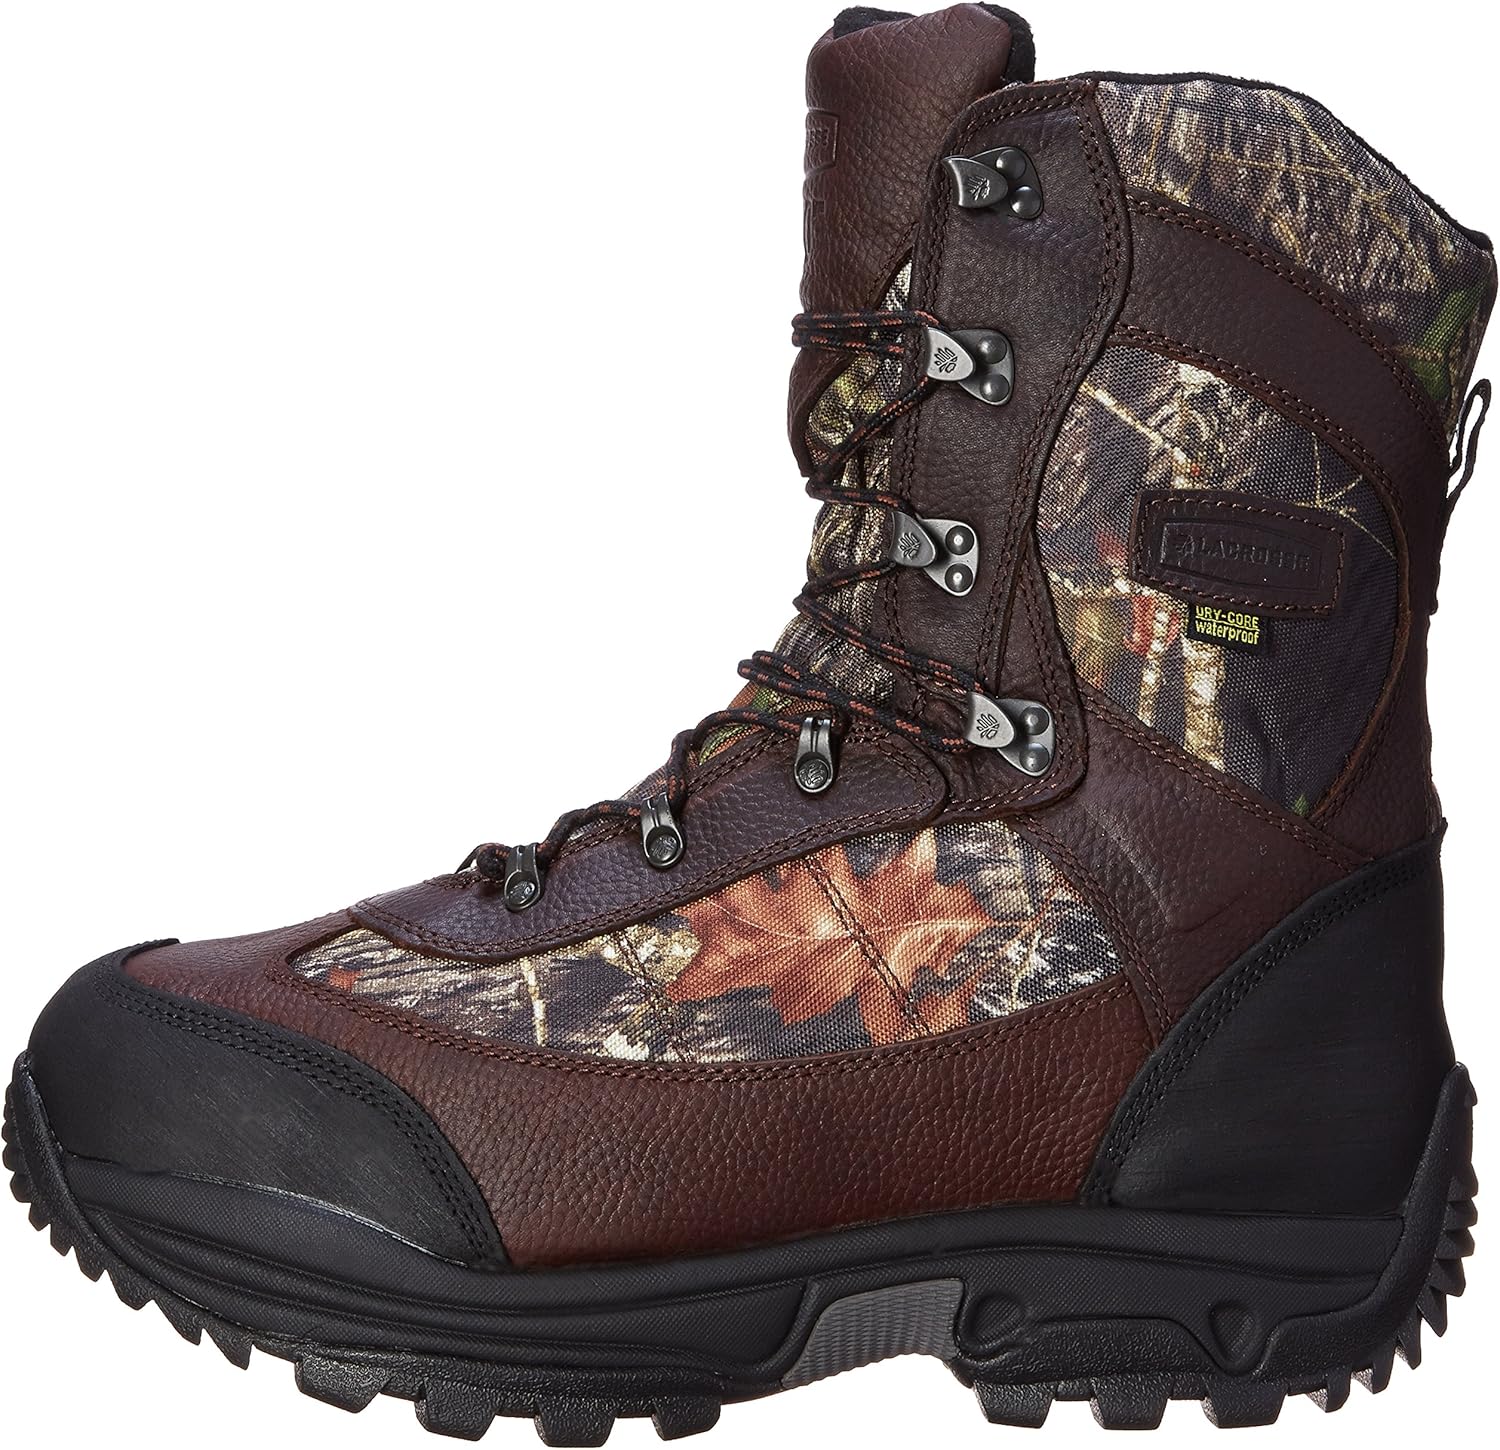
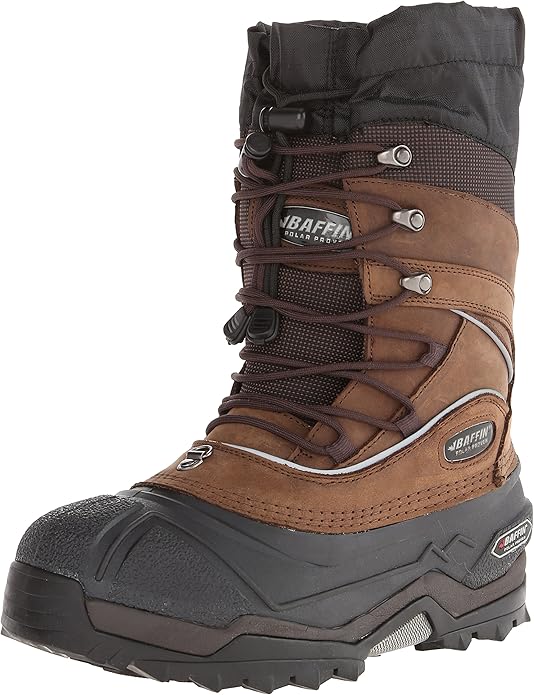
Baffin Titan Rubber Pac Boots For The Coldest Weather
These Baffin Titan rubber boots are comfort-rated to -148ºF (-100ºC). They’re one of the warmest insulated hunting boots out there. They are perfect for hardcore hunters who hunt stationary for long periods (like in a treestand) in the cold winter weather months. Also, they are waterproof, breathable, scent-free, and have removable liners for extra insulation and warmth. Since they’re waterproof you can be sure your feet stay dry, which is essential for hunting in cold weather. Make sure to size up when you buy these. I am a size 11 and I had to buy size 14 boots for them to fit somewhat well.
They are big, heavy, and clumsy. They weigh in at 1873g or 4.13 lbs per boot making them the heaviest boot in this review, which makes sense because they are ultra insulated. These boots aren’t for walking around very far, they are for walking to your treestand and sitting in cold weather.
Neoprene just does not last as long as a full rubber boot if you walk in the thick brushy country and through thorn bushes. Neoprene rubber boots are great if you can avoid these areas. They are often lightweight and comfortable if you buy a well-made pair. Here are a few of the best neoprene rubber boots:
Bogs Arcata Boots
Bogs Arcata rubber boots are the most comfortable rubber boots I have ever worn, they feel like socks. Their neoprene and 15-inch design makes them lightweight and have excellent traction for such a low-profile rubber boot. Because they are low-profile you don’t feel like you’re going to roll your ankle. They’re lined with 5mm of neoprene which makes them great for colder weather, they’re comfort rated down to -40ºF. This means you should be able to wear these while walking down to that temp. That said, I don’t know how much I trust this number they feel too thin at the rubber for that rating. Based on my experience they would be fine walking down to temps closer to 0º to -10º.
Muck Boots are decent rubber boots and aren’t that expensive. If you prefer neoprene, these Fieldblazers are a pretty good choice although I prefer the Bog Arcata boots over them. The rubber on the Fieldblazers is stiff and thick, making it uncomfortable and not the easiest to feel the environment underfoot. Their traction is also not as good as the Arcata’s and is only slightly better than the LaCrosse Grange boots.
The Heights and Weights of the Rubber Boots in this Review
Tips When Buying Rubber Hunting Boots
Are Cheap Rubber Boots Worth The Money?
I have never seen a pair of rubber boots under 100$ last long. They are usually quick to crack because to keep costs low the rubber is mixed with higher clay content. Since they are made with a higher clay content they are also less flexible, making them less comfortable, and making you more prone to blistering.
If you’re going to buy a cheap pair of rubber boots I would only expect them to last 1 year, and they won’t be as comfortable as the more expensive brands.
Tread Height and Rolling Ankles
It’s like comparing a Lamborghini vs a lifted truck. Which do you think is more susceptible to rolling? The Lamborghini is less likely to roll because it has a lower center of gravity. The same can be said for rubber boots, the lower your footbed is, the more stable your ankles will be.
If you buy rubber boots with tall treads/base you’re going to roll your ankles a lot more. A lower-profile rubber boot is a great way to go, especially for walking. This is why the Lacrosse Granges are excellent boots for walking.
If you’re not going to be walking as much a taller tread, although it may cause ankle rolling, likely will provide more insulation from the ground and you will likely have better traction because the tread can be deeper.
Keep Your Heel in the Heel Pocket to Avoid Blisters
If the rubber of a boot is flexible at the flex point just behind the toes, then it helps to keep your heel down in the heel pocket. If you have a stiff rubber boot it doesn’t flex easily at the flex point just behind the toes, when you roll your foot forward when walking, the stiff rubber at the flex point will spring the heel up and out of the heel pocket.
For this reason, I find the most comfortable rubber boots the boots that have softer more malleable rubber. This helps reduce heel blisters.
Snug Lightweight Boots to Avoid Blisters
Lightweight boots are also important for reducing heel blisters. If you have a bottom very bottom-heavy boot it’s going to pull the boot off your foot every time you roll your foot forward, especially if it’s not a snug fit. With a lightweight rubber boot, there is less weight to pull your heel out of the heel pocket, and with a snug fit, your heels will remain blister-free.
What Does Boot Comfort Rating Mean?
A comfort rating for boots will tell you the effective temperature that a pair of boots are designed to keep you comfortable with light usage.
This is important to know because there is a big difference between being stationary in a treestand and light usage.
For this reason, you will want a pair of hunting boots that are comfort rated much warmer than the temperatures you plan to hunt to ensure your feet stay warm in cold weather.
Repurpose Old Rubber Boots Into Rubber Slippers
When it is time to replace my boots sometimes I will repurpose them by making rubber slippers out of them. They’re great for keeping your feet dry on wet or snowy days.
Repurposing Old Rubber Boots to Make Waterproof Rubber Slippers
I define high-quality bedding areas as an area that provides excellent protection in the form of security from hunters and predators, so much so, that mature bucks feel safe and relaxed. However, in this definition, I include proximity and availability to does, food sources, and water. The more readily available these are, the higher the quality of the bedding area.
I’ve written many articles mentioning high-quality deer bedding areas without actually writing an article on the subject itself. That’s where this article comes in. In this article, we’ll be diving into just what high-quality bedding areas are and how you can use them to your advantage as a hunter.
Understanding what makes a deer bedding area high-quality isn’t complicated, but there are some key concepts to understand to put the deer bedding puzzle together. In my experience, I’ve found that five main factors influence where deer like to sleep:
Habitat Availability
Habitat Type
Hunting Pressure
Bucks vs Does
Time of Year
High-Quality Bedding Areas Components
Deer are looking to get the most bang for their buck (pun intended) when it comes to habitat availability, they don’t want to expend unnecessary energy. High-quality habitat will provide deer with everything they need to survive and more. This includes food, water, and shelter. This is convenient for deer because these three usually go hand-in-hand. Deer will be more likely to bed in or near areas with abundant high-quality habitat.
Deer Bedding and Food Sources
Food can be found in many forms, but having a high stem count, in other words, thick cover with vegetation at deer height provides deer with an abundance of food. Both bucks and does will bed near high-quality food sources, which makes food an important habitat component for determining where deer will bed during the day. They will bed slightly differently though, more on this later.
Deer Bedding and Water Sources
Although food is an important factor when narrowing down where deer bed, you will also want to take water into the equation. An area could have all of the food in the world, but if there is not a decent water source nearby then deer won’t be bedding close by. If an area has food and water then that’s a good start. You may find does and fawns inhabiting areas with just these two ingredients. Bucks are pickier, as we’ll get into later in this post.
Deer Like To Bed Down Within High-Quality Shelter
The third and most important tier that will help you determine where deer bed is shelter. Deer gravitate to thick areas to bed down during the day. This is because thick cover provides deer with the most security from hunters and other predators. It also reduces their stress levels.
They do not come in contact with people as often and feel safe because they are hidden. For this reason, habitats that have dense cover, plenty of nutritional food, and water nearby will likely have deer bedding in them or near them. Having dense cover is especially important for bucks because they prefer to bed in more concealed and isolated areas than does and fawns.
Trail Cam Photo Showing a Big Buck Bedded Down in a High-Quality Bedding Area
Deer Bed Down In These Habitats
Depending on the characteristics of the landscape, deer may lean towards either wetlands or uplands for bedding.
Deer Bed Down In Swamps
Swamps are a classic deer bedding area because the vegetation density in swamps/wetlands is usually much higher. This is also where more nutritionally dense food is found because water can break down and transport the nutrients more effectively. Because the vegetation is thick and offers high nutrition, deer will often seek the security cover of swamps. Deer will often spend most of their day bedded on high points or dry hummocks in swamps and then come out of the swamp at night to find better nearby forage.
A classic buck bedding area. Bucks will often bed at the edges of islands or on hummocks in cattail swamps like this.
A buck bed on a hummock in a swamp
Deer Bed on Mountains and Points of Ridges
In areas where wetlands are less prevalent, deer will bed in upland areas. These upland areas usually consist of mountain knobs/ridges. Deer will bed in these areas but will still make sure to keep the odds in their favor when they’re bedded down. Knobs on mountains or points of ridges will give deer a visual advantage. Also, deer will use the wind and thermals to their advantage more in these settings because they don’t have as much cover as they do in swamps. For this reason, deer will change where they sleep depending on which way the wind is blowing.
Big Buck Bed in Snow on a Ridge
Deer Bedding Habitat Can Be Found Using Google Earth Pro
You can often predict with great accuracy where deer will be bedding using Google Earth Pro Imagery. This is done by using aerial imagery, topography, and vegetation color. For more on how to do this, I’ve written an article and made a YouTube Video.
Hunting Pressure Will Change Deer Bedding Behavior
Urban & Suburban Deer Bedding
Hunting pressure has a huge effect on where deer bed. If hunting pressure is high deer will leave and bed in new areas that have less pressure. They’re not going to stick around in a high-stress environment. When hunting pressure is high deer may bed in very thick cover, so thick that 90% of humans would never think about going in there. Other times they may wander into a wildlife preserve where they’ve found they are safe. They may also hide in overlooked areas, like the thick cover right next to a parking lot. If you want to learn more about how deer react to hunting pressure, you’ll like this article I wrote about how to find pressured bucks.
Where Deer Bed In Remote Areas
There is a difference between where deer bed in remote forest settings versus in more developed areas. In the big woods, deer don’t go back to the same general area every day to bed down. They roam more and since they have a lot of habitat at their disposal, they will often bed down anywhere they feel like. They will still keep the odds in their favor when they do bed down because they are used to other predators, like coyotes, but they don’t have their go-to bedding areas like they do a lot of times in more urban environments.
Buck vs Doe Bedding Differences
Another key aspect of bedding areas is understanding where each gender (buck vs doe) will bed based on what supports them best energetically. For example:
Does Bed For Food
Does and fawns have no problem bedding in more open areas as long as there is high-quality food nearby. Does will bed as close to high-quality food as they can without completely exposing themselves. This might be right on the edges of thickets that border crop fields or lush field greenery.
Generally, crop fields are going to produce the lushest and most nutrient-dense foods. Does are often found in these areas, and is the reason why most farms have deer issues with deer.
Does need a lot of food because they’re either pregnant and need a lot of healthy nutrients for their soon-to-be fawns or their fawns are born and they need to provide food. This is why does are often found closer to food, they have adapted to risk some security for the reward of good food.
Does and fawns also have a different defense strategy. Since there will be a doe and a fawn or two, they have more eyes and noses to detect danger. You’ll often see the bed impressions they’ve left close together but all looking in a different direction.
Bucks Bed For Security
Bucks are less worried about food. They prioritize security over food. Of course, they still eat their share but they are only eating for one. Because of this bucks are often found farther back into the “thick stuff” or at least in a more secluded/overlooked area. They don’t want to be disturbed at all during the day. Swamps, points of ridges, or even knobs on top of mountains. Bucks will often be the last to the food sources because they feel safest with the cover of darkness.
I have found bucks naturally gravitate high-quality bedding areas. Here is one example of a confirmed bedding area based on a hunch from aerial imagery.
Time Of Year And Deer Bedding Areas
The time of year also plays a big role in where deer will be bedded. As the season changes, deer change their bedding locations.
Food Sources
Bedding areas change throughout the year because of changes in food sources. As the months progress, some food sources die and others start to produce. To reduce the distance traveled, and to position themselves in areas with better food, deer will shift where they bed.
Winter Bedding Areas
Also, as temperatures drop deer need to start thinking about new places to bed to maximize their energy reserves for winter. For this reason, deer will often move in the colder months to bedding areas with more thermal cover, like evergreen trees.
Deer Wintering Areas
Deer wintering areas are a great example of the shift in deer bedding as the season progresses. In the cold northern parts of North America deer will actually migrate. Once snow-depth starts to make them uneasy, they will head straight for a Deer Wintering Area. These deer-wintering areas will be used year after year if food is abundant enough.
High-Quality Bedding Area Summary
As you can probably tell, the link between food, water, security, and time of year are the key factors that determine where deer sleep. Hopefully, you’ve been able to glean some new information about deer bedding. Below is a bullet summary:
Consistent shed hunting success in Maine has less to do with luck than you might think. These 30 shed hunting tips will enable you to get results by putting the odds in your favor in Maine. It might seem like shed hunting is like searching for needles in a haystack. However, some steps can be taken to increase success and make shed hunting a whole lot more enjoyable.
1. When Do Deer Shed Their Antlers In Maine?
One of the most important Maine shed hunting tips is to make sure you are searching at the right time. You can spend all the time in the world shed hunting, but if you’re searching at the wrong time your success will be reduced. Many factors influence when bucks will drop their antlers and it varies slightly from year to year. Here’s an interesting article about why bucks cast their antlers early by the Quality Deer Management Association: Causes of Early Antler Casting.
In Maine, bucks start dropping antlers around mid-December with most antlers off by mid-March. It makes the most sense to start shed hunting when the majority of antlers are off, and not before. Waiting until most antlers are off will make sure you have the best chances for success.
A few of the nicer sheds I’ve found in Maine.
2. Don’t Push The Deer Too Early Or Too Often
Pushing deer off a property by looking for sheds too early, or by checking trail cameras too often will likely push bucks off a property. Before you shed hunt an area make sure you wait long enough into the season so that the majority of bucks have lost their antlers. You don’t want to be spooking bucks off a property if they’re still carrying antlers, this will make finding sheds more difficult.
Deer in the winter are in pretty consistent patterns. Following established trails is simply more efficient than creating new paths through the snow. It allows deer to move more quickly and with less effort, which is crucial for conserving energy during the harsh winter months when resources are limited. If you pressure the deer too soon they may change their patterns. By not pressuring the deer you have a better chance of finding sheds on the main trail.
3. Use Trail Cameras
Trail cameras are a great way to determine when bucks in an area are losing their antlers. To do this effectively, leave your cameras out after hunting season is over.
Being careful not to spook deer out of the area, check your trail cameras a couple of times between late January and mid-March. Once you start noticing most bucks have lost their antlers you can determine when to start shed hunting. If you’re after a specific buck’s sheds, trail cameras are a great way to determine when that buck has shed his antlers.
Trail cameras are a great way to determine when bucks in your area are losing their antlers.
4. Work hard But More Importantly Work Smart
This is one of the best shed hunting tips in my opinion. A lot of time and hard work can be spent shed hunting with little to no success. To have the most success, it is important to shed hunt smart. This means maximizing the amount of time you are in high percentage areas and spending the least amount of time as possible in low percentage areas.
Shed hunting is very much a numbers game. The more time you put yourself in the high percentage areas the better your chances will be of finding sheds. These areas include food sources, late-season bedding, and travel corridors between these two areas. Late-season food sources and bedding areas are explained in greater detail below.
Also, it’s important to know if bucks are wintering in a particular area. Don’t waste your time in areas where bucks are not because the odds of you finding sheds are greatly reduced. Trail cameras are a great way to know if bucks are using an area and thus worthwhile to scout an area.
5. Find The Late-Season Food
Cedar is a great late-season food source in Maine. Stands of cedar can be great places to find sheds.
Focus on where deer are spending the most time. One area deer spend a disproportionate amount of time in is feeding areas. The late season is energetically expensive for whitetails, especially in Maine because of the harsh winters. This means deer will be feeding very heavily during this time of year. Finding food sources that are being used during the late season will greatly increase your odds of finding sheds.
You might find some great sign right behind people’s houses. This is because deer will eat planted bushes behind people’s houses and sometimes people feed deer behind their houses too which are hotspots and using have heavily traveled trails from their bedding areas.
6. Find The Late-Season Bedding
Bedding areas are a great way to find sheds. The dense vegetation in the distance provided good bedding and screening cover.
Late-season bedding areas are another great place to find sheds. In an attempt to reduce energy expenditure at this time bucks are looking to keep as warm as possible. Bedding areas that provide good thermal cover are great places for bucks to bed during the frigid winter months. By focusing your efforts in late-season bedding areas your odds of finding a shed will be much higher than aimlessly walking through the woods hoping to stumble upon a shed with no plan.
7. Travel Corridors
Highly traveled corridors are also great places to find sheds. You can see old and new tracks in this travel corridor.
Areas between bedding and feeding areas also provide the potential to hold sheds. Once you have determined the bedding and feeding areas search the area in-between where deer are traveling. There is a good chance a buck could have knocked an antler off in his travels between the two destination areas. Fence lines, streams, or any area where bucks have to jump within travel corridors offer great opportunities for finding sheds. The force of jumping increases the likelihood that an antler may be knocked off.
8. Slow Down In Prime Areas
When you get into high-quality areas (bedding, feeding, travel corridors) make sure you take your time and slow down. It is really easy to miss sheds. These areas provide your best chance of finding them, so go slow and double-check every stick to make sure it is not a piece of an antler.
Speeding up in areas that aren’t high odds and slowing down in prime areas is a good way to maximize efficiency.
9. Virtual Scouting/E-Scouting
Virtual scouting is a crucial step for finding more sheds, and one of the more important shed hunting tips. Using aerial imagery you can often determine bedding areas, feeding areas, and travel corridors. You can do this without even getting off the couch!
Of course, e-scouting will only get you so far but it is a good preliminary step to put the odds in your favor when shed hunting on new properties.
By making a list of areas that look good to you based on the tools you can use on Google Earth you keep yourself in higher quality areas. Virtual scouting will save you a lot of time and energy. Google Earth and Google Maps are my favorite tools for virtual scouting. To learn more about scouting deer using these platforms check out my post: 15 Best Tips for Scouting Deer Using Google Earth.
10. Go To Multiple Properties
After you have thoroughly scouted the high percentage areas of a property don’t waste your time scouting the low percentage areas afterward. Once you have scouted the high-quality areas of a property, leave and scout a new property. This will maximize the time you spend in high percentage areas, which will overall increase shed hunting success.
11. Track Your Path Using A GPS
I like to use a GPS App on my phone to track my path. Being able to see where you have gone will allow you to ensure that you are not looking into areas you have already covered and will show you areas you may have missed. A phone GPS will make you more efficient at searching properties.
12. GPS Mark Locations Of Sheds
Deer, in general, are habitual creatures and tend to use the same areas at the same time each year. For this reason, places where you’ve found sheds in the past are likely to have sheds in the future. By marking the locations of the sheds you will start to develop a database of areas where you have found sheds. This information can be used to improve future shed hunting excursions.
Big Maine Buck Shed Found During Shed Hunting
13. Look For A Second Antler
Often when bucks lose one antler the other is not far away. Bucks don’t like the imbalance of having one antler, it makes their head feel awkward. For this reason, they will try to knock the other anter off. Spend time looking in the areas where you found the first shed. There is a good chance you will find a matching set! Using a GPS to mark the first antler and then searching a grid around that first antler could be beneficial.
14. Bring Surveyor Flagging
Surveyor flagging is a very bright-colored ribbon. This ribbon can be used to flag trees over sheds that you have found. The reason to flag sheds is because, as mentioned above, many times bucks lose their second antler not far from their first. For this reason, it can be helpful to place bright-colored flagging over the area where you found the first shed.
I like to bring surveyor flagging with me when I’m shed hunting. This way I can mark the locations of sheds that I’ve found and can refer back to the area if needed.
When searching for the second shed it is easy to forget the exact location where you found the first. Flagging will make it so you can easily go back and refer exactly where you found the first shed. Being able to refer back to where you found the first shed will allow you to make another game plan for searching the area for the second shed.
15. Stop Scouting, Start Shed Hunting
Out of all the shed-hunting tips, this is probably the one I need to work on most. When shed hunting it is best to forget about scouting. This is still really difficult for me to do. I’ve trained myself to look at tracks and rubs when I’m in the woods during hunting and scouting season.
If your sole reason for shed hunting is to find sheds, scouting will be counterproductive. Shed hunting requires your full attention. By keeping your eyes and mind focused on sheds you will have the most success.
16. Think Small Win Big
A similarity between tracking deer and shed hunting is that when you are tracking you rarely see the entire deer. More often than not it’s an ear twitch or a tail wag that gives the deer away. The same can be said for shed hunting. Instead of looking for an entire shed, look for parts of sheds. Often the entire shed won’t be visible, it could be buried under mud or snow with just the tines sticking up.
17. Shed Hunting With A Dog
Dogs are very effective for finding sheds. Because dogs use scent as their primary tool for finding sheds they can cover ground faster and more effectively. They also can find sheds in the ‘thick stuff’ which is useful for finding those sheds back in the dense bedding areas. If you’re curious about how to use dogs for shed hunting check out; The Basics of Shed Dog Training and The Best Shed Hunting Dog Breeds.
Even if your dog isn’t trained to find sheds, taking your dog along with you is a great way to have more fun when shed hunting.
18. South Side Of Ridges
The south sides of the ridges get the most sunlight. For this reason, bucks like to bask in the rays during the cold months to warm up. Bucks also like to bed under small evergreen trees for thermal protection on these south-facing ridges for additional warmth and protection. Make sure to check under these evergreen trees on the south sides of the ridges, you might be in for a welcome surprise. Additionally, south-facing ridges are the first to melt. Less snow means sheds will be less buried offering better opportunity.
19. Bring Binoculars
Binoculars are a useful tool for scanning fields and for confirming a visual on a potential shed in the distance. This saves you from walking up to every bleached stick or white rock. Binoculars are also nice just to have to observe deer if you bump any, and for observing wildlife in general.
20. Bring Safety Glasses & Sunglasses
The glare from snow during sunny late winter or spring days can make finding sheds difficult and can give you a headache. Safety sunglasses reduce glare, making shed hunting easier and more enjoyable. I prefer polarized sunglasses to help cut down on the glare.
Additionally, bucks often drop their sheds in thick bedding areas such as swamps. Safety glasses/sunglasses will allow you to plow through thick brush without taking a stick to the eye. You can get them pretty cheap on Amazon. You can get a pair of polarized glasses for around 15-25$.
21. Make A Day Out Of Shed Hunting
Bringing everything you need to make a day out of shed hunting is a great way to improve your odds of finding sheds. Bringing food, water, or anything else you might enjoy will ensure you are as comfortable as possible. Hunger is very distracting and often causes you to head home early. Having snacks out in the woods will satisfy your hunger and allow you to spend more time in the woods. The more time you can spend in the woods, the better your chances are of finding sheds.
22. Mental Focus
Having the right state of mind plays a big role in shed hunting success. The minute you stop concentrating on what you’re looking for is the moment a shed slips by unnoticed!
23. Discouragement Prevention
It’s easy to get discouraged after long days without finding any sheds. Shed hunting isn’t easy. It takes a lot of walking in the right places to find them. Some great ways to keep from getting discouraged is to bring friends or bring a dog. Having company makes shed hunting more enjoyable. Also, you can add a competition component to it, which turns shed hunting into a game that boosts spirits and helps to prevent discouragement.
24. Make Sure Bucks Are In The Area
Some areas are hunted more than others during the actual hunting season. Bucks in heavily hunted areas just aren’t as numerous as they are in lower hunted areas. Also, a lower percentage of bucks can make it to an older age class. A lower age class means sheds will be smaller than unpressured areas where bucks can grow to maturity.
Lower buck densities combined with smaller sheds make finding sheds in heavily hunted areas more difficult. Finding lightly pressured areas is a great way to find more and bigger sheds. Areas that do not allow hunting or have limited hunting seasons could be a good bet for finding more sheds.
Maine Shed Hunting Tips: Heavily hunted areas will result in a lower probability of finding sheds than areas that have low hunting pressure.
25. Set Realistic Expectations Depending On Where You Live
Everyone wants to find those giant sheds. But you have to be realistic depending on where you live. Not every area will be able to produce Iowa-sized racks. Make sure you set your expectations based on what your area holds for bucks to avoid disappointment. By setting realistic expectations you will be able to accurately visualize what size sheds to search for when shed hunting.
26. Dress Accordingly
Having the proper attire when shed hunting helps to keep you in the woods longer. Shed hunting requires a lot of walking, and walking at variable paces. For this reason, you want to wear clothing that will keep you warm when you’re walking slowly in high opportune areas.
That being said, you don’t want to dress so warm that when you have to pick up the pace you overheat and sweat. Getting overheated and sweating will drain your energy and make you want to head back to the truck. Additionally, if you start sweating you’ll become cold when you have to slow down in the high opportune areas.
I am a big advocate for wool clothes for shed hunting. Wool clothes keep you warm when wet, they are water-resistant, fast-drying, warm, and quiet. You may want to bring extra gloves if it’s rainy or there is snow melting off trees. Having an extra pair of gloves is nice after wearing wet gloves for a while.
27. Bring A Backpack
Bringing a backpack is very helpful. You’ll want a backpack to put your lunch in and any other useful things you might want to bring. Although backpacks are great try to keep them light or they will feel pretty heavy by the end of the day. Some things to throw in your backpack could be a compass, GPS, extra gloves, survey flagging, sunglasses, lunch, and of course for putting sheds in!
28. Shed Hunt On Rainy Days
Don’t let poor weather hold you back! When antlers get a sheen of water on them they tend to shine and glisten. For this reason, light rainy days or the day after a rainy day is a great time to be out looking for sheds. Additionally, overcast rainy days block a lot of sun which reduces glare making for good shed hunting. Additionally, after rain, the snow around sheds has melted, making them even more obvious.
29. Practice
It can be helpful to bring old sheds with you and place them at random locations at the beginning of a shed hunt to help train your eyes.
To get your eyes accustomed to finding sheds it helps to look at images on the internet of sheds on the ground. It is also a good idea to bring some older sheds with you and place them in random locations at the beginning of the shed hunt. Then walk about and observe the sheds to train yourself on what to look for. Although this sounds a little odd, it does help.
30. Shed Hunt In Deer Wintering Areas
In the northern regions deer congregate together in deer yards. These deer yards are found in areas that provide good shelter from the snow. These areas consist of dense softwood stands that block a lot of snowfall. Because of the sheltering effect from the softwoods stands the snow depth is much less.
These areas are great places to check for sheds because deer are congregated in these deer wintering areas. It is not recommended to continually disturb deer that are in these deer wintering areas in the middle of winter. Bumping deer in these areas at this time causes them to expend needed energy and creates stress. Energy is valuable to deer at this time because they need all they can get to fight the elements and evade predators. When conditions improve in early Spring is a great time to start looking for sheds in deer wintering areas.
Conclusion
Properly preparing for shed hunting and continuously putting yourself in high-odd areas will greatly increase your chances of finding sheds in Maine.
These 30 Maine shed hunting tips combined with hard work will have you collecting more sheds than ever before. For additional/interesting information on sheds and shed hunting tips check out these articles:
In this post, I explain how to scout deer in July. Hunting preparations in July can mean the difference between success and failure this fall. It’s important to understand whitetail movement throughout the year to be ahead of the game.
Whitetails transition between summer and fall habitat. Knowing how to scout in July with the fall transition in mind makes all the difference.
How To Scout Bucks In July
Trail Cameras
At this time of year, you can finally start to identify individual bucks, so I put my trail cameras out in July at the latest. I have a dozen or so trail cameras and add to my collection every year. These trail cameras will be placed both in newly scouted areas and in previously determined hotspots from years past.
Often, I start putting trail cameras out at the beginning of June. Trail cameras are one of the best ways to scout during July. This gives me adequate time to get all of my trail cameras out by the 4th of July.
The cameras that are set out before July are only to identify any camera malfunctions that may be occurring. In my experience, this has worked very well for me. Trail cameras that have been out for about a month will be checked around the 4th of July.
This will ensure cameras are running properly and that there are no obstructions for the rest of the all-important month of July when real data collection begins.
I have also been experimenting with checking trail cameras less and less because I do feel like it can have very negative consequences. Often I will leave regular trail cameras out for the entire season. Or even better, I’ve also started using cell cameras to keep my disturbance virtually non-existent.
The downsides are that most cell cameras don’t have a big enough battery to last from June through December and they cost money every month. I place cell cameras in September so they will last through the hunting season. This isn’t ideal since it’s so close to the hunting season but I try to pick my days to set them when the weather is dry and windy or rainy.
Newly Scouted Areas
In newly scouted areas where I have no previous data, my main goal is to determine the caliber of buck/bucks that made the previous year’s sign. If I start getting pictures of a target buck I will leave the camera in this location, checking the camera at most once a month. I will then start to put the pieces together to determine where I think this target buck is spending most of his time. Then I will pick the tree I will hunt out of.
Previously Scouted Areas
In areas I’ve historically seen, or captured big bucks on trail camera I will attempt to re-capture them to see if they made it through the season and are using the same core area as the previous year. If they are still using the same core area this will likely be a good place to hunt in the fall. Additionally, I will be able to see if new bucks have moved into the area.
High-Quality Bedding Areas
It is important to note that the cameras I am placing are almost always near high-quality bedding areas. High-quality bedding areas often hold particular bucks in their core area until the rut. Pictures of these bucks in July means they will likely still be in the area come October.
Big bucks not near high-quality bedding areas are less likely to stay once the hunting season begins. A previous post How To Place Trail Cameras For Mature Bucks goes into more detail on high-quality bedding areas and will help you succeed in trail camera placement.
The movement will likely change as hunting season approaches. Pictures in July will often reveal many daylight pictures of bucks when compared to the hunting season. Daylight pictures are never a bad thing, but I am not so much interested in the time of day bucks are showing up on camera. Instead, I am looking for the frequency. This tells me how close I am to a buck’s core bedding area.
Boots On The Ground Scouting
Although scouting in July is getting late in the game and you risk the potential of permanently bumping deer out of an area, I still think boots-on-the-ground scouting in July is worth it.
That said, it is harder because the buck sign from last year is harder to see, so you have to pay closer attention. You can still find excellent spots in July. Additionally, in some areas, bucks haven’t moved from their summer areas to their fall areas so you’re not disturbing much in that instance.
I focus my efforts on finding big buck rut sign in the shape of big rubs and scrapes and their proximity to a high-quality bedding area. I usually refrain from going into bedding areas to keep stress levels at a minimum in July. Once I find the sign I’m looking for I will hang a trail camera.
I may or may not hunt that spot in the upcoming hunting season. My trail camera will tell me if it will be worthwhile the following year. If the property has excellent deer sign and I want to prepare a tree, I do it that day. Accomplishing everything in one day eliminates repeated invasions which keep stress levels to a minimum.
Scout For Bucks In July By Glassing Fields
Bucks are taking in as much nutrients as possible to put on weight and antler growth in July. Glassing fields during this time has proven to be a pretty successful tactic for me in recent years and is one of the best ways to scout deer in July.
Bucks are much more relaxed from the lack of hunting pressure and the increase of cover from summer foliage. I try to capitalize on bucks having their guard down. On roads that don’t get a lot of traffic dawn and dusk seem to be the most successful times for glassing. I like this scouting tactic because it requires little effort and can produce a big reward.
Scout deer in July by glassing fields with high-quality food sources.
Scout For Bucks By Shining Fields
I prefer shining fields at night over glassing fields at dawn and dusk. Both can work well but in my experience, the biggest bucks seem to like having the cover of darkness. Mature bucks know from experience that when they show themselves during daylight people/hunters driving by stop to check them out.
Being the weary creatures they are, mature bucks will only tolerate so much of that stress. I have found bigger bucks learn to avoid that stress completely, opting to only enter fields in the dark. I have had a lot better luck seeing big bucks at night than daylight or dusk. Sometimes they are not far from the road and when I pick my flashlight up I am surprised how close I can find myself to a big buck.
Scout deer in July by shining at night where legal.
You’ve Located A Big Buck In July, Now What?
When I see a big buck in a field whether glassing or shining I will mark the location in my phone on a GPS App. When I get home I will analyze the surrounding landscape and see if I can identify any key features that may point me in his direction. To learn how I do this check out: 15 Best Tips For Scouting Deer Using Google Earth.
To keep stress levels at a minimum I will do a quick but precise scouting mission to see if I can figure out where bucks in the area are spending most of their time. For example, if I see a lot of old rubs and scrapes from year’s prior I will find a tree to hunt out of for the hunting seasons and place a trail camera. Depending on how close to the season it is, I will wait a month at least before returning to check the camera.
July Is For Practice & Preparation
Routine
When I was younger I only gave myself a week or two to prepare for the upcoming season. Being out of practice going into the hunting season cost me a few deer. When I got tired of failing I adopted a routine that works for me. My routine leaves me feeling confident with my equipment for the hunting season and confidence is key.
I start my routine once there is enough daylight after I get home from work to shoot my bow outside, which is usually after daylight savings time around the first week of March.
My routine consists of shooting at least a dozen arrows or so every day after work to keep my focus and strength up for the hunting season. Most times I end up shooting more.
Gear Preparations In July
This is the time of year to start thinking about gear. When I think back at the previous hunting season I ask myself; what worked? What didn’t work? Do you wish you had anything? What broke and needs fixing?…etc.
Asking these kinds of questions and making the improvements sooner rather than later allows me to make the upcoming season less stressful. For me personally, when things don’t go as planned I tend to get stressed out (like metal clanking metal together when climbing up a tree in a bedding area). I like to enjoy myself on the stand, after all, it is supposed to be fun! Making sure I have the right equipment and gear adjustments completed early has helped me to create a less stressful and seamless hunting experience.
Conclusion
You can still do a lot of scouting in July to put the odds in your favor for the hunting season in the fall. Boots on the ground scouting is a great options, but does have some cons being so close to the hunting season. My preference is to let my trail cameras, binoculars, and flashlights do the heavy lifting where possible.
While these are doing the heavy lifting I focus my efforts on getting in shape and preparing for the upcoming hunting season. I hope this post has helped you be more effective in scouting deer in July.
Many of the concepts for scouting deer in July apply to the other summer months as well. Check out the next post in this series: How to Scout Deer in August.
Trail cameras are expensive, and if you’re like me you are trying to get the most out of each trail camera you own. Proper placement is necessary to do this, especially for mature bucks. There are two types of trail camera placement in my opinion, inventory placement and bedding area placement. I go into detail on both.
Inventory Trail Camera Placement For Mature Bucks
The first method is inventory placement of trail cameras. Inventory placement is the placement of trail cameras over food sources, bait, deer trails, rubs, scrapes, or a combination of these, basically any location that is not bedding. Inventory placement can work well to inform you if a mature buck is in the general area. Finding a mature buck to hunt is in my opinion the hardest part. Getting a few trail camera pictures of him means he’s most likely living nearby (outside the rut).
I’ve noticed when hunters start getting pictures of a mature buck they get excited and become content with their camera placement, ultimately leaving their trail cameras in the same spot in hopes that they will get more pictures of the particular buck. Usually, hunters will get a few more pictures of this buck until the season changes and the buck moves core areas.
Placing Trail Cameras and Buck Seasonal Shifts
The biggest problem I had when placing trail cameras in inventory locations was bucks disappearing from their core areas as hunting season approached. This frustrated me because I took extreme precautions to avoid spooking deer when checking trail cameras, so I was fairly confident that was not the issue. I found it especially difficult to hunt a particular buck.
What I noticed was I would get pictures of hitlist bucks fairly consistently until about the first weeks of September when they started to shed their velvet, then they would vanish. The funny thing was they would be right back in the same spot at the exact same time the following year, only to vanish again before the hunting season. Only a small percentage of bucks I got pictures of would stay in their core area into the hunting season.
Corrected Date: July 16th 2016, 3:30PM (Buck 1)
Date: July 19th 2017, 8:18 AM (Buck 1)
Corrected Date: August 14th 2016, 9:55AM (Buck 2)
Date: August 14th 2017, 9:12 AM (Buck 2)
Above you will see photos taken of big bucks in the summer. In both years the trail camera was placed over a well-used deer trail. Although camera’s exact placement changed these pictures were all taken in the same spot. These pictures show the same two bucks during the summer of 2016 and 2017.
Bucks in this area show up at the same time every year in the summer but then vanish in August every year (The date and time on the photos is not correct, I was able to figure out the exact date and time and have inserted the correct date and time as text below each photo.) “Buck 1” shows up within 3 days of the previous year. “Buck 2” shows up within the same hour as he did the previous year. This year I will have to move my cameras and figure out where these bucks are bedding.
Place Trail Cameras Where Bucks Will Be During Hunting Season
Unfortunately, inventory trail camera placement will likely not be where a mature buck feels comfortable during daylight hours during the hunting season. More often than not when hunting season rolls around bucks aren’t using food sources, bait, deer trails, rubs, and scrapes during daylight hours, especially if you’re hunting an area with hunting pressure. As hunting pressure increases daylight movement tends to decrease. Of course, there are exceptions to every rule but in general, I have seen less success when I leave cameras over inventory areas throughout the hunting season.
If you have located a mature buck using inventory trail camera placement that is fantastic, finding a mature buck is the hardest part, but now you need to take it to the next step. Where is this buck likely spending his time in daylight during the hunting season? Bedding areas.
Trail Cameras and High-Quality Bedding Areas
I felt that if I could just figure out why a small percentage of bucks remained in the same area for longer periods I could put myself in similar situations and start capitalizing on particular bucks. After a few seasons of brainstorming, increasing my arsenal of trail cameras, and testing hypotheses I started to notice a pattern; my cameras, even though they were over inventory placement they, by chance, were on the border of bedding areas. Cameras at the edge of high-quality bedding areas were more likely to keep bucks in their core areas longer into the season.
This is how I first discovered high-quality bedding areas. I define high-quality bedding areas as an area that provides excellent protection in the form of security from hunters and predators, so much so, that mature bucks feel safe and relaxed. However, in this definition, I include proximity and availability to does, food sources, and water. The more readily available these are, the higher the quality of the bedding area.
From trail camera observations I found that the higher the quality of the bedding area the more likely I would be to get pictures of a particular buck into the hunting season.
Big Buck In High-Quality Habitat September
Big Buck In High-Quality Habitat In October
Big Buck In High-Quality Habitat Early November
Big Buck In High-Quality Habitat Mid-November
Bucks Spend The Most Time In Bedding Areas
The more I thought about this the more it made sense. High-quality bedding areas are where mature bucks feel safe which is where they will be spending most of their time during most times of the year. Additionally, even if deer seasonal patterns change due to food availability, loss of foliage, testosterone levels increasing… etc, mature bucks will likely want to remain in the same high-quality bedding area because it is where they feel secure.
The highest quality bedding area on a property can likely hold multiple bucks depending on its size. These bucks will want to take advantage of its safety and compete for the safest areas in that bedding area. Mature bucks will push satellite bucks out to maintain the highest quality bedding areas for themselves. Camera placement near high-quality bedding like this increases the odds of catching dominant bucks and respectable satellite bucks on camera during daylight into the hunting season.
From trail camera placement trial and error I have found that buck bedding that provides food, water, and does nearby gives bucks less of a reason to leave in September and into the hunting season. Do I still have bucks disappear on me in September? Absolutely. Each situation and buck is different but the rate at which they disappear has reduced.
It is important to note that I rarely intrude on a buck’s bedding area when placing trail cameras, as this will likely result in the buck leaving his core area or becoming nocturnal before the season starts. Instead, I put my trail cameras as close to the bedding as possible but where I am confident that the buck will not be alerted in any way by sight or sound. I assume some of my scent may be left behind but I take precautions mentioned below to minimize this as much as possible.
The one exception is if I place a camera deep within a bedding area in the spring, during spring scouting, and leave it there throughout the entire hunting season. I will only check this camera after the hunting season has ended. The information on this camera will help me plan for future hunts because I will be able to see what days and times bucks are moving through the bedding area.
Summer Trail Camera Placement In Bedding Areas
Trail Camera Placement In Bedding Areas
Summer Trail Camera Placement In Bedding Areas
Trail Camera Placement In Bedding Areas
High quality bedding location: I had this buck (above) on camera from the beginning of June through the middle of August. Unfortunately, I forgot to turn my camera on for the last check of the season. However, on October 13th, 2017 I had a deer walk by at 20 yards, 5 minutes after quitting time. I couldn’t see him, but when I got out of my tree I smelt what was unmistakably the smell of tarsal gland. I’d bet a lot of money it was him. The location of this camera was just on the outside of a thick winterberry and alder swamp, this buck made many appearances.
When To Place Trail Cameras For Mature Bucks
Most of my scouting takes place just after snowmelt in spring. When I find a buck bedding area from scouting I will come back and place a trail camera at the edge of the bedding in May. To learn how I scout for buck bedding check out my article Finding Pressured Bucks. I like to put my cameras out in May.
I check my trail cameras about once every two months preferably during windy or rainy weather conditions. This way I leave almost no evidence that I was in the area and the bucks have a minimal chance of catching onto me. I always wear rubber boots and use scent-free wipes to clean my cameras when I’m done setting them up. I also am quick to download pictures and get out of the area to reduce scent contamination.
If I am not getting any mature bucks on camera after two months I will adjust accordingly. Sometimes I’ll move the camera and other times I will leave a camera out over the hunting season to see what it turns up if I have a good feeling about an area. Sometimes there’s not much activity in an area until the hunting season starts. Other times I will move the camera to another bedding location I feel has potential.
I will continue to check my trail cameras until one month out from the season opener, sometimes later if there is really bad weather that lets me sneak in undetected. This gives the area time to cool down before hunting season.
There is a balance between checking cameras close to the season and having high-quality information telling you that a mature buck is moving in daylight close to the start of the season. During this check, I wear full scent-lok clothing that has been carefully stored to minimize scent.
Trail Cameras And The Rut
I have found that during the peak rut most bucks have left their core areas in search of does, making it much harder to capitalize on a particular buck. For this reason, I won’t check my trail cameras again for the rest of the hunting season. I let trail cameras collect valuable data that I can use and apply to future hunts.
Being that the buck I am after is most likely gone during this time there is no reason to check cameras. Instead, during this time of year I rely on last year’s trail camera dates and times. Deer are habitual creatures and often visit areas at the same time and dates each year.
I will use the dates of rutting buck pictures from the previous year and use them to determine when to hunt during the present year. This way I do not contaminate my hunting locations with my scent from checking trail cameras. I don’t want to be checking my cameras during the season because as the season progresses and hunting pressure increases bucks will become much more sensitive to human presence. Checking trail cameras during the season is a great way to ruin a spot.
Conclusion
If you are a hunter who is having trouble capitalizing on trail camera pictures of bucks then I recommend you try the method above on how to place trail cameras. Although placing trail cameras near bedding areas can be risky, I have found it to be worth the risk with the proper precautions. I hope you can take away from what I have learned and apply it to your trail camera strategy to capitalize on mature bucks.
A classic buck high-quality bedding area. Bucks will often bed at the edges of islands or on hummocks in cattail swamps like this. They feel secure in these areas, most hunters don’t want to walk through this thick stuff and it is difficult for the ones that do to sneak up on them. A trail camera set up at the edge of a bedding area like this has the potential to capture a big buck.
Understanding how hunting pressure shapes deer behavior, especially buck behavior has completely changed my approach to whitetail hunting. I used to get frustrated in heavily hunted areas, but now I see the pressure as an opportunity.
Figure Out The Hunting Pressure In Your Area
Some states are hunted more heavily than others. Many states require hunters to gain permission from landowners to hunt their land. That is to say that private property is considered posted property unless the property specifically states that public access is allowed.
However, in my home state of Maine the opposite is true. In Maine, you are allowed to access and hunt anybody’s property without asking permission as long as it is not posted. There are some caveats to this but in general, this statement is true.
This causes much of the populated portion of central and southern Maine, where I live, to be hit hard by hunting pressure. Especially during the rifle season. Also, there are no antler restrictions in Maine which means hunters can shoot any size buck, reducing the overall age class of bucks. In the more populated southern areas of Maine, you have to do your homework to find a 3 ½-year-old buck.
If you also experience high hunting pressure, big bucks won’t be just anywhere. Understanding areas that bucks prefer will greatly increase your odds of success. Bucks that have grown to maturity in these pressured areas are smarter animals. They have found sanctuaries where they feel safe which has allowed them to reach a higher age class.
Pressured Buck Bedding Areas
Pressured bucks prioritize safety above all else when the rut isn’t in swing. They’ll seek out the highest quality bedding areas – often overlooked, secluded, difficult to access, and with dense vegetation offering excellent cover. This makes focusing your scouting on bedding areas a smart starting point.
Fortunately, the type of vegetation pressured bucks prefer to bed in can usually be seen from aerial imagery. To determine how secluded a bedding area is you will have to use your imagination. I often ask myself the question; would other hunters likely be accessing the area?
Where do you think a big buck would be living on this landscape? My guess would be a hummock in one of these swamps.
I can usually tell if a property will provide quality bedding opportunities by looking at aerial imagery. To learn how I do this check out my blog post: 15 Best Tips for Scouting Deer using Google Earth. This post goes into detail on different Google Earth tools that are useful to increase your deer scouting efficiency.
Figuring out certain areas that pressured bucks gravitate to has advanced my whitetail hunting career more than anything. Even though few bucks manage to live to a mature age because of high hunting pressure, there are areas I have found that hold bucks over others. Not only are these areas more likely to hold bucks but they also hold bucks consistently.
Edges of Protected Areas
One of my favorite places to find pressured bucks is on the edge of properties where hunting is not allowed. I call these areas Protected Areas. Protected Areas could be wildlife reserves, conservation areas, and posted property where hunting is not allowed.
Scouting in these areas during the off-season and along the border of posted land has been beneficial to me in finding bigger bucks. Why would you scout places you cannot hunt? Because nobody else can hunt them either, and as a result, bucks feel safe and have a chance to grow to maturity.
First, I’ll try to get permission from the landowner to simply scout the property. This lets me confirm buck activity and strategically place a stand near the boundary.
Even without access, if the buck sign is excellent and the bedding area is clear, I’ll assume bucks are using it. Experience has taught me that pressured bucks naturally gravitate toward the safest bedding available.
I have found bucks naturally gravitate high-quality bedding areas. Here is one example of a confirmed bedding area based on a hunch from aerial imagery.
When setting up a stand location it is key to be as close to the property line as possible. Pressured deer often don’t stray far from their beds until dark. Being as close to the bedding area as possible increases the likelihood of catching a big buck on his feet before quitting time. Many hunters don’t think about protected areas when looking for areas that produce big bucks, but I have found they have potential.
Highway Bedding Areas
Highways are another spot I key in on. They often create good deer bedding habitat because the edges of the highway get a lot of sunlight which creates dense vegetation. Additionally, they often create wetlands from the water that is shed off of the highway and into the ditches.
If this water remains long enough to inundate soil for long periods of time, wetland vegetation starts to grow. This wetland cover often includes cattails, speckled alder, and tall grasses, which provide great screening cover. I have found whitetails love this vegetation for bedding compared to other areas.
Pressured bucks have learned to use the shape of the highway to their advantage as well. They are aware highways greatly limit where danger can approach them, and will often choose a concave portion for bedding.
A great example of concave portions of a highway with dense vegetation. An area like this is one of my favorites for finding pressured bucks.
I believe they do this because this shape protects them from approaching threats in the greatest range of directions. Pressured bucks can utilize multiple wind directions, take advantage of thick and noisy vegetation by hearing approaching predators, and see what is coming from all threatening directions.
Doing this allows them to slip out the backdoor undetected. Bedding areas like this pretty much offer complete safety. Becoming aware of how bucks use highways to their advantage will help you place stands in more strategic locations. Although it may not be the most peaceful hunt, highways can produce great results.
Swamp Bedding Areas
I have found swamps to be especially productive when it comes to finding pressured bucks.
The first reason is that swamps, especially large ones offer isolation from other hunters. Hunters avoid these areas because to most it is a lot of work to struggle through the nasty cover. Additionally, many hunters like to hunt from treestands. Swamps often stunt tree growth and do not produce trees big enough to support conventional treestands.
Most hunters usually end up hunting the edges of swamps where the trees are. I have found that getting deep into swamps where other hunters do not want to go can provide excellent hunting. Being able to get away from other hunters has allowed me to find areas of low hunting pressure within regions of high pressure. These types of places are where mature pressured bucks seek refuge because they know from experience that there are fewer hunters; thus, it’s safer.
Here I had to use hip-boots to get through this swamp, but it was worth it because I found isolated bedding deep in the dense cover of the swamp.
Swamps also have the potential to hold multiple big bucks. Like I mentioned before I have found that pressured bucks seek out and bed in the highest quality bedding areas, they aren’t mindlessly bedding down anywhere. Thick swamps, more often than not, offer the highest degree of safety when compared to other areas on a property. This means multiple bucks will gravitate toward the same swamp because they know it is the safest place in their core area. The size of the swamp influences its ability to hold multiple bucks. Big swamps are more likely to hold multiple bucks than small ones. Hunting areas that pressured bucks tend to gravitate to, and that potentially hold multiple bucks has increased my success.
Pressured bucks do not spend all their time in swamps; they need to feed at some point. However, this is usually after dark when they feel safe. Deer trails are often easily noticeable in swamps, sometimes you can even see them from aerial imagery. I make sure to follow these trails from the mainland into the swamps during scouting missions to find buck beds. Doing this has helped me understand where I should place my stand in relation to these beds. Usually, this means placing my stand as close to these beds as possible without spooking them. I hunt from a tree saddle which allows me to get into trees much smaller than conventional treestands. Getting closer to these bedding areas has helped me get eyes on bucks during daylight hours.
River Oxbow Bedding Areas
Rivers often create swamps at their edges from soils being exposed to hydrologic conditions for long periods. Thick and nasty wetland vegetation is created as a result, which is where pressured bucks like to spend their time. I have noticed that bucks will use rivers almost identically to how they use highways for protection.
I often find pressured buck beds in swamps where the river has created a concave shape. The beds are usually located on a hummock at the edge of the river looking back toward the mainland. I find these beds here because, like highways, they know they are safe in the direction of the river. By bedding the concave portions it limits the direction danger can come from, reducing the likelihood of being snuck up onto.
Pressured bucks feel safe with the River at their back. Also, notice the change in vegetation as you near the River, this is thick wetland vegetation.
Conclusion
For me, understanding where and why mature bucks bed where they do has made me a significantly better hunter. I struggled with seeing mature bucks for years and could never figure out why. I thought that hunting harder and longer using the same tactics would provide better results.
Now that I am hunting smarter I have seen much better results. If you are someone who is struggling with finding pressured bucks you can take action. Seek out and scout places that other hunters would not think to go, or may not want to go, be creative. If you find big buck sign the next step is to find the highest quality bedding area on the property. Then search the bedding area for more sign, if you see an additional big buck sign near the bedding area set up your stand!
Scouting deer using Google Earth will save you countless time and effort by efficiently scouting properties. Not to mention it can be done without even leaving your house! The tools and add-ons mentioned of Google Earth Pro combined with aerial imagery a very powerful deer scouting deer tool. You don’t have to spend hours scouting entire properties. Instead, with a little practice, you’ll be able to identify portions of properties that are of higher quality than others without setting foot on the ground.
By eliminating portions of lower-quality properties from your scouting missions, you are ultimately spending less time on properties. Although you are spending less time on properties, you are spending a higher proportion of your time in high-quality areas. This undoubtedly increases scouting efficiency and makes scouting even more enjoyable.
Although I love scouting for deer, it can sometimes be frustrating. Finding new properties, getting permission to hunt properties, and meticulously walking those properties to understand how deer use them is a slow and time-consuming process. If you’re like me and you don’t have a lot of time to scout, using your scouting time efficiently is key to hunting season success.
Scouting deer using Google Earth provides powerful preliminary information, but it is no substitute for boots-on-the-ground scouting. Make sure you get out there and compare what you are seeing on Google Earth with the actual site. Over time, after comparing enough Google Earth data to on-site observations, you will become proficient at finding the best areas to scout for deer.
Tip Number 1: Scout Deer Using Google Earth Pro
The first step toward effectively scouting deer using Google Earth is to download Google Earth Pro to your desktop. Google Earth Pro is free and better version of Google Earth. With Google Earth Pro you get everything Google Earth offers and more.
Google Earth Web is another option to choose from but does not provide the same features as Google Earth Pro. I regularly use measuring tools that are only found on Google Earth Pro and is the program I recommend.
Tip Number 2: Measuring Tools
If you click on the ruler at the top of the window you can measure areas of interest. It gives you the option to measure with a Line, Path, Polygon, Circle, 3D Path, and 3D Polygon. I commonly use these measurement tools as drawing tools to journal my past and future scouting trips. I do this by placing circles and Placemarks on areas I’d like to scout and drawing Paths where I’ve previously scouted. By doing this I can recall these areas at a future date. Measurements overlaid on top of the aerial imagery are saved in the Places window and can be toggled on and off.
Google Earth Pro Measuring Tool
Tip Number 3: Organize and Prioritize
You can also roughly pre-determine the distance you will be walking, and the area of a property. This is helpful when determining how many properties you can realistically scout in a day. Another advantage of measuring tools is marking boundaries. For example, in Maine we have an expanded archery season. This season only takes place in a few specific locations of the state. By using the Path measurement tool, I was able to draw the boundaries of the expanded archery zones. Doing this eliminated the redundancy of checking to make sure I was in the expanded zone before each new scouting trip. The use of measuring tools has helped me organize and prioritize my scouting schedule greatly, saving me a lot of time in the field.
Picture 1. Representation of how I might use Placemarks and measuring tools to plan a scouting trip.
Tip Number 4: Historical Imagery
A simple yet effective tool for scouting deer using Google Earth is using Historical Imagery. The Historical Imagery icon can be found at the bottom left of your Google Earth Pro window, shown as a clock with a green arrow. The icon appears when you zoom into a location close enough so the program can find the area’s imagery dates. Once zoomed in far enough, click this icon and a slide bar with a range of dates will appear. By moving the slider across these dates, you will be able to observe years of previously recorded aerial imagery.
Google Earth Pro Historical Imagery Feature
Tip Number 5: Find Wetlands
Another benefit of Historical Imagery is you can toggle between different seasons. This is because the imagery was captured at different months from year to year. By choosing imagery with the foliage off you can locate features that you otherwise would not be able to. I often use this feature to find small streams, swamps, and other wetlands when scouting deer using Google Earth because wetlands often provide high-quality bedding areas.
Tip Number 6: Forest Composition
You can also use Historical Imagery to look at forest composition. Using aerial imagery with foliage off will make determining the hardwood-to-softwood ratio simple. I like to know the ratio of forest types of the property before I scout. This helps me understand what the area looks like. It also helps me get a general sense of how much food could be available to deer in the area. Higher proportions of hardwoods often will often mean more forage in the area.
Tip Number 7: Age Timber Harvests
If logging has taken place in an area you can estimate cover density and the age of a forest stand. For example, let’s say in your most recent aerial image you find an old clear-cut. You can determine how old the vegetation will be by going back in time on your Historical Imagery. The date where you encounter the clear-cut disappearing will roughly be the age of that logging event. Being able to age forest stands like this is important because it allows you to theorize how deer will be using the area.
I often scout clear-cuts that are around 8-15 years old to see how they have grown back. Often they provide quality bedding and feeding. Using this method has allowed me to identify sections of properties that I believe are worth scouting over other areas, increasing efficiency. Historical Imagery is a very effective tool for scouting deer using Google Earth.
Picture 2. The clock with a green arrow is shown at the bottom of the screen, when clicked it opens the slider bar shown at the top. Notice that some features have changed, such as the field and logged area which are not present in the 2003 imagery.
Tip Number 8: Google Earth App
Google Earth can be found in the App Store and has proved very useful. Data placed on Google Earth Pro on your desktop can be uploaded onto the Google Earth App on a phone. This means that any Google Earth Pro file that you find online such as; topo maps layers, parcels layers, public land layers…etc. can be uploaded onto your phone via the Google Earth app. This is one of my favorite tips because it allows you to take preliminary research from your laptop into the woods.
Tip Number 9: Placemarks & Baselayers
Before I head into the woods I like to set Placemarks on my Google Earth Pro desktop in areas I specifically want to visit on a property, then download them onto my phone. This is helpful because when using different baselayers, like topography, you can’t see the aerial imagery. This makes it difficult to navigate to the preliminary features of interest you marked. Placemarks will stay on top of all layers so that you know where your features are at all times, even when using other baselayers. This eliminates having to repeatedly toggle a base layer on and off to see the aerial imagery.
Tip Number 10: Property Parcel Information
Parcel information is another huge advantage to have remotely. Having property lines available at your fingertips while in the woods allows you to always know whose property you’re on; thus, you’re quickly able to ask for permission when you find good deer sign. This has sped up my permission-seeking and asking process immensely. The Google Earth App is a great tool for scouting deer when combined with Google Earth.
Picture 3. Points from Google Earth Pro are shown downloaded onto a mobile phone. Notice that you can still view the Placemarks when using a different base layer.
Tip Number 11: USGS Topographic Map Layer
USGS Topographic Maps layer is a layer I use every time before I start scouting. This layer can be easily downloaded from the internet and can be found by clicking the link above or with a simple Google search. I have found viewing topography to be a helpful preliminary step before putting feet on the ground. Topography influences deer movement, whitetails generally want to follow the path of least resistance. There are exceptions to every rule but generally, you can predict where you should focus scouting. Doing this reduces time wasted on areas that have a low potential for concentrating deer movement.
Tip Number 12: Pinpoint the Best Areas on Properties
Pinch points are a type of terrain feature I key in on with topographic maps. An example of a pinch point would be a steep hill that runs perpendicular to a river. A hill that decreases in steepness as it nears the river creates a great pinch. Whitetails generally will want to use shallow terrain to get around hills. In the picture below, the closest part of the hill to the river provides the easiest travel corridor. I will place a Placemark to remind myself to scout this area to see how well-traveled the pinch point is.
Another example of a pinch point would be two steep hills near each other that create a valley in-between. Often, the deer will walk in the valley. Using the valley acts as a shortcut and is less energetically expensive than climbing the hills. Pinch points like these are excellent candidates for tree stands, especially during the rut when bucks use travel corridors to find does.
Topographic layers have helped me identify specific sections of properties that should be scouted more thoroughly. It has also helped me identify sections that aren’t worth my scouting time. Topographic map layers are great tools for scouting deer using Google Earth and are a must in my scouting regimen.
Picture 4. The Placemark labeled “Pinch Point” is located in a saddle between mountains. Naturally, deer want to walk the path of least resistance. Saddles often provide deer with the easiest travel corridors.
Tip Number 13: Parcel Data Layer into Google Earth
There are multiple ways to obtain parcel information to be downloaded into Google Earth Pro. Parcel information is available to the public. Historically, to interpret parcel information you had to visit a town’s assessors page and figure out the map and lot number of the property of interest by looking at confusing PDFs. This took a long time and was tedious. Recently, however, parcel information is becoming digitized/computerized. Towns often have an online parcel viewer which is incredibly helpful. Even better this information can often be downloaded as a Google Earth File (.KMZ) which can be overlaid onto Google Earth Pro aerial imagery.
Tip Number 14: Research State and Town Websites
Parcel information is not a nationally recognized layer because parcel information is only at the state or town scale so it can be harder to obtain. Some leg work may be required to find out where to obtain Google Earth parcel information for towns and states you’re interested in, but it’s worth it. I recommended searching state and town websites for this information. It may also be beneficial to get in contact with state and town officials.
Tip Number 15: Interactive Parcel Layers
Once projected onto Google Earth Pro they often (not always) do much more than show you the locations of the parcels. These Parcel layers are generally interactive which means you can click on them to display additional information. Some of the more helpful pieces of information that pop up include the property owner’s name, address, and acreage. After locating properties you deem worth scouting you can overlay parcel information over those properties. This allows you to obtain all the information you need on properties you want to scout before heading into the woods.
As previously mentioned, parcel information can also be downloaded onto your phone so you can have it in the field with you. Having property lines available at your fingertips while in the woods allows you to always know whose property you are on, enabling you to quickly ask for permission.
The ability to have property owner names, addresses, and acreages one click away, all on a single platform, rather than going through pages and pages of confusing documents to find it has saved me copious amounts of scouting time. Parcel information is a useful tool for scouting deer using Google Earth.
Picture 5. Parcel information from a town’s website in Maine. Notice this particular parcel is owned by the town of Freeport, is 104.75 acres and they can be found at 30 Main Street in Freeport.
Conclusion
Although there are other ways to e-scout deer digitally, like with OnX Hunt, I still prefer Google Earth when I’m on the desktop. I feel like there is much more customizability.
There are so many ways to use Google Earth Pro to your benefit that this blog does not cover. These tips will help you unlock the potential Google Earth has to scout for deer. I am confident that if you implement these tips you will improve your scouting efficiency. Scouting deer with Google Earth is one of the best tools a hunter can use to become successful during the hunting season.
If you’re interested in more ways to effectively scout deer check out my post: Finding Pressured Bucks. This post goes further into scouting deer using Google Earth. I share how to how to determine habitat types and features that bucks are likely to key in on.
If you want to learn additional skills and shortcuts or are having trouble getting started with Google Earth the Google Earth User Guide is a helpful resource. Leave a comment below and let me know what you think about scouting deer using Google Earth! If there are any articles you want me to cover in the future feel free to let me know.
The best boots for ice fishing will be big, heavily insulated, waterproof, comfortable, and durable. These ice fishing boots were designed to keep your feet warm in the coldest conditions while being relatively stationary.
To have the most enjoyment while ice fishing it is important to have the correct footwear. Otherwise, you’ll be focusing on your feet when you should be fishing and having fun. The boots below are great options for keeping your feet warm and dry while ice fishing.
This post contains Amazon and other affiliate links, which means I’ll receive a commission if you purchase through my link, at no extra cost to you. Of course, you are not obligated to use my links, but it does help fund these posts in hopes of bringing more value to you!
These Baffin Titan rubber boots are comfort-rated to -148ºF (-100ºC). They are perfect if you’re stationary for long periods of time with your feet on the ice.
Also, they’re waterproof and have thick removable liners for insulation and warmth. Since they’re waterproof, you can be sure your feet stay dry, which is essential for ice fishing in cold weather. For how big and warm they are, they’re surprisingly not that heavy.
These rubber boots are made by Cabela’s and are one of the warmest rubber boots on the market. They have 2000g of insulation in the toe area, 1600g in the arches, and 1200g in the heel. This design is for maximum warmth in the areas that need it but also to keep them mobile enough for walking.
Also, you can find these boots for a very affordable price compared to the other warm rubber boots on this list, making them a great budget option. These boots will fall apart if used for a lot of walking but if you’re relatively stationary when you’re ice fishing these could be a great option.
These are the 1200g Zoned Comfort Boots, but same idea as the 2000g.
Lacrosse Alpha Burley 1600g Insulated Boots
The Lacrosse Alpha Burleys are one of the warmest full-sized (18″) rubber boots on the market with 1600g of insulation to keep your feet warm in the coldest weather while ice fishing. Also, another benefit is that they are waterproof so your feet don’t get wet which will further which is key to keeping your feet warm on the ice.
Another one of the warmest ice fishing rubber boots is the Thorogood Infinity with 1600g of insulation. These boots are similar to the Lacrosse Alpha Burleys but they use Solarcore insulation (which NASA uses for insulating space things) to keep boots as insulated as possible and retain heat better than other boots.
Cabela’s Saskatchewan – Warmest Winter Boot For Ice Fishing
The Cabela’s Saskatchewan boots are one of the best boots for ice fishing because of the3 inchesof insulation between your foot and the ground surface that they offer.
This means it will be very difficult for the cold to penetrate from the ground up into your boot, which is key when your feet are on the ice for long periods of time. They have a removable liner which gives them even more insulation and warmth.
Although they’re one of the biggest and bulkiest boots, they’re very warm. They’re also surprisingly lightweight for their size because of the synthetic material they’re made of.
These boots are unique in that they have interchangeable soles so you can add ice grips to the bottom of them which is a great feature for ice fishing. They’re comfortable, insulated (1200g), and waterproof making them great ice fishing boots. This is a versatile boot because it’s fairly heavily insulated for warmth but agile allowing for better mobility.
Lacrosse makes a winter boot called the Hunt Pac Extreme. They are big and bulky winter boots with 2000g of insulation which is great for keeping your feet warm on the ice. 2000g of insulation is a lot which means these boots can keep your feet warm during the coldest temperatures of the year. Although they aren’t rubber, they are still waterproof.
Another one of the warmest ice fishing boots is the Cabela’s Inferno 2000g insulated boot. These boots are big and bulky but they will keep your feet warm in just about any weather condition you throw at them. They’re waterproof which is essential for keeping your feet dry and warm on the ice.
The Baffin Snow Monsters are comfort rated to -94°F and are another top ice fishing boot. Additionally, they are waterproof and have a removable felt liner. The big and bulky winter boot offers a lot of insulation to separate your feet from the cold and retain foot heat. Baffin is a Canadian company they are well-known for its quality warm winter boots.
If you’re looking for some of the warmest ice fishing boots for the money, these budget winter boots are great. Also, they are comfort-rated down to -40°F. They won’t be able to handle the coldest days but they’ll be able to withstand most. If you’re a beginner ice fisherman these are a good option. Especially if you know you won’t be ice fishing on the most brutally cold days.
Tips For Buying The Best Ice Fishing Boots For You
What Does Boot Comfort Rating Mean?
A comfort rating for boots will tell you the effective temperature that a pair of boots are designed to keep you comfortable with light usage.
This is important to know because there is a big difference between in warmth between being stationary and walking around a bit.
For this reason, you will want a pair of ice fishing boots that are rated warmer than the temperatures you plan to fish in to ensure your feet stay warm while ice fishing.


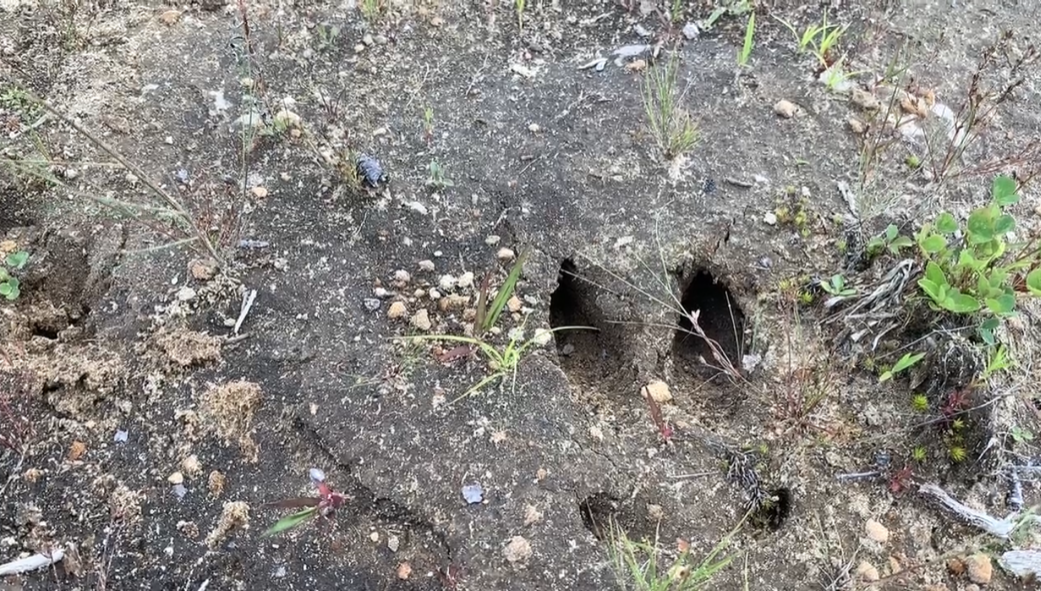


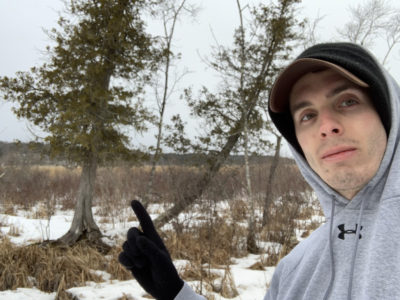
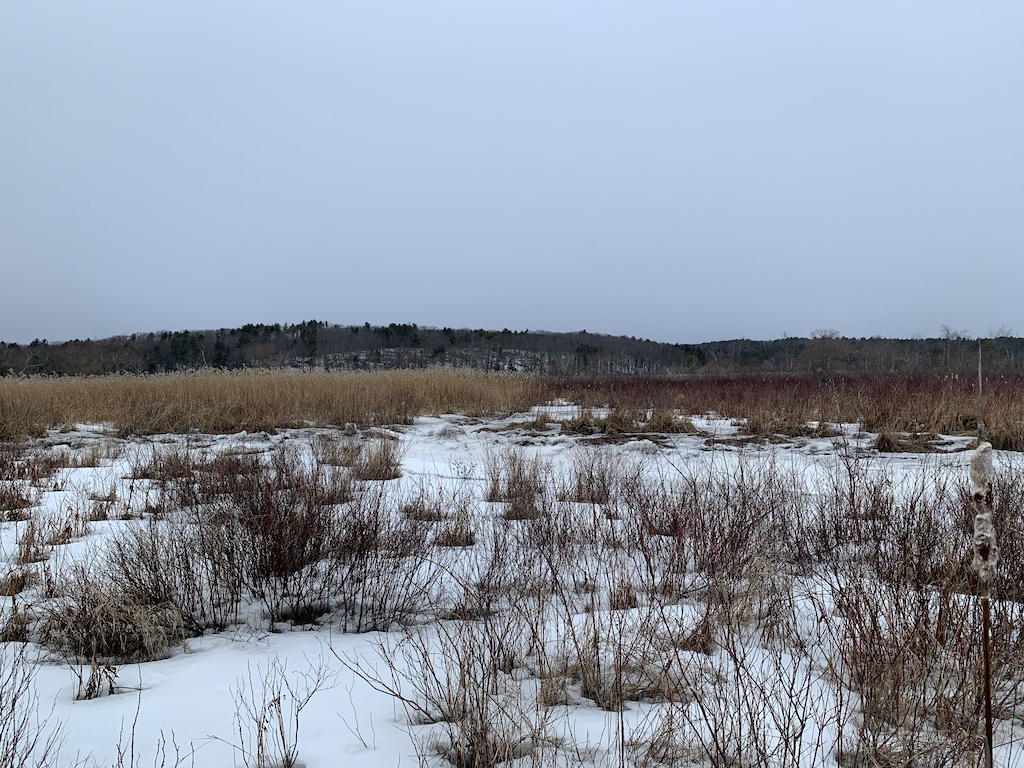
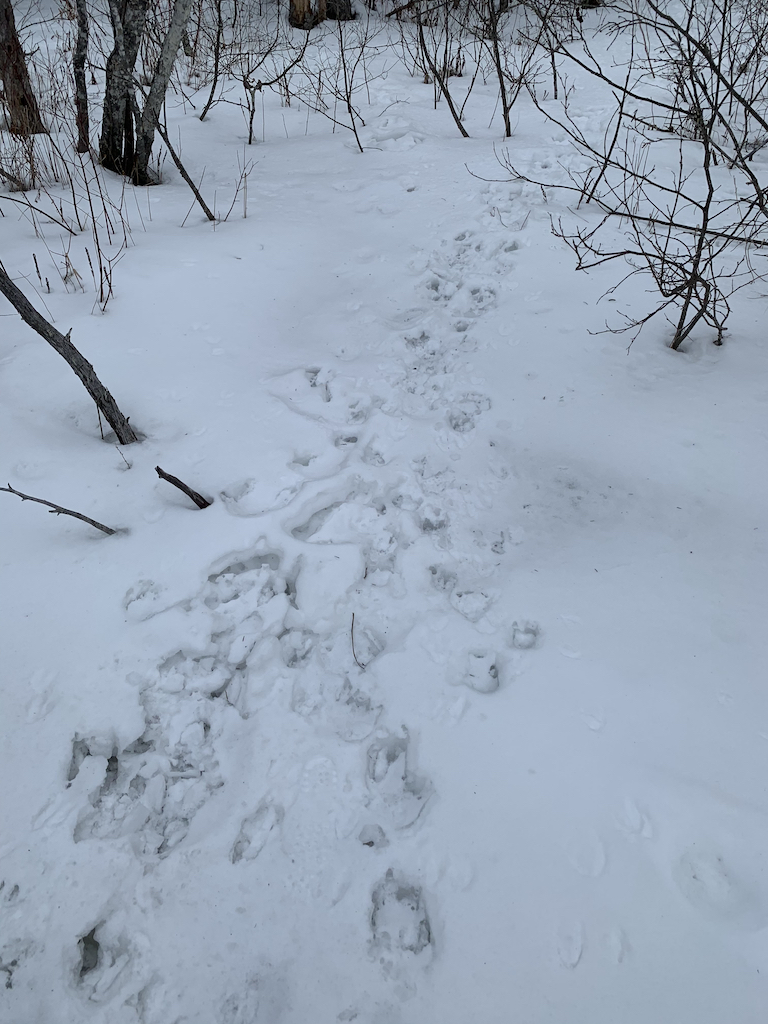


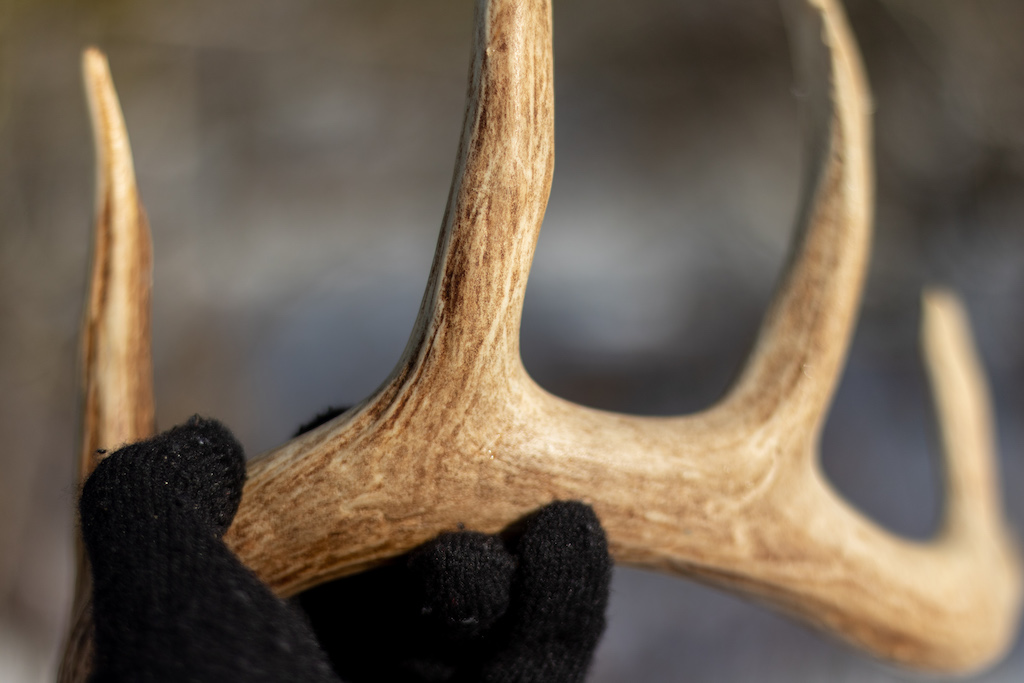
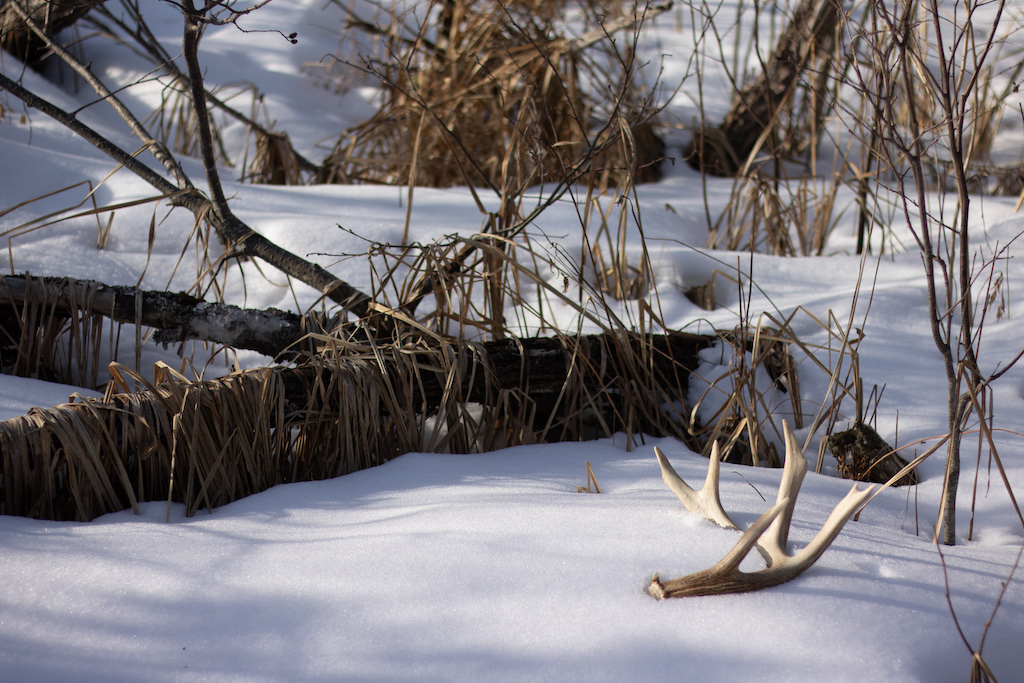

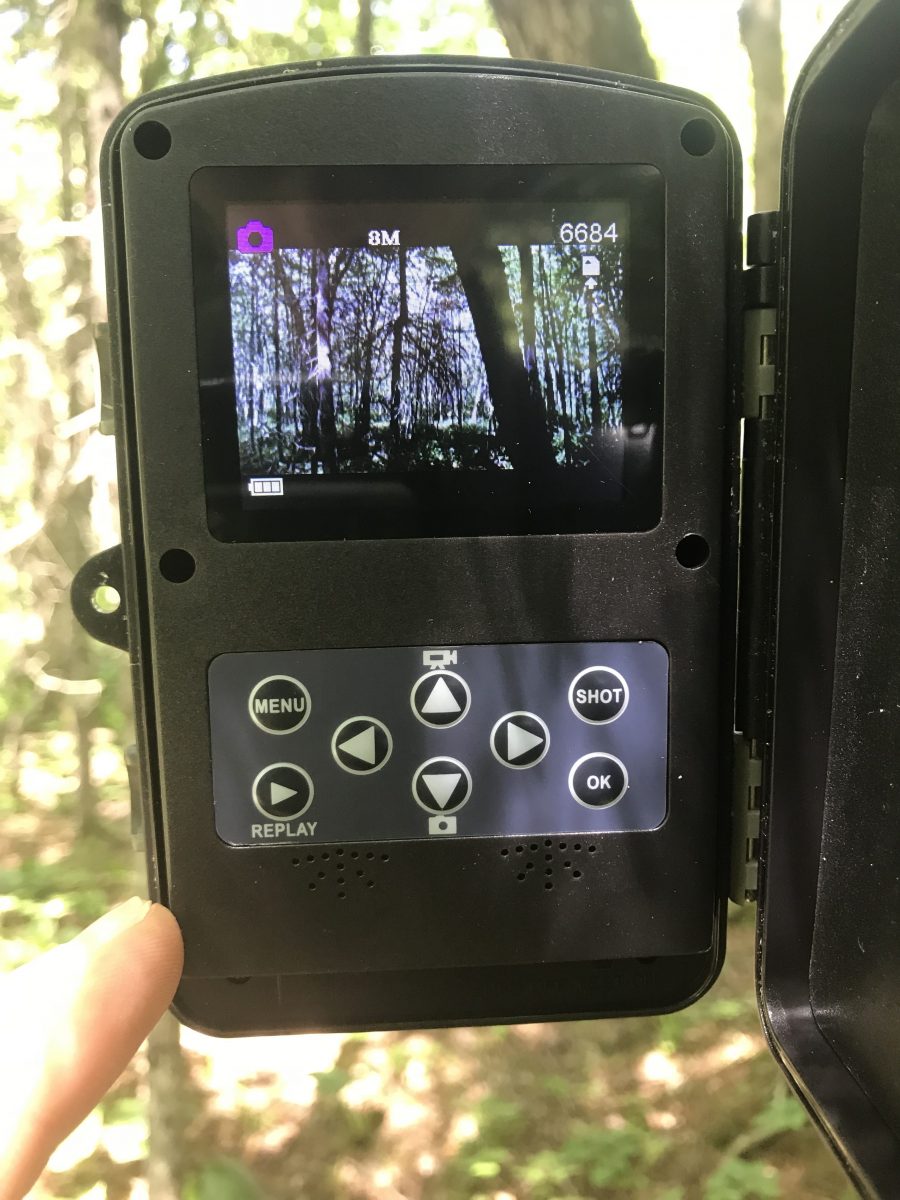
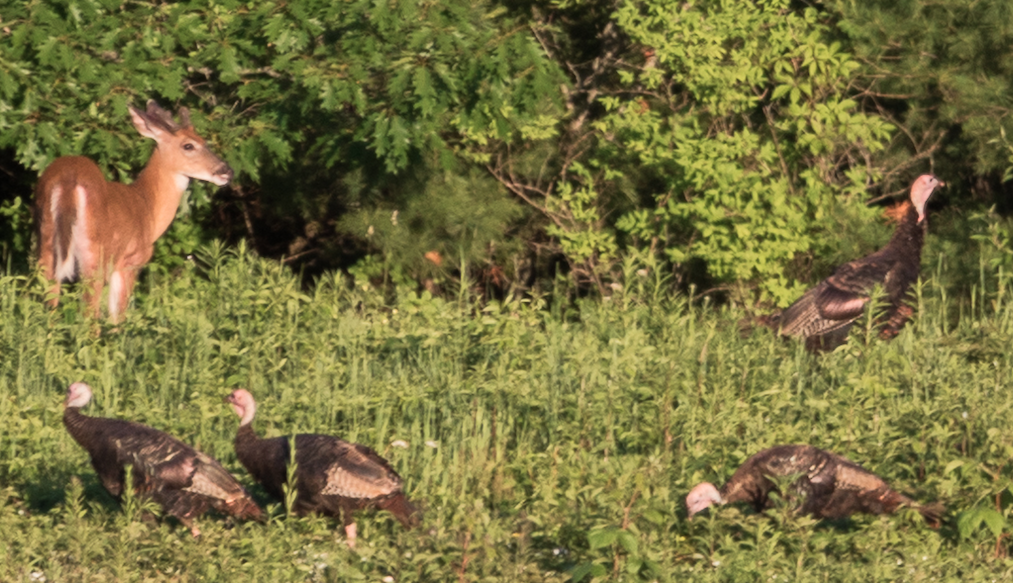
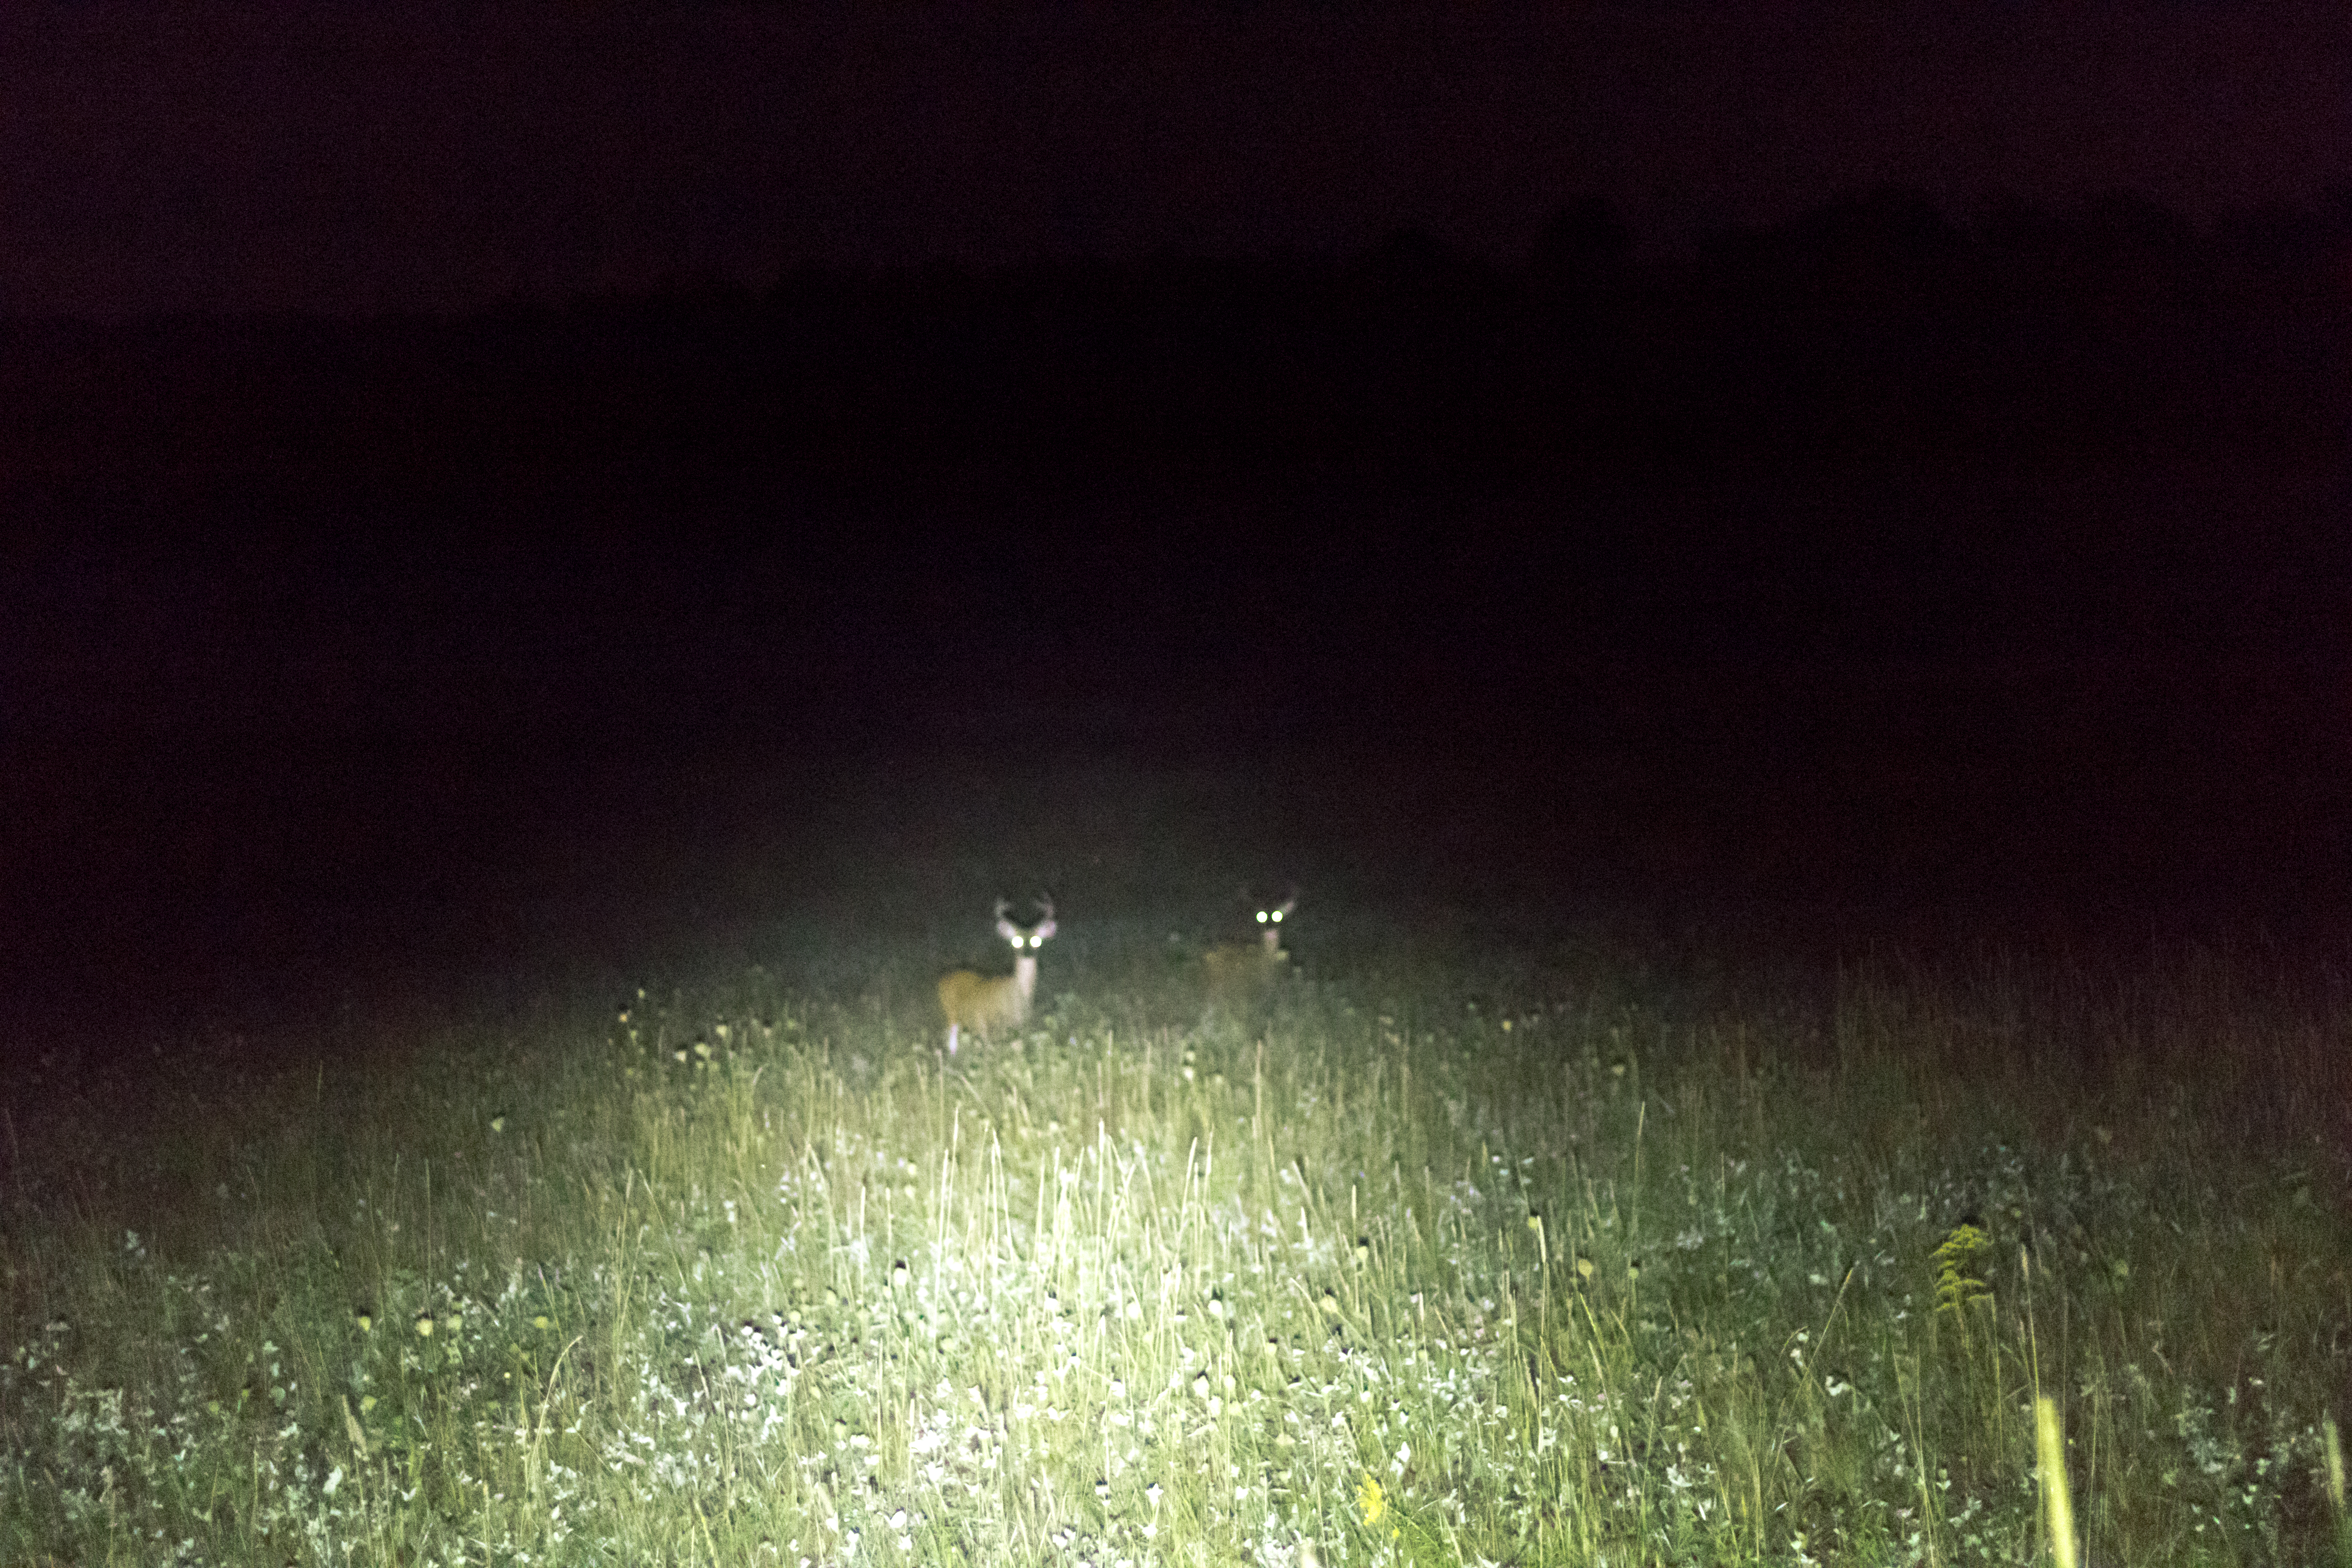
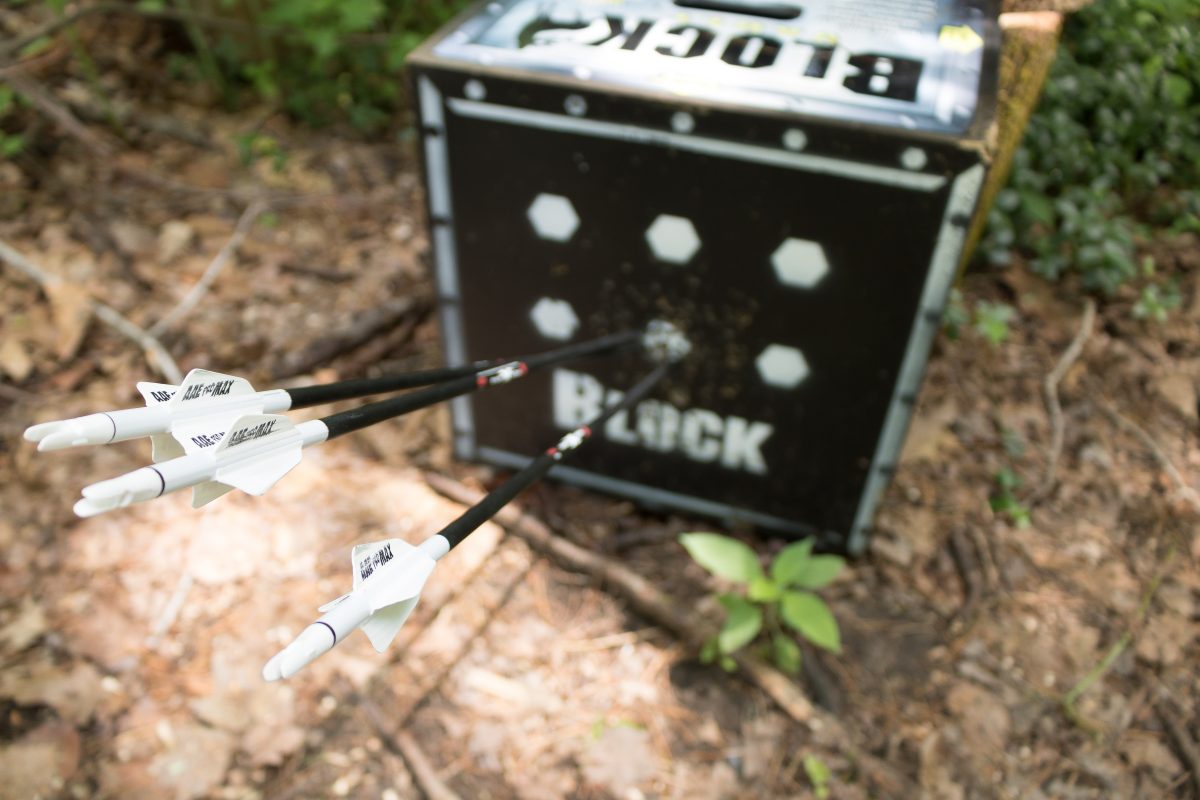

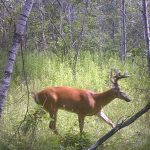
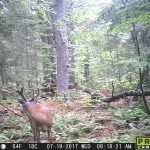
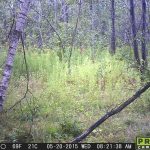
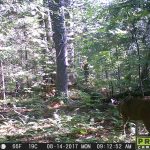


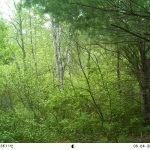
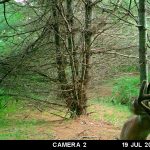
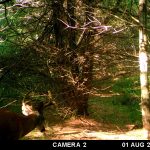
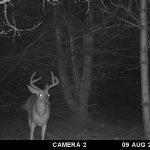

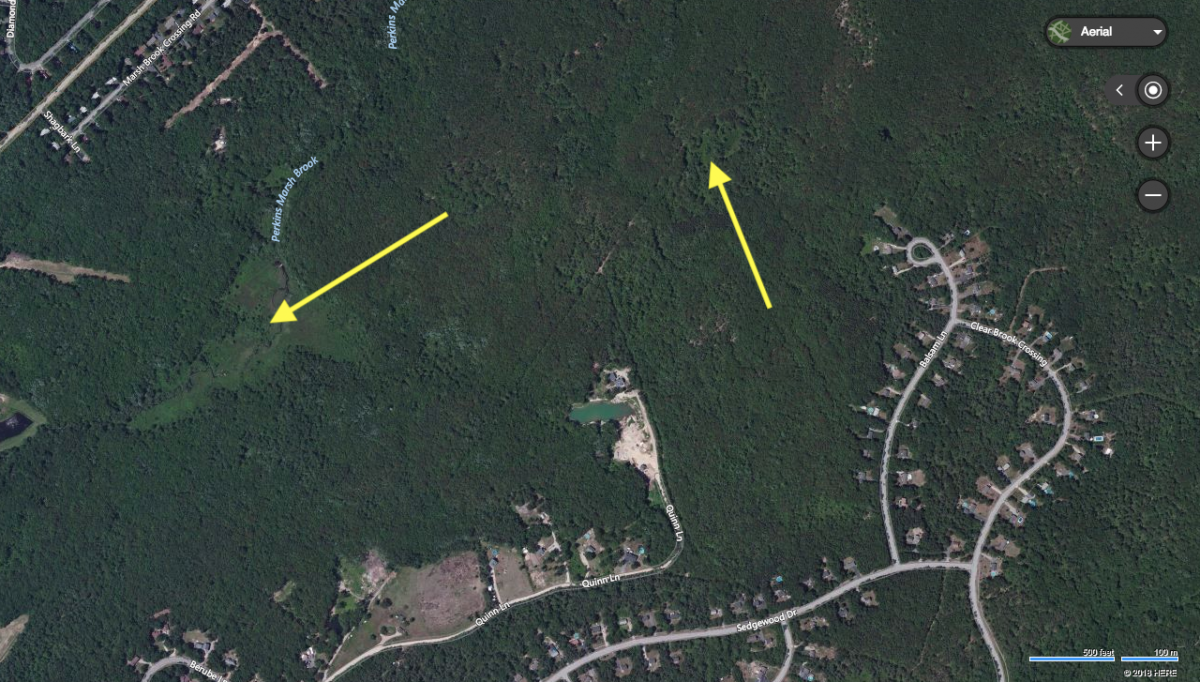
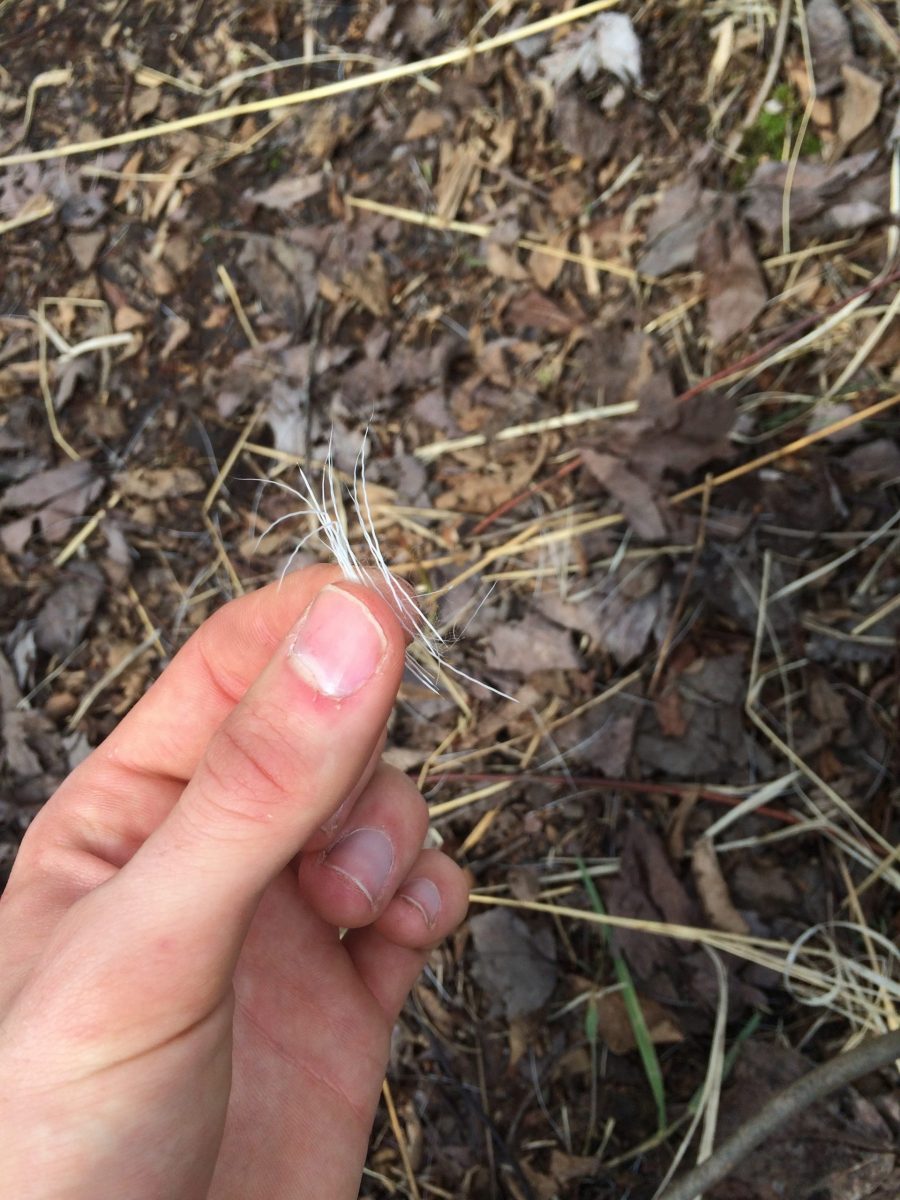
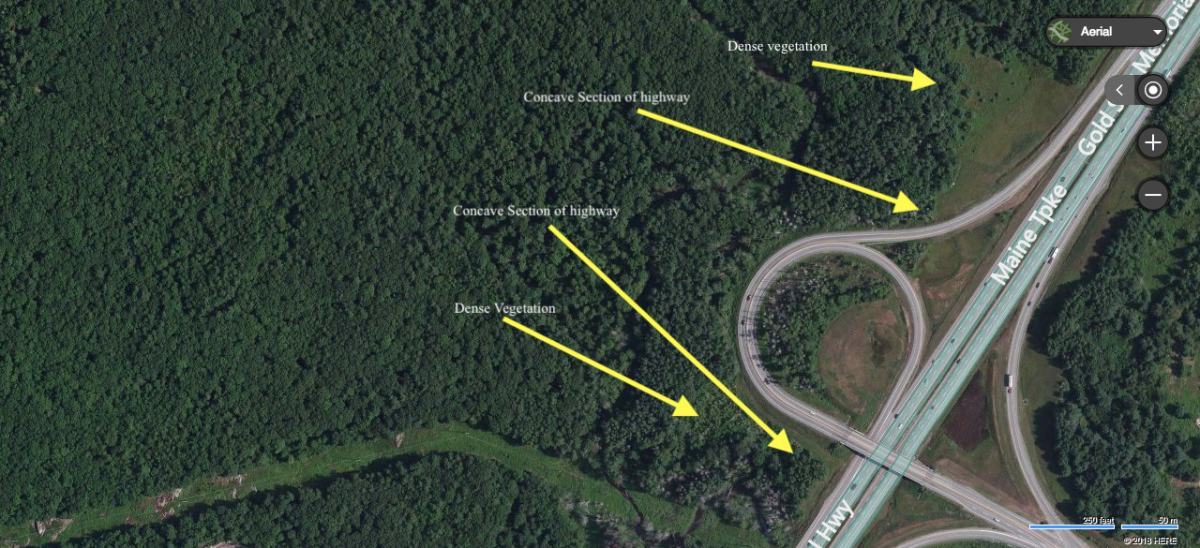
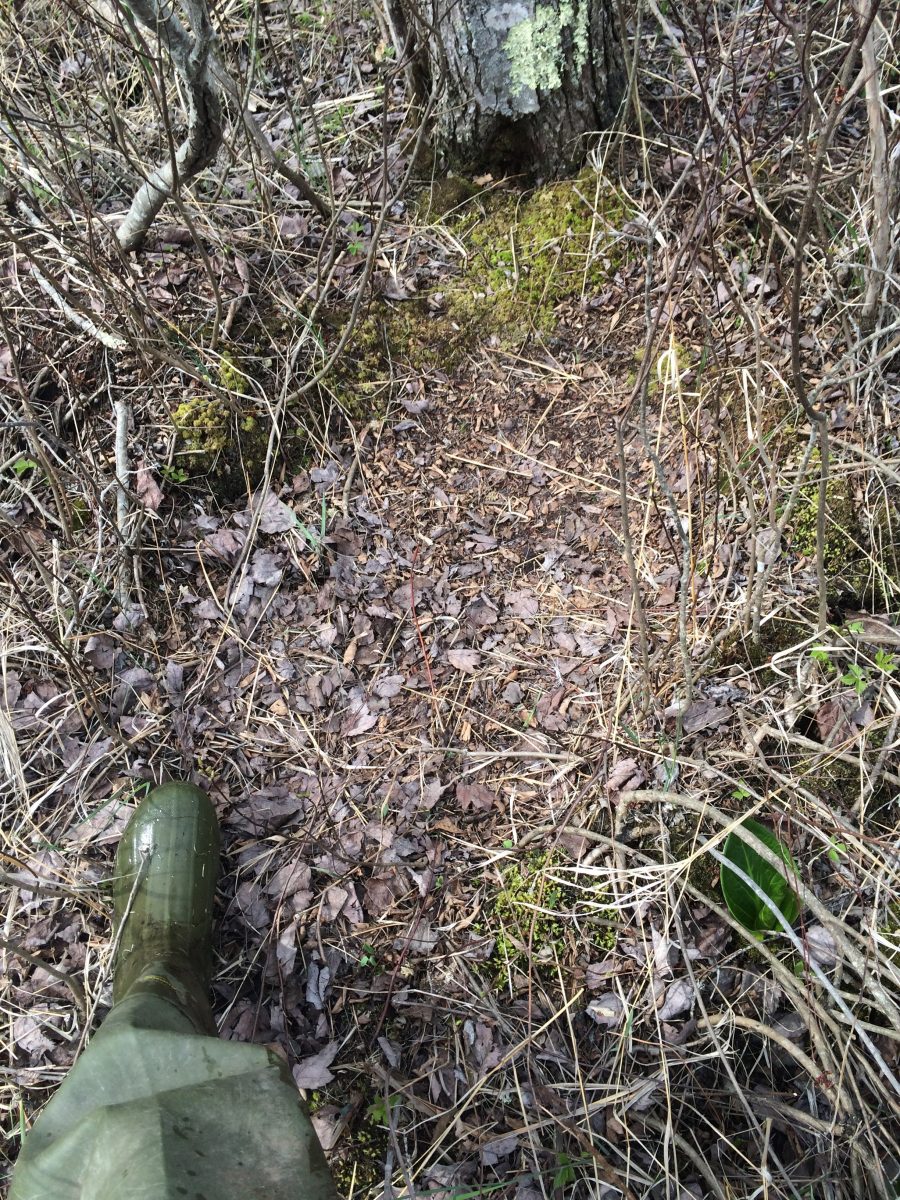
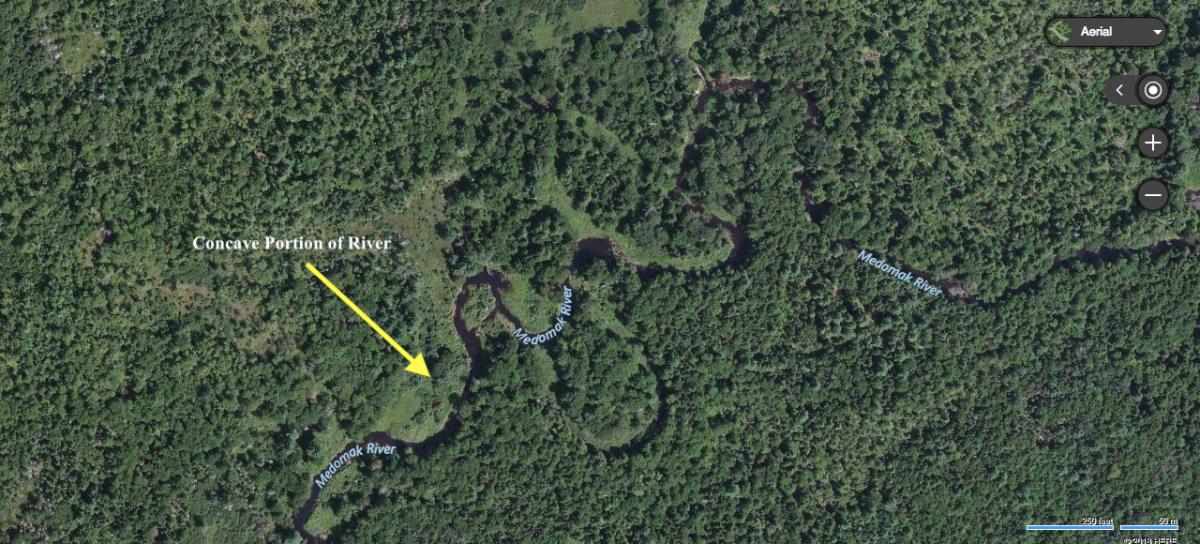


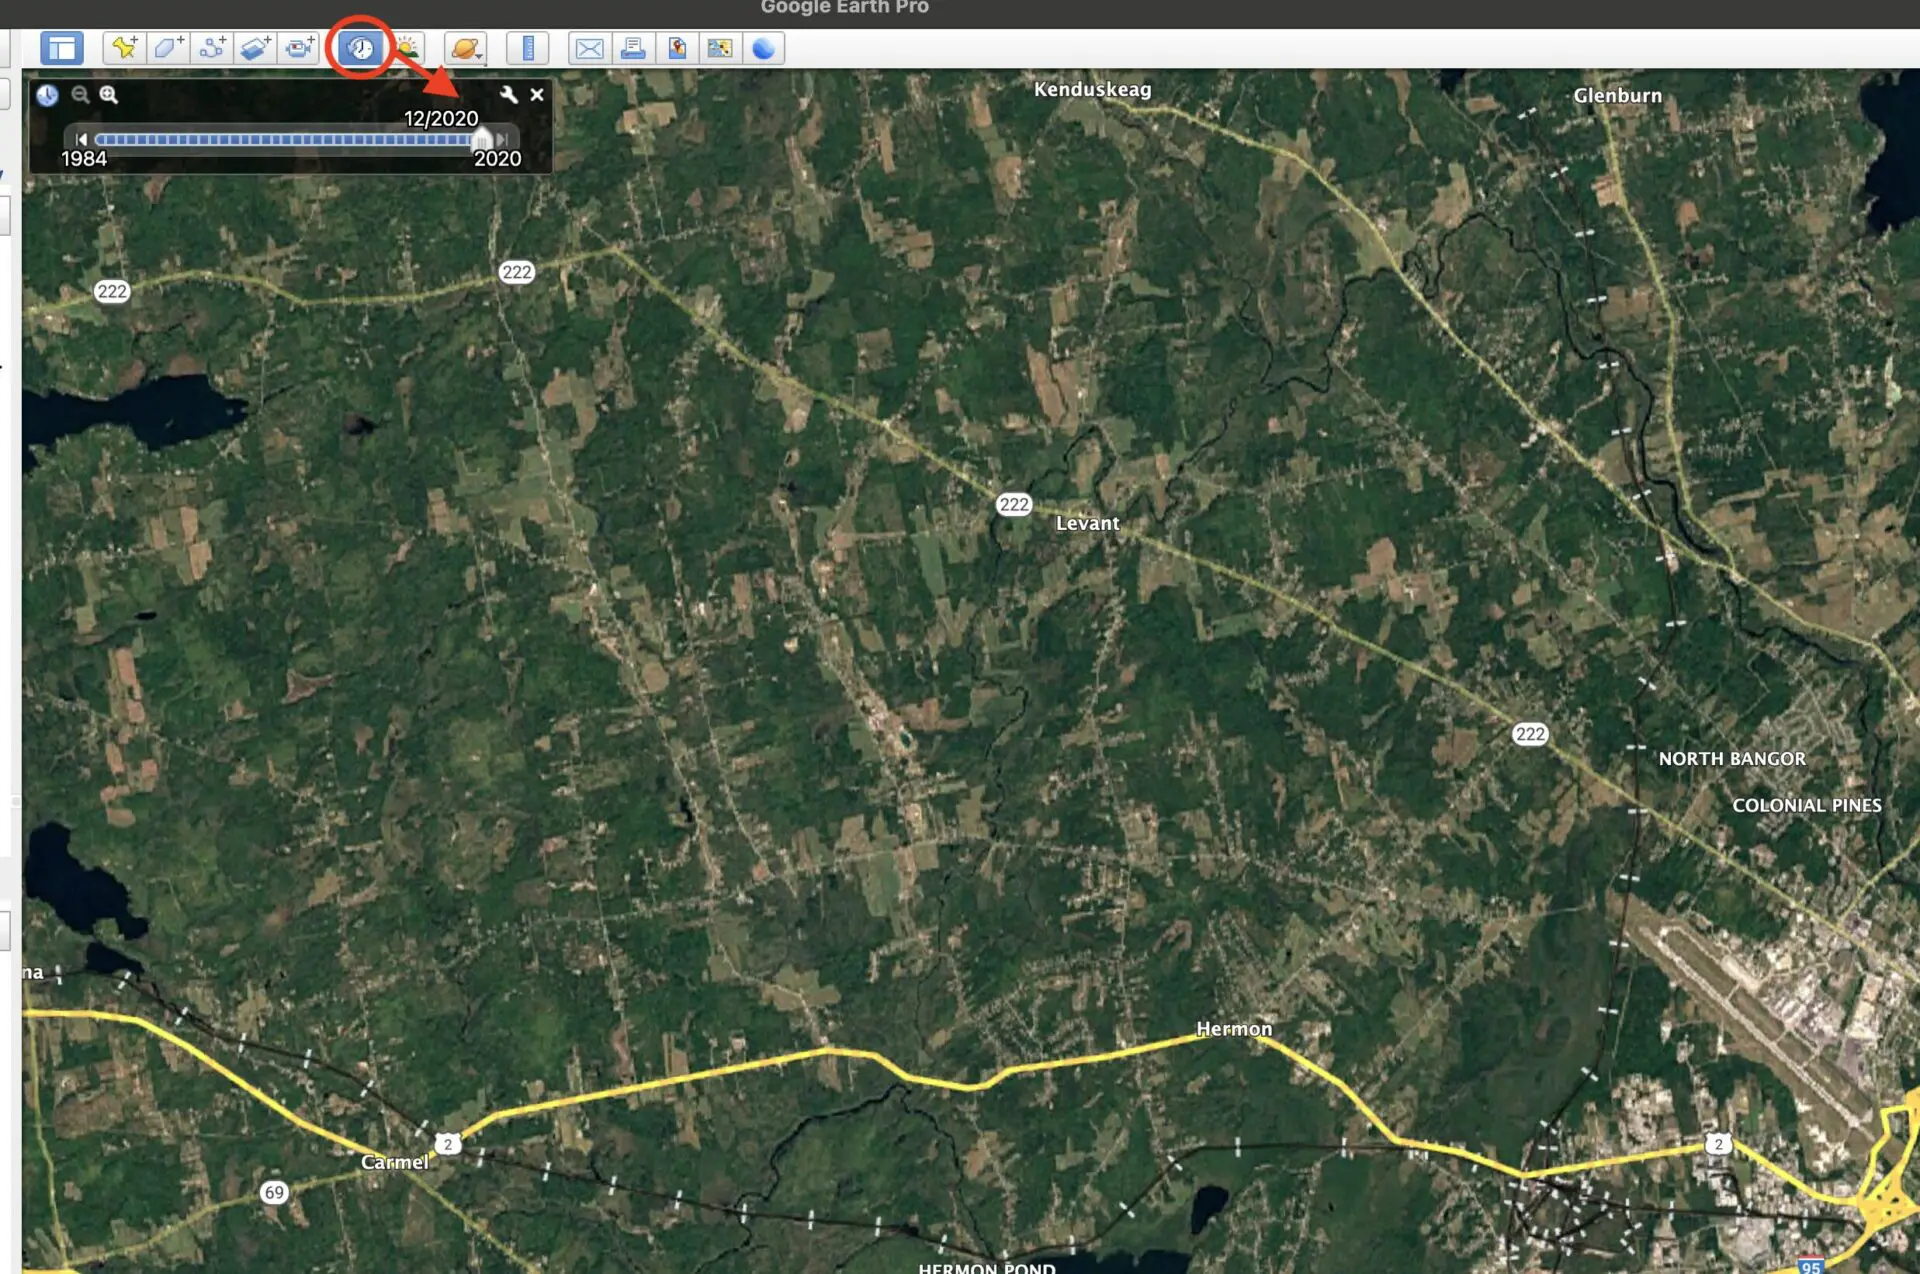


![10 Best Boots For Ice Fishing [2025]](https://jasontomeoutdoors.com/wp-content/uploads/2023/03/Best-Boots-For-Ice-Fishing-768x432.png "10 Best Boots For Ice Fishing [2025]")